Wedge anchor - why is it trusted by heavy structures? + video
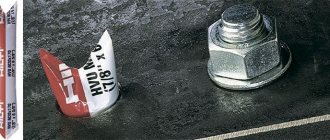
GOST defines a wedge anchor as a pin that ends in a cone-shaped shank. The essence of its effect on the base is that it can support quite heavy structures, which is what we will examine in this article.
What makes a wedge-type anchor stand out from the rest?
The construction and repair of various objects involves the use of a number of tools and devices, which greatly facilitates the work. So, to secure heavy equipment in walls made of concrete, brick or stone, a wedge-shaped anchor is used. This is the so-called fastening element. Sometimes there is a need to use it for home repairs. This usually happens when the walls are made of very durable materials (concrete or brick), and a fairly heavy part is required to attach to them.
The strongest galvanized steel is used to make the wedge anchor. Such fasteners are often used to secure an elevator shaft or cable route, railings, and beams. At the same time, he must ensure the safety of their use. After all, they are expected to be used frequently, and errors in securing these objects can lead to the death of people. Therefore, it is so important to follow the installation rules, which will be discussed below. There is also a ceiling wedge anchor, it is used when installing chandeliers, who would want it to fall on their head soon.
Wedge anchor - design and marking
What is such an anchor? This is a steel rod that has a cylindrical movable coupling, resembling a belt in appearance, and it also has a shank, which is a cone. The kit includes a wedge anchor with a nut, which is used for fastening. Previously, the process of installing parts, especially quite heavy ones, was very difficult, because the nails available on the farm could not hold them in the concrete.
This procedure became much easier with the introduction of the wedge driven anchor. Its dimensions for a given situation are selected taking into account the weight of the fastening part, as well as its thickness. For the convenience of this process, specialized labeling was introduced. Such anchors have their own general marking, they are designated WAM, and then there are numbers indicating the dimensions. Thus, the wedge anchor WAM-06040 has the following dimensions: thread – 6 mm, diameter – 6 mm, length – 40 mm. And WAM-08080 is as follows: thread – 8 mm, diameter – 8 mm, length – 80 mm.
Features of selecting an anchor with a wedge shank
For each size there is a minimum attachment depth, which is also measured in millimeters (the longer the anchor, the greater this parameter). If for a fastener 40 mm long this depth is 27 mm, then for the eightieth it is 40 mm. In this case, a longer wedge-type anchor is used to secure thicker elements. The length of this fastener starts from 40 mm, then increases by 5 mm for subsequent markings; there are even wedge types of anchors 10 cm or more long.
A distinctive feature of the wedge type is the absence of a protective jacket. All other types of anchors have it. There are working load limits for these types of fasteners. In addition to this, they also have a leveling load limit. There is also a relationship between them - the workload should be no more than 25% of the maximum leveling load. The greater the strength of concrete, the greater the permissible load. But if elements are attached to a concrete base that has cracks, then the permissible load also changes. Since it is very important to ensure the reliability of the fastening.
All wedge and other anchors that are suitable for use must comply with their GOST. At the same time, to ensure the quality of the product, you can ask the seller for a certificate for this product. If everything is in order with the documentation, then you can safely make a purchase. Checking the relevant documents is mandatory, since such a small mechanism plays too big a role, and the safety and even health of people depends on its quality.
Installing a wedge anchor - what to pay attention to?
A distinctive feature of using a wedge anchor is that there is no need to determine the exact depth of the hole being prepared for it. The wedge anchor is installed as follows. When the nut is tightened on it, the coupling slides onto the shank. At the same time, a bursting mechanism is activated inside, due to which it is firmly fixed in the surface to which it is attached.
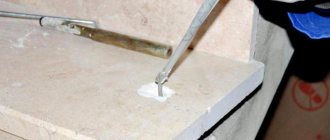
The entire sequence of installation of various elements to durable surfaces is performed as follows. First you need to drill a hole into which the wedge-shank anchor will be inserted. The hole does not need to be thoroughly cleaned; you just need to blow out the bulk of the dust and remove particles that have crumbled from the surface. The diameter of the hole must match the diameter of the wedge anchor. After this, the fastener itself is inserted, and then it needs to be hammered into the surface; this can be done using a regular construction hammer. When the anchor is tightly driven in, you can hang the part; to do this, use a nut that is tightened to create expansion inside the anchor.
The type of fastening with which the part is fixed to the surface is called through. Since this involves drilling the part for its subsequent installation. At the same time, the use of a wedge anchor ensures the reliability of the connection. Since this type of fastening device is the most durable.
But, unfortunately, it is not always possible to fasten the product correctly the first time. There are times when it is necessary to dismantle a part attached with a wedge anchor. In this situation, proceed as follows. If you know that in the future you will have to dismantle the product, then when drilling a hole, its depth should be greater than the length of the anchor. After removing the object, the fasteners can be driven in to the very end and there will be no hole in the surface, and it itself will be smooth. The only inconvenience is that the wedge anchor cannot be reused.
Companions of the wedge anchor in construction
Anchors are sold individually, in bulk and in small wholesale. The shorter the wedge-shaped anchor, the more pieces there are in the package. If you need a fairly large number of parts to secure them, then it’s easier to buy a whole package; anyway, the remaining elements will be useful in the future. The wedge-shaped anchor is not the only mechanism for mounting parts to surfaces.
For these purposes, there are also anchor bolts (they are most often used to fasten building structures) and a wedge anchor, which has a high degree of wedging. There are also rod clamps, which are used for deep installation. Brass anchors – for fixing in concrete. There are even special anchors with which parts are attached to drywall or plywood. But at the same time, the weight of such parts is insignificant.
Modern progress has also ensured the creation of chemical anchors. They don't require as much physical effort to secure them. For installation, simply insert an ampoule containing a special adhesive liquid into the hole. As you can see, a large number of fasteners are designed for fixing various structures to various surfaces. Each of them has its own distinctive features, which determine the specifics of their application.
remoskop.ru
Attaching joists to a concrete floor
Scheme for attaching joists to a concrete floor.
The second common case in construction of attaching a wooden beam to a concrete surface is installing joists on the concrete floor. Modern floor equipment techniques are very diverse: various insulating materials, heated floors, various solutions for leveling and improving the floor surface, etc. are used.
But even today, the option of installing ordinary wooden logs is quite relevant for both houses and apartments. This method of laying floors is used, as a rule, in houses where there are no problems with ceiling heights, but where one would like to save on expensive insulating materials.
Wedge anchor, review. WikiArticle.
Anchor from German Anker means anchor. The principle of operation of a construction anchor is, in fact, similar to a ship’s fixture: the fastener reliably holds the attached structure/element in a certain position, counteracting external forces (swinging, hanging additional load, applying short-term large force or permanent load). Another name is ceiling anchor.
Wedge anchor design
The wedge anchor is made of carbon steel and coated with an anti-corrosion layer. Consists of three elements: a metal pin or rod, a wedge-shaped spacer and a locking head. Each of these components has its own characteristics.
Let's look at each element separately:
- The length of the pin is 40 or 60 mm - these are the optimal dimensions, verified in practice. Along the entire length of the pin body there is a cut that serves as a guide for the wedge, which comes to naught at the very end of the pin. This makes it look like the leg of the anchor is expanding. It is because of this “skirt” that the wedge expands into the working material during installation. Thanks to this technology, the product is firmly fixed to the ceiling. The side that interacts with the wedge has a ribbed surface. This allows the spacer element to have a stop that prevents the wedge from “slipping” under the action of the pulling force when installed in the ceiling.
- A spacer wedge is a rod with a narrowed end on the side that enters the solid working material. In cross-section, the wedge-shaped element repeats the shape of the hole in the head - through it it is connected to the pin (anchor rod).
- The locking head of the wedge anchor is wide and consists of a round flat plate. Due to its large size, the area of contact between the fastening and a flat surface is increased, which does not allow the product to “go” completely into the material under the influence of considerable force during installation. After all, the wedge anchor is installed using a regular hammer with several strong blows.
Purpose of the wedge anchor
The only use for wedge anchors is for hanging devices. Use it to attach:
- light suspended ceilings and similar systems in intermediate ceiling areas
- ventilation ducts and ventilation grilles
- thin metal substructures
- perforated tapes
- cable system
- corners, channels
- metal profiles
- metal slats
Application material
An important condition for using a wedge anchor is the high density of the material into which the structure is attached, which provides sufficient support when the fastener operates in the working material. In other words, the ceiling anchor is intended for installation only in strong, dense materials, and even cracks and chips significantly affect the load-bearing capacity of the fastener , not to mention the initially porous structure:
- concrete (grades from C20/25 to C50/60, C12/15, concrete with cracks is allowed)
- building solid stone, natural stone
Advantages of a wedge anchor
The wedge anchor has a big advantage over the plastic dowel-nail, which has almost the same range of applications, and this is heat resistance
.
The ceiling anchor is made of metal, which means it is, by definition, flame retardant. It is because of this property that fastenings for ceiling structures meet fire safety requirements.
An important advantage of a ceiling anchor over other types of ceiling fastening is the high load-bearing load of the anchor .
The table below shows for comparison the min values of the pull-out force applied to fasteners for ceiling work, depending on the solid working material:
| Fasteners/material | concrete B25, kN |
| Wedge anchor 6x40 | 3,6 |
| Wedge anchor 6x60 | 5,0 |
| Dowel-nail polypropylene 6x40 (6x60) | 0,6 |
| Dowel-nail nylon 6x40 (6x60) | 0,8 |
| Professional dowel nylon 6x30 (+screw) | 0,9 |
| Professional dowel nylon 8x40 (+screw) | 1,4 |
Affordable price and simple installation also allow builders to give preference to this anchor for ceiling work.
Calculation and installation of ceiling anchor
To calculate the structure to be mounted using a wedge anchor, the max or min pullout force is used. If the maximum maximum load for the selected fastener is known, then feel free to multiply it by 0.25 (the working load is 25% of the maximum). If the minimum value is indicated, this is the workload. The presence of defects in concrete or stone will reduce the calculated value by 40%.
To convert the mass of the attached element from kN to kg, adhere to the identity: 1 kN mass = 101.97 kg Thus, the working load of the 6x40 wedge anchor in concrete is 367.1 kg, and 6x60 - 509.86 kg.
The recommended thickness of the attached material is for a wedge anchor measuring
6x40 - 5 mm;
6x60 - 8 mm
Installation of the ceiling anchor is extremely simple:
- the location for installing the fasteners is outlined and the hole is prepared
- cleaned, if necessary, the hole from construction dust
- the fastener is connected to the element being attached
- the combined structure is inserted into the hole and then, using a hammer and physical force, the protruding end of the wedge is driven in so that there are no lagging elements from the locking head of the anchor wedge - the surface must be flat, which is aesthetically pleasing and practical for subsequent painting.
Recommendations for installation:
- The minimum distance from the edge of the concrete is calculated by the formula: (drilling depth - 10mm) x 2.5. It follows that the 6x40 wedge anchor is installed from the edge of the working surface at a distance of 87.5 mm, and 6x60 - 137.5 mm.
- It is important to make the diameter of the hole equal to the diameter of the fastener - 6 mm; the minimum drilling depth for 6x40 is 45 mm, for 6x60 - 65 mm, that is, slightly greater than the length of the anchor rod.
- Since the working material is a dense material, the hole should be prepared responsibly: for example, an old drill in a hammer drill can narrow it by microns, which is why the wedge anchor will not be driven in completely, or due to the hole not being deep enough, the wedge will not completely go out flush.
Dismantling is not possible! Only with the help of a grinder is it possible to cut the connection.
Technical characteristics of the wedge anchor
| Size, mm | 6x40 | 6x60 |
| L, anchor length, mm | 40,00 | 60,00 |
| G, max. thickness of attached material, mm | 5,00 | 8,00 |
| D, anchor hole diameter, mm | 6,00 | 6,00 |
| N, min. drilling depth for through anchoring, mm | 45,00 | 65,00 |
| Min. pullout force kN (concrete B25) | 3,60 | 5,00 |
goskrep.ru
Fastening methods
Bottom trim to strip foundation
It is attached as follows:
- The concrete surface is waterproofed. The minimum program is laying a couple of layers of roofing material; ideally, it is not simply laid under the framing beam, but glued to bitumen mastic;
- In the strapping beam, grooves are selected to connect half the tree. All connections must be made at the points of attachment to the foundation;
- The timber is impregnated with an antiseptic and (ideally) a protective waterproofing impregnation. Usually this role is played by ordinary drying oil;
- Then the lower trim is drilled for anchor bolts - at the connection points of the beam sections and in straight sections with a pitch of no more than 1.5 meters. The holes are countersunk for the washers and nuts of the anchors;
- Holes for anchors are marked and drilled in concrete;
- The last stage is the actual fastening. The anchors are driven into the concrete monolith through holes in the beam, after which the nuts are tightened with a socket wrench.
The anchor attracts the beam to the concrete base.
Wooden grillage for a columnar foundation
Here the fastening algorithm is very similar to that described above; however, instead of anchor bolts, pieces of smooth or corrugated reinforcement with a diameter of 14 mm, laid in their masonry during the construction of pillars, are usually used.
- The surface of the pillars is waterproofed. The methods are similar to those above;
- Holes for anchors are selected in the timber;
Please note: in this case, the pillars with anchors must be located at all beam connections.
- The grillage is impregnated with antiseptic primer and, if possible, a water-repellent composition;
- Then the grillage is laid on the pillars, after which the part of the anchors protruding above the surface of the beam is cut off. As a rule, additional fixation of the grillage to the pillars is not used: after the walls are erected, it will be securely pressed by their mass.
Anchors embedded in the masonry prevent horizontal displacement of the grillage.
Mauerlat to armored belt
In this case, fastening the wooden beam to the concrete wall is necessary in order to subsequently tie the rafter system to it. It's probably better to be a little more specific about the design description.
As a rule, the walls of residential low-rise buildings are built from lightweight materials with low thermal conductivity. Here are some examples:
| Construction material | Density, t/m3 | Thermal conductivity, W/(m*S) |
| Expanded clay concrete | 1,8 | 0,66 |
| Ceramic hollow brick | 1,6 | 0,41 |
| Foam concrete | 1 | 0,29 |
| Limestone | 1,4 | 0,5 |
| Shell rock | 1 | 0,27 |
All these materials have one thing in common - low mechanical strength. They are able to provide sufficient load-bearing capacity due to the solid thickness of the walls; but it is impossible to reliably attach a rafter system or mauerlat to them: any anchors will be torn out by the first strong gust of wind.
The problem is solved by pouring a reinforced concrete armored belt along the top of the wall, which, in fact, becomes the basis for attaching the Mauerlat.
Pouring armored belt on aerated concrete walls.
Please note: the reinforced belt additionally increases the seismic resistance of the structure by connecting adjacent walls. In areas with high seismicity, the reinforced belt is replaced by a load-bearing reinforced frame; lightweight materials are used only as wall filling.
The instructions for installing the Mauerlat to the armored belt are almost identical to the description of installing the lower trim on a strip foundation:
- The surface of reinforced concrete is waterproofed with bitumen mastic and/or roofing felt;
- A timber impregnated with antiseptic and drying oil is laid on them, connected at the corners and splice points by cutting into half a tree;
- The timber is drilled into the corners and splice points;
- The holes are countersunk for washers and anchor nuts;
- Holes are drilled into the concrete for the anchors;
- The anchors are driven in, after which their nuts are pulled through with a socket wrench.
Operating principle of a wedge anchor, design and installation procedure
Among the range of fastening elements, anchor products stand apart.
They are not used as often as, for example, screws or nails. And yet, not a single construction or large-scale renovation can be done without them. The industry produces anchors of various types - ceiling, in the form of bolts with a nut, spacer, with an “eye”. There are enough options for all occasions. Wedge anchors are highly reliable and are often more convenient to install than their analogues. What are they and on what principle are they established?
Design features and principle of operation
A wedge anchor is a metal pin (usually galvanized carbon steel), with a thread on one side and a wedging part on the other. The “shirt” characteristic of analogues is missing. On the cone-shaped shank there is a special coupling (movable), which, expanding, ensures strong fixation of the anchor in the base (reinforced concrete, solid brick, stone).
Its movement along the longitudinal axis of the fastening element is ensured by a nut, which, after seating the anchor in the prepared hole, is tightened.
This type of fastener is convenient because there is no need to maintain the exact drilling depth, especially since in some cases it is either difficult or impossible to check. Consequently, the master does not have to spend additional time on control.
The installation algorithm is clearly illustrated in the figure:
Drill out - blow out the channel (not a mandatory step) - “drive” - tighten the nut. There is nothing difficult for any man.
Scope of application
- Fastening of structural elements or products characterized by significant mass (fences, load-bearing consoles, cable and pipe lines, attachments, etc.).
- To ensure increased strength of connections.
Wedge anchors are produced in a large assortment and are not in short supply, so choosing a specific sample with the appropriate parameters will not be difficult.
masterim.guru
Hammer-in anchor with and without notches - fastening features
A hammer-in anchor with notches in appearance resembles a hollow cylinder with an internal thread. At one end of the cylinder there is a four-segment spacer zone. And on a certain section of the outer side of the anchor there are special notches, which are necessary for its reliable fixation in the prepared hole during installation work. The notched hammer anchor has long been noted by professionals as the simplest and most effective hardware product. With its help, you can always create a reliable and durable fastening, without the use of additional or special equipment.
The main advantages include the low cost of products, durability and strength. Manufacturers manufacture drive-in anchors using the latest equipment, resulting in good quality products at low prices. This product is especially often used in the construction of buildings, structures and various repair work. Notched anchors are used for mounting wall cabinets, grates, bars or slats, etc. If you need to attach heavy equipment, you can use multiple anchors. The main condition is to correctly calculate the load.
Wedge anchor. Wedge anchor size according to GOST. Installation of a wedge anchor
Features of choosing an anchor for various jobs
Depending on the conditions under which fastening will occur using anchor devices, there are several types. Based on this, the chemical composition of the product is determined, as well as its shape and design features.
Among the types of anchors the following can be distinguished:
- Metal frame. It is used when it is necessary to fasten wooden frames and other structures to concrete, brick and stone walls.
- Hex head. Used to secure heavy objects to concrete, brick or stone.
- With a ring. Can be used in installation of structures or construction tours on concrete or brick surfaces.
- Anchor fastening with hook. It is used in the installation of various elements in concrete walls, solid brick or natural stone.
- Nut anchor. Used for fastening and installation of frames and structures on stone, concrete and brick walls.
- Wedge anchor. It is used for the quick installation of frames, scaffolding and other structures on concrete surfaces, for the installation of planks, suspended ceilings, and metal products.
- Wedge anchor. Used for mounting heavy structures on concrete, brick walls and natural stone.
- Hammerable anchor. It is used in installing structures on concrete, brick and stone surfaces.
- Ceiling anchor. Used for attaching products such as chains, ropes, cables, suspended ceiling structures, and lighting fixtures to the ceiling.
- Driven-in dowel-nail type anchor. Used when installing profiles, as well as various products made from thin iron sheets. This type of fastener is non-removable.
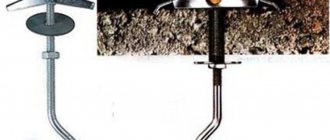
- Folding anchor with spring and hook. Used in fastening lightweight structures to plasterboard, wood and hollow materials.
Wedge anchor: dimensions, markings and characteristics according to GOST
The peculiarity of this type of fastening material is that at the end of the anchor there is a tail, on which, when screwing the product into the wall, a coupling is found, as a result of which the structure is spaced inside the hole. Therefore, this type of fastening is very reliable and is used when particularly heavy structures are to be fastened.
In accordance with GOST, the dimensions of the wedge anchor can vary from 10x100 mm to 8x80. The variety is very large, so you can choose fastening material for any type of work. Also, various coatings can be used to create anchor fastenings: galvanizing, passivation.
Note! You can check the purpose and marking of anchor fastenings according to GOST at the link https://www.docload.ru/Basesdoc/3/3425/
Each unit is labeled according to the type of product, its manufacturer, and the size. So the marking of the anchor can be WAM - 08060. The letters indicate that this is a wedge driven anchor, and the numbers indicate that the anchor has a diameter of 8 mm, thread - 8 mm, length - 60 mm.
Installation specifics
The installation of a wedge anchor has a specific sequence, which will be described step by step below:
Step 1: Drilling a Hole
In the intended installation location, a hole is drilled using a drill, the diameter of which should be equal to the same size of the fastener.
Step 2: Surface Cleaning
After the hole is ready, it is necessary to blow it out and clean it from dust and other by-products of drilling.
Step 3. Install the bolt
After making sure that the prepared recess is free of any type of blockage, you need to place the fastening material into it. This happens by driving it there with a hammer, similar to a nail.
Step 4. Securing the anchor in the hole
After the wedge anchor is driven into the hole, it must be strengthened. This process is done by tightening the nut using a wrench. You need to tighten the nut, then unscrew it. Then you should place the material to be installed on the bolt and tighten the nut again until it stops.
As you can see from the steps listed, there is nothing complicated in the process of installing a wedge anchor. You need to have minimal knowledge and skills in construction.
Important information on working with wedge anchors
When working with wedge anchors, there are several important aspects to consider that can affect the quality of the structure being installed.
- If the fastening is made to a solid brick, then you can use fasteners with a diameter of no more than 8 mm. Otherwise, the brick may split.
- If during work there are no tools at hand to blow out the installation hole, then it must be drilled 15-20 mm larger.
- Wedge anchors cannot be removed. Therefore, if in the future it is planned to dismantle the installed structure, then it is necessary, as in the previous paragraph, to drill a hole that exceeds the length of the fastening device. Thus, in the process of removing the attached structure, the product may be driven completely into the base.
ogodom.ru
How to correctly calculate an anchor bolt
SergeyTD wrote: So your anchor should fit into the internal walls with tension. But he doesn’t bother stupidly.
If the internal thread is 10mm and the bolt is 10mm, how will it fit into the 10mm hole? I didn’t even try to score, he won’t go in. But even if you hammer it in, the bolt will definitely not tighten.
Sergei wrote: If the internal thread is 10 mm and the bolt is 10 mm, how will it fit into the 10 mm hole? Sergei wrote: I bought an M10 anchor and a 10 mm bolt. I drilled a hole with a 10 mm drill.
We use a calculator for the required amount of injection mass so as not to make a mistake with the number of cartridges. We drill a hole with a drill, the diameter of which corresponds to the size of the selected stud, usually the hole diameter is 2...4 mm larger than the diameter of the stud.
Sergei wrote: I drilled a hole with a 10 mm drill. The anchor does not fit. I need a drill. Well, with a file, one of these days I will slightly change the position of the antennas 1,20 and 0, and the question arose: what mount to choose and what anchors to use? Photo of the installation site.
Moderator -sections- Acknowledgments: Offline Gender: Messages: Master class Acknowledgments: Offline Messages: Sergey, you are setting me a rather difficult task, it’s easier for me to tell it in words and show it in real life than to describe it all - it’s quite complicated and time-consuming. This yellow anchor that you showed here for Valera is just what the doctor ordered!
First you need to install it in the wall bracket under Supral 1. Over time, the anchor will need to be twisted and tightened!
Ceiling wedge anchor. Size 6x40 with photo. Characteristics. Description
For quick installation of suspended structures, manufacturers have developed a convenient fastener - a wedge anchor. Specific Russian standards regulating the requirements for just such fasteners have not yet been adopted, so experts are more focused on the parameters specified in the technical documentation of well-known manufacturers: HILTI, FISCHER, SORMAT, MUNGO. Builders and electricians show the greatest interest in buying wedge anchors. This is an indispensable fastener for quickly and firmly attaching suspended structures from the anchor technology family.
Design
Wedge anchor
consists of two parts - the anchor body and the spacer wedge rod. The anchor body is made in the form of a rod with a supporting (locking) cap. The rod has a specially shaped cutout that ensures the desired direction of the spacer wedge. A spacer wedge is a rod sharpened on one side. The simple design gives the wedge anchor a number of advantages. First of all, this is ease of installation and low price. The large diameter of the head provides sufficient clamping area, which is especially important when fastening metal sheets, profiles, and thin-sheet elements. Wedge anchors, due to their rather narrow specialization, are produced by manufacturers in only a few standard sizes for different thicknesses of the attached material. For example, for HILTI these are versions DBZ 6/4.5 and DBZ 6/35; FISCHER has FDN 6/5 and FDN 6/35. See below for the design and dimensions of the 6x40 wedge anchor.
Purpose
The wedge anchor is used for fastening suspended structures. Fasteners are most widely used during installation:
- suspended ceilings
- ventilation systems
- metal substructures
- shaped (angle, channel), strip products
- metal sheets
- perforated tapes
- cable systems
The base for the wedge anchor can be concrete, solid building stone, reinforced concrete, sand-lime brick. It is recommended to use products on concrete grades from C20/25 to C50/60. Installation in concrete C12/15 and in concrete with cracks is allowed.
Manufacturing materials
The German-made wedge anchor is made of carbon steel for cold heading and cold extrusion in accordance with DIN EN 10263-4-2002, the Chinese one is made of Q215 steel (analogs St2kp, St2ps, St2sp). Anti-corrosion protection is provided by a yellow-passed or white zinc coating, usually 5 microns thick. Galvanized steel provides the fasteners with good strength, thermal and anti-corrosion resistance, and an aesthetic appearance.
Features of operation and installation
For a long service life, such products made of galvanized carbon steel are recommended to be used inside dry rooms and not exposed to high humidity.
Installation of the wedge anchor is through, very simple and performed using the impact method. Unlike an anchor bolt, for example, you do not need a wrench to install it.
The sequence of operations is as follows:
- at a pre-marked point of the base base and the attached part, a hole of the appropriate diameter is drilled with a drill or hammer drill
- the hole is cleaned of dust and dirt with compressed air and a special blower
- the part to be attached is applied to the base, the holes are brought together and a wedge anchor is inserted into them
- by hitting the locking cap with a hammer, the body of the anchor is driven into the hole until it stops. The spacer wedge cannot be struck at this stage.
- the spacer wedge is driven flush with the locking cap
When choosing a wedge anchor, you should take into account the recommendations set out in the manufacturer's instructions. For the correct selection and installation of an anchor wedge, manufacturers regulate the following parameters:
- permissible pull-out and shear loads (depending on the type of base)
- minimum axial distances (usually 200 mm)
- critical edge distances (usually 150 mm)
- maximum thickness of attached part
- effective anchorage depth
- minimum thickness of the base base (80-100 mm)
Marking, symbol
The marking of the anchor wedge is applied to the outer surface of the locking cap or is located on the packaging tag. It includes the version of the fastener and its main working dimensions. For example,
- Wedge anchor HILTI DBZ 6/4.5
DBZ - fastener version
6 — drill diameter 6 mm
4.5 - thickness of the attached part up to 4.5 mm
- Wedge anchor FISCHER FDN 6/35 (6x65)
FDN - fastener version
6 — drill diameter 6 mm
35 - thickness of the attached part up to 35 mm
65 - anchor length 65 mm
- Wedge anchor 6x40 (made in China) 6 - drill diameter 6 mm 40 - anchor length 40 mm
Catalog products:
Please enable JavaScript to view the comments powered by Disqus. comments powered by
www.rusbolt.ru
WEDGE ANCHOR
Wedge anchor - purpose
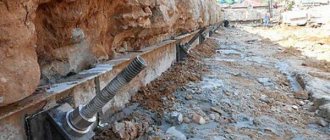
Used for fastening load-bearing consoles, channels and beams, railings and various heavy metal structures. The part is not pre-attached to the anchor. The wedge anchor is used for through-cut installation, when drilling is carried out directly through the hole in the part.
Design and principle of operation
The wedge anchor consists of a pin with a conical spacer tail and a sleeve. The spacer zone of the sleeve has convex stops that keep the sleeve from rotating in the hole. The anchor also includes a nut and washer. When the nut is tightened, the stud begins to move towards the nut along the longitudinal axis. At the same time, the conical tail of the pin wedges the sleeve, ensuring reliable fastening. The anchor is made of galvanized steel.
Anchor installation
Fastening is carried out to concrete, solid brick or natural stone. If the base is not dense enough (hollow brick, foam concrete, plaster), fastening with a wedge anchor cannot be carried out.
Wedge anchor fastening:
- Drill a hole according to specifications
- Remove dust and debris from the hole
- Insert the anchor and hammer it in
- Tighten the nut until it stops
Specifications
| A | L | G | D | N | S | min. | ||
| Designation | thread | anchor length, mm | Max. thickness of attached material, mm | drill diameter, mm | anchorage depth, mm | min. thickness of the building element, mm. | breakout force, kN concrete B25 | weight 1000 pcs/kg |
| 6*40 | M6 | 40,0 | 5,0 | 6,0 | 35,0 | 53,0 | 1,40 | 12,30 |
| 6*65 | M6 | 65,0 | 15,0 | 6,0 | 50,0 | 75,0 | 3,20 | 17,70 |
| 6*100 | M6 | 100,0 | 50,0 | 6,0 | 50,0 | 75,0 | 3,20 | 25,50 |
| 8*50 | M8 | 50,0 | 5,0 | 8,0 | 45,0 | 68,0 | 1,60 | 24,30 |
| 8*75 | M8 | 75,0 | 10,0 | 8,0 | 65,0 | 98,0 | 3,30 | 31,50 |
| 8*95 | M8 | 95,0 | 30,0 | 8,0 | 65,0 | 98,0 | 3,30 | 37,70 |
| 8*120 | M8 | 120,0 | 55,0 | 8,0 | 65,0 | 98,0 | 3,30 | 45,50 |
| 8*150 | M8 | 150,0 | 85,0 | 8,0 | 65,0 | 98,0 | 3,30 | 54,90 |
| 10*60 | M10 | 60,0 | 5,0 | 10,0 | 60,0 | 90,0 | 4,00 | 46,10 |
| 10*80 | M10 | 80,0 | 10,0 | 10,0 | 70,0 | 105,0 | 5,00 | 56,00 |
| 10*100 | M10 | 100,0 | 30,0 | 10,0 | 70,0 | 105,0 | 5,00 | 64,00 |
| 12*85 | M12 | 85,0 | 5,0 | 12,0 | 80,0 | 120,0 | 6,00 | 85,20 |
| 12*100 | M12 | 100,0 | 20,0 | 12,0 | 80,0 | 120,0 | 6,00 | 96,00 |
| 16*90 | M16 | 90,0 | 5,0 | 16,0 | 85,0 | 128,0 | 7,50 | 160,00 |
| 16*110 | M16 | 110,0 | 5,0 | 16,0 | 105,0 | 158,0 | 9,40 | 190,80 |
| 16*125 | M16 | 125,0 | 20,0 | 16,0 | 105,0 | 158,0 | 9,40 | 189,70 |
| 20*170 | M20 | 170,0 | 20,0 | 20,0 | 150,0 | 225,0 | 12,30 | 457,10 |
| 20*220 | M20 | 220,0 | 70,0 | 20,0 | 150,0 | 225,0 | 12,30 | 588,70 |
| 20*280 | M20 | 280,0 | 130,0 | 20,0 | 150,0 | 225,0 | 12,30 | 749,70 |
krepmir37.ru
What is important to know about installing drive-in anchors
When using a drive-in anchor to fasten a structure, it is imperative to knock down the internal wedge, which is proposed by the manufacturers as part of the structure. Screwing a bolt or stud into a hole is one of the most common installation mistakes. When using them, the bushing does not completely wedge, which leads to the fact that the load-bearing capacity of such a structure drops several times.
In some cases, situations arise when it is not possible to remove dust from the hole that was formed during drilling. In such a situation, experts advise simply making the hole for the drive-in anchor a little deeper. It is also worth noting that when installing an anchor in a solid brick, you can only use those fasteners whose internal thread diameter does not exceed 8 mm. On the website of the RusMetizGroup company you can find all types of anchors in any volume; if necessary, our specialists will provide you with detailed advice on all questions that arise.
The hammer anchor is a universal fastening element and is used for reliable fixation of various objects on walls, ceilings and floors. There are brass and steel anchors. The second type is used for fastening very heavy objects. The effectiveness of the first option depends on how correctly the product was selected.
