Preparatory work for installing tiles
As always, before starting work it would be a good idea to refer to the basic standard SNiP 3.04.01-87/SP 71.13330.2011 “Insulating and finishing coatings”. The surface of the concrete floor must meet the basic requirements of this document and be:
- Clean - traces of oil, old paints, bitumen mastics, soot, soot and anything that interferes with adhesion are not welcome.
- Dry – concrete moisture content should not exceed 4%. Highly absorbent surfaces are treated with a deep penetration primer, and wet surfaces are treated with special primers for substrates with a high level of residual moisture.
Modern adhesives are mixtures of cement, mineral fillers and modifying additives. Therefore, it is allowed to level the floor with tile adhesive if there are uneven surfaces of up to 5 mm.
It would be useful to remind you that before starting all work you need to read the instructions for using dry building mixtures for tiles and porcelain stoneware. This will help avoid many mistakes during the installation process.
We also note that this article discusses preparing the floor for laying tiles in the kitchen, bathroom, hallway or any other room. When installing a shower in a bathroom, the technology becomes more complicated due to:
- the need to maintain slopes of 2-4%;
Arrangement of the floor in the shower room.
Leveling the floor under tiles: methods and features
Any floor finishing must be installed on a flat, dry and durable base. But it is a rare concrete surface that meets these requirements. Therefore, various methods are used to level the floor under the tiles with your own hands:
- Tile adhesive (ready-made dry mixtures);
- Self-leveling (leveling) compounds;
- Cement-sand composition (screed).
Each of the above methods has its own advantages and disadvantages. Let's take a closer look at them.
Tile adhesive
Leveling the floor with tile adhesive.
From a professional point of view, it is better to use specialized products - levelers, thin-layer finishing compositions. But since the adhesive composition contains all the necessary components (cement, quartz sand, plasticizers), it is actually allowed to be used for smoothing the floor for laying tiles. But there are several nuances here.
Firstly , experienced professionals recommend:
- If the floor is almost flat and a thin layer is required, then you need to mix the glue with a large amount of water until the consistency of liquid sour cream is obtained;
- Preparing the floor for laying with differences of 5-10 mm is carried out with a thicker mixture, optimally in 2 passes. That is, the first time a preparatory layer with a thickness of 3-6 mm is poured and stretched, and the second time a finishing layer, no more than 4 mm.
Secondly , many craftsmen prefer to use cheap mixtures for leveling, and when working directly with tiles or porcelain stoneware, use expensive, professional compositions with a high degree of adhesion and plasticity. In addition, they already contain special water-repellent additives, due to which preliminary waterproofing is not required. This is true for kitchens, balconies, hallways and other similar rooms.
Thirdly , there are no clear instructions. Each master develops his own work algorithm, but the principle is the same: cleaning, priming and applying a leveling mixture. The discrepancy is only in proportions, and most importantly - in timing. Cement needs at least 28 days to fully mature and gain strength, but the percentage of its content in adhesive mixtures is less than half of the total mass. In addition, the composition contains a variety of plasticizers, including hardening accelerators, increasing workability, etc. Therefore, it is worth focusing on such an indicator as the period after which full load on the ceramic flooring is allowed. As a rule, for internal work this period is from 5 to 7 days.
The technology is simple:
- The concrete base must be cleaned of dust, dirt, paint, oil and other stains, peeled and loose areas, and if necessary, deep holes, cracks and cavities must be filled with a repair mixture.
Filling cracks with repair mixture.
Self-leveling compounds
An incredibly convenient development that allows you to smooth the surface of the base with a layer from 2 mm to 10 cm is leveling compounds. They are divided into basic levelers (coarse-grained), universal and finishing (fine-grained thin-layer). Let us immediately note that all three types are suitable for our purposes (depending on the thickness of the layer). To form a durable coating, it is better to use cement or cement-gypsum compositions.
The advantages of bulk compositions are speed and ease of working with them. It is allowed to lay ceramic tiles, porcelain stoneware, artificial or natural stone within 3-5 days after pouring. You need to select the appropriate composition based on:
- Areas of application (indoor or outdoor);
- Method of use (manual or machine);
- Layer thickness.
The installation of a self-leveling floor must be carried out strictly in accordance with the instructions. The surface is cleaned of dirt and old coatings, weak areas are removed and filled with repair mixtures. Next, a primer is applied in 2-3 layers with mandatory drying for 12-24 hours.
Along the perimeter of the room, the level of the new floor is marked on the walls or point beacons are installed. When forming a layer with a cross-section of more than 1 cm, it is advisable to use a damper tape.
The solution is mixed in the proportion indicated on the label, poured onto the surface and distributed with a spatula or squeegee. The coating is rolled with a needle roller for deaeration and compaction. The leveled base will be ready for further work in just a few days.
Cement-sand mixture is a universal and inexpensive means of leveling any type of base. Due to the high binder content, the surface is very hard, practically does not deform and can withstand significant loads. But the drying time and strength gain is too long - up to 28 days. Because of this, preference is often given to self-leveling compounds or tile adhesive.
For leveling the floor with a layer of more than 3 cm, a full-fledged screed is ideal. You can purchase a ready-made packaged mixture or form it yourself in the approximate proportions: 1 part cement, 3-5 parts sand and water in an amount sufficient to obtain a thick solution (approximately 20% of the volume). You can add screenings, crushed stone, reinforcing fiber, expanded clay, and crushed slag to the composition. That is, everything that will give the screed additional properties: strength, thermal insulation, etc.
Beacons are installed on the floor. These can be reference products, metal profiles fixed with mortar, or even just nails screwed into the base at the required level. The finished composition is applied to the surface and distributed as a rule. After pouring, experts recommend covering the floor with film and periodically moistening it so that the cement matures evenly and gains strength. After 14-28 days (depending on thickness), the screed is ready for laying tiles or porcelain stoneware.
Alignment methods
Leveling the floor under the tiles can be done in several ways:
- Using a dry screed;
- Cement-sand (concrete) screed;
- Using a ready-made self-leveling mixture;
- Using tile adhesive.
Dry screed method
An inexpensive method that requires a minimum amount of time to level the floor under the tiles. In addition, this method will allow for additional noise and heat insulation. After the screed is laid, you can immediately begin facing work.
The surface of the slab is covered with waterproofing and an antiseptic solution that prevents the formation of fungus and mold. As a waterproofing material, you can use a polyethylene film 50 microns thick, which is laid in one layer with an allowance of 12-15 cm along the walls, and a damper tape is glued around the perimeter of the room. The joints of the film strips are overlapped by approximately 20 cm and glued together with tape.
Dry floor screed method
The material for dry screed is quartz sand, fine-grained expanded clay or expanded polystyrene. The bulk layer should be as thick as necessary to hide all unevenness of the floor surface. After this, the bulk material is carefully compacted using hand or electric tools and leveled using the rule. Next, the floor layer of the dry screed is covered with a backing made of fiberboard, chipboard, gypsum fiber moisture-resistant sheets or plywood. The joints between the sheets are tightened with self-tapping screws in increments of 15-20 cm and glued with PVA glue. After all the sheets are fastened together, a single, durable surface is formed on which the tiles can be laid.
This method is well suited for use in living rooms, as well as private houses with wooden flooring.
Cement-sand screed
A common method is a concrete screed, which can be used to level floors in both residential and non-residential premises. This is a budget-friendly method with which you can level out differences in the floor up to 10 cm, fill holes and potholes. But such a screed takes quite a long time to dry - up to six weeks; it is impossible to do cladding before the drying time.
Before leveling begins, the surface is covered with waterproofing. This can be a thick plastic film, as in the method described above.
Cement-sand floor screed
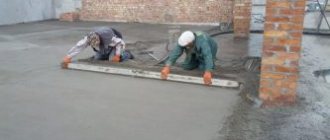
You can buy a ready-made one, or you can prepare “your own” leveling solution: to do this, you need to mix half of the water with cement and sand in a ratio of 1 to 3. Before pouring the solution, you need to install beacons from profiles at intervals of 80-90 cm from each other, from the wall - 30 cm. After this, the spaces between the beacons are filled with small portions of cement-sand mortar, leveling as a rule. Leveling can also be done with a wide spatula in the direction from the far corner of the room to the entrance. It is recommended to cover the finished screed with a layer of plastic film to prevent rapid evaporation of moisture from its surface, which should be periodically moistened. As the screed dries, the beacons are removed from it, and the voids are filled with mortar and rubbed.
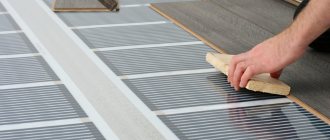
If a “warm floor” system is installed under a concrete screed, you must check its functionality before pouring. In this case, the thickness of the leveling layer may increase.
Self-leveling mixtures
The most expensive method of leveling under tiles is using ready-made self-leveling mixtures from a special polymer composition. Their cost is justified by rapid hardening, easy distribution on the surface, and ideal adhesion to the concrete slab. The surface can be covered within 10-12 hours after pouring the mixture. Unlike previous types of leveling, this method requires ventilation of the room, because does not tolerate high humidity.
Such mixtures are divided into three types:
- Repair mixtures for eliminating significant defects - large cracks, holes, parts of exposed reinforcement. They give the surface greater strength and good adhesion.
- Compositions for rough screed (starter) - applied up to 2 cm thick to get rid of minor surface defects (slopes, sagging, depressions).
- Finish coatings are not highly durable; they are applied to the surface in a thin layer to ensure a perfectly flat, smooth surface.
Self-leveling mixtures for floors
To calculate the required amount of self-leveling mixture, you must keep in mind that per 1 square meter of area you will need one bag (20-25 kg) to fill a layer 1 cm thick.
After cleaning and priming the rough concrete floor, damper tape is glued around the perimeter of the room, and beacons are also installed, but this is not necessary. The properties of self-leveling mixtures allow them to distribute themselves.
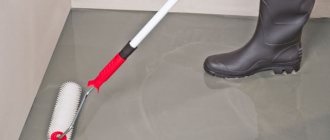
The mixture is evenly distributed using a wide spatula. The mixture sets within 20 minutes, so it should be leveled during this time and it is not recommended to fill the entire area of the room with it at once. Each subsequent strip should be poured until the previous one hardens, starting from the far corner of the room. Then, after completely treating the floor surface, using a needle roller with a tooth length of at least 30 mm, the mixture is rolled out over the entire area of the room, air bubbles are removed from it.
When working with this type of material, you should strictly follow the manufacturer's instructions.
Leveling with glue
If the unevenness and defects of the floor surface are insignificant and amount to less than 5 cm, leveling can be done without pouring a screed, but using an adhesive solution during the laying of tiles. The surface is prepared by priming and impregnation with an antiseptic.
The thickness of the adhesive layer depends on the size of the tile - the smaller it is, the thinner it is. The glue is applied to the floor surface, as well as to the tile itself, then the evenness is determined using a level and adjusted by tapping the tile with a mallet. Tile adhesive screed is prepared by thinning the adhesive to a thinner state and covering the concrete slab with a thin layer before installation. It should be remembered that this method is used only in the presence of minor defects and minor irregularities.
Leveling the floor for tiles
An experienced finisher can lay ceramic tiles on a base with almost any surface variation. However, such masterful distribution of the mixture, without specialized devices, is available only to real professionals. Beginners, before laying, first of all, should carefully level the floor under the tile, otherwise it will lie unevenly and will “play” on the surface with protruding edges or will have poor adhesion to the plane.
You can do this in several ways:
- Using a cement-sand screed;
- Using “dry” screed technology;
- Leveling solution;
- Tile adhesive.
Any of these materials and the technology for their application are suitable if you need to create a flat surface for tiles with your own hands, for a person who has never done this before. There should be no difficulties in leveling.
What is this article about?
Self-leveling floors
The simplest method of arranging a screed is to fill it with self-leveling solutions. They are a gypsum or cement mixture with sand and special fillers such as glue and plasticizers.
It is very easy to pour such a screed, and it dries much faster than cement screed. They are universal, since the abundance of varieties allows you to choose a mixture for easy leveling, complex surfaces, as well as thick screeds.
Filling is carried out according to the following scheme:
- Surface preparation - removal of dust, dirt, crumbling elements, degreasing, priming;
- Applying the solution in the proportions clearly indicated on the pack using a construction mixer;
- Pouring the mixture from the far end of the room, which does not require the installation of beacons;
- Distillation of the solution with a needle roller.
Some solutions allow you to walk on the screed already on the day of pouring, but on average, drying occurs in 10-12 days. The disadvantages of leveling mixtures are the high cost of the material.
Pouring self-leveling floor under tiles
If you do not have the skills to lay tiles, you will need to level the uneven floor. This will help you lay tiles faster and easier. Often, a self-leveling floor is used for this purpose, which allows you to level the surface as perfectly as possible.
If the level differences are not very large, you can use a self-leveling floor
Types of self-leveling floors:
- Polymer;
- Mineral.
For polymer types, epoxy resins, polyurethane and other substances are used. This floor can be a worthy finishing touch. The price of such a mixture is quite high, so if further laying of tiles is intended, then it is better not to use polymer floors.
The mineral look is an ideal filler for tiles. The mixture contains concrete and plasticizers. The self-leveling floor allows the mixture to spread evenly and creates the correct base for the tiles.
Subtypes of mineral mixtures:
- Basic – used for significant unevenness of about 8 cm;
- Medium – suitable for differences of up to 3 cm;
- Finishing mixtures are the main fill for further finishing.
Before installation, it is necessary not only to purchase the correct mixture, but also to prepare the necessary tools. To begin with, you should stock up on special studded boots. They will allow you to move along the screed.
Before work, you should dismantle the old coating. All garbage is also tedious to clean up during the process. For perfect cleaning, use a vacuum cleaner.
The next step will be treating the floor with a primer. The work should be done with a roller or paint brush. All cracks and deep holes will need to be covered with cement mortar and sand.
The optimal temperature for installing a self-leveling floor with your own hands should be from 5 to 25 degrees.
After this, you need to dilute the mixture following the instructions. The substance must be poured into water, and not vice versa. The consistency of the solution should be uniform.
Next you need to start pouring the floor. Consistently you need to level the layer using a spatula. To get rid of air, you should treat the surface with a needle roller. This floor hardens quickly, so you need to allocate up to 20 minutes for work.
Cement-sand screed for tiles
This classic method has been used for a long time, when craftsmen not only did not know how to level the floor under tiles in any other way, but there were simply no other materials on the finishing market. This can be done both on a concrete floor and on a plane with a sheet, moisture-resistant, wooden covering (with pre-treatment with concrete contact).
The plane is leveled by at least 3 cm.
The work is carried out in several stages:
- Surface preparation - removal of dust, dirt, crumbling elements, degreasing, priming;
- Adding a mixture of grade 500 cement with sand screenings at a rate of 1:3 and water - 1 liter for each kilogram of cement. All this is thoroughly mixed with a mixer or concrete mixer;
- Then you need to fill your solution according to the level of the installed beacon markers and level it with the rule;
- When the screed dries, the beacons should be removed, and the void under them should be filled with additional solution;
- After this, the evenness of the floor should be checked with a level, and the surface should be covered with plastic film.
The screed will take at least 2 weeks to dry, and ideally 30 days, during which time it will have to be periodically moistened with a roller so that it dries evenly.
Before installing the tiles, the surface must be cleaned of dust and primed with a deep penetration solution.
The disadvantages of such pouring include the long-term drying of the screed, the unreliability of the coating in case of violation of the pouring rules or poor-quality cement.
Dry screed
Dry screed has a huge number of advantages:
- Quick installation;
- Low cost;
- Cleaner installation than the “wet” method;
- Low weight of the overall structure;
- Ease of installation, since leveling the floor under the tiles using this method is possible without a large number of specialized tools and experience;
- Possibility of conducting communications within the coverage.
However, it is advisable to use this method when there are significant differences in the surface in order to save money, when the screed requires a significant thickness, since the filling under the tile will still need to be done at least 2.5 cm.
Installation is done as follows:
- Surface preparation;
- Laying waterproofing material - polyethylene film, at least 200 microns thick;
- Finishing along the perimeter of the wall and baseboard parts of the room with dumping tape, with film holding;
- Installation using a level, guide T-shaped beacons with fixation with self-tapping screws;
- Filling with a layer of at least 3 cm - expanded clay, perlite or fine-grained slag;
- Next, when leveling the surface, you should constantly use the rule and level;
- Compacting;
- Installation of GVLV sheets, OSB and so on, with a locking connection, spaced apart by at least 25 cm;
- Application of concrete contact mixture.
- After the concrete contact has dried, you can pour a thin layer of 2.5 cm of screed and lay the tiles.
Dry screed device
A load-bearing screed made of cement-sand mortar, if the work is not carried out in the bathroom, can be replaced by laying chipboard sheets covered with two layers of liquid nitro varnish or drying oil on compacted expanded clay, called a “dry screed”. The sheets are laid end-to-end and rigidly fastened together with self-made overhead metal strips or plates using self-tapping screws. The seams between the chipboards are filled with silicone sealant. A day after using silicone, you can begin installing beacons.
Tile adhesive
All of the above technologies are easy to install and are quite accessible to everyone. However, when it is necessary to correct the screed or top it up without significant lifting, it is advisable to level the floor with tile adhesive.
Of course, it is not advisable to fill a thick screed with glue, but it copes quite successfully in case of the following problems:
- Pits, holes, grooves in the base;
- Damage to the concrete screed - dusting, partial peeling, other problems associated with low-quality concrete mixture;
- When you need a screed for tiles of small thickness with maximum adhesion.
The advantages of using this method include:
- Reasonable cost;
- Excellent grip characteristics;
- Quick drying;
- Plastic;
- Ease of arrangement;
- Does not shrink.
How to create a smooth surface with tile adhesive
So, there are 2 ways to level the screed using glue - with sealing on the tiles and filling with beacons.
Leveling simultaneously with installation of tiles
In one case, the leveling of the plane is carried out directly together with the laying of the finishing coating.
This is done like this:
- First you need to prepare the surface;
- Using a level, mark the highest and lowest points on the floor. If there is no level, the room is small, you can use a standard spirit level with the rule;
- Next you need to lay out the tiles. At the entrance, as well as along the free wall, the tiles should be as solid as possible. There should not be a narrow pruning row along the walls;
- Between the highest and lowest marks, you should set a control beacon and start laying from the maximum point. In order for the tiles to go smoothly, you need to set the direction using a stretched cord;
- Next, mix the solution according to the instructions on the package;
- The adhesive should be applied to the tiles with a comb in a thick layer, this will ensure uniform coverage;
- The first tile is laid with level control, and then a special clamp is fixed to it, called SVP - tile leveling system;
- And so it repeats until the end.
Tile adhesive dries quickly, but since leveling was done using glue and SVP, it is not advisable to walk on the floor for 2 days after installation.
Once dry, all that remains is to knock down the clamp guides and rub the seams.
This way, you can easily lay the tiles on tile adhesive without pouring the screed.
Pouring adhesive screed
But if the installation technology with hvp is not suitable, you can level the floor with tile adhesive and fill the base. This is done if it is necessary to fill a layer of insignificant thickness in order to correct the old surface, seal holes, cracks, and bumps.
- To do this, you need to prepare the surface similarly to the above recommendations;
- You should apply a small amount of glue, taking into account the speed of its drying;
- The glue falls directly between the old beacons in the previous screed and is pulled through with a long rule. At the same time, the layer in the area of the lighthouses should be close to zero, and in the middle of the spans - depending on the level differences;
- After preliminary cleaning and priming, you can use the screed and lay tiles on it within 2 days.
Thus, without resorting to the help of specialists, using any of the above methods, you can level the surface for installing tiles.
How to level floors under tiles
The tiles are laid in rooms with high humidity. Tiles as a material are quite beautiful and durable. The tiles are very resistant to various types of damage, which means the floor will last a very long time.
Ceramic tiles on floors have several serious advantages over any other floor coverings. This type of flooring is very easy to remove and clean. Spilled water, as well as any organic contaminants, are easily and easily removed from the surface of the tile. Often, tiles are laid in kitchens, toilets, and bathrooms. Tiles have many more advantages. This coating also has a drawback - it is very demanding on the evenness of the base. Let's find out how to level the floor under the tiles.
Benefits of tiles
- Natural material (clay with impurities, subject to heat treatment)
- Does not cause allergies. When firing tiles, 99.9% of all bacteria die
- Moisture resistance. Wood floors tend to swell and rot if they are laid in a damp place. The tiles are not at all afraid of moisture, which is why they are used in bathrooms and kitchens.
- Wear resistance. The only thing is that she is afraid of blows. Eliminate this type of mechanical stress, and the tiles will serve you for a very long time.
Leveling a concrete floor
To level the floor under the tiles, experts recommend making a real, full-fledged screed. Before pouring, very careful waterproofing is necessary. The tiles can be laid only after the screed has completely hardened. The material does not like height changes, so the screed should be carefully leveled.
If you cannot decide in what way and with what to carry out the leveling procedure, the room itself will tell you what should be used. Evaluate humidity, elevation changes, slopes, loads, as well as the cost of finance, effort and your time - you will understand what is most suitable in a particular case.
The process of leveling a concrete floor can be done in several ways. Depending on the situation and type of room, as well as the finishing coating, choose the appropriate technology. Today, dry screeds, traditional screeds based on wet cement mortar, as well as modern self-leveling materials are used to level floors.
Dry screed
The technology is very simple, its cost is not high. To level a concrete floor using this method, you do not need any special skills or special equipment. This method is popular among those who are planning to decorate their floors with their own hands.
This screed is called dry because, unlike the traditional method, the technology does not provide even a gram of water. Often this screed is used to level floors under laminate, tiles and other types of finishing coatings.
Laying dry screed
In order to level the floor using this method, it is necessary to carry out several operations. At the beginning, the monolithic slab must be thoroughly cleaned of dust and various debris.
When the surface is clean, a layer of waterproofing material is laid on the slab. For these purposes, it is recommended to use thick construction polyethylene film. Its edges must be folded onto each wall by at least 100 mm.
Then a special granular mixture is poured over the entire surface of the base and distributed evenly. The layer thickness must be at least 50 mm. Then control the horizontality of the plane and carefully compact the layer of the mixture. For compaction, you can use a hand or electric tool. After the pad is thoroughly compacted, a substrate is laid on the surface, on which the tiles can already be laid.
Among the advantages of this technology are excellent thermal insulation characteristics, which are ensured through the use of a porous granular mixture.
Cement-sand screed
This is the classic way. If you think about how to level the floor under the tiles, then such a screed allows you to get a foundation of sufficiently high strength for any type of room. This screed is also recommended for leveling surfaces in garages.
Before starting work, the surface is thoroughly cleaned of dust and debris. Then, after this, the base is coated with penetrating primers. Next, the beacons are fixed. After this, prepare a solution of sand and cement and begin pouring the screed.
The solution is poured between the beacons and, using the rule, evenly distributed between the slats. So, the filling is carried out over the entire area of the room.
As you can see, this technology will not cause any difficulties for anyone. The cost of this process is not high, and the price-quality ratio is high.
Surface leveling options
Diagram of a floor with expanded clay insulation and a leveling layer.
How to do the work yourself? Marking is the beginning. Next you need to decide how to level the floor under the tiles and what to use to level it. There are several options here: dry self-leveling mixtures or leveling screed.
Mixtures are useful if the height difference is no more than one centimeter. The packaging of this product indicates the proportion in which it is diluted with water and how much of the finished mixture is needed per 1 square meter. m of floor. Expert advice: the thicker the floor, the thicker the mixture should be. Like any other surface, the floor is cleaned of dust and debris and primed before leveling.
The self-leveling mixture is poured onto the floor and spread over the surface using a special roller. Wait until it dries - leveling the floor under the tiles is complete. You can lay tiles. The only disadvantage of such mixtures is their high cost. Therefore, if the differences exceed 1-1.5 cm, it is better to screed (the layer will be thick).
For a concrete screed you will need cement, sand, a level, a shovel and beacons. Some people use a profile laid with the wide side down as beacons. The beacons are placed on small “buns” of the solution. The distance between them and the wall should not exceed 30 cm. The distance between the beacons themselves is 50-60 cm.
Self-leveling mixtures or screed?
One of the cheapest ways to level the floor is, of course, a screed. The mixture is prepared independently. You can add various fillers to the solution to increase strength. You can also purchase ready-made mixtures that simply need to be diluted with water. The screed is indispensable if there are large differences in heights and other serious defects on the surface.
But in addition to its advantages, this method also has significant disadvantages. So, for a concrete wet screed to completely dry and gain its strength, a certain amount of time must pass - often about 3 weeks. Also, before laying the screed, it is necessary to lay waterproofing, and then carefully sand the surface several times.
Modern building mixtures help to level floors very carefully, and the required drying time is only 4 days. This will save you from unnecessary problems, costs of finance and time. There is nothing easier than leveling the floor with these mixtures. They are ideal for tiles, laminate and other demanding and capricious finishing coatings.
What are these mixtures? These are special polymer-based compounds. In their properties and characteristics, they resemble popular self-leveling floors. The composition spreads very easily on the floor, hardens quickly and then provides excellent surface quality and excellent adhesion for laying tiles.
Polymer mixtures can be divided into several categories:
- Mixtures for primary, rough processing;
- Mixtures for finishing coatings;
- Mixtures for eliminating large defects.
Self-leveling compounds for rough processing are applied in a thin layer up to 2 cm. These products will help get rid of small defects, waves, and slopes.
Finishing coatings do not have high strength characteristics, so they are applied in a thin layer to obtain a smooth and perfectly flat surface. Compositions for eliminating large defects have the greatest strength and have excellent adhesion to a monolithic surface.
These products can be purchased in bags of 20 and 25 kg. So, for 1 sq. m. you will need one bag of mixture. Before leveling the floor under the tiles, it is advisable to perform calculations on how much materials will be needed.
Concrete screed/self-leveling mixture
One of the cheapest and most affordable ways to level a floor under tiles is to pour a concrete screed. In this case, concrete is prepared using sand, cement and water. To increase the quality and strength of the entire structure, it is necessary to add some additives, such as expanded clay, lime glass, and the like. Among other things, you can use ready-made mixtures. But this mixture is suitable for leveling the floor under the tiles if the unevenness is minor. If it is necessary to level the floor of a large area, it is better to use a cement-sand mixture.
Interesting! If you use a cement-sand screed to level the floor under the tiles, it will take about two weeks for the screed to dry. As for ready-made self-leveling mixtures, the drying process is much faster.
The drying speed of self-leveling mixtures is very fast and reaches up to four days. This became possible thanks to the presence of polymer additives, which ensure rapid hardening of the entire surface. With all this, such a coating has excellent adhesion to the future flooring. Self-leveling mixtures are divided into several categories:
- Special composition for screed thickness up to 20 mm.
- As a finishing coat. Apply a thin layer.
- A mixture for removing large cracks and other defects.
All these compounds provide high-quality adhesion to the entire surface.
If you prefer a cement-sand screed, then you may need the following material and tools:
- Container for mixing the solution.
- Cement, sand, water and other filler.
- Needle roller to eliminate air.
- Waterproofing material.
- Rule.
- Lighthouses.
- Level.
This is the basic set of tools you will need when making a screed.
Important! If the screed layer is large, it may be necessary to lay a metal mesh. It is necessary to prevent cracking of the screed.
Scheme of work
The first step is to prepare a level, as well as a container in which the mixture will be mixed. To stir, you need to purchase a drill attachment. It is advisable to have a drill where you can adjust the speed. You will also need measuring cups or scales. The tools required are a spatula and a needle roller.
Preparatory stage
At this stage, all furniture is removed from the room, and it is also recommended to thoroughly ventilate the room. Self-leveling agents do not like drafts, high humidity and sudden drops in temperature.
To obtain a durable and even surface as a result, it is necessary to thoroughly clean the area from dust and debris. If it is not removed, then it will be impossible to talk about a surface on which tiles can then be laid.
If there are various defects in the subfloor, it is recommended to putty them, otherwise this will disrupt the evenness of the applied composition.
After cleaning, measuring work begins. For this, experts recommend laser levels. They are ideal for these purposes. These devices project a mark along the entire perimeter. You don’t have to carry out long calculations and take measurements with a tape measure.
It is necessary to install the device at the highest point. Self-tapping screws are screwed into the floor, and a rope is tied to them. This is done to control the zero level.
If there is no laser level, then you can use a water level, but a laser meter is best suited.
If it is necessary to obtain high strength, then a reinforcing mesh should be laid before leveling. It is necessary if the surface of the base needs to be raised by more than 2 cm. The reinforcing mesh will several times increase the adhesion between the concrete floor and the polymer coating.
Leveling the floor
To get the most even floors possible, you must prepare the mixture exactly according to the instructions. For high-quality mixing, it is ideal to use a mixer. The resulting composition is poured onto the floor from the far wall to the doors.
The mortar on the floor should be smoothed with a spatula, and then it is recommended to go over the layer with a roller with needles. This will remove any air bubbles that affect the strength. It is very important to remember that self-leveling mixtures dry very quickly. Therefore, leveling the floor can only be done within 20 minutes. Then the composition will set. Professionals do not recommend immediately applying the composition over the entire area.
The composition is applied in layers. The thickness of one layer can be from 5 to 20 mm. Thus, it is possible to obtain a durable surface. Thin layers will not provide strength, and large layers will take a long time to harden. During pouring, you must constantly check the level.
After the polymer composition has dried, you can lay the tiles on a perfectly flat floor. If you didn’t know how to level a concrete floor, now you can do it yourself. These technologies are suitable for floors under tiles, laminate and other floor coverings.
Leveling the floor with cement screed
This concept includes the complete readiness of the floor surface for laying tiles on it. The screed is made with cement mortar, which saves money.
Preparation process:
- It is necessary to clean the floors from any bulges on the surface.
- Collect debris, dust, wet wipe and degrease the surface.
- Apply primer mixture.
- Using a level, make marks on the wall at the same level from the floor.
- Attach ropes from the wall to the beacons, which are located around the entire perimeter and floor at a distance of 6 centimeters from each other.
- Dilute the mixture for the screed (it dries quickly, which must be taken into account when preparing the solution). The composition of sand to cement is 1/3.
- If the difference in floor level does not exceed 2 cm, then one layer is enough to level it.
- Use special tools to remove bubbles that form inside the screed.
- Track the level along the rope.
- Do not start working on the second layer until the first one is completely dry.
- Finish the work with a more liquid cement mortar, it will ensure the elimination of all defects that arose during the screed.
