Home > Tools > Do-it-yourself manual wall chaser
The construction of houses from high-strength aerated concrete blocks has become popular in recent decades due to the special characteristics of this material. The blocks, having a cellular fine-porous structure and forming monolithic strong walls, perfectly maintain the thermal balance in the house. Do-it-yourself construction from such material has certain subtleties, since special tools are required to work with it.
Factory made wall chaser
For information. When sawing grooves, dust is formed not from the cutting itself, but from the fact that the grinder takes air for cooling and, blowing it through the ventilation grilles onto the dusty wall that is being cut, simply blows dust from this wall into the air.
Scoring methods
Any electrical work is carried out after rough work, so that the sockets are not deeply recessed when applying a thick finishing layer. To carry out such work, grooves are made in aerated concrete in one of three ways:
- Take a hammer drill or jackhammer and drill out a groove of the required depth. Significant disadvantages of the method are the unevenness of the furrows, slowness and noise, usually leading to conflicts with neighbors;
- Take a grinder, install a cheap Chinese-made diamond wheel on it, and make two cuts in the wall. Then what remains between these two grooves is easily knocked out. A significant disadvantage of this method is dust, from which only a gas mask can save you;
- A special electric wall chaser with a dustproof casing is purchased.
All these tools are used to create grooves for hidden electrical wiring.
Important! It is more convenient to hide fittings, small pipelines, and electrical wiring right away so that they do not in any way spoil the appearance of the room.
Working with cutting tools
How to use the tool correctly
Proper use of a manufactured wall chaser helps eliminate unnecessary waste of material and time. When working with a manual furrower you need :
- Draw markings for the future furrow.
Modern industry offers a lot of different tools for working with aerated concrete, both electric and manual. It is irrational to purchase a ready-made furrower for private use, since even the manual version is not cheap. The costs of making the device yourself will be lower. In addition, a homemade tool can be sacrificed if it breaks.
However, there are discounts on aerated concrete tool kits.
Scoring technique
There are some nuances in the gating technique that must be taken into account:
- The most important rule is compliance with safety precautions. You should work with headphones, a mask and safety glasses;
- In order for the recesses to be smooth and beautiful, it is necessary to make markings in the wall;
- On the factory-made device, the width and depth between the disks are set;
- The wall chaser must be operated from top to bottom. The advantage lies in the guiding force of gravity and saving one’s own forces.
Wall chaser
The markings on the walls are applied with a margin, due to the fact that the disks are offset relative to the edge of the casing substrate. Therefore, the apparatus is carried out with a reference point to the edge of the casing substrate and a vertically drawn line. This makes it easier to control.
The width is set so that the tool for further knocking out (chisel, drill) fits in easily and does not damage the edges of the resulting groove. The depth of the groove is made with a margin so as not to waste time on sealing the cable being laid. It is usually 15mm for a single cable, but increases for more cables. The point is to ensure that the cable is laid normally and does not need to be further pressed and adjusted.
Important! It is inconvenient to cut with a laser, because during operation it involuntarily gets blocked and becomes invisible. Practice has shown that it is much faster to draw grooves with a level and then cut along them.
Wall chipping
Why do you need to cut aerated concrete?
According to technology, when building a house, it is necessary to reinforce the first row, window sill openings and, in some cases, every fourth row. Using a wall chaser , grooves are created, reinforcement is placed in them and covered with aerated concrete adhesive.
also needed for laying electrical wiring or cables in an already built box at home. Since aerated concrete has a porous structure, difficulties may arise in attaching various trays and boxes for laying communications. An alternative is to make grooves in the blocks themselves.
There is no point in trying to do without a wall chaser by using a chisel and a hammer. The recess made in the blocks must be level. This may not matter for laying wires or a corrugated case, but pipes in such a groove can be deformed, and the fittings may not lie correctly. In addition, impact may cause blocks to crack.
Types and features of application
The gating device can be:
- Manual;
To make a vertical groove, a flat board attached to the wall can serve as a guide. Using a hand wall chaser, draw a straight line along this board (as if with a pencil on a ruler). The work is done quickly, without noise and dust.
To lay a multi-cable line, a deeper groove is required, so the tip is slightly flattened with a hammer.
As a result, the guide is unscrewed, the wires are carefully placed in the groove, which is then finally sealed.
- Electric.
An electric wall chaser is a tool equipped with two rubber rollers for easy movement on the treated surface of the block. It should be noted that the quality of work is better when working only with a professional tool. A wall chaser is a normal working equipment that every electrician should have.
Important! When chipping, you should always wear safety glasses. A small flying pebble can easily cause quite serious injury.
If we compare the factory and manual versions of these devices, then this comparison is not always in favor of the factory devices. There is a certain sense in assembling the instrument with your own hands, especially if the amount of work is small.
For information. If you can’t purchase one, you can make a homemade wall chaser with your own hands.
Homemade tool option
Features of the wall chaser
Wall chaser design.
A wall chaser is used to cut the necessary holes for small-diameter pipes, fittings and electrical wiring in aerated concrete blocks. There are the following types of this tool:
- manual;
- electric.
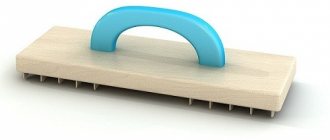
There are two types of manual wall chaser - with a curved and straight handle. The first type of tool has holders for both hands and a double-sided cutter, which is secured with a bolt. When performing work on a horizontal surface, the most relevant would be to use a manual wall chaser. It is very convenient to use, since the presence of two holders ensures completely uniform distribution of pressure.
A manual wall chaser with a straight handle is mainly used for various works on building walls. It also has two holders. This type of tool will become simply irreplaceable if you have cellular aerated concrete in stock. With the help of such a wall chaser you can easily and quickly cut the required grooves and grooves in this type of building material. This tool will allow you to perform the necessary work with very high precision. As a rule, the cost of a manual wall chaser on the domestic market varies from 350 to 550 rubles.
A manual wall chaser is recommended for cutting materials on a flat horizontal surface.
An electric tool for cutting aerated concrete is a small device with two rubber rollers. They serve to facilitate the movement of the wall chaser along the working surface of the blocks. The rotary design of this tool consists of several cutters, which are driven by a built-in electric motor. There are hand holders located above the rollers. This type of wall chaser is usually used for cutting hard surfaces. The cost of this tool varies from 4,500 to 26,000 rubles and depends on the power of its engine.
Manual wall chaser for aerated concrete
DIY soldering station
Making a wall chaser with your own hands is very simple, focusing on a picture from the Internet and visually observing the proportions.
The tool is made by welding from leftover material, for example:
- the main part is made of corrugated pipe 25x25 mm, 1.2 m long;
- handle - made of corrugated pipe 30x30 mm;
- cutting plate - from a strip 20-25 mm wide.
On the side from which the groove will be made, the cutting blade is sharpened with a grinder. In general, such a tool will work for gating one room and will be useful in the future.
How to make a wall chaser yourself?
The set of tools and materials used to make this device depend on what kind of craftsman wants the device. Typically, manual wall chasers are made from an angle grinder or reinforcement pipe. Let's take a closer look at the method of manufacturing each of them.
Rebar wall chaser
To make the device yourself, you will need the following tools and materials:
- a piece of metal water pipe, the length of which is equal to one meter;
- Bulgarian;
- welding machine;
- sledgehammer;
- vice or anvil.
Using a grinder, cut off a piece of pipe 80 cm long. Bend one end of the piece at a right angle. Make a U-shaped bracket from a piece of iron plate. She will play the role of a cutter. Sharpen the base of the future cutter and weld it to the straight end of the pipe. Sharpening can be done using a grinder. Make a handle from the remaining piece of pipe and weld it to the base of the future wall chaser where its edge is bent. The tool is ready.
Wall chaser from an angle grinder
If you don’t want to tinker with the manual version of the device, and you don’t want to waste “crazy” money on an electric one, you can make a tool with an electric motor with your own hands by remaking an angle grinder. Of course, you will also have to spend a little money here, but if you take into account the full cost of a new wall chaser, then these costs will seem like pennies.
What tools are needed here? You will need:
- Bulgarian;
- a pair of diamond discs;
- nut of the required size;
- material under the casing;
- vacuum cleaner mechanism.
First, screw two diamond blades onto the grinder. The first one is attached in the usual way, the second one is placed next to it, secured with a specially selected nut, on which there should be an auxiliary ring for better fastening. It is this nut that will hold the second disk on a homemade wall chaser.
To make working with such a wall chaser more comfortable, you need to attach a special safety cover to it, which will protect you from dust, directing it to the opposite side.
Next, you should think about immediately removing dust after working with the wall chaser. Therefore, an additional vacuum cleaning mechanism must be attached to the main device. The diamond blade rotates backwards, so the dust collection mechanism should be attached behind the housing. The tube is attached using clamps and then bent. Thus, it will not interfere with the disk's operation.
Homemade electric wall chaser
You can also assemble a wall chaser with your own hands from an ordinary grinder and a dustproof casing. If you go to YouTube and look for information, there is already a lot of it there. Craftsmen themselves install casings on angle grinders in several ways, and there are almost copies of the factory ones. But there are also primitive designs made from a plastic canister. Nevertheless, all these designs work well in practice.
Do-it-yourself wall cutting for wiring
For manufacturing you will need the following components:
- grinder with a power of 1.5 kW with speed control, having a standard spindle with two discs;
- dust cover to be made.
Important! Low-power cutting machines are not suitable for making your own wall chasers. If they do, it will only be with a 150 m disc.
Dust cover assembly process:
- You can even find available materials (metal sheets and a pipe for connecting a vacuum cleaner) in your garage.
- Ask a neighbor who has a semi-automatic welding machine to weld a dustproof housing.
An outlet for a vacuum cleaner is provided. For convenient operation of the machine, a handle is welded.
A homemade wall chaser copes with its task very well, the cutting depth is about 2.5 cm. One part of the casing works as a kind of dust collector. Due to the design features, a high-pressure zone is formed, and the bulk of the dust ends up in the vacuum cleaner. During operation, the backing of the device is placed against the wall and guided from top to bottom. Thanks to the ease of cutting and convenience, you can work with one hand.
The width of the casing is obtained with a margin for two disks, equal to 35 mm. In the future, you can install two disks in the device, but it is also convenient to work with one. The result should be approximately similar to the casing shown in the picture. If the added components are painted black, then the product cannot be distinguished from the factory version at all.
Homemade casing for wall chaser
Tips for use
- Tip #1. During cutting, you need to constantly catch the dust flow. To do this, the adjacent part of the casing should be as close as possible to the wall, this is about 5 mm. Therefore, first the tool is brought with the dust-suction side to the wall and only after that they begin to bury the circle into the wall;
- Tip #2. It is important to carry out the gating from top to bottom in such a way that the trajectory of movement in a semicircle helps to throw dust into the casing. If you move the tool from the bottom up, the resulting scattering angle becomes much wider, and the dust begins to flow past.
Homemade wall chaser
During operation, many people prefer to use a homemade tool. Additional benefits of using a modified angle grinder are:
- cuts niches for sockets;
- works online, without the need to change settings;
- allows you to cut a groove in the form of a wedge with an inclination in one direction or the other; knocking out a groove with inclined sides is much easier than straight.
In addition, the homemade product is suitable for any walls, not just flat ones, and is inexpensive.
Equipment for cutting aerated concrete
Grooving of aerated concrete can be done with special equipment, which can also handle harder concrete, as well as brick. In appearance, such devices resemble angle grinders, and the difference is only in the number of diamond discs that are used simultaneously.
The width of the future groove will be determined by the distance between the disks. This value can be adjusted, as well as the route depth. For example, for wires in a casing, 2 cm will be enough, but water pipes will require a wider groove.
To cut aerated concrete, you can use a drill, which is complemented by a special cutter. Using this equipment, you can make grooves of any parameters, for example, certain sizes and shapes.
Electric wall chaser
To use this tool on the wall, at the first stage, the trajectory of the future groove is depicted. At this stage you should use a building level.
Attention! To make working with the wall chaser easier, the guide rail should be strengthened at the bottom of the future groove. It will become a support for the movement of the instrument, and you will not leave the intended course.
Before you start processing aerated concrete blocks, you need to determine the parameters of the communications that will be laid there. This determines what dimensions the recess will have. The groove must have a depth with a margin that is necessary for finishing. To do this, add about a centimeter to the diameter of the stacked products.
Grilling of aerated concrete should be carried out so that adjacent wires are 5 mm apart from each other. You should not work on the wall directly near the ceiling. You need to step back about 20 cm from it. The tool is quite powerful, so it needs to be held with both hands; for this, the manufacturer has provided 2 handles. Once the tool is installed on the surface, you should make sure that the rear rollers are touching the wall. The machine is lowered until all rollers are in contact with the base. The tools are operated as smoothly as possible and there should be no jerking.
Once you have reached the end point, the equipment is carefully pulled out and then unplugged. The wall chaser should be positioned so that the saw blades do not face people or come into contact with other objects and surfaces. You need to wait until the disks completely stop rotating. The pieces of concrete wall that will be between the two slots should be removed using a hammer drill or longitude. The first method is more efficient and faster, while the second is labor-intensive, but less dusty.
Manual wall chaser
With the help of this device, it will only be possible to cut aerated concrete; other materials, for example, brick or reinforced concrete, will not yield to it. Among the advantages of this tool, low dust formation and complete noiselessness should be highlighted.
How to use a manual wall chaser on aerated concrete. Video
At the first stage, the work algorithm will remain the same as when using any other tool. It will be necessary to carry out the marking, checking the correctness of its position with a building level. Then the cutting part of the device is installed at the starting point.
With your right hand you need to grab the clamping handle, which is located above the cutting element. The left hand should be held on the handle, which is slightly removed. Next, you should begin to pull the device towards you, pressing the handle with your right hand. Although such a tool is inexpensive, many people try to make it themselves, upgrading it to suit their own needs.
Method number 3. Hammer
Another common and fairly simple way to make a wall chaser yourself is to use a hammer drill. But instead of the usual drill, you should insert a cutter of the required size into it.
Such a wall chaser is quite simple and does not require much time and effort to manufacture, but at the same time it produces a very low quality of work. The groove is not only curved in height and length, but also of different depths and widths. As a result, you will have to spend much more time on gating and a much larger amount of finishing materials.