Most city residents dream of owning a country house, but buying a good new property requires a lot of money, and building a house from scratch is even more expensive. This is why many people prefer the “secondary market” and buy old houses. It is rare that an old house does not require renovation, and this article is devoted to this very topic. What should you pay attention to first, and how can you renovate an old house with your own hands as economically as possible?
Advertisement
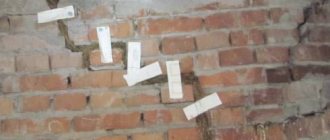
We carry out precise marking of the foundation ourselves
Korovin Sergey Dmitrievich
Master of Architecture, graduated from Samara State University of Architecture and Civil Engineering. 11 years of experience in design and construction.
Before starting excavation work when constructing the foundations of a building, it is necessary to prepare the site. To do this, you need to know how to correctly mark the foundation for a private house with your own hands. The drawing or sketch must be transferred to the area and this must be done with high accuracy in order to avoid problems during further construction.
Why is markup needed?
Many non-professional builders do not understand the importance of preparatory work. Below are the problems that may arise if the markup is done incorrectly or if it is completely neglected:
- violation of the geometric dimensions of the building;
- inaccuracies in angular dimensions;
- improper operation of load-bearing structures due to deviation of foundations and walls from the design;
- When using prefabricated floors, their elements, manufactured according to design values, may not fit the existing dimensions, which will lead to additional financial and labor costs.
Marking the contour of the foundation for the house allows you to position the supporting structures in strict accordance with the decision made.
The location of the future walls of the building and the size of the premises depend on the location of the foundations.
Capital works
Strengthen the stairs
In my experience, in Soviet houses the stairs were always narrow and very steep. When remodeling, it is important to change the angle of the staircase to a flatter one and make wide steps. If there is extra space on the ground floor, then changing the angle of inclination will be quite possible. It may be necessary to widen the hole in the ceiling between the first and second floors.
- Vacation home
Renovating a dacha over the summer with your own hands: 6 steps
Enlarge your windows
The Soviet layout of dachas is often distinguished by small windows - it was previously believed that it was through the windows that heat escaped from the house. But with modern double-glazed windows you no longer have to be afraid of this. But large windows will make the space lighter, airier and visually enlarge it.
Design: Maria Amelina
If there are heating radiators under the windows, move them to the side wall. It is not difficult to make window openings anymore in wooden houses: log and laminated timber. It will be more difficult with shield buildings.
- Vacation home
5 alterations in a country house that need to be approved by the authorities
Shorten the corridors
In my experience, a typical dacha has few load-bearing structures - a transverse partition and walls around the perimeter. Therefore, redevelopment will not bring negative consequences. First of all, I advise you to shorten the corridors and, through them, increase the area of bathrooms and living rooms.
- Vacation home
How to renovate a dilapidated dacha for the season: 5 things you can do yourself
Combine the kitchen with the living room
All life in a country house takes place on the ground floor, so the combined kitchen-living room space will become the center of attraction of the house.
Add a veranda
I don’t consider houses without a veranda to be country houses at all; only a city house can look like that. If the house does not have a veranda, it is necessary to add one; this is where literally all life takes place in the summer. Choose verandas with independent supports, and when the roof of the veranda meets the house, be sure to check the waterproofing - this is the weakest point.
Design: Maria Amelina
Ideally, there should be a veranda under the roof, with access from the kitchen or living room, as well as an additional open terrace in the sun, since in most regions there is not much sun, but you want to warm up.
- Vacation home
Cozy outdoor recreation: 12 design ideas for verandas and terraces in a country house
Check and update your fireplace
If there is a fireplace in the house, this is clearly a source of potential danger, so the issue needs to be approached thoroughly. Call a specialist who will check the draft, especially pay attention to the points where pipes pass through the roof. It is the roof insulation that is susceptible to fire.
In old houses, brick chimneys were often made; there is no need to change them - brick is a reliable and durable material.
Design: Maria Amelina
As for the external cladding, the new tile will solve the renovation issue. I recommend choosing tiles that resemble handmade materials. It is better if there are borders in the tile collection - this will allow you to create a beautiful edge on the mantelpiece.
Equip a utility room
Without a storage room in the country it will be difficult. There are several options for where and how it can be arranged.
- At the dead end of the corridor. Close the space with a partition and install a door.
- In the attic floor under the roof. It will be possible to install a retractable ladder to make climbing easy.
- In the ceiling of the first floor in the foundation area, you can organize a cooler cellar in the kitchen area and make a hatch and steps in the floor.
- In the vestibule - make shelving along the walls.
- Vacation home
Updating the dacha to make it look like a designer’s: 6 real examples
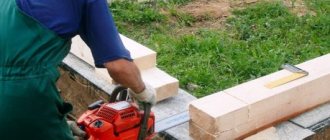
Required Tools
In order for the marking for the foundation to be accurate and quick to complete, it is necessary to stock up on the following instruments and materials:
Tools for marking foundations
- a tape measure with a long measuring tape (ideally equal to or greater than the length of the longest wall of the house);
- wooden pegs or reinforcing bars (the choice depends on the available materials and the density of the foundation soil);
- construction square (has angles of 30,60 and 90 degrees);
- durable cord;
- wooden slats;
- clips, clothespins or nails for securing the cord to the pegs;
- construction level (you can buy an inexpensive bubble level; a laser level will make the work much easier, but is expensive).
If possible, you can also use a level, but purchasing it for the construction of one building is impractical. You also need to have scissors for cutting the cord, a hammer for driving nails, and a calculator for making the necessary calculations.
What to do with the old frame
But let's get back to your situation. In front of you stands a dilapidated house, blown by the wind from all sides... The area is overgrown with grass and trees. The slightly open door creaks quietly. You are afraid to go into it. How to live? Just like an abandoned house from a horror movie. And you’re wondering where to put a comma in the following phrase: “DEMOLISH CANNOT BE RESTORED.” And you are more inclined to demolish... Or at least to sell to gain at least some money...
But in vain! Your framer will be taken away with his arms and legs. Right tomorrow. Or maybe today. After all, people know that everything is restored and can be returned to its normal appearance and condition even in 1 week. At low cost. How? Read on!
Let's look at your frame from the other side. Surely, he is already 50 years old... What if you inherited an ordinary brick house? Didn't it need to be renovated? Insulate? Put in order? Same thing. But let's move on. You have 2 options: reconstruction or renovation.
Reconstruction:
- You contact the construction company and talk about your wishes and indicate the estimated budget.
- Experts are preparing a design for the future home. It may include additional rooms, floors, an attic, etc. If desired, you can completely change the design.
- The foundation is raised (if necessary), the frame is reassembled and sheathed with OSB.
- Next we move on to the roof. Metal tiles are being laid.
- Interior work is being carried out.
The new house is ready.
Update
- Insulation . Surely, after 50 years, the old insulation has become unusable and no longer performs its functions. It is best to give preference to mineral wool insulation. They are the most vapor permeable. Although ecowool, expanded clay, polystyrene foam, etc. are also suitable. Why is insulation so important? It will protect your old frame from wind and drafts, improve thermal insulation and sound insulation characteristics.
- Façade renovation . There are many options for exterior cladding. This is moisture-resistant plywood, lining, flat asbestos-cement sheet, etc. It all depends on your personal preferences.
After this, your old house will become new. Live in it and enjoy life.
Beginning of work
As a general method, marking the strip foundation can be cited. Removal of tape or individual supports (pillars, piles) to the area. The difference is insignificant. The easiest way is to mark the ground for a slab foundation. Here it is enough to indicate the corners and sides of the slab.
They begin preparing the site for construction by finding the first point. It can serve as any corner of the house. For strip and other types of foundations, you will need to find the outer side of the corner. When making drawings or sketches, it is recommended to link the object under construction to existing ones or to the boundaries of the site.
Having determined the first point, you need to construct a right angle. The easiest way to do this is using the “Egyptian Triangle” method. First you need to mark a corner with a short side length using a construction square. Next, a value divisible by 3 is set aside in one direction (it is convenient to set aside 3 or 6 meters, such a large length will reduce the measurement error), and in the other direction, divisible by 4 (if in the previous case 3 meters were set aside, then the side length should be taken as 4 meters, and if 6 meters, then – 8).
Then check that the angle corresponds to 90 degrees. To do this, you need to measure the distance between the ends of the postponed segments along the shortest path. If segments of 3 and 4 meters were used, then the length of the diagonal should be 5 meters. If the segments were 6 and 8 meters, then the diagonal, if the angle is even, will be 10 meters. If the values do not match, it is necessary to align the angle until it meets the condition.
To perform the work correctly, it is also necessary to clearly understand the design of the markings.
The marking or casting consists of wooden pegs and slats nailed to them. This design is created only along the outer contour of the strip foundation.
The internal boundaries of the outer tape and the internal walls are marked with a cord, which is nailed to the cast-off. External castings made of wood can be made either continuous or with breaks.
After finding the first corner, work on marking a strip foundation of a simple rectangular section is carried out in the following order:
The process of applying markings under the base
- Finding the second and third points by plotting the lengths of the walls. Constructing 90ᵒ angles from these points and checking them. At every point, milestones are forgotten.
- Finding the last fourth point and completing the building outline. Checking the angle.
- Checking diagonals. They must correspond to the drawing. If the house, as in the case under consideration, is rectangular in plan, the diagonals should be equal. The same rule applies to a square.
- Driving pegs around the outer perimeter, pulling the cord.
- Nailing horizontal slats to pegs. This should be done approximately at the middle of the height of the vertical post or along its upper edge.
- Next, mark the internal contour. To do this, step back from the outside by the width of the foundation and also mark it using pegs and a cord (slat).
- Checking internal angles and diagonals.
- Marking internal walls and checking the angles of their connection with external ones.
After marking is completed, the top layer of fertile soil is removed from the area under the house and a trench is dug. When installing a strip foundation for a building with a basement, instead of a trench, it is necessary to make a foundation pit. In this case, the construction of the internal part of the marking is not required before the start of soil development. The cord for marking the internal boundary is pulled out after excavation work, attaching it to the external slats at the required distance.
Marking the foundation with your own hands does not require complex equipment. But if a fairly large construction project is planned, a level (laser level) will be required to reduce labor costs. With its help, all necessary geometric measurements, including checking angles, can be carried out in the shortest possible time. For private housing construction, the simplest devices are sufficient.
To ensure that strip foundation demolition does not interfere with excavation work, it would be correct to perform it with an indentation of 50 cm outward from the design values.
For free-standing foundations, as well as for strip foundations, the external casting is first performed, and then a cord is pulled to indicate the supports.
If the marking work is carried out correctly, during the construction of the building there will be no significant deviations from the design values (provided that the technology for installing the walls and their evenness are followed). Casting and marking for the foundation will allow you to build a house without additional measures to adjust the elements of the house to the existing dimensions.
Buying an old house: pros and cons
The Germans say: “Only a very stupid or a very rich person can afford to buy an old house.” But the nature of our mentality and the peculiarities of pricing in the real estate market are such that sometimes it is indeed more profitable to purchase used housing.
In addition to financial savings, there is another advantage of old houses - they are usually built in places with developed infrastructure, while progress has not yet reached new buildings. If you buy a plot and build a house yourself, you will have to lay communications to it, which will take additional money and time. And everything would be fine, but no one has canceled the natural wear and tear of structures, and very often old houses require major repairs. Where to start, and what should you pay attention to first?
The disadvantages of used houses are primarily related to the specifics of construction in Russia, more precisely, in the Soviet Union, since old houses were built precisely at that time. In the past, most private houses in rural areas were built of wood, and one has to think that after 50 years or more such structures need to be restored and strengthened. Colonies of wood-boring beetles probably live inside the walls and floors, and rot and fungus are noticeable in some places. If you are “lucky” to become the owner of such a Soviet-built home, repairing an old wooden house will require a lot of money, and sometimes it’s even easier to demolish the box, strengthen the foundation and build everything anew.
In the 90s, there was a sharp BOOM in private housing construction, and brick replaced wood. It would seem that a more durable material should retain its performance qualities much longer, but the lack of qualified architects, the use of fragile building mixtures, and sometimes outright sloppiness during construction have led to the fact that today most of these houses require large investments.
Most often in such houses there is a discrepancy between the design of the foundation and the nature of the soil - brick buildings weigh quite a lot, so there must be a strong foundation and stable soil under them.
If you had to work with an “unfinished” house - the frame of a house without interior decoration, then, most likely, the unprotected brick walls have already cracked and began to crumble, so you will have to strengthen them or even replace heavily damaged areas.
Typical damage in old houses
Before you begin repairs and purchase building materials, you should develop an action plan. To do this, it is necessary to carefully inspect the home and assess its condition. So, what should you pay attention to first when renovating an old house?
The weakest points in old houses:
1. External walls - often cracks are found in them, weak seams that allow water to pass through, rusty steel beams, rotten elements (lathing, beams), peeling concrete. Damp basement walls, for example, indicate missing or damaged foundation waterproofing or poor design. Particular attention should be paid to thermal insulation and internal ventilation in the walls.
2. Internal walls - poor sound insulation, fire safety is violated (finishing materials are easily flammable or are not treated with fire retardants), plaster is crumbling due to dampness or poor-quality application.
3.Windows and doors - in 99% of cases, windows in old houses need to be replaced. Pay attention to the window sills (strength, integrity of the coating), insulation of metal window frames (condensation may form on them). As a rule, the fittings and locks on the doors suffer; sometimes, when the foundation shrinks, they can warp, and the seal peels off. If there is no cold vestibule in a house with a metal entrance door, condensation will form on the inside of the door.
4. Roof - in the 90s, tiles were very popular, which were laid, frankly, at random. Pay attention to the rafter structure - whether it is skewed or whether the beams are rotten. The roofing pie must be complete and include hydro-, heat- and vapor barrier. If there are chimneys and roof structures, they must be undamaged. Inspect the gutters and check the strength of their fastenings.
5. Interfloor floors - as a result of incorrect calculations, floor beams bend or crack. If there is no waterproofing between the brick wall and the wooden beam, it will have to be replaced. It is very common to find steel beams or concrete floors that are too short in basements.
6. Floors – the wooden flooring is worn out, there are wide gaps between the boards, parquet floorboards are creaking, holes and cracks in monolithic ceilings, worn out or burnt linoleum, shaky chipboard covering.
7. Stairs - almost all wooden stairs in old houses require major repairs or replacement of damaged elements. Very often, fire safety requirements are violated - the distance between the balusters is too small.
8. Plumbing - damaged or clogged pipes, incorrect location of communications, resulting in constant blockages, impossibility of installing a boiler or geyser for heating water. In almost all cases, it is recommended to replace the plumbing in older homes.
9. Heating – an old crumbling stove (in wooden houses), the adapter size is not suitable for connection to a centralized gas supply system, chimneys are too wide (they quickly accumulate soot), lack of heating regulators, unsuitable radiators (often cast iron).
10. Electricity – unsuitable wiring, low voltage (only enough to turn on the lights in the room and the TV, but not enough to operate modern household appliances), old fuses.
Many of the above problems are eliminated by themselves during repairs; for example, unsuitable wall coverings will be dismantled if you decide to increase thermal insulation. Replacing sockets and switches is also not difficult; you can replace old plumbing fixtures in a fairly short time. But if we are talking about a faulty roof or a cracked foundation, resolving such issues will be difficult and expensive.
Repair planning
It is necessary to begin a major renovation of an old house with thorough planning. When you have inspected the property and noted down all the serious defects, you can begin to implement the project, for now - on paper.
Why do you need a plan:
1.You will know what to do and in what order.
2.You will be able to see in advance what the house will look like and compare the real result with the virtual one.
3.You will be able to calculate the exact amount of building materials needed.
If you have planned to demolish or move walls (partitions), plumbing equipment, gas or heating appliances, or replace an electric stove with a gas one, such actions require documentary permission. To do this, you should contact the relevant organizations in the area. To correct the technical passport of a house, you need to provide a written application and a package of documents, including a detailed description of the upcoming work. To determine whether you need to obtain permission to repair anything in the house, look at the technical passport - all structures in the plan can be repaired. But to add additional space, for example, a summer kitchen, you need permission. Otherwise, the extension may be considered illegal and demolished.
How to make markings with your own hands for the foundation: rules
The durability of the building will depend on the correctness of the markings. Making markings does not require much effort or the availability of various tools. All work can be done by two people with a minimum set of tools:
- construction cord;
- roulette;
- square;
- pegs;
- hydraulic level
Marking is carried out after leveling the construction site. The better the site is prepared, the easier and more convenient it will be to transfer design diagrams from paper to the site itself. The process itself can be divided into marking the external perimeter and marking the foundation itself, including internal partitions and extensions to the future building.
Rectangular foundation
The first side of the foundation is tied to some object on the site. The reference point for reference can be the fence of the site or neighboring buildings. The location of the sun should also be taken into account.
According to the chosen guideline, pull the first cord to the required distance and hammer in two pegs. To prevent the pegs from falling through while digging a trench, they are installed further than the corner of the foundation. The places where the cords intersect will indicate the corners. This method of placing the cords will allow you to maintain the original markings when excavating.
Marking the external contour and forming the corner of the foundation
For example, a 6 x 8 house will be built. After marking the side that will serve as its length, mark the second side. To do this, hammer in another peg, tie a cord to it and pull it perpendicular to the first one. The intersection point of the cords is fastened. This will be the corner of the foundation. On the second cord you need to make a mark, which should be equal to the width of 6 m.
The Pythagorean theorem is used to form the angle. In order not to engage in deep geometric calculations, take two segments of 3 m and 4 m. On the first cord, which indicates the length of the foundation, measure 4 m from the corner and put a mark.
A mark is placed on the second cord at a distance of 3 m. Then, using a tape measure, connect one mark to another so that 5 m are separated on the tape measure. If the distance between the marks is 5 m, everything is fine. If not, then the end of the second cord with the 3 m mark is moved until the tape measure is set to the desired distance.
Constructing a rectangle
After leveling the angle at 90 degrees, a mark of 8 m is made on the length cord, and 6 m on the width cord. Then move on to the third side. Pull the third cord perpendicular to the first and fasten it at the 8 m mark.
The fourth cord is pulled perpendicular to the second and fastened at the 6 m mark. To obtain a quadrangle with right angles, it is necessary that both marks on the third and fourth cords coincide.
If the lengths of the diagonals of a quadrilateral are the same, then a rectangle is obtained. But the diagonals can be the same in an isosceles trapezoid. Therefore, the main condition for constructing a regular rectangle is the presence of an angle of 90º, and in an isosceles trapezoid there are no such angles.
This method is external markup. It is suitable for slab foundations. When making a tape-type foundation, markings are made along the internal perimeter, taking into account the width of the tape.
After the initial breakdown is done, they move on to the second stage - stripping the territory. This will allow you to keep the taut cords marking the contours of the base until the end of construction.
Cast-offs are installed outside the trenches. They consist of columns driven in in pairs, connected by a bar. Installing the cast-off is a crucial moment. They are mounted so that the upper parts of the planks are at the same level. This is why a hydraulic level is required. The cords stretched over the upper strips will serve as the zero horizontal mark of the support.
How to build a new house around an old one
There are plenty of reasons why a new one needs to be built on the site of an old house.
Housing inherited, dilapidated and lack of modern communications in the previous building, the desire to expand the existing space and build a two-story mansion.
What documents are needed to demolish a battered house? How does the process of approving the building with the BTI take place and what to do with the foundation? The answers to these questions are in this material.
First of all, you should assess the degree of wear and tear of the old building, especially the foundation and external walls
The main thing is that the foundation “sits”
The first option is to preserve the existing foundation on which new housing will be built.
To do this, you need to invite specialists who will conduct a technical examination of the foundation, the quality and properties of the soil at the base.
This procedure is necessary to understand the suitability of the future home for the expected load.
Experts note that a professionally made monolithic reinforced concrete foundation is universal, on which almost any new structure can be erected.
True, there is one “but”. If the house was built before the perestroika years, then the chances of the foundation being healthy will be negligible.
The fact is that until the 90s of the last century, no one made the foundation for a house using current technologies. Which is quite understandable: they simply did not exist at that point in time.
High-quality concrete at that time was in dire shortage, and technology was underdeveloped.
Important!
The fact is that almost all land plots and residential buildings purchased before the restructuring period (during the USSR) never had registration. According to the law, it is possible to build new housing on an old foundation only if the land is officially registered as ownership.
“Nevertheless, the old foundation has its advantages,” notes Alexey Petrenko, director of the Omsk construction company.
– Based on housing that has stood for at least half a century, one can absolutely understand how many more years a newly built home will stand.
But it is necessary to check the documents for the land, even if the development plan will not change during the construction of a new building.
Only a specialist will determine the condition and “illnesses” of the old foundation and give an assessment of how long and what kind of building will still stand on it. On our website you can find contacts of construction companies that carry out foundation repairs and turnkey construction of country houses. You can communicate directly with representatives by visiting the “Low-Rise Country” exhibition of houses.
Demolish, cannot be reconstructed
If we look at the demolition situation, this procedure also requires special permission. Its issuance depends on the characteristics of existing communications on the site and the claims of utility services to reconnect them.
| An example from life : “To demolish my mother’s old house after her death, we had to remove the building from the cadastral register,” shared Varvara Urina, a resident of the Krasnoyarsk region . “Then the house was demolished and we went to BTI specialists so that they could inspect the property and draw up an appropriate report. Based on this document, the record of the existence of the house was canceled. The next stage was a visit to Rosreestr, where the official “death” of our old housing was also recorded. |
What to prefer: reconstruction or complete demolition of an old house and what arguments are given in favor of making a decision are described in the video:
On our website you can get acquainted with the most popular projects of houses made of laminated veneer lumber, which are offered by construction companies presented at the exhibition of houses “Low-Rise Country”.
It's not worth the risk
So, the building permit has been received. Now the new owner must have time to transfer complete information about the future building to the administration that issued the document within ten working days.
Namely: area of the house, height of the building, number of floors. Also, representatives of the federal body will request data on utility networks and a copy of the land map, which indicates the location of the future house.
This permit is valid for the next ten years.
| An example from life : “We bought a plot outside the city measuring fifteen acres,” shared Olga Voronovskaya, a resident of the Pskov region . “On the territory of this plot there was a one-story ruined house without windows, a roof or even doors. We thought we would have to pay some fines to demolish this old piece of wood, but we didn’t have to spend any money on verification. It turned out that if such housing is not registered in the cadastral register, it can be easily demolished without special permission. All that was needed was deregistration and registration of a technical passport for the construction of a new one. |
When purchasing a plot with an old building, it is recommended to make sure that the housing is not registered in the cadastral register and deregister it if it is registered
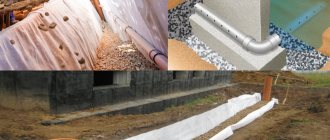
Marking for slab foundation
This work is easy, but is an important stage of construction. Without an accurate breakdown, further operation of the future home may result in frequent repairs of the building and foundation.
How to do this work correctly? To do this, the outer contour of the base is drawn on the prepared area using pegs and cords. Then, cords are pulled through the cast-offs, which will serve as a zero mark and the subfloor of the future house. Features of marking a slab foundation are:
- it is easier to carry out, because here it is enough to mark only the outer perimeter contour, and the installation of internal walls and partitions is determined when the foundation is ready;
- the support layout is made 1 m wider in all directions from the perimeter so that it is possible to install a drainage system and blind area;
- if the project includes a terrace, balcony or other extensions, they are also marked and poured along with the foundation.
After all, this foundation must be monolithic and guarantee the integrity and reliability of the constructed object.
LiveInternetLiveInternet
Quote from muhtuya
Read in full In your quotation book or community!
It is possible to build a new house around an old one - life often throws difficult challenges at rural residents. Usually this is done in this case - the old hut has fallen apart, it is necessary to demolish it and build a new house. But the owners have no other housing and simply have nowhere to move during construction. Or they understand that the construction will drag on for a long time; again, they don’t want to burden their friends or relatives with their problems. Therefore, a decision is made to build a new building around the old one.
Yes, it is more difficult than building on a clean site, much more expensive, but, we repeat, it is often the only way out of the current situation. Therefore, objections like “it’s better to demolish everything and build a new house” are not accepted. In the end, everything turns out even simpler than it seemed, the old folk wisdom applies here - the eyes are afraid, the hands do. How such a problem can be solved practically, we will explain in this article.
So, we have an old village hut, built in the 50s of the 20th century. We bought it along with a small plot for farming. They immediately renovated the interior in a country style, connected a pumping station, cleaned up the area, built a country shower and toilet, and got chickens.
After a couple of years, they decided to add a small room to the house. And here unforeseen difficulties began. Having dismantled the wooden paneling of the hut, it became clear that its walls, made of logs, had been eaten by bugs. In some places the tree simply turned into dust. It is clear that making an extension to such walls is unwise; the consequences can be very disastrous. It’s easier, and most importantly more reliable, to build a new house, although it will be much more expensive.
Since we spent and are going to spend all the summer months in the old house, and construction according to the plan will take more than one year, we decided not to dismantle the hut. The plan is to first build a “box”, prepare a room, move into it, and only after that break down the walls and take them out through the window openings.
First of all, we made markings and poured a rubble foundation around the house.
They dug a trench near the old foundation, making sure that the width of the future rooms did not exceed 6 meters. This is due to the fact that the boards for the construction of floors and ceilings, which we order from the sawmill, have a standard 6-meter length. Material longer than 6 meters costs much more. The depth of the foundation is 120 cm, equal to the freezing point of the ground in our region, the width is 40 cm, the height of the base is 50 cm. The higher the height of the base, the more beautiful the house will look.
While the foundation was standing, the front and back terraces were dismantled along with the entryway. The wooden cladding was removed from the walls of the hut, and the satellite dish was dismantled. Only four walls of the old house were left, along with the roof.
Our hut is connected to the gas supply, so the outbuildings must be dismantled carefully, without damaging the gas pipes.
Subsequently, reliable supports must be placed under them. At the same time, we are dismantling the vacant electrical sockets and switching the electrification system inside the old hut.
The preparatory work is completed, the construction of new walls can begin. The material from which the house will be built is pine timber measuring 15 by 15 cm. But if you decide to use brick or gas silicate blocks, there is no difference, the main thing is that nothing sticks out of the old walls or protrudes above the foundation.
No problems arise during the construction of walls; so that later you can enter the old hut, you need to cut out the doorways.
So, laying one beam on top of another, we rose to the level of the roof. The walls of the new house will be 50 cm higher than the old ones, so there will be no problems with laying the ceiling beams.
At this point, an additional cost item appears - dismantling the old roof. First we remove the old slate, then we dismantle the sheathing, then the rafters. To protect from rain, we cover the hut with a thick PVC film, which we prepared in advance.
Our house is heated by a stove converted to use a gas burner. We decided not to break the stove yet in order to heat the room in winter. To increase traction, an asbestos-cement pipe was inserted into the base of the brick pipe, extending above the roof ridge. To prevent it from interfering with the work, we cut it with a grinder using a disc for cutting stone. The ventilation pipe was completely broken.
Now nothing stands in the way of erecting a new gable roof. To ensure that the construction of the roof takes as little time as possible, the material for its manufacture must be purchased in advance. In our case, it was built in a week, during which there was one slight rain. The timely spread of the film protected the ceiling of the hut from leaks.
Having covered the roof with roofing felt and hammered the gables with boards, the construction of the “box” of the new house can be considered complete. So that there is a little more natural light in the hut, which is located inside, you can cut out openings with a chainsaw in place of the supposed windows.
The issue with the chimney was resolved as follows: a tin elbow was inserted into the remainder of the asbestos pipe at an angle of 135 degrees. They extended it using straight elbows, hanging them on a wire fixed to the sheathing, and brought them out into the gable of the roof.
There they installed another corner and raised the pipe above the ridge. The pipe does not come into contact with the wooden elements anywhere, and it hardly heats up. The draft allows the furnace to operate in normal mode; the reverse draft effect does not occur.
This is how we built a new house around the old house. We enter it through a doorway with a perimeter of 60 cm, the only inconvenience of which is that we have to bend over, but at the same time the flexibility of the joints is ensured for a long time.
The wood will shrink during the first year, then finishing of the premises will begin - at this time we will be using the old house. When we make repairs in one room, we will move things there, and only then we will destroy the old hut, sawing the walls with a chainsaw and throwing them through the window. Thus, we do not switch off from country life for a single day due to large-scale construction.
What will happen next from this story, you will eventually find out on the pages of our website.
Video
What else to read:
Warm water floor with your own hands
DIY landscape design
DIY mill
Read more: https://stroimzanovo.ru/kak-postroit-dom-vokrug-starogo-doma/#ixzz4KI9T1JsG
Series of messages “Construction”:
Part 1 - Air heating systems for a private house Part 2 - We make a concrete path in a country house ourselves... Part 26 - Foundation ventilation Part 27 - Houses made of sip panels: fast construction and high-quality material. Part 28 - How to build a house around an old house
Strip base and columnar foundation
The outer contour is divided according to the Pythagorean theorem. Next, the design width of the tape is retreated and markings are made inside. The cords are secured to the installed cast-offs at the height of the zero horizontal mark.
With a columnar foundation, all work is done in the same way as for a strip foundation. The difference is that in the corners and along the entire perimeter, according to the design documentation, markings are applied to the places where the pillars are buried.
After the pillars are buried to the design mark and if there is a grillage installed in the project, another marking is made using a two-tier cast-off.
First, pull the cords for the outer and inner perimeters of the grillage at the level of the pillar heads. Next, the top casting is performed at the level of the grillage.
Details
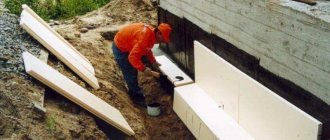
Technology for strengthening the foundation of an old wooden house
Depending on the degree of destruction of the foundation of the old house, some work is carried out to strengthen it. The easiest and easiest do-it-yourself option is to seal cracks that usually appear when the house subsides slightly. To do this, you need to slightly widen the crack and clean it of dirt. Next, you need to prime the walls as best as possible, and then seal them with sand-cement mortar.
More partial repair work for the house can be carried out if the wooden house goes into the ground. To do this, the building needs to be raised. To perform such a procedure, it is first of all important to reduce the load on the foundation, and it is also important to remove all pieces of furniture from the house, disassemble the floors and remove sand if it does not have its own foundation. If the house is light and small, then it can be raised using joists. To do this, a wooden beam, which has a cross-section of 8*8 cm, needs to be placed at the corner of the building. Next, the logs are used as a lever, creating emphasis on the log and raising the house.
Heavier buildings are lifted using a jack, which is placed in certain places. After you raise the building to the desired height, you need to build up the old house foundation using concrete or even brick. For more severe deformation of the base, it is usually necessary to strengthen one side of the base, or, if necessary, the entire perimeter. Let's consider certain types of strengthening of the supporting structure.
Repair work to the base by strengthening the corners
How to strengthen the foundation of a wooden house with your own hands? In certain cases, to strengthen the structure of a load-bearing house made of wood, you can limit yourself to strengthening the corners. In order to carry out the work correctly, you first need to expose all the corners of the foundation.
To do this, you need to dig a hole near each corner of the house, the diameter of which is approximately 1 meter. The depth of the pit should be 0.5 meters lower than the depth of the old foundation. Reinforcement must be done using a reinforcing grid. The dimensions of the cells can be 0.2*0.2 meters.
But on the old foundation, it is necessary to clear the reinforcement from concrete in certain places, to which a reinforcing lattice is attached. In this case, the connection should be made by welding. After the grate is installed, begin pouring it layer by layer using concrete and leaving it to harden. In order to increase the degree of reinforcement, you can strengthen more than just corners.
In certain places along the general perimeter of the housing, prepare ditches with a width of up to 0.5 meters every 1.5-2 meters. The depth of the ditches will be the same as the depth of the old support. Next, attach reinforcing bars to the steel rods from the old base and fill them again with concrete. Thus, reinforcement will occur both in the corners and along the general perimeter. This is easy to do yourself and will significantly increase the load-bearing capacity of the base.
Please note that concrete pouring must be done gradually and in layers. This can be achieved by filling the recesses one by one.
Strengthening the foundation with a reinforced belt
An often reliable and widely used method for strengthening the foundation with one’s own hands is to install a reinforcing monolithic belt around the old foundation. Watch the video on how to properly reinforce with a reinforcing belt. To build it, a certain algorithm is used:
Prepare a trench around the house. It must be such that there is free access to the foundation and the ability to carry out work without obstacles. Its width can be 0.5-0.6 meters. The depth should be no less than 0.6 meters lower than the location of the old support.
- For better adhesion of the old base and the reinforcing belt, thoroughly clean the foundation walls of foreign objects. It is important to clean thoroughly, and it is best to use a metal brush. Next, carry out deep priming.
- Place a sand and gravel cushion at the bottom of the trench, which will easily spill and compact. It should be as compacted as possible.
- Formwork should be installed from plywood or boards.
- It is necessary to prepare a hole in the old foundation with a diameter that is 0.1 cm larger than the cross-section of the reinforcement rods. It is best to use reinforcement with a diametrical cross-section of 1.2 or 1.4 cm. Install steel rods by driving them into pre-prepared holes. The distance between them should be from 0.25 to 0.3 meters. It is better to arrange the rods in several rows.
- Attach a new reinforcing belt or mesh for reinforcement to the hammered rods.
- Proceed with layer-by-layer pouring of concrete. The thickness of the layers should not be more than 0.2 meters.
- Waterproof the reinforcing belt and install a blind area.
Please note that strengthening the supporting structure in this way makes it possible to evenly distribute the load over a double area.
Strengthening the foundation by installing piles
How to strengthen the foundation of a wooden house? This can be done using piles, and there are several methods for doing the work yourself:
- Bored method - on both sides of the base, holes are drilled every 1.5 meters with a depth of approximately 2 meters. Next, reinforce and waterproof the recesses. After all preparation work has been completed, the well must be filled with concrete.
- By means of screw piles. This method is less labor intensive. True, in order to perform it correctly, several people are needed. It is required to simultaneously monitor the position of the rods and directly carry out work to deepen them.
After arranging the piles, they need to be attached to the house using anchor bolts.
If the foundation is of arbitrary configuration
Very often foundations have an irregular shape. Modern buildings can have an L- or T-shape, with different projections. Some walls of the building are rounded.
But even with a very complex foundation, they start by marking a rectangle, and then add other shapes to it.
For a porch or fireplace chimney, a rectangular base is made. They can simply be attached to the main foundation without installing additional cords. But in some cases, additional cast-offs are installed.
Circles, arcs and polygonal elements are marked relative to their center. For a round base, drive a peg into the desired point of the foundation, and use a cord instead of a compass to draw the base lines.
When marking a polygonal element, mark a square and then form a polygon. Cast-offs are placed near each corner, and the perimeters are marked with a cord.
Irregular support shape
Such bases are rare, but if such a need arises, we do the markings like this: put tracing paper with a coordinate grid on the drawing and mark reference points.
Then they stretch a coordinate grid of cords and at the next stage, using this grid, transfer all the reference points of the contour to the ground.
To summarize, we can say that marking the foundation with your own hands is not difficult and does not require any experience. Any developer can do it on his own site, without using any complex tools.
The only difficulty may be marking the zero horizontal point. To do this, use a hydraulic level or level. But even in this case, you can use a simple old-fashioned method.
You will need a regular long irrigation hose. If it is made of an opaque material, then pieces of a transparent tube are added to its ends and water is poured into it. One end of the hoses is brought to the selected zero point and the water level is aligned with this point. The water level at the second end of the hoses will mean zero horizontal level.
Material storage.
Why did I start with nails? The point here is not only about savings, but also about the convenience of subsequent storage. Boards with protruding nails take up about 3 times more space. And when you have only 6 acres with an old garden and buildings on them, you quickly begin to understand that you need to save space.
The time spent on pulling out a nail and bending it is almost the same.
You need to be careful when storing material so that you don’t have to drag boards and logs from place to place several times. It is necessary to think through all further actions during construction in advance.
For example, if excavation work is planned, then it is better to move the boards away from the future foundation pit so that they do not interfere with the work. In addition, it is better to choose a higher place for stacks. Then they will not end up in a puddle after rain or from melted snow in the spring. It is also advisable to put opaque material under them to prevent grass from growing under them. For this purpose I used roofing felt, which I removed from the walls and roof.
In addition, I used an old greenhouse as temporary storage. Many of the windows in it were broken, so to prevent rain from dripping on the boards, I also covered it with roofing felt.
Sawdust, glass wool and safety precautions. After dismantling the interior decoration of the attic, I went down to the first floor. I would like to note once again that at the first stage I did not touch the racks in order to prevent collapse, but only tore off the sheathing.
Sawdust and small shavings mixed with lime were used as insulation in the ceiling of the first floor. Adding lime is a very old and reliable way to get rid of mice. In any case, I did not find any traces of these annoying rodents in the sawdust. But they lived comfortably in glass wool...
The sawdust turned out to be dry, so I also decided to save it “just in case” - I poured it into plastic bags and put it under the roof. In the future they may be useful for their intended purpose, and if not, they will be used as fertilizer.
Glass wool was installed under the first floor sheathing. This created an additional problem, since it was not safe to work with, and after so many years it fell apart in the hands, which created unnecessary difficulties.
To avoid itching later, I took precautions. First, I put on clothes made of thick fabric and fastened all the buttons. He put a special helmet on his head, and two pairs of gloves on his hands (first fabric, and rubber on top). It must be said that the glass wool often pierced this protection, and then I suffered, trying to pull out the brittle splinters.
Secondly, I put on goggles and a respirator.
And thirdly, so that the glass wool generates less dust during disassembly, I first sprayed it with water, and immediately placed the extracted pieces of insulation into 120-liter plastic bags. This, in my opinion, is the optimal size in terms of weight and volume. However, if the glass wool is very wet, then it is better to use 60 liter bags, making several holes at the bottom with a nail for water drainage.
Here it is appropriate to say a few more words about safety precautions. The work of demolishing old buildings is often not without injury.
For example, when dismantling the roof, I was standing below on the stairs, trying to tear off the gable cornice board. But I didn’t calculate my strength, it came off and fell on my head, unprotected even by my cap. It’s good that the rusty nail only tore the skin on my head and didn’t stick into my head. But I still had to get stitches at the emergency room. Therefore, I strongly advise everyone who is preparing for such work to follow safety precautions!
Do-it-yourself foundation marking for a house
Building a house is a very complex and responsible process. Any, even the smallest mistake can lead to the collapse of the entire structure, so most people prefer to turn to professionals in such matters. But, nevertheless, having the necessary knowledge and a head on your shoulders, you can build a house completely on your own.
At the same time, each stage of construction is important; in this article, probably the most important one will be considered, namely, the construction of the foundation.
Methods for marking a rectangular foundation
The rectangular shape of the foundation is the easiest to build. To mark it, you can use the following methods:
- Spider web method.
- Golden triangle (t. Piagora).
- Cast-off (more often used for complex shapes).
Golden Triangle
A very simple and reliable way to mark the foundation. In order to make markup using this method you need:
- Drive a peg into the corner of the main wall.
- Measure 4 meters along the main wall and drive a peg
- Connect 2 existing pegs with rope
- Measure 3 meters from the first peg along the adjacent wall and drive the peg.
- Connect the 1st and third peg with a rope.
- Stretch a rope from a peg located on the main wall to a peg located on the adjacent wall. The length of the rope should be 5 meters.
- If the rope does not reach the peg on the adjacent wall, move it closer, but if the rope is not tight, move it further.
This way you will get an even 90 degree angle. Next, you will need to extend the walls to the required length. To get the remaining ones into the walls, measure 2 pieces of rope of the required length and stretch from the corner pegs of the existing walls until tension is reached. Then secure. That's all - the rectangular marking is ready.
Cultural layer: how to build a new house around an old one
The town of Dornbirn in Vorarlberg, Austria, is famous for its ancient mansions and cozy alpine foothills. A strange house with a graphic facade, as if built into one of the hills, has recently been added to the list of attractions. The most amazing thing, however, is not its appearance, but what’s inside: behind the walls of a modern house, an old building has been preserved.
In the image and likeness
Rectangular windows-screens, from which the life of the inhabitants of the house is broadcast outside, are the only futuristic feature of the external walls of the building. A closer look at the exterior suggests that the memory of the historical structure has been preserved here, because ultra-modern houses like this are not usually built in the form of a standard box with a gable roof.
The silhouette of the house in Dornbirn follows the outline of the old walls. The previous house was built in 1961; it, in the same way, went into the slope of a small mountain, and was distinguished by its modest size, simple lines, and high concrete base. And it suited its inhabitants quite well. In 2012, it was decided to rebuild it while preserving the brick walls.
The architect Jochen Specht got down to business: the volume of the house was increased by external walls by 4 meters in length, by 1.5 meters on the end sides, and a new concrete base was built to accommodate the new walls. And the interior building became the starting point for a unique interior layout.
fragile shell
The exterior of the house is built of fine materials: wood panels, aluminum and glass contrast with the heavy, thick walls inside. The old house is the core of the entire building, and can stand for centuries, protected from time by new cladding.
Between the outer façade and the old house, space was created for small rooms and tall staircases. The openings above the flights are covered with a steel mesh - strong, but transparent, it reliably blocks the voids, introducing a rebellious industrial-street note into the room.
The brick walls of the interior house were re-plastered and painted bright white. All the equipment in it was dismantled, the partitions were demolished. The windows of the old house serve as niches and passages; the opening from the former kitchen remained a window - but now an interior one.
And yet, in general, the old building looks rather dull in the interior of the new house. While the external structure is airy and openwork. Large windows of different sizes form an intricate irregular pattern on the façade.
Interior labyrinth
The layouts perhaps evoke ancient Egyptian associations - mysterious staircases with endlessly long flights and internal chambers that can only be entered in a certain way. Jochen Specht has created a house that can be explored every day, with a new event waiting around every turn.
The adventurous and historical spirit of the layout is softened by the purity and tranquility of natural materials and minimalist forms. The outer walls are lined with untreated wood from the inside; its fresh hue and expressive texture continue into the furnishings. Shelving, cabinets, kitchen units, and under-stairs storage systems are also made of wood.
The lamps are more than laconic - they are small cylinders built into the ceiling; private rooms are decorated with pendants with exposed wiring. The floor in the entire house is devoid of a finishing coating - it is simply polished cement screeds, made anew on each floor after reconstruction.
New energy
The laconic interior is not only a consequence of the architect and clients’ love for minimalism: impressive views of the Rhine Valley and Lake Constance are the main highlight in this house, from which nothing should distract.
The huge glazing area forced the author of the project to take care of reliable but environmentally friendly insulation. The most advanced solution was made: the house is insulated with wood fibers and foam glass.
Comfortable temperatures in oil radiators are maintained using a new pump - technology based on the use of geothermal probes. They allow you to set up not only the heating system, but also to cool the house on hot days.
Source: https://domik.ua/novosti/kulturnyj-sloj-kak-postroit-novyj-dom-vokrug-starogo-n236878.html
Marking depending on the type of foundation
Each foundation has its own characteristics in connection with which there are its own characteristics in the marking.
Strip foundation
Pegs are placed at the corners of the foundation, between which it is necessary to stretch twine or colored tape. Pegs are driven into the corners of the outer edges, while the trench is dripped from the inside of the marking. It is difficult to find a perfectly level area, so the depth of the trench is usually measured at the lowest point of the foundation marking.
For a small building, a trench half a meter deep will be enough. It is extremely important that the bottom of the trench is as level as possible. Also, the trench must have strictly vertical walls.
Columnar foundation
Marking a columnar, pile or slab foundation is very similar to conventional marking, but the process is somewhat more complicated. On the edges of the foundation markings, it is necessary to mark the points for placing supports. The distance between them should be no more than 2 meters.
Let's consider the structure of each type of foundation separately
Strip foundation
Strip foundations are trenches filled with reinforced concrete, rubble concrete, brick or reinforced concrete foundation blocks. Trenches are dug directly under the walls.
The material used for the foundation depends on the type of soil:
- Brick foundation. It is used extremely rarely, mainly for the outer part of the foundation. This type can be used on clay soil. Under no circumstances should it be used at elevated groundwater levels.
- Rubble concrete. Used on rocky or sandy soils.
- Concrete slabs and cast reinforced concrete are used on clay soils.
The advantages of this foundation are as follows:
- Suitable for construction on any soil.
- Possibility of placing a basement under construction.
- Cheaper and simpler than slab.
The strip foundation can be:
- Shallow. Used on stable, stable soils and for the construction of lightweight buildings. The depth of the trench for such soil does not exceed 70 cm, that is, it does not go deeper than the freezing level of the soil.
- Recessed foundation. Used only for heavy buildings. The depth of the trench for such soil extends beyond the freezing level of the ground. This type of foundation is good because it is resistant to soil shifts. However, only on condition that the building standing on it is heavy enough.
- Monolith. The internal space of the faces is filled with concrete.
- Collection tape. This type of foundation is not filled with mortar, but is assembled from separate reinforced concrete foundation slabs.
Marking the external contour of the foundation
Pile foundation
If the soil on which the house is being built is too weak to support the structure, or too uneven, a pile foundation would be a reasonable solution.
Due to the fact that the piles penetrate quite deeply, it becomes possible to bypass weak layers and place support on stronger ones. Beams and walls are installed on top of the piles, thus creating a stable foundation.
Piles are of the following types:
- Hammers. Massive, long, reinforced concrete piles with a pointed end. It is driven deep into the ground by driving it using special equipment. It is usually not used in the private construction of small houses, since the use of equipment is quite expensive.
- Bored. Instead of driving ready-made piles, holes are drilled in the ground and filled with concrete, the height of the tops of which is adjusted depending on the construction plan. Can be reinforced or unreinforced.
- Screw. Metal, pointed piles with screws at the end. This makes it possible to deepen them to the required depth in a simpler way. This type of foundation is more often used in oversized private buildings.
Slab foundation
Universal, reliable and most expensive type of foundation. A monolithic reinforced concrete slab is cast on a “cushion” to the size of the house or slightly larger. When the ground moves, the cushion can float, which gives the structure stability.
Slab foundations can be of the following types:
- Shallow slab foundation. Installed on the ground surface. The disadvantage of such a foundation is that it eliminates the possibility of building a basement.
- Recessed slab foundation. During its construction, a hole with smooth walls the size of the house is dug, and a slab is poured along the bottom. Using this foundation, it is possible to build a basement.
Foundation marking scheme taking into account the established norms of distance to the neighboring site
Columnar foundation
It is the simplest and cheapest, however, and the most unreliable foundation. Its essence lies in the fact that low pillars made of brick, stones or rubble are installed along the perimeter of the wall contours. They are installed in the most critical places, the distance between them is from 1.2 to 2.5 meters.
From below, for greater stability, such pillars are expanded. A columnar foundation is installed only on stable foundations, and is only suitable for low-rise, light buildings. In addition, the construction of a basement is excluded.
Renovation inside
The modern rhythm of life forces people to constantly work or spend time on the road, but even the busiest person in the world spends a third of his life at home, what can we say about housewives, children or pensioners. Therefore, it is extremely important to create a favorable atmosphere inside, and we are talking not only about beautiful decoration, but about warmth, ventilation lighting and other important points. The physical and psychological health of residents depends on this.
Daylight
Natural lighting must be present, and the more, the better. According to standards, windows should occupy 10% of the house's area. Imagine how much discomfort a person will feel if he is in a constantly shaded room - it will damage his vision, it is impossible to grow indoor plants, ventilate and fully clean in such a room. Moreover, the absence or lack of windows will lead to unnecessary waste of electricity, and today even the most affluent homeowners save on electricity.
Interesting: previously, small windows and small doorways were made in wooden houses in order to minimize heat loss. Then they used ordinary glass, which did not protect against the cold very well.
But, unfortunately, no one will allow you to just cut a beach window in the wall. For the transfer, expansion or replacement of windows, appropriate standards are provided, which can be found in the document “Natural lighting of residential and public buildings”. Please note that each region of Russia has its own standards, since the coefficient of natural illumination is different everywhere.
The degree of illumination of a home depends not only on the size of the window, but also on what kind of glass is inserted there. It is known that ordinary glass or double glazing does not transmit UV radiation, so it will not be possible to create a solarium or a luxurious greenhouse. Quartz glasses are used for this, but they are quite expensive, so they are bought for specific needs.
How to properly place windows in the house:
1. The windows in the kitchen and bedroom should face southeast, so that there is natural bright light in the morning, and in the evening the sunset does not blind your eyes.
2. It is better to place the living room windows to the west so that you can admire the sunset and not turn on the lights during the evening rest for as long as possible.
3. The windows of the utility rooms should be oriented to the north, since they usually contain tools, equipment, products and materials that do not need excessive natural light.
4.If there are several windows in the room on different sides, then the large ones should be oriented to the south, and the small ones to the north.
5.Windows facing west and south should be shaded naturally using structural elements of the building (balconies or protruding roofs), trees growing nearby, shutters or awnings.
Insulation of the house
A comfortable indoor microclimate depends on air temperature and humidity. These factors, in turn, are ensured by proper heat and vapor insulation, as well as ventilation of the space.
The temperature in the house consists of two components - the temperature of the air and surfaces (floor, walls and ceiling). The optimal air temperature is +20C, surface temperature is about 17C. In this case, the individual characteristics of the residents should be taken into account. Thus, for older people, housing should be made warmer, so ideally it is recommended to install a heating regulator for each room so that everyone can set the optimal temperature for themselves.
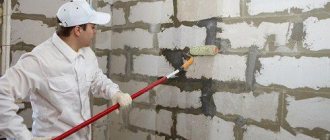
In old-type houses, as a rule, there is insufficient thermal insulation of the walls, or there is no insulation at all, so there may be a difference between the temperature outside and inside the building. As a result, condensation forms, humidity rises, and residents feel uncomfortable due to constant stuffiness. If it is impossible to disassemble the wall, it is recommended to insulate the walls from the outside or inside.
Ventilation in the house
Disruption of natural air exchange indoors leads not only to damage to the structure of walls, floors and ceilings, but also causes respiratory diseases. In the old days, they rarely cared about creating ventilation in the walls and roof, and the reason for this was often not so much the carelessness of the builders, but the lack of well-designed projects. At that time, the methods of ventilating facades, foundations and roofs that are used in modern construction had not yet been invented.
Particular attention should be paid to ventilation of rooms with high air humidity - basements, kitchens, bathrooms. In multi-storey buildings, exhaust ventilation is used, which works due to pressure differences between warm and cold air, but for private houses this method is unacceptable. In a house on 2-3 floors, the air pressure is too weak, so air exchange must be carried out through the walls. To do this, they should be insulated with “breathable” materials and a vapor barrier should be installed. These include expanded polystyrene (regular and extruded), mineral wool boards, penoflex, etc.
Auxiliary ventilation should be carried out through vents and windows, but in winter this method will cause inconvenience. Therefore, in cottage construction, an exhaust ventilation system is provided, powered by fans - they take in “exhaust” air and exhaust it outside, supplying fresh air from the street in return. The illustration below shows the operating principle of classic exhaust ventilation:
To improve the indoor microclimate, it is recommended to use natural building materials - clay, wood, bricks, gypsum plaster, etc. They are capable of absorbing moisture and unpleasant odors.
Electricity in the house
The power supply of old houses almost always leaves much to be desired. If the previous residents did not take care of improving the system, then this work will fall on your shoulders. The main problem in such cases is not old sockets and rotten wiring, but insufficient power. Previously, people consumed less electricity because there was not such an abundance of electrical appliances. The only entertainment was TV and radio, but now there are computers, game consoles, stereo systems, etc.
If you are planning to install heated floors, do not want to turn off the TV to turn on the washing machine, or risk the performance of expensive equipment, you will have to contact the energy supply organization in the area and ask to increase the quota for your home. Unfortunately, for most old houses this is simply impossible to do, so the only correct solution is to install your own substation. This event is quite expensive, but it will pay for itself in the first few years and will subsequently allow you to save money and fully control your energy supply.
If everything is fine with the power, and you just need to replace the wiring, you need to draw up a detailed diagram of the existing system. It is needed not only for coordinated and quick replacement, but also for subsequent repairs in the house. So, if you decide to move a doorway or demolish a wall that contains wires, you can cut off power to the entire house. Older houses have mostly open electrical wiring (the wires are located on the outside of the wall, running in corners under the ceiling or near the floor), so drawing up a diagram is not difficult. If the wiring is closed, it is better to call a specialist.
Useful: when drawing up a diagram of future electrical wiring, indicate not only the location of the sockets, but also the power of the devices that you plan to connect to them. It would be a good idea to make a small supply of sockets in case you plan to install additional equipment in the future.
Heating in the house
The most common problem with old houses is the high energy consumption for space heating. First of all, this is due to insufficient thermal insulation of walls, floors and ceilings, as well as an outdated heating system. To reduce costs, in addition to thermal insulation, care should be taken to replace old radiators (usually cast iron). Particular attention should be paid to the thermal insulation of the roof, since most of the heat escapes through it.
Helpful advice: if you paint the radiators black, and lay foil material between them and the wall with the reflective side facing out, the house will be much warmer. The black color will help the radiator heat up quickly, and the foil will reflect heat into the room, whereas previously it would have escaped through the wall.
It is extremely important to choose the right heating equipment for your home. Thus, modern solid fuel boilers can automatically maintain the desired temperature at the outlet of the boiler; a capacitive heat accumulator can be connected to them, accumulating excess heat during the day and releasing it at night. This is very convenient if during the day almost all the residents are absent, and there is simply no one to warm up.
Gas generator boilers have recently become increasingly popular. Their efficiency can reach 90%, since not only wood, but also wood gas burns. They produce a minimal amount of ash, do not produce soot and significantly save fuel.
Pyrolysis boilers are suitable for houses with a centralized gas supply, while electric ones are better used as a backup option in case the main boiler fails. They consume quite a lot of electricity and are not financially profitable. But even the best boiler will not completely eliminate heat loss, especially if we are talking about an old house.
There are several ways to help reduce heat loss to a minimum:
-replace or seal doors and windows;
-install sealing gaskets and thresholds between the doors and the floor (if they do not exist);
-if there is only one glass installed in the windows, install a second one or provide it with a second frame;
- hang heavy thick curtains in the bedroom, living room and children's room, but so that they do not cover the radiators;
- insulate the cold floor in the room above the basement using felt or cork underlay, thick carpet, linoleum, and insulating boards. To enhance the effect, you can also insulate the basement ceiling;
-cover the outer surface of the heating boiler with non-combustible insulation. You can determine that a heating installation is losing a lot of useful energy by the excessively warm air in the boiler room;
- in those places where the heat pipeline route passes through unheated rooms, insulate it with mineral wool or foam materials;
- in the warm season, solar collectors for heating water will help save energy.