Assembly of a polycarbonate greenhouse on stilts
Many owners of summer cottages or private houses dream of a functional and reliable greenhouse, but without spending a lot of time on its construction and money on materials.
A non-portable greenhouse is best equipped with a foundation. One of the universal types of foundations for a greenhouse is a pile foundation. According to experts, it is almost universal, and it can be laid on any soil. It doesn’t take much time to complete the work, and there will be little cost for materials. Therefore, today we’ll talk about how to build a pile foundation for a greenhouse with your own hands.
Deciding on the location and material
Choosing the right place to place a greenhouse is a top priority. The main condition must be met - unhindered penetration of sunlight onto the surface of the building and the soil. Only in this way can the process of photosynthesis be ensured for plants and the costs of artificial lighting reduced.
The next important point is that it is not advisable to assemble a greenhouse on a pile foundation in places where there is a high level of groundwater flow.
In cases where the choice of location is limited, it is necessary to first carry out the dehydration process. Its essence lies in the initial arrangement of a sand and crushed stone embankment, on which a good layer of soil is subsequently placed.
Polycarbonate is quite flexible and durable
To assemble greenhouses, materials such as:
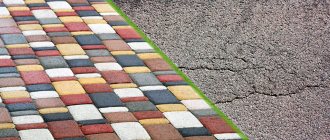
Each of them has its pros and cons. For example, film is much cheaper in price, but is not durable. Glass is a fragile material.
Polycarbonate is the best option both in terms of price and service life for greenhouse assembly.
When choosing polycarbonate to cover a greenhouse, consider such important features as transparency and color. Each of them should not prevent the free penetration of sunlight into the greenhouse.
The most common and convenient for operation are greenhouses, arranged in the form of an arch or with a gable roof.
Some greenhouses try to be built on a foundation when arranging durable structures.
What type of foundation to choose or in what way it should be laid is decided in each case individually.
Design Features
Greenhouses on screw piles are installed in two cases. If the area on which the building will be built has weak floating soil or, conversely, hard rock.
Moreover, the technology of arrangement on different soils is different. For example, on peaty or clayey soils, piles must be driven into hard, stable layers. In this way, an even distribution of the load is achieved.
On rocky soils, the screw-in depth may be minimal.
The piles themselves come in different types. They are divided mainly according to the following parameters:
- by material of manufacture (wood, metal, reinforced concrete);
- according to the shape of the sections (round, rectangular, pyramidal);
- according to the method of construction (solid and hollow).
They are selected mainly according to the type of soil and climatic conditions that will constantly influence them. To make your choice easier, you can use the table
Base installation
The piles are installed according to the previously prepared diagram of the future greenhouse.
Typically, the pitch of pile placement is 3 - 5 m in width.
Therefore, knowing the dimensions of the building and taking into account the fact that pile supports should be placed primarily in the corners of the building, we calculate the number of required rods.
Having completed all the necessary calculations and markings, we proceed directly to the installation of pile rods:
- A pile is installed at the marked point, its level is checked and, using a metal scrap, which is inserted into a special hole in the upper part of the rod, the element is gradually screwed in. For a greenhouse, piles no longer than 1.2 m are usually taken.
- Having screwed in the required number of piles, we begin to align them horizontally. This process should be approached with responsibility, since any irregularities can affect the quality functioning of the building.
- After everything has been checked, we strengthen the piles with concrete. The concrete mixture consists of sand (2 parts), cement grade 400 or 500 (1 part), fine crushed stone (2 parts) and water. It is better to use a concrete mixer for mixing.
- After pouring, it is better to let the structures sit for about 10 days.
- After time has passed, we move on to the process of connecting the piles. This activity should be carried out based on the material from which the piles are made. The metal elements are welded, and the wooden beam is attached using self-tapping screws. For more information about screwing screw piles under a greenhouse, see this video:
If there are strong soils on the site, then you can first prepare a small well using a drill. This will help make the screwing process easier. It is not recommended to use a pile foundation for a greenhouse if the groundwater in the area is too high.
After connecting the piles, the next day you can begin assembling the greenhouse. This foundation can last for many years. To increase the service life of polycarbonate greenhouses on stilts, it is recommended to treat the structures with anti-corrosion compounds.
Wooden beam foundation
The most common type of foundation for a cellular polycarbonate greenhouse is a wooden beam structure. This design has the following advantages.
- Low cost and construction time - it is impossible to create something faster and for a lower price.
- Minimum of parts and tools used.
- Working with wood is relatively simple.
- No need for overly tight sizing control.
- After arranging the foundation, you can immediately begin assembling the greenhouse.
- Easy to dismantle the foundation, repair it or move it. The latter is especially true for those summer residents who constantly move the greenhouse from depleted soil to a new place on the site.
But with all these advantages, you should know that a foundation based on timber is not the most durable - depending on the type of wood used and the presence of a protective coating, the service life ranges from 5 to 10 years. In addition, it is not possible to protect the soil from freezing in this way.
To build a timber foundation you will need the following materials and tools:
- timber with a section of 100x50, 100x100 or 150x150 mm;
- corners with self-tapping screws or dowels for fastening;
- antiseptic impregnation and brush;
- sand;
- rope and pegs;
- roulette;
- ruler for controlling angles;
- level;
- pencil or marker;
- electric jigsaw or saw;
- shovel.
Beam 150x150 mm made of larch
Step 1: Clear the area of debris, tall grass and rocks.
Step 2: Level the area.
We suggest you read: How to make a sliding polycarbonate greenhouse
Step 3. Using pegs and a stretched rope, mark the outer and inner edges of the foundation.
Marking the site for the foundation
Step 4. Dig a trench according to the height and depth of the beam.
Step 5. Level the walls of the trench, fill the bottom with a layer of sand or gravel (25% of its depth).
Step 6. Compact the layer.
Step 7. Measure and mark the length of the timber, taking into account the method of fastening (on corners or “half-tree”). Then cut with an electric jigsaw or saw.
Timber trimming
Step 8. Treat the material with an antiseptic and let it dry.
Antiseptic
Step 9. Assemble the timber into a rectangular box without joints, check the lengths and diagonals with a tape measure.
Laying timber in a trench
Step 10. Connect the structural elements to each other. If dowels are used for this, make cuts in the timber and drill holes for fasteners.
Connection using reinforced corner
Half-tree connection using a dowel
Half-tree corner connection
Step 11. Place the timber box in the trench. Please note that the weight of the structure can be from 150 kilograms or more, so carry out the work with several assistants.
Step 12. Fill the gap between the timber and the walls of the trench with sand. On top of the foundation you can lay waterproofing made of roofing felt or other coating with the same characteristics.
After completing all twelve steps, you can begin installing the greenhouse frame on the foundation.
The principle of building a foundation from two rows of timber
Pros and cons of installing a pile
A pile foundation can be laid in areas where the soil is weak and there is low groundwater, which is one of its main advantages. Piles can also be used on hard soils, where it is impossible to use another type of laying the base for a greenhouse.
This type of foundation is easier to dismantle, which is also a plus. The only drawback of the pile base is the complexity of its construction.
What do you need for work?
To build a good foundation and frame for a greenhouse, you need to choose the right place for construction, as well as select the materials from which the greenhouse will be built. What to look for when choosing a material and what tools you should definitely have with you during installation work, read below.
Material and tool
The greenhouse frame is made of the following materials:
- glass;
- polycarbonate;
- film.
It is best to opt for a polycarbonate building. This material, unlike film, is stronger and more durable. The glass frame is too heavy and fragile, which creates additional load on the foundation and complicates its installation.
In order to build a foundation, you need to prepare the following tools:
- a shovel to level the area;
- magnetic level to determine the vertical level of the pile;
- roulette;
- sledgehammer;
- a screwdriver with an attachment for a Phillips screwdriver and an 8 mm deep bit;
- marker for marking;
- gloves made of dense material so as not to injure the skin of your hands when working.
Selecting a location
Before installing a pile foundation, you need to choose a suitable location for its location. The site for construction should be well-lit and spacious so that the greenhouse is always in direct sunlight. You should not build a structure in an area where there is strong wind, because this will affect the stability of the greenhouse.
The site must have a high groundwater table. If there is an underground flow at a level of 1 m, then dehydration work should be carried out, which consists of forming a special embankment of sand, crushed stone and soil in order to create a hill at the site where the pile is installed.
Blueprints
Below is a ready-made drawing of a pile foundation that you can use when carrying out work:
Pile foundation
The construction of any building, even the lightest one, on soft soils prone to heaving is a difficult task. Uneven changes in ground level that occur in such areas every season can lead to damage to the greenhouse. The solution to this problem is to build a foundation on piles.
An example of a polycarbonate greenhouse using steel screw piles as support
Piles can vary in material (steel, reinforced concrete, wood) and installation method (driving, screwing, laying or pouring into drilled holes). Let's consider the two most popular methods of arranging a point foundation for a polycarbonate greenhouse - on screw piles and on concrete piles.
Pile foundation diagram
The main advantage of the first type of piles is ease of installation. The durability of steel screw structures is comparable to the service life of a polycarbonate greenhouse frame. Perform the installation process step by step as follows.
Steel screw piles
Step 1. Mark the area and places for screwing the piles. They should be located in the corners of the greenhouse and along its walls at intervals of 1-2 m, depending on the mass of the entire structure.
Step 2. Dig holes at the installation points of the piles with a depth of 20 to 50 cm and a diameter 3-4 times larger than that of the piles. This can be done quickly and efficiently using a drill.
Drilling a hole
Step 3. Install the first pile and start screwing it into the ground. To do this, you can use both manual tools and special equipment. The screwing depth should be 1.5-2 m - it is necessary to go below the freezing line of the soil and get to its harder layers that are not subject to swelling.
Screwing the pile
Step 4: Repeat the previous step with the remaining piles.
Step 5. Align the piles in height. The easiest way to do this is with a grinder. As a result, the piles should protrude 10-15 cm above the ground level.
Trimming a screw pile with a grinder
Step 6. Place a grillage on top of the piles, to which, in turn, the greenhouse frame will be attached. The most popular option is made from timber with a cross-section of 100x100 mm; use long self-tapping screws as fasteners. Other examples of grillages can be seen in the image below.
Examples of grillages
An example of a pile foundation installed on a site with a large slope. Between the grillage and the piles you can see a layer of waterproofing
Reinforced concrete piles, unlike screw piles, are not screwed into the ground, but are poured into pre-dug wells. They are used in cases where, due to soil heaving, the construction of a shallow strip foundation is risky. Such reinforced concrete piles are also called bored piles.
Step 1. Mark the points where the piles will be located.
Step 2. Using a manual or automatic drill, drill holes 1.5-2 m deep.
Drilling a well using special equipment
Step 3. Install the formwork in the well. This could be an asbestos pipe or roofing felt.
Roofing felt formwork
Use of asbestos pipes
Step 4. Place layers of sand and gravel at the bottom of the well, then, if possible, compact it.
Foundation from the inside
Step 5. Place a pre-welded or wire-twisted reinforcement structure inside the formwork.
Laying the reinforcement structure
Step 6. Then pour concrete grade M200 or higher into the formwork. Carry out the process in separate layers, giving each of them time for initial setting. Usually this period is several days. After this, give the entire mass of concrete time to fully set and harden.
Pouring concrete
Step 7. Remove the formwork, level the piles in height and install the grillage.
We invite you to familiarize yourself with: Greenhouses for growing mushrooms all year round
screw piles
Step-by-step manufacturing instructions
Instructions for installing a pile foundation under a greenhouse manufactured by a ready-made greenhouse factory. Foundation dimensions - 3x4 m.
Video: assembly and installation of a polycarbonate greenhouse on piles
To make the base you will need:
- 14 piles 70 cm long;
- profile 2 m long - 4 pcs.;
- profile 1.5 m - 4 pcs.;
- self-tapping screws - 56 pcs.
Step-by-step instructions for installing a finished base for a greenhouse:
- To begin, unpack the greenhouse components, presented in the form of 4 pieces of profile pipes. 2 m each are the lower base and guides, which are assembled on the site.
- Take the connecting bars and fasten the profiles together, thereby obtaining 2 pipes of 4 m in length.
- Next, install T-shaped piles on the lower base of the greenhouse, there should be 5 of them for each 4-meter profile. Fastenings must be made in such a way that 2 fastenings are at a distance of 10 cm from the edges, 2 more in the middle of the lower base and 1 at the joint under the brand.
- Fix the piles with 4 screws. for one fastener.
- Move the bottom base to the location where the greenhouse will be located.
- Dig holes for the foundation, approximately 30–40 cm deep. They should be located at the same distance as the piles on the structure.
- Insert the structure into the dug holes and drive them into the ground to the bottom anchor using a sledgehammer and a wooden beam. The work must be done carefully so as not to damage the profile pipes.
- To dig in the second side of the greenhouse base, you need to measure 2 m 98 cm in length from the edge of the already installed structure using a tape measure. Now drive in the second side of the foundation in the same way.
- Using a level and an upper guide, you need to check the proportionality of the sides of the foundation.
- Next, the arcs are installed.
- Work is being done on cladding the end.
- Dig holes for the end.
- Insert and fix the end to the lower base.
- Drive 2 piles into the recesses under the end, which are located approximately at the door post to the greenhouse.
- Remove the end from the lower guide and place it on the pile grip.
- Connect the piles to the lower base of the end using 8 self-tapping screws.
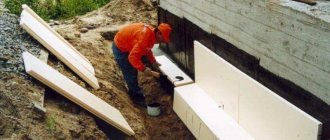
Strip foundation with plinth
To build a solid greenhouse made of cellular polycarbonate for a long time, it makes sense to equip a strip foundation made of concrete. Given the relatively small mass of the building, the structure can be shallow, that is, not reach the freezing line of the soil. By adding a brick base to the concrete “ribbon”, you will improve the appearance of the foundation and its thermal insulation properties.
The disadvantages of such a design include the labor intensity of the work and the construction time - from the completion of concrete pouring to the start of work directly above the greenhouse, it should take from two weeks to one month. Due to this circumstance, the first growing season in such a greenhouse is somewhat “cut down”.
A strip foundation requires the creation of concrete of a grade (compressive strength) not lower than M200. This indicator determines the compressive strength of the mixture and its ability to resist loads. The composition of concrete (depending on the brand) is given in the table below.
Table. Mass proportions of cement, crushed stone and sand for preparing concrete.
| Concrete grade by compressive strength | Cement M400, kg | Sand, kg | Crushed stone, kg | Volume of concrete produced from 10 liters of cement, l |
| M200 | 1 | 2,8 | 4,8 | 54 |
| M250 | 1 | 2,1 | 3,9 | 43 |
| M300 | 1 | 1,9 | 3,7 | 41 |
| M400 | 1 | 1,2 | 2,7 | 31 |
Concrete preparation scheme
Step 1. Remove stones, branches and debris from the greenhouse area.
Step 2. Using a tape measure, pegs and rope, mark the future trench for the foundation.
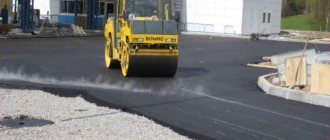
Step 3. Using a bayonet shovel, dig a trench for the foundation. The depth is from 20 to 50 cm, depending on the mass of the future greenhouse, and the width is 25-30 cm.
Trench for the foundation
Step 4. Level the walls of the trench and compact its bottom. In the latter case, it is advisable to use a manual or automatic rammer, which can be rented from companies that own special equipment.
Tamping the bottom of the trench
Step 5. Pour sand or gravel into the bottom of the trench and compact it. The layer thickness should be 25-30% of the trench depth.
Gravel backfill
Step 6. Install formwork from boards or plywood on the sides of the trench. The formwork must necessarily rest on pegs driven into the ground, otherwise the concrete can “pull apart” the lower edge and the foundation in cross-section will become not rectangular, but trapezoidal. Installing additional ties on top is advisable.
Formwork diagram
Construction of formwork
Step 7. Prepare the concrete mixture. From the point of view of labor and time, it is better to use a concrete mixer rented from a company that deals with special equipment.
Step 8. Pour concrete to half the height of the formwork. Using a shovel or trowel, try to level it out.
Pouring concrete
Step 9. Place reinforcement on the concrete mixture in the corners and along the length of the strip foundation. Fasten the individual parts together by welding or wire. If there is a risk that the reinforcement elements will “sink” in the concrete or move, then use supports called “crackers” or factory-made clamps.
Laying reinforcement
Schemes of reinforced reinforcement of the corner of a concrete strip
Plastic reinforcement clamp
Step 10. Pour the rest of the concrete on top of the reinforcement to the border of the formwork. Control horizontality using tensioned threads and a level.
Step 11. At a certain distance, insert fasteners into the concrete for anchor bolts - this is necessary to fix the greenhouse frame to the foundation. Carefully consider installation locations. If you plan to build a plinth, the anchor bolts should be located at the junctions of the bricks with each other.
Laying a profile to fix the greenhouse frame
Step 12. Over the next 3-5 days, add water to the concrete so that the difference in humidity between the inner and outer layers does not cause defects and cracks in the foundation. In rainy weather, do not forget to cover the tape with polyethylene.
We suggest you read: About chickens: what to feed, how to properly, what laying hens eat and how many times a day
Step 13. After finishing the pouring, leave the concrete to dry for 2-3 weeks, depending on the width and depth of the foundation. In dry and hot weather, this period can be reduced by 1.5 times.
Step 14. After the drying period, remove the formwork.
Step 15. Start building the base. It is advisable to use red brick for it, since its other types or brands of blocks are too susceptible to moisture, to which the base will be constantly exposed. Lay the bricks in half or in whole bricks.
Various masonry methods
Step 16. Lay a layer of roofing felt or other material with similar properties on top of the brick. If you decide not to equip the base, then the waterproofing is placed directly on the concrete.
Greenhouse foundation diagram
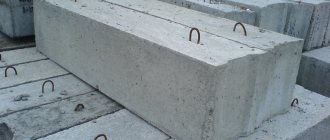
There is a type of strip foundation, where instead of concrete, brick or ready-made concrete blocks are laid in the trench. It differs from the conventional design in its ease of installation and the ability to begin construction of the greenhouse literally a couple of days after completion of work on the foundation. At the same time, the depth of the bricks and their strength characteristics are inferior to concrete grade M300 or M400.
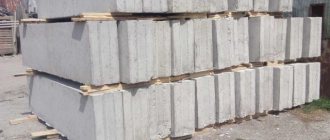
Concrete block foundation
Prices for fittings
fittings
Pile foundation for a polycarbonate greenhouse
Early greens come to our tables mainly from domestic greenhouses. A high-quality structure ensures not only the durability of the entire structure, but also the safety of the crop from negative external factors. Therefore, owners begin to care about the harvest from the moment they develop a plan for installing a greenhouse.
Photo 1 Pile foundation for a greenhouse
First of all, you will need to choose the right place for construction. The sun's rays should fall on the outer shell without any obstacles. This way you can save on artificial lighting and ensure full photosynthesis of plants.
Where to place the greenhouse correctly on the site
The installation of a greenhouse depends on the general parameters of the site. It is advisable not to carry out installation in places with high groundwater levels. If there is no other possibility, then a little additional work on dehydration will be required. To do this, an embankment is made from a mixture of sand and crushed stone. Then a massive layer of soil is laid on top.
Related article: Formwork for monolithic construction
Basic material for building greenhouses:
- glass;
- polyethylene films with a sufficient level of density;
- polycarbonate
The film is attractive due to its price, but it has a minimal service life - often it does not even last 3-4 seasons.
Glass is a fragile material and also places a significant load on the structure.
Cellular polycarbonate is the best option in combination of price/quality. Quite lightweight, very durable and with proper care will withstand more than 10 years of use.
Photo 2 Cellular polycarbonate
The color of cellular polycarbonate is of great importance for plant growth.
Shape and size
The most popular forms used in the construction of greenhouses are gable and arched structures. This makes installation easier and ensures stability and strength of the structure.
For relatively short plants, an arched structure will be sufficient, and for tall plants, it is advisable to use a gable version.
Unlike greenhouses, greenhouses require a solid foundation. Its basis is selected individually.
Photo 3 Polycarbonate greenhouse
Types of foundations
When laying modern greenhouses, several main types of foundations are used:
- wooden from timber;
- strip made of reinforced concrete;
- pile with installation of screw piles;
- tiled with laying of finished slabs;
- concrete block with block laying.
Each of these designs has advantages and disadvantages.
Thus, the installation of a wooden structure is easy to install, but short-lived. Service life is no more than 5 years.
The strip base is more labor-intensive, but quite common among site owners, since it can be built independently in just a few days.
The pile structure can be quickly installed anywhere, requires virtually no preparatory work and has a long service life, but it does not have protection from external atmospheric factors.
A slab foundation protects against rodents, but requires additional installation of drainage. The use of concrete blocks is the most expensive option, therefore it is used more often on an industrial scale, although it is a very reliable and durable foundation option.
Using a pile foundation for a greenhouse
There are two main areas of application for pile foundations for buildings:
- in areas with weak, “floating” soil;
- on an area with too strong soil, where it is not possible to use a classic strip foundation.
If the selected area has peaty or sandy-clayey soil, you will need to drive the piles until they are fixed in a more rigid layer of soil. In this case, the load is redistributed into stronger soil.
In the case where it is not possible to dig a pit on a site due to a high percentage of rocky-cartilaginous soil, which increases the cost of work, it is advisable to use piles.
Types of piles
The main difference in piles is the method of their manufacture and some other factors:
- use of various materials;
- cross-sectional or longitudinal shape;
- method of installation in the ground.
Photo 4 Screw piles for foundation
Placement principle
The installation of piles is carried out according to the established scheme, which determines the location of these supports:
- singly (at light loads);
- in the form of pile strips (mostly located under the main weights);
- in the form of pile bushes (more rare arrangement).
The number of piles is calculated along the perimeter of the greenhouse in increments of 3-5 meters.
Installation of a pile foundation for a greenhouse:
- The most common type of piles are metal ones, although there are also concrete and wooden ones. In the working part, which will pass through the ground, there are blades that help drill a channel for the installation.
- In a small area, you can manually screw in such a pile without additional equipment. Sufficient length for an average greenhouse size is 1.2 meters.
- For preliminary drilling, you can use a hand drill, which will help remove some of the excess soil from the installation site.
- It is recommended to choose a distance between piles from 70 to 90 cm.
- After preparing the hole for the piles using a hand drill, it is advisable to pour a small layer of sand and crushed stone into the bottom of the vertical channel.
- We install the pile in the prepared place and carry out the installation. This operation is carried out with each support.
Installation must be carried out using a building level. Any significant irregularities will further affect the quality of construction.
After installing all the piles, you can install the structure of the greenhouse itself. The pile field is ready for further work the very next day after all the piles have been laid. Such a foundation can support a structure for up to 100 years. For greater durability, you can treat the base with a special anti-corrosion solution.
Greenhouse frames
A galvanized profile is used as a frame material. It is protected from corrosion, but due to its lightness it is often subject to deformation under significant loads. Powder coated steel is not suitable as it has lower corrosion resistance.
Photo 5 Greenhouse frame
For a greenhouse with an area of up to 150 m2, it is advisable to choose profile pipes with a wall thickness of 3 millimeters or more.
Providing ventilation
A method for ventilating the interior space must be considered. Since the air rises quickly and stagnates, painful microorganisms quickly develop in it, which subsequently harm the crop. It is necessary to install side windows along the entire perimeter. Their area should be approximately 20% of the side surfaces.
Related article: Finishing a screw foundation for a house
Seedlings at the stage of planting in open ground especially need ventilation. Ventilation must be completed no later than 4 pm. It is also necessary to provide air ventilation at night. It is imperative to begin such procedures two weeks before planting the seedlings.
At the same time, sharp gusts of wind or drafts should not be allowed. This may negatively affect the quality of the plant material.
Greenhouse construction process
The process of building a greenhouse on a suburban site should begin with a soil analysis. On sandy soils, it is worth using a base for greenhouses that will not allow such a structure to sag. Most often, greenhouses are built on a foundation. All this happens for the reason that most of these structures are quite impressive in size, and in order to ensure the strength of the greenhouse it will be necessary to place it on a very solid foundation. It will be possible to build greenhouses without using a foundation.
Advice. It is best to use greenhouses without a foundation on soils that have a fairly high density (clay and chernozem soils). It is also worth considering the size of the structure. without a foundation it should not be very large.
- Before planning the process of building a greenhouse, it is worth deciding whether it will have a foundation. After this, a plan for the future structure is drawn up.
- If the greenhouse is without a foundation, then you will need to draw up a detailed drawing of the greenhouse without a foundation. It includes a full calculation of the dimensions and amount of material required for its construction.
- This design can be made using wooden boards and a certain finishing material (glass, film or polycarbonate). Each of these materials has certain qualities and properties.
- Very popular among greenhouses that do not have a foundation are structures whose walls are made of special film. It is attached to a pre-fabricated frame (see DIY greenhouse frame). As a rule, this frame is constructed from wooden planks. Wood has fairly good technical characteristics and is an environmentally friendly material. This fact must be taken into account, since harm to the environment and future plants should not be caused.
DIY greenhouse construction
- Another type of greenhouse is a glass structure. In this case, the thickness of the glass must be at least 2 mm. This will make it possible to constantly maintain the same temperature regime in it during the operation of the greenhouse. Temperature changes can negatively affect the growth of plants grown in a greenhouse. Moreover, sunlight will enter the greenhouse through the glass, which is very necessary for plants to synthesize.
Advice. In very hot times, as a rule, it begins in mid-summer, the greenhouse is covered with a protective film so that the sun's rays do not damage the leaves of the plants.
- A foundation for a greenhouse will be necessary if the structure itself is made of polycarbonate or other heavy finishing material that is intended for such purposes. The most commonly used foundation is a pile foundation, which is distinguished by its strength and ease of construction.
- If you build a greenhouse yourself, the price of such a structure will be quite low, which helps save the family budget. The process itself is very simple. It will be necessary to draw up a detailed plan for future work.
Pile foundation for a greenhouse
The simplest and most practical is considered to be a pile foundation for a greenhouse. It is erected in a very short time and eliminates labor-intensive earthen and concrete work. What are piles? They are a metal pipe, the length of which is 1.2 m. A helical curved blade, which is made of a metal sheet, is welded to the bottom of such a pipe. The lower end of the pile, as a rule, remains open. This makes it possible to reduce soil resistance. The process of making such a pile will be quite simple. All piles have differences:
- According to the internal structure (solid and hollow).
- According to geometric shape (round, pyramidal, rectangular).
- According to the material from which they are made (metal, wood, reinforced concrete).
Installation of the pile foundation can be done independently. For this, there are a large number of methods that allow you to make a solid foundation for a greenhouse in a short time.
Pile foundation for a greenhouse
Small piles can be driven into the ground without the use of special equipment. The entire process is carried out manually. It will be possible to use a jig, which consists of a metal frame to which blade elements are welded. There is also a guide pipe with a diameter of 60-80 cm. It is attached to the support channel on the metal frame itself. Drilling holes for piles can also be done using a hand drill, which has wide fields.
Advice. A hand drill is best used at the very beginning of the drilling process. With its help, you can pull out excess soil from the hole, thanks to its blades.
- Next, you will need to use mechanical equipment in the form of machines specially designed for this.
- The drilling depth will depend on the length of the pile. It will be necessary to place the piles at a certain distance between each other. It should not exceed 70 cm. All this will give greater strength to the entire structure.
- After the holes for the piles have already been drilled in the ground, it will be necessary to carry out preparatory work. They include pouring layers of sand and crushed stone to the bottom of such a peculiar well.
- Then piles are inserted into the prepared holes. If the frame of the greenhouse is made of wood, then it would be rational to use wooden piles. If the frame is metal (see Metal greenhouses for gardening), then the piles should also be made of metal. All this will create the integrity of the structure and make it possible to secure the frame itself well to the foundation.
- Each pile is leveled. The quality of the pile foundation will depend on this. There are pile foundations, the elements of which are located at an angle. This may occur due to the fact that the soil on the site has several layers, and in order to give strength to the entire structure, the piles are immersed only in denser soil layers.
Then pre-made concrete solution is poured into the drilled “wells”. It consists of:
The concrete calculation is based on preparing a solution of 1 bucket of cement to 3 buckets of sand. It will be more convenient to mix the solution using a concrete mixer, which can significantly save time on building the foundation. So:
- To prevent the piles from changing their position, you will need to initially make wooden formwork for them. There will be no need to remove it after the concrete solution has hardened.
- The period during which the concrete solution acquires sufficient strength is at least 10 days.
- After the piles in the concrete solution have already settled and the concrete itself has dried, it will be possible to proceed to the process of connecting the piles. If the piles are metal, then a large diameter metal pipe can be used to connect them. If the piles are wooden, then it would be rational to use wooden beams.
- The metal pipe is attached using welding, and the wooden beam is attached using self-tapping screws with a large leg. After this, it will be possible to freely install the greenhouse frame on such a foundation and cover it with appropriate material.
DIY pile foundation
Advice. A pile-type foundation for a greenhouse can be made if the groundwater level is low enough. Such measures will protect the base of the greenhouse from flooding and deformation.
A pile foundation for a greenhouse is not a very complex structure. You can build it yourself. The video shows the entire process of making a pile foundation for a greenhouse. There are certain instructions that allow you to build this type of foundation without any problems. It will need to be strictly observed in the work in order to ensure high quality of the foundation for the greenhouse. In order not to make a mistake in calculating the required amount of building material for the foundation, you will need to draw up a drawing of the foundation for the greenhouse and, according to the dimensions, it will be possible to calculate all the necessary materials.
We build a polycarbonate greenhouse in one working day
Owners of summer cottages, as in previous times, often do gardening work. Since in most regions of Russia the climate does not allow one to do without greenhouse farming, either temporary greenhouses are installed in summer cottages, which are dismantled before the winter season, or stationary greenhouses made of polycarbonate and other materials. When choosing the second option, land owners have to resolve quite a lot of issues. One of them is the foundation for the greenhouse, the type of which is chosen carefully, taking into account many factors.
Installation of a brick foundation
The most reliable option for arranging the foundation will be concrete-based bricks. But in order to complete the installation it will take a lot of effort and time. The thing is that the first layer can be applied to a concrete cushion only after a week, when it is completely dry.
- First a trench is made. Its width should reach 20 cm, its depth should also be 20 cm.
- Then the formwork is installed 20 cm above the soil level.
- Next comes the pouring of concrete - you can do it yourself or purchase ready-made.
Important! Use only high-quality and proven materials. Do not forget that the bricks must have anchor bolts on which the frame of the structure will be attached.
Which foundation for a polycarbonate greenhouse would be the best option is a controversial issue. Most people think that it is worth giving preference to a strip foundation
Features of choosing a foundation for a greenhouse
Every owner is interested in his greenhouse serving for a long time and not requiring time or financial investments during operation. In most cases, site owners do not even know that they have a very promising option, and they equip a traditional foundation:
They are, of course, durable and last a long time, but every spring summer residents are faced with such a problem as subsidence of the building. This happens after the soil thaws and moves. As a result, the greenhouse structure has to be restored and strengthened annually because it is deformed. There are cases when such a foundation for a greenhouse or the entire structure cannot be restored at all.
Another disadvantage of stationary bases is the inability to move them to another place. You will have to build the foundation again if:
- changes in landscape solutions;
- reconstruction of the site zoning;
- moving a polycarbonate greenhouse to a more fertile place.
There is a very simple solution to all these and some other problems. These are screw piles, with the help of which a pile-screw foundation is equipped - a modern, inexpensive and multifunctional alternative to all other types of foundations.
Block foundation
For wet soil, you can make a block foundation. In this case, blocks with dimensions of 200x200x400 millimeters are taken. It is worth noting that the presented option is more expensive, but it lasts a long time, which means that the investment will definitely pay off.
First, preparatory work is carried out. Gravel is poured and filled with a layer of concrete. After the pouring has hardened, the blocks are laid horizontally and vertically. Then the seams between the blocks are sealed.
Regardless of which greenhouse frame you choose, you will need to place it on a foundation and not directly on the ground.
What is a pile-screw foundation?
Screw piles are wooden or metal pipes with blades that have a special structure and are pointed at the end. They are endowed with high load-bearing capacity and can withstand severe pull-out and compression loads.
The screw pile is screwed to a depth exceeding the depth of soil freezing. Traditionally, for the northwestern regions of Russia this is 1.5 m, for the Moscow region - 1.2 m, but it is necessary to clarify the data for each area. These simple and inexpensive products allow you to create a high-quality frame for greenhouses - a pile-screw foundation:
- lasting,
- reliable,
- economical,
- environmentally friendly (does not change the chemical composition of the soil).
Of course, wood is a short-lived material, so gardeners prefer metal. Metal screw piles are covered with a protective layer, and therefore their service life is comparable in duration to a concrete base.
It is enough to correctly calculate the required number of piles, taking into account their diameter and the distance between adjacent pipes, in order to build a prefabricated foundation in just one working day. This type of base for a greenhouse can be used on any soil except rocky soil. It is especially recommended if there are soft, water-logged soils on the site.
Obvious advantages of a pile-screw foundation for greenhouses
Work on installing a pile-screw foundation for a greenhouse is carried out without damaging the surrounding landscape in any type of area:
- on uneven terrain;
- on the slopes;
- in areas near water bodies;
- on a well-kept lawn and near flower beds;
- near tall trees and bushes;
- next to residential and ancillary buildings;
- in close proximity to established small architectural forms, fences, and so on.
The fertile soil layer is completely preserved, since when installing piles there is no need to carry out excavation work or level the site. If necessary, the piles are quickly dismantled and installed in another location. The number of dismantling and re-installation is not limited. At the same time, the products do not lose their qualities, including load-bearing capacity.
The installation of a pile-screw foundation for a greenhouse provides owners of suburban areas interested in creating greenhouse conditions for their crops with a number of advantages, among which, in comparison with analogues, it is especially worth highlighting:
- minimum investment;
- reduction of installation time (carried out manually, in one day, without the use of equipment or the involvement of third-party labor);
- applicability even on the most difficult soils;
- safety for nearby buildings and landscape forms;
- the ability to carry out work in any season of the year and under any climatic conditions;
- huge service life (over 75 years).
Obviously, there is no reason to overpay and waste time on the construction of stationary foundations for polycarbonate and other types of greenhouses. A pile-screw foundation eliminates the problems of owners of sites with complex terrain, peat soils, high groundwater levels, heaving and other moving soils.