Icer
4392 0 0
Icer October 10, 2016Specialization: master in the construction of plasterboard structures, finishing work and laying floor coverings. Installation of door and window units, finishing of facades, installation of electrical, plumbing and heating - I can give detailed advice on all types of work.
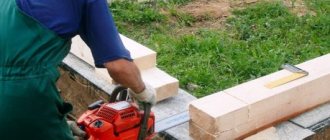
A frame for plasterboard allows you to create a solid base and easily level even the most problematic surfaces, which is why this design option is so popular among developers. Today we will figure out how to properly build a supporting structure with minimal time and effort. I will tell you about the simplest technologies that even inexperienced craftsmen can do; you just need to repeat all the steps described below.
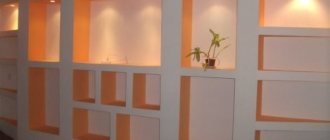
In the photo: after constructing the frame, covering with plasterboard is very easy and quick
The most important things about drywall - short and succinct
Gypsum plasterboard sheets (GKL) are a fairly complex composite material. It is made from plaster, cardboard and various additives. The latter give drywall special qualities. The main ones are high fire safety and excellent sound insulation. In addition, when using plasterboard, a minimum of dirt and waste is generated. This sets it apart from other construction projects.
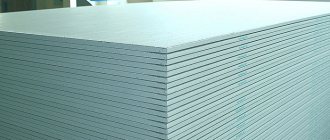
Plasterboard sheets are manufactured in three types:
Types of plasterboard sheets
GCR is used for the construction of partitions in residential and office premises, finishing wall and ceiling surfaces. Some modern manufacturers (for example, KNAUF) have launched in recent years the production of special plasterboard, ideal for finishing floors. Due to the fact that gypsum plasterboard does not emit harmful compounds during operation (the material is considered environmentally friendly) and is characterized by an acidity level approximately identical to the acidity of human skin, it is often used for repair work in residential buildings.
Among other things, drywall is capable of creating an optimal microclimate in living rooms. It can naturally regulate the humidity in them. Nowadays, plasterboard sheets are almost indispensable for performing various types of repair work. They make both simple structures and luxurious multi-level structures. Due to this, you can create the most modern, bright and original design in your home.
How to install gypsum boards - two standard options
There are the following technologies for installing plasterboard sheets: frameless and frame. In the first case, sheet products are attached to the wall using an adhesive. The second technology involves the preliminary arrangement of a special frame. Drywall is subsequently attached to it.
The frameless method makes it possible to save room space. Its significant drawback is that installation of gypsum boards is allowed only on a flat wall. But using the frame method, drywall can be attached to surfaces that have bulges and depressions. But at the same time, the total volume of the room becomes smaller.
Frameless method of installing gypsum boards
Frame technology for installing gypsum boards means a minimum of construction dust. You do not need to make grooves in the wall to lay electrical wiring and other household communications; all systems are placed in the free space between the skeleton of the structure and the wall surface.
The frame for the subsequent installation of plasterboard sheets on the wall can be easily built with your own hands. A home craftsman with minimal experience in carrying out repair activities will build a skeleton for a plasterboard in a matter of hours. And then he will also quickly attach drywall to a self-made structure.
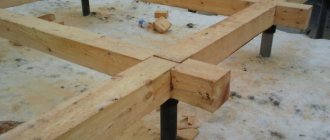
In most cases, the frame is made of metal profile products. But there is a technique that is easier to implement. It makes it possible to build skeletons for gypsum boards from lightweight and easy-to-install wooden products (slats, beams). We will talk about this method of creating a frame structure for drywall with your own hands.
We select and prepare wood - we do everything right
It is recommended to build the frame for attaching gypsum boards to the wall from coniferous wood. In this case, the wood must have a moisture content in the range of 12–18%, and also undergo special fire retardant treatment at the manufacturer of the beams or slats. It is also recommended to additionally apply antiseptic agents to wooden products. This treatment will protect the frame from:
- rodents (the smell of antiseptic is good at repelling mice and other living creatures that can damage the structure);
- mold and fungal microorganisms that destroy wood;
- wood-boring insects;
- biological natural decay.
You can do antiseptic protection of wood yourself. For these purposes, you can use sodium fluoride. It is sold as a light gray fine powder. You will need to stir the purchased mixture in well-heated (but not boiling) water (35–40 g of the drug per 1 liter of liquid). Then treat all elements of the future frame for drywall with the resulting composition.
Sodium fluoride for antiseptic protection of wood
Fluoride antiseptic easily penetrates into wooden products and is practically not washed out of them. It is important that it is non-toxic to humans, has no odor, and does not decompose during use. Working with such a composition is simple and safe. An almost complete analogue of fluoride is sodium fluoride. It is allowed to purchase such a drug. But before use you should add a little soda ash (soda ash).
It is impossible to carry out antiseptic treatment of wood with compositions containing the following components:
- anthracene oils;
- coal;
- creosote;
- slate.
The effect of their use will be good. But they are harmful to human health, as they are recognized as toxic substances. Advice from the pros! Before arranging a frame for mounting drywall on the wall, be sure to let the wooden products sit in the room where you will build the structure. In 48–72 hours, the wood will fully adapt to humidity and temperature conditions. This process in the language of specialists is called tree acclimatization.
Frame installation - how does it all happen?
The structure we are interested in is made from wooden blocks or slats of different sections - from 3x5 cm to 5x6 cm. The specific dimensions of the lumber are selected taking into account the expected load on the frame. All work is carried out using the most common construction tools - a hacksaw or saw, electric drill, screwdriver, screwdriver, level. Drywall screws, stainless steel screws and nails, and mounting dowels are used as fastening elements.
Important point! GCR is mounted on a frame structure in cases where the wall surfaces are characterized by poor-quality coating (plaster or other) and significant roughness. It is also advisable to install such a structure when finishing walls in rooms with a height of 3 meters or more. The implementation of adhesive technology for installing gypsum boards with your own hands in such high rooms is considered inappropriate by professionals.
Installation of gypsum boards on a frame structure
A wooden frame on the wall is created according to the following scheme:
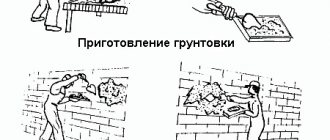
- Analyze the condition of the wall surface. Fill any irregularities found with putty (plaster), and clean areas with peeling old coating.
- Mark the wall. Carry out this operation with strict adherence to levels and angles (use measuring tools).
- The horizontal beam is installed first. It should be secured to the floor base with anchors.
- Attach wooden slats vertically to the installed beam. They should be approximately 1 cm from the edge of the sheathing. The distance between individual vertical elements is 60 cm.
- Check with a level that the slats are positioned correctly.
- Install the second horizontal element on the ceiling.
Before proceeding with the installation of gypsum boards, the frame should be leveled. If the floors in the room are uneven, the correct position of the horizontal beam can be set by placing pieces of wood or scraps of wood chips under it. After leveling the skeleton, firmly fasten all its parts. That's the whole technology for assembling a wooden frame on the wall. Feel free to start installing gypsum boards on your hand-made skeleton.
Installation of a wooden frame under gypsum boards
The cross-section of the beam must be no less than 40 by 70 mm for vertical and support slats and 30 by 50 mm for horizontal ones. Wood moisture content does not exceed 15%. The preferred choice of material is coniferous wood.
Work begins with a sketch of a diagram indicating the location of door and window openings. Then they calculate the required number of plasterboard sheets, after which they begin to install the sheathing support beams to the floor and ceiling.
Installation begins from the floor using dowels or nails if the house is wooden. The next stage is the installation of vertical struts, between which horizontal ones are then mounted. Vertical posts are installed in increments of 60 cm.
Horizontal ones are nailed on top of the vertical posts, then vertical ones again, and so on. Horizontal ones are also placed in increments of 60 cm. Each row of sheathing is checked for verticality and plane with a level. Level the position of the lower beam on the floor by placing pieces of wood. The correct position of the wall plane is also adjusted.
It’s easier to immediately assemble the frame directly on the floor of the room, if its size allows. In this case, its width should be 1 cm less than the actual width of the wall.
Wooden frame for gypsum plasterboard
Frame covering technology is a trifle for the home craftsman
Installation of plasterboard sheets should begin from the window or doorway of the room or from its far corner. GKL are fastened with self-tapping screws on wood. The installation step for hardware is 25 cm. It is recommended to use self-tapping screws no longer than 3.5 cm.
Installing plasterboard sheets on a wooden frame
Important note: if you are installing moisture-resistant sheets, it is better to secure them to the frame with serrated galvanized nails. Place the first self-tapping screw (nail) at a distance of 1.5 cm from the edge of the uncoated edge of the gypsum board (1 cm from the lined one). Another subtlety of the work is that when fixing drywall, it is necessary to move from one edge of the sheet to the other. In this case, the installation of products is carried out end-to-end. Special edges are provided on the end parts of the gypsum boards. Using them, you can subsequently easily fill in the gaps between the products (first prime them and then treat them with putty).
Let us finally add that fasteners must be installed as carefully as possible. Make sure that the heads of nails or screws do not pierce the front side of the gypsum board. Such fasteners hold sheets very poorly. Over time, plasterboard products will begin to move and become loose, which, quite possibly, will lead to the destruction of the entire structure.
Technology for installing a metal profile frame for shaped elements
Technology for installing a metal profile frame for shaped elements: 1 - use metal scissors every few cm; 2 - applying it to the line, we begin to carefully bend it to the desired position and screw it on; 3 - dry bending of gypsum boards with cutting longitudinal cuts; 4 - screw the gypsum board to the frame.
First you need to learn how to bend the profile correctly. To do this, you need to draw a curved line on the walls, ceiling or drywall. Using metal scissors, we make cuts every 5 cm in the side walls of PP 60/27. Applying it to the line, we begin to carefully bend it to the desired position.
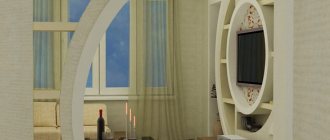
To install shaped elements: arches and various curved parts, you need to learn how to properly deform drywall. This will allow you to make high-quality cladding of the structure with your own hands. For these works, the gypsum board sheet must have a thickness of no more than 6 mm.
Wet bending of drywall. On one side of the sheet we make the required number of shallow punctures, about a third of the thickness of the material with a distance between points of 1.5-2 cm. Using a sponge or brush with soft bristles, we wet the surface of the sheet from the side of the punctures. We repeat the process until moisture is no longer absorbed by the plaster. We apply the plasterboard onto the pre-prepared template and fix it. After 12-20 hours, the drywall will take the desired shape and dry.
Dry bending of gypsum boards. This method requires care and precision. Longitudinal cuts are made on one side of the sheet, up to the depth of the cardboard on the back side of the gypsum board. These seams are milled. That is, using a sharp knife, chamfers are removed, the cutting angle of which depends on the bending diameter required to manufacture the desired part. The wider and deeper the grooves, the smoother and steeper the bend will be. After this, the drywall is attached to the template, and the cut grooves are cleaned of dust and puttied.
Related article: How to make a plasterboard ceiling in a hallway yourself
Materials used for frame installation
A person who has decided for the first time to build a frame from a plasterboard profile with his own hands may well be confused by the different designations of profiles that can be found in different sources, as well as the large assortment of fastening accessories offered by the building materials market. There is no need to be alarmed here: the purpose of metal profiles is not so difficult to understand, and of the entire variety of fasteners, only a small part will be required for installation.
Types of metal profiles:
- Guides. The markings are designated UD or PN. They lay the foundation of the entire structure, and it is from them that the construction of the frame begins.
- Rack-mounted. They are designated by combinations CW or PS. They are inserted into the guides and form vertical posts to which sheets of drywall are attached when leveling the walls.
- Ceiling. To such metal profiles, abbreviated CD or PP, a sheet of plasterboard is attached when leveling the ceiling. They are inserted into special ceiling guides, which have a combination of letters UD or PNP in their designation.
- There are also arched and corner profile models. The need for their use is determined by the nature of the structure being built.
To secure the frame to a wall or ceiling, as well as to fasten its elements together, several types of fasteners are used.
- To lengthen the metal profile to the desired size, use a simple connector, and to strengthen the intersections of the profiles, a cross-shaped version, called a “crab,” is useful. When leveling the ceiling, a two-level “crab” is used to securely fix the lower level profile to the ceiling.
- Additional fastening to the ceiling or wall is provided by direct or anchor suspensions. With their help, all structural elements are displayed in one common plane.
- The suspensions and guide profiles are fastened using dowels with a diameter of 6 mm; the profiles are fastened together with self-tapping screws. Installation of drywall on the installed frame is carried out using self-tapping screws with a diameter of 3.5 and a length of 25 mm. It is preferable to use galvanized steel hardware.
Wall frame installation
This stage of work is quite simple and does not require much effort. Before installing the frame, markings are applied. Professionals advise placing it as close as possible to the surface on which it will be attached. They start making markings from the floor, and then move to the ceiling. After this, marks are applied to the main plane and side walls. It is necessary to take into account the step of the rack profile, which is 50-60 centimeters.
The next step is to make holes for fasteners and install U-shaped brackets. Then the profile guides are installed, resulting in a closed system. The rack elements are attached to the hangers using special self-tapping screws. If the hangers protrude beyond the edges, they are bent inward so that they do not interfere with the installation of plasterboard boards.
To give the wall frame made from a plasterboard profile greater rigidity, you can use horizontal ties. They are made from a profile, cut into the necessary parts along the edges, using metal scissors. Next, you need to bend the ribs and screw the ties through them to the racks. The central part is left without a screw to prevent the appearance of a bump.
Assembling the ceiling frame
If you plan to level the walls and ceiling of a room using plasterboard, then you should start with the latter. It's rare that a room can boast of perfectly right angles. In this case, after leveling the walls, the sheets on the ceiling will have to be quite labor-intensively adjusted to the required geometric parameters. If you start from the ceiling, then all the gaps between the sheets of drywall and the wall will subsequently be closed when the walls are leveled.
Markup nuances
Marking is one of the most important stages in the construction of a frame structure. In order to correctly choose the distance between it and the ceiling, you should determine in advance the height of the lamps built into the ceiling. This distance is set aside from the lowest point of the ceiling, and then, using a level, the installation locations for ceiling guide profiles are marked along the entire perimeter of the room.
The ceiling profiles are marked at a distance of 600 mm from each other. Thus, having made the markings with your own hands, you will end up with a grid of squares with a side of 60 cm on the ceiling.
Before installing the frame with your own hands, you should finish the work with communications, which will subsequently be located behind the drywall. It would be correct to stretch all the wires, install sockets and other elements in advance. It is better to leave the wiring for the lamps with a margin of 10–15 cm, this will make it much more convenient to connect them.
Installation progress
- Using the applied markings, a ceiling guide profile is mounted to the walls along the entire perimeter of the room.
- A hole for a dowel is drilled in the middle of the side of each marked square and a direct hanger is installed. Thus, we will get a step of additional fastenings of the metal profile to the ceiling measuring 600 mm.
In the process of marking the frame for both the ceiling and the walls, it is necessary to take into account a mandatory condition: all joints of the plasterboard sheets must be located on the profile.
- We insert ceiling profiles into the PNP profiles and secure them at the joint with self-tapping screws.
Since the geometry of rooms in apartments often leaves much to be desired, it is better to measure the length of each element separately, reducing the distance between the walls by 2-3 cm.
- Having cut transverse jumpers 60 cm long with a grinder or metal scissors, we also fasten them with self-tapping screws. The cross-shaped joints of metal profiles are reinforced with the help of a “crab”.
- The resulting frame is brought into a single plane using hangers. To do this, a level is applied to each profile, and after the necessary adjustment, the position of the ceiling profile is fixed using hangers. Their antennae are bent with pliers and attached with self-tapping screws to the profile at the required distance from the ceiling.
Materials and tools used to make the frame
- metal profile:
- Guide profile. It is represented by the product PN28/27. Used as a part that holds the rack and ceiling profiles in line.
- Ceiling profile PP 60/27. It is used for mounting vertical and horizontal posts, various lintels and curved shaped structural parts.
- Rack profile. Along the entire length of the product in the central part there are special grooves designed to make it much easier to attach the screws during installation of the structure. It can also be used for various types of posts, lintels and curved parts.
- The suspension is straight or shortened. It is a part intended for fixing the racks of their metal profiles to the walls and ceiling.
- Single-level crab connector. Designed for fastening and strengthening assemblies of profiles crossed at right angles.
- Various connectors for the profile, which are designed to join its sections.
- Spring suspension. It will be needed if, when installing a suspended ceiling, the structure needs to be lowered more than the use of hangers will allow.
- Self-tapping screws for metal SMM 3.5/51, which come in two types: sharp and with a drill-shaped end.
- wooden bars.
Frame diagram for a plasterboard structure made of wooden blocks.
Previously, drywall was attached to wooden frames. With the advent of metal profiles, the need to use bars disappeared due to the undoubted advantages of steel:
- the metal profile frame is not subject to rotting;
- it will not be damaged by wood bugs;
- it does not absorb moisture and is not deformed as a result;
- metal racks will not dry out, crack, or begin to creak over time when the floor moves;
- the profile is many times more durable than wood, cheaper and has significantly less weight.
Therefore, it makes sense to install a wooden frame for drywall with your own hands if you have at your disposal a sufficient amount of dry timber that has nowhere else to put it. You can’t rely on the timber that is on sale: in the vast majority of cases it is freshly sawn and has high humidity. If a frame is mounted from such material, it will soon become deformed as the wood begins to dry and bend.
Tools for mounting the frame.
Tools that will be needed during the work:
- Hammer or impact drill.
- Battery powered screwdriver.
- Levels: water, construction, laser.
- Tape measure, marker, pencil, square.
- Knife for cutting drywall.
- Metal scissors or a grinder with a thin metal disc.
- If you decide to make a frame from timber, you will need saws and a jigsaw.
Related article: How to make a hammock with your own hands at home?
Assembling a frame for drywall on the wall
How to make a frame for drywall when leveling a wall? The general principles remain unchanged, only some nuances change.
- Having determined the distance between the wall and the structure being built, having installed all communications, a line is drawn on the ceiling along which the guide profile will be attached. Using a plumb line, an identical line is reproduced on the floor.
- Having secured the guide profiles, proceed to marking the horizontal posts. They should be spaced in 600 mm increments so that each sheet of plasterboard is secured to three posts. One will be located in the middle of the sheet, and the two outermost ones will have a junction with other sheets.
- After marking and installing direct hangers along it, the horizontal posts are inserted into the guides and fixed with self-tapping screws.
- Horizontal crossbars are mounted in the same way. After attaching them, the entire structure is leveled into one plane, for which a level and direct hangers are again used. A “crab” connector is applied to the places where metal profiles cross.
Installation becomes much more complicated if there are windows on the wall to be leveled. In this case, first of all, horizontal posts are attached on both sides of the window, and further marking of profiles in increments of 60 cm is carried out from them.
When constructing partitions, special attention should be paid to the doorway. It must be strengthened by inserting a wooden beam into the profiles that form the perimeter of the door frame.
Advice: since the partition frame will not be attached to the wall, its cells should be smaller than those on the wall or ceiling. It is recommended to form them from squares with a side of 40 cm. This will achieve the necessary rigidity of the partition.
The greatest difficulties can arise when constructing frames for niches with your own hands. In this case, you will have to combine the elements of wall and ceiling fastening profiles. In addition, you must have good spatial thinking. But the structure and general principles of fastening and fixing metal profiles remain unchanged.
Please note that the two profiles should only be fixed in a straight plane. Here it is necessary to take into account the fact that both elements are connected to each other on one side by the front part, on the other by the side. During repairs and construction, we have to interact with wood, cement, metal, plaster, and plastic.
The final result will depend on what tools are used and how accurately the technology for working with a particular building material is followed.
Drywall frame: materials and general assembly principles
In order to understand the design principles according to which the frame for drywall is made, you first need to carefully study the entire range of materials used. As a rule, the following elements are used to construct the frame.
- UD profiles are a guide profile with the help of which the planes of future products are specified. It should be understood that this type of profile is used not only to connect the entire frame with existing surfaces, but also to connect different planes of the same product.
- Profiles cd – load-bearing profile. The weight of the finished structure is placed on it - it is to it that the drywall is attached.
Profiles ud and cd for mounting the frame photo
- Profiles for partitions uw and cw. In principle, these are the same ud and cd, only larger in size - they are used to create partitions from plasterboard. This type of profile is produced in various widths: 50mm, 75mm, 100mm, 125mm and 150mm.
- Profile connectors. There are three types of connecting elements, without which installation of a plasterboard frame is simply impossible. These are a straight CD connector, a cross-shaped CD connector (popularly called a “crab”) and a two-level CD connector used to connect load-bearing profiles at different levels. A straight CD connector is used to extend the supporting profile, and crabs are used to connect them crosswise.
- U-shaped bracket. Designed exclusively for attaching load-bearing profiles to existing walls or ceilings.
U-shaped bracket for fastening load-bearing profiles photo
- Quick hang. Used for ceiling structures. It is a device assembled from two elements - a spoke with a loop for fastening to the ceiling and equipped with a spring latch that slides along the spoke. This device is very practical and allows you to quickly level the frame at the horizon level. The only drawback is that they cannot be used with a small distance from the ceiling to existing floor slabs.
To make a metal frame from plasterboard, in addition to the elements described above, you will need fasteners:
- tex (metal screw with a diameter of 3.5 mm and a length of 9.5 mm), used to connect profiles to each other;
- metal screws with a diameter of 3.5 mm and a length of 25 mm for fastening drywall;
- dowels with a diameter of 6 mm, necessary for installing profiles and other fastening elements on existing walls or floor slabs.
Fasteners for mounting the frame photo
How to make a frame for drywall - the main points of choosing material and assembly
Modern steel profiles are much more popular than wooden structures, and it’s not a matter of price. Metal profiles are easy to use, stronger and more durable.
- We attach the guide profile . To do this, you need to take the guide rails and attach them along a line, first to the floor, then to the ceiling. This is done using dowels in increments of no more than 60 cm.
So, how to properly frame corners for drywall. Due to the fact that the corners experience high mechanical loads, not one rack profile is used, but two. This allows you to significantly strengthen the structure. Remember that incorrectly applied markings can lead to fatal consequences.
At best, you have to disassemble the structure and redo the frame.
- Having retreated 5-6 cm from the wall (usually the amount of indentation is taken from the thickness of the insulation that will be laid in the sheathing), draw a line parallel to the surface. This line will indicate the thickness of the entire wall, including the thickness of the plasterboard, so be careful.
Drywall frame: necessary materials and assembly principles
The frame for covering walls, ceilings and other decorative products is a rather complex structure, on which literally everything depends - the appearance of the finished product, its reliability, and, as a result, durability. It is for this reason that the manufacture of the frame must be carried out in accordance with certain requirements, which will allow the finished product to serve faithfully for many years. According to what principles is a plasterboard frame made from metal profiles? What material is needed for this? How to guarantee its reliability? We will try to answer these and many other questions in the current article, in which, together with the site stroisovety.org, we will lift the veil of secrecy that most drywall craftsmen do not disclose.
If you set out to learn how to install a frame from a profile for drywall, then you should understand one important thing - the frame is different from the frame. When pursuing one goal or another, you need to be prepared for the fact that each type of product is assembled differently. The only thing that frames of different designs have in common is the principle of assembly, which we will consider first.
Drywall frame photo
How to properly make a frame for drywall on a wall video
During renovation work, for finishing the interior of apartments, country houses, cottages or offices, a material such as plasterboard is often used. With its help, it is possible not only to hide significant uneven surfaces, but also to implement almost any ideas when decorating rooms: arches, complex ceiling systems, partitions, alcoves. In this article we will look at how to make the right frame for a drywall wall.
- Profiles can be from 2750 to 4000 mm long; if a longer length is required, then a kind of coupling (connector for PP 60x27 mm).
- The crab has a cross shape and is used at the intersection points of the profiles, ensuring the strength of the frame. The two-level crab fits onto the upper-level PP and reliably fixes the lower-level profile.
- The final stage of installation of this structure is to attach the ceiling profiles to the suspensions. To do this, a level is applied to the PP at each connection point. And after the deviations are checked and, if necessary, adjusted, fixation is made. Next, the installation of drywall sheets is carried out.
If you plan to install a heavy picture, a chandelier with significant weight, or brackets for installing any device, it is recommended to strengthen the frame at these points at the construction stage. It is not recommended to use a marker to mark drywall, because some types have the “amazing property of appearing on the surface of the sheet even after several layers of putty and painting.
Installing a frame from profiles for plasterboard on walls and ceilings: video
- Ceiling and rack profiles are used only for their intended purpose;
- Flexible (arched) profile (PP) is designed to form a vault of arches or when installing edges near ceilings;
- according to the finished markings, the UW guide profile is strengthened with dowels and nails in increments of 50 cm on a sealing tape that eliminates cracks in the corners;
- UW guides are also mounted on the ceiling with an angle of 90 to the vertical profiles;
- where they intersect, another vertical profile is attached;
- then jumpers are installed at a distance of 40 cm to ensure structural rigidity. Next you can cover it with plasterboard.
The installation of a plasterboard ceiling must undergo careful preparation, since the process must proceed without errors and the entire structure must be very durable. Important. If you plan to insulate the ceiling of a room, then the insulation is installed after assembling the frame. It is cut into fragments slightly larger than the size of the resulting cells. And only after insulation is the wiring carried out. There are many recommendations on how to make a frame for plasterboard on the ceiling, both from professional builders and from self-taught craftsmen. Such information is very useful and I would like everyone who has encountered the installation of suspended ceilings to share their experience and recommendations with novice repairmen. After all, any business has its secrets and non-standard solutions to certain issues. Wood is a material that humanity began to use in construction a long time ago and which has not lost its relevance to this day. For a plasterboard ceiling, you can safely make a wooden frame. But for this you need to have very high-quality processed components: the slats must be perfectly dried, perfectly smooth and perfectly processed. Then such a wooden structure will last a long time and without problems.
Return to contents
- level;
- tape measure;
- rule;
- cord;
- plumb line;
- metal scissors;
- hammer drill;
- drill with reverse or screwdriver.
Tools for the frame Return to contents We mark on opposite planes - walls, ceiling and floor, lines for the PN guides. You can do this using plumb lines, but the easiest way is to make marks with a level. In order to make a high-quality frame for plasterboard from metal profiles, it is necessary to carefully prepare the surface.
It should be as clean as possible from easily crumbling elements, plaster, and dirt. Also, the ceiling must be properly dried, make sure there are no through holes, cracks, or repair them, if any.
Necessary equipment for constructing the frame
Before assembling the frame with your own hands, prepare the means and materials for its production.
To make a simple interior partition with a thickness of up to 10 cm, you will need;
- Availability of UW and CD profiles. If communications are being laid, then the UD and CD types are suitable; there should be parallel guides fixed at a certain pitch on the walls.
- The fastening elements you will need are straight hangers and screws called “fleas” with a drill tip, as well as plastic dowels and impact screws.
- To cover the finished frame, you will need plasterboard sheets: gray or green, 12.5 mm thick and with extensive cut chamfers at the edges. Sheets of the second color are moisture resistant, suitable for rooms where there is high humidity.
- To strengthen the door opening with plasterboard in the frame, you will need a profile of the AU type, and a wooden beam will also be suitable.
Frame materials
Tools
To assemble a frame from a plasterboard profile, you will need to use the following tools:
- level;
- tape measure;
- rule;
- cord;
- plumb line;
- metal scissors;
- hammer drill;
- drill with reverse or screwdriver.
Frame Tools
How to properly make a frame from a profile for drywall on a wall
When installing guide profile hangers to solid walls and ceilings, dowel-screws measuring 6x60 or 8x80 mm are used. The size of the fasteners depends, first of all, on the material of the capital structures: longer dowel-screws are useful with a thick layer of loose plaster. These structures are created to divide the room, as well as to completely separate one from the other. In principle, the work scheme is similar to that presented above, but there are some technical features.
- They have a limited service life. Leaking pipes in the box will force you to dismantle it to repair or replace a section of the riser;
- Lack of ventilation in the box will lead to condensation on cold water pipes in the summer. Dampness will shorten the already short service life of the steel riser.
Reinforcement of seams solves the problem only with minor deformations. Significant bending of the block will inevitably lead to damage to the final finish. Installation of a frame for creating partitions from gypsum plasterboard has significant differences from installation of lathing for sheathing walls with plasterboard. The construction of a metal frame begins with fastening along the drawn lines of the guide profile. After this, it is necessary to install hangers to fix the ceiling or rack profiles.
Their fastening does not occur without taking into account the width of the drywall sheet. If the width of the gypsum board sheet is 120 cm, then there should be an interval of 60 cm between the racks. After this, ceiling or rack profiles are installed in the resulting cavity. The interval observed between slats is 40-60 cm.
The width of the slats themselves is 3-5 cm, and where the joints will form, a sheet of finishing material, the width of which should reach 8 cm. Otherwise, the slats should be double. The frame is attached to a brick or concrete wall with self-tapping screws and dowels, and to a wooden surface - just self-tapping screws will be enough.