Advantages and disadvantages
There is a wide selection of laminate flooring on the market today. However, only waterproof models are suitable for finishing a bathroom. Let's consider their advantages.
- Wide variety of design options. It is easy to choose the shade and texture of the material to suit every taste. Moreover, such material will complement any stylistic decision.
- Low cost. Compared to tiles and natural wood or stone, laminate has a lower price. This will be a practical, durable and economical solution.
- Ease of installation. You can install laminate flooring yourself. The material is made with special locks that are easily connected. Moreover, its installation is a very fast process.
- Laminate is a warm material. It retains heat for a long time and is great for heated floors.
- Moisture-resistant models have a long service life . Moreover, they retain their original appearance for a long time.
- The process of dismantling the material is also quite simple and fast.
Of course, this material also has disadvantages.
- This is a natural and environmentally friendly material, but under regular exposure to moisture it can become hazardous to health. If not properly cared for, it may develop mold or mildew.
- Compared to tiles, this material has a lower level of moisture resistance.
- Laminate is a rather slippery and therefore traumatic material. But this minus is not significant for wall decoration.
- This material is afraid of high temperatures; it can crack under their influence.
Thus, it is important to take into account all the pros and cons of using this material and only then proceed to decorating the toilet room.
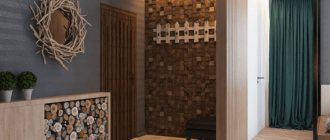
The use of wood and all its variations as decorative wall decoration is a sign of refined taste and respectability. But since the scope of use of wood and MDF is somewhat limited, an alternative has to be used. An excellent replacement is laminate.
This type of finish appeared on the market thanks to the development of innovative technologies, which made it possible to obtain a surface almost identical to real wood, which costs much less. Thus, renovation using laminate panels that look like wood has become accessible to every family.
Laminate finishing will be appropriate in any room, regardless of its stylistic decision. Some owners go even further and decorate the toilet walls with laminate. Let's try to figure out what is needed for this.
Walls
Experienced owners who are thinking about decorative wall decoration know that to give the room respectability and emphasized splendor, it is most profitable to use wood and MDF, however, the use of these materials is often limited by their significant cost. The century of innovative technologies has made it possible to find a cheaper alternative to wood and MDF panels, making repairs accessible to everyone. And this alternative is laminate.
Content
Laminate for wall finishing: main advantages
There is no point in questioning the practicality of laminate as a material for wall decoration, since it has been tested for strength as a floor covering for a long time.
Previously used as a cheaper alternative to conventional wood and wall panels, today laminate is gradually displacing its competitors due to its undeniable advantages.
The main advantages of laminate as a material for wall decoration:
- High environmental friendliness due to the wood component included in the laminated panels;
- Durability is an important advantage of laminate, relevant in conditions of compliance with operating rules;
- A wide selection of textures and colors is an advantage of laminated panels, giving life to the most daring ideas of designers;
- Ease of installation allows you to finish walls without the help of specialists;
- Ease of operation and high practicality allow you to easily carry out wet cleaning of the room without fear of damaging the laminated panels.
Disadvantages of laminate that limit its use
Despite the large number of advantages, laminated panels also have disadvantages that prevent their use as a finishing material in any room.
This is mainly due to the low resistance of the material to changes in temperature and humidity, which preclude its use in the bathroom and kitchen.
There are no restrictions for decorating a hallway using laminate, since possible changes in the indicated microclimatic factors in this room are short-term.
The main parameters that you need to focus on when choosing a laminate
Before moving on to covering walls with laminate, it is important to choose the right material, focusing not only on its cheapness, but also on the operational factors affecting it.
In this regard, when choosing a material you need to focus on the following parameters:
- Possible level of abrasive and mechanical impact. This factor is important to consider when choosing the thickness of the material. Frequent cleaning and constant exposure to sharp animal claws are a reason to abandon excessively thin panels;
- The installation method is perhaps the most important factor determining the choice of material. The opposite statement is also relevant - the type of laminate determines the method of attaching the material to the wall.
Parameters for selecting the type of laminate
Bathrooms and toilets are rooms with high humidity, so when choosing a laminate for wall decoration, you need to focus on the following parameters:
- How often the surface will need to be washed. If you plan to regularly clean the walls, a highly wear-resistant laminate is best.
- Which installation method is preferable? Here it is also important to take into account the moment of humidity and possible deformation of the panels in the event of even a small temperature difference.
At the same time, you need to know that laminate on the wall in a toilet may not be the best solution due to a number of its disadvantages:
- It is too susceptible to moisture, which means that when humidity increases, the panels will swell and gradually deform. An externally beautiful surface can very quickly become unusable.
- Laminate is sensitive to temperature, especially at high temperatures, which lead to cracking of the laminated layer of panels.
In this regard, we recommend that you think again before installing laminate flooring on the walls of the loggia, bathroom and kitchen. If the decision remains unchanged, then at least we advise you to choose the most expensive and high-quality laminate, which must be carefully looked after during operation and use various protective agents such as joint sealant.
Waterproof
A waterproof laminate for the bathroom is made from plastic PVC. Plastic is durable, does not swell from water and is absolutely safe. Even if a pipe breaks and water stands on the floor for many hours, this coating does not deform.
The plastic laminate for the bathroom is made of a two-level base, the parts of which are connected vertically by plates. There is a layer inside that ensures heat retention.
The surface of linoleum is finished with special paper and coated with acrylate resin.
The back of the laminate is covered with wax, and the end is treated with silicone. All parts of the coating are securely fastened with a specialized glue that does not allow water to pass through.
Methods for installing laminate flooring on a toilet wall
There are only two options: installation with glue and on a wooden sheathing. Wall mounting using liquid nails or glue is popular due to its simplicity and the ability to combine different color and texture solutions of panels. In this case, you will need to carefully prepare the base - it must be perfectly smooth without any defects.
Laminate for bathroom walls: features of selection, installation and care
Moisture-resistant laminate is an ideal material for finishing interior walls of rooms with a high content of water vapor in the air. Many people prefer to choose it because of the wide variety of colors, textures and patterns. With proper care and taking into account all the nuances of installation, such a finish will not be destroyed by dampness or direct contact with water. Let us consider in detail the features of choosing a finishing material for bathroom walls, methods of its installation and maintenance requirements.
Summary
It is best to use laminated panels of a high wear resistance class for installation in the bathroom and toilet. Their price is quite high, but otherwise the cladding will quickly deteriorate when exposed to moisture.
You can get inspiration from interior photos posted online, or trust your own taste. There is material on the market to suit every taste and budget, so the field for imagination is truly wide.
You can create an interior in any style. You can try to complete all the work yourself if you read the short list of installation recommendations. Then you can save on the work of a specialist.
But if you have doubts about your skills and abilities, it is better to hire an experienced craftsman who will definitely do everything as it should and will not have to do repairs again in a couple of months.
The search for original solutions leads to the use of finishing materials for purposes other than their intended purpose. A striking example of this approach is the finishing of wall surfaces with laminate. But this does not mean that it can be done any way you like. Be sure to take into account all the subtleties and nuances, only then the result will be positive.
Using laminate in a bathroom or toilet, features of the coating and its protection
Back
One of the most difficult rooms to renovate in a home is the bathroom. After all, in a small room you need to fit a lot of necessary items. In addition, there is a problem with the use of materials. Because you need to take into account the increased humidity of the room. Therefore, they are wondering: is it possible to use laminate flooring in a toilet? And how he will behave in this room.
Laminate features
This coating has a poison of advantages:
- it is strong and durable;
- relatively inexpensive;
- appearance and variety of textures;
- easy to install - you can install the panels yourself;
- resistant to stress and mechanical damage.
Despite all its advantages, the material has one drawback - it is afraid of moisture. Therefore, it is not advisable to install such a coating in rooms with high humidity.
Damaged coating
Important! For use in toilets, panels with a moisture-proof bottom layer are chosen.
If water gets on the slats, they will swell and warp. And this can happen quickly. But the worst part is that even exposure to high humidity can cause damage to your floors.
Way out
However, there is a way out of this situation. The fact is that moisture is not absorbed through the front part - it is protected by a special film. Vapors or droplets penetrate through the joints between the slats and are absorbed into them. After all, there is no such protection on the sides. The lower part of the panel is also susceptible to absorption, but they can be protected.
Bathroom
Therefore, if you plan to install this material in the bathroom, adhere to the following rules:
- buy panels with the highest moisture resistance class;
- there must be an additional bottom moisture-proof layer;
- when the master lays the panels, he must coat the ends with a wax composition - this will protect against water penetration.
This way you can solve the issue of laying panels in toilets. But, nevertheless, it is worth keeping an eye on the surface.
Average rating NAN ratings more than 0 Step-by-step instructions and technologies for pouring a self-leveling floor with your own hands
laminatepol.ru
Coating features
Finishing walls with laminate is unacceptable for kitchens, because under the influence of excess moisture and temperature fluctuations it will swell and warp. There is no way to avoid such influences; there is no protection against them. The same reasons do not allow us to recommend this coating for cellars, basements, and closets. But in hallways, where deviations from normal room conditions are rare and insignificant, such finishing is quite acceptable.
Covering a balcony with laminate is not a good idea. No matter how hard you try to equip the room, changing conditions from season to season will definitely affect the coating.
The strip of a click product can be adjusted accurately only with the help of a tool; no amount of effort is enough to do it manually. Most often, they apply a boss and hit it with a hammer, so the blows are evenly distributed in force.
You can also lay laminate on the wall using a rule (hook), erroneously called a clamp by some craftsmen. The indentation along the outer border is created by spacer wedges, and it is advisable to have a double set of such tools in case they fail. It is most reliable to cover a wall with laminate using lathing; this will help achieve high strength, enhance sound insulation and thermal insulation. But please note that the design will inevitably be limited. The adhesive method only helps to form an original design.
Laminate flooring is very durable (it lasts so long that you won’t see any wear and tear and will rather just want to change your surroundings). At the same time, the coating is completely safe and can be disposed of in the simplest way. Decorating walls with laminate is significantly more economical than using wood, and even lining or MDF, but is not inferior to them in external elegance. There are a lot of textures and colors mastered by technologists, and they will fit into any interior. An important factor is easy care. Only occasionally will you need to rub the wall with polish.
Decorating the walls in the toilet with laminate yourself
The search for original solutions leads to the use of finishing materials for purposes other than their intended purpose. A striking example of this approach is the finishing of wall surfaces with laminate. But this does not mean that it can be done any way you like. Be sure to take into account all the subtleties and nuances, only then the result will be positive.
Finishing walls with laminate is unacceptable for kitchens, because under the influence of excess moisture and temperature fluctuations it will swell and warp. There is no way to avoid such influences; there is no protection against them. The same reasons do not allow us to recommend this coating for cellars, basements, and closets. But in hallways, where deviations from normal room conditions are rare and insignificant, such finishing is quite acceptable.
Covering a balcony with laminate is not a good idea. No matter how hard you try to equip the room, changing conditions from season to season will definitely affect the coating.
The strip of a click product can be adjusted accurately only with the help of a tool; no amount of effort is enough to do it manually. Most often, they apply a boss and hit it with a hammer, so the blows are evenly distributed in force.
You can also lay laminate on the wall using a rule (hook), erroneously called a clamp by some craftsmen. The indentation along the outer border is created by spacer wedges, and it is advisable to have a double set of such tools in case they fail. It is most reliable to cover a wall with laminate using lathing; this will help achieve high strength, enhance sound insulation and thermal insulation. But please note that the design will inevitably be limited. The adhesive method only helps to form an original design.
Laminate flooring is very durable (it lasts so long that you won’t see any wear and tear and will rather just want to change your surroundings). At the same time, the coating is completely safe and can be disposed of in the simplest way. Decorating walls with laminate is significantly more economical than using wood, and even lining or MDF, but is not inferior to them in external elegance. There are a lot of textures and colors mastered by technologists, and they will fit into any interior. An important factor is easy care. Only occasionally will you need to rub the wall with polish.
First of all, you need to carefully check whether they are really uneven. Take a lath, the size of which is equal to the height of the wall without taking into account the baseboard. Important: before starting the test measurement, the plaster layer and trims should be removed so that they do not distort the result. The rail is moved vertically, the slightest bulges and dips are marked with a pencil. Protruding parts must be scraped off or knocked down with a chisel.
The holes are filled with putty and rubbed over. Such simple methods will allow you to strengthen even the most uneven and chaotic wall. Assessing how smooth the control rail itself is is also not particularly difficult. Attach it to the wall and trace the outline with a pencil, turn it 180 degrees and attach the ends of the strip to the end points of the line. If both lines completely coincide, you can safely use this tool in your work. But the slightest deflection or bend indicates that you need a different rail (which, of course, is checked in the same way).
The adhesive laminate must be attached to flat surfaces. Liquid nails or construction silicone are used to hold it in place. The wrong side of the panel is covered with glue in the form of a zigzag, after laying the strip, coat the end with the same glue, and proceed to the next chain. If adhesive liquid appears at the boundaries of blocks and lines, it is immediately removed with a soft cloth made of natural fabric soaked in culinary acetic acid.
Laminate that is installed with glue cannot be fixed to the sheathing; it has too little contact strip with the support.
The tongue and groove type of laminate is equipped with a lock of the same name. This coating can be laid out without smearing the tongue with adhesives. Therefore, the borders of individual boards will not be stained with adhesive. If you don’t want to glue at all, you can nail the product to the surface in the manner of a regular lining. It is attached to a wood lattice using furniture nails or gluers (the second option is also suitable for an iron base).
For wall laying, you can also use click format laminate - this is an improved version of tongue and groove covering. The cut of the ridge is pear-shaped, as is the structure of the channels. The connecting structures push the ridge lobe of the lock into the niche, having first tilted the block. Then they twist the product towards the base and at the same time press lightly, due to which the lock closes. The click type of laminate is good for its high hardness.
Click coated gluers are not compatible. If you use them, you will not be able to latch the lock. But it is quite possible to glue the block onto a wooden sheathing yourself.
You can attach the laminate to the walls either with glue and liquid nails (but you will need to thoroughly level the base and prime it), or using slatted lathing (but it will take up some of the space, so it is not recommended in small rooms). If you decide to nail the covering to the entire wall or to its upper part, work begins from the ceiling to the floor; Decoration of the lower half of the walls is carried out from the floor upward. To ensure that the planks are firmly fixed, check their correct installation using a building level. When there are locks in the panels, they should be glued like this: first coat the surface with glue, then connect them into a lock, and only then attach them to the wall.
If you think that glue alone is not enough, additional reinforcement of the structure with nails or staples is acceptable. The tongue and groove board is attached to the sheathing with clamps at the top and bottom.
The choice of items to strengthen and hold the structure is extremely important. The most common seemingly ordinary clamps are available in a wide range, and if you purchase the wrong product, you will devalue all your work. The thicker the panel that needs to be held, the larger the diameter of the tongue should be . Compared to other types of mechanical fasteners, clamps have the advantage of having a low risk of panels splitting. They are great even in rooms with significant humidity. A bracket with a jagged protrusion is driven into the board and held in place with self-tapping screws; a bracket with a flat protrusion will help press the protruding part of the click lock against the wall or sheathing.
When choosing liquid nails, be sure to check their area of application. They are both universal and intended for interior work. Very dense laminate cannot be attached to walls , so there is no point in using liquid nails to hold heavy objects. Acrylic composition cannot be used at subzero temperatures.
Covering the end of the laminate on the wall is not so easy, but this task can be solved. According to experts, profiles in the shape of the letter P, which are made from a variety of materials, will help - there are aluminum, plastic, and even wood. As an option, you can purchase a flexible rubber threshold. All these blocks can be attached using the same liquid nails or glue-sealant. Sometimes they also offer edge tapes, but any method should not disturb the color harmony of the canvas.
A separate topic is guides for wall mounting of laminate; the step between them should not be more than 0.6 meters.
Laminate flooring swells as it becomes wetter. And therefore, no matter what installation method you choose, be sure to leave a gap of 1.5-2 centimeters from the corner along the entire perimeter. Spacer wedges on the walls can help with this, but there is a much better solution. Completely flat boards or slats of the required thickness are placed below, which are wrapped in thin plastic film. And on the sides you can safely use wedges, where they will not be squeezed out by the weight of the sheathing.
Experts recommend that after completing the work, lay a plinth over the gaps to prevent debris and dirt from accumulating there.
Laying the canvases should begin from the far left corners, it is carried out as the clock progresses. Left-handers will be more comfortable working on the right against the clock. Installation of laminate flooring is allowed both vertically (from left to right) and horizontally, with the second method being preferable. Solid strips, contrary to imaginary evidence, are by no means simpler or cheaper. Joints running along the same line must be covered with plinths attached to mounting nails.
The technology involves drilling mounting holes directly through panel joints. And even in the case when the wall is lined with continuous strips along its length, you will have to install skirting boards every 170 centimeters or even more often . Continuous panels support each other only in one direction, and if there is no additional reinforcement, the cladding can fold.
No matter how well you try to install the covering, no matter how high-quality nails, gluers and glue you use, these holding elements may no longer perform their function. Excessive proximity will create increased mechanical stress.
It is best to lay the laminate using the comb method: cut exactly in the middle as many strips as would fit on half of the horizontal rows. When ten lines can be laid in height, five strips are required to cut. Installation proceeds alternately: a solid part, then cut, again a whole block. This solution will make the load on the fasteners as uniform as possible.
In some cases, it will be more interesting to lay out the laminate in a diagonal way; then they take it in two different colors. But if you do not have solid experience in working with such coating or special training, it is not recommended to take on diagonal laying. It is much easier to lay the covering vertically on the glue: you will, of course, have to clean and level the wall, but you will not have to pay for the sheathing elements. You can limit yourself to panels of only two types (long and complementary).
To install laminate flooring yourself, be sure to buy an electric jigsaw; it will help you cut the panels as accurately as possible, and in the future it will be useful for other work. You will also need consumable files, a hammer for tamping, a short (up to 40 cm) ruler and square, a tape measure, limiting wedges, a block for tamping, a corner cutter, a saw, a drill and a hammer drill. To laminate a wall that was previously wallpapered or painted, remove the coating using a spatula or a hammer drill with an attachment. The final removal of irregularities is achieved with sandpaper.
Having decided to create a backlit wall, immediately lay all the cables, draw up a diagram with their placement and output (connection) points so as not to get confused in the future.
For a detailed process of laying laminate on walls, see the following video.
Laminate flooring is not only beautiful and aesthetically pleasing, it allows you to seal cracks on balconies and loggias. With proper selection, the coating will last you at least a decade and a half.
Always take into account the possible mechanical stress and the risk of abrasion. If you have to frequently clean the walls or have cats in the house, too thin plasterboard coverings will be unacceptable.
Fitting and trimming will inevitably increase the consumption of material, therefore the resulting overall figures for the need for it can be safely increased by 10%, then the necessary reserve will be created. As already mentioned, the indentation along the perimeter should be 1.5-2 cm, it is set on the sides with spacer wedges, and at the bottom with a special board or plank. Always use a boss for tamping; if you hit it directly with a hammer without it, you can create crooked cracks. Using a rule (hook), you can attach the last row in the corners; to do this, knock with a hammer or hand on the surface of the “flag”.
When creating the sheathing, it is recommended to use slats of 3 centimeters, the distance between the screws should not exceed 40 millimeters. The slats themselves should go at an angle of 90 degrees relative to the panels, so first outline what and how exactly will be installed.
The exact distance separating the edge of the laminate from the wall border is determined individually, taking into account a number of nuances. If you cannot find this distance, you should seek help from professionals.
When using coating, it is enough to never deviate from these rules in order to avoid many serious problems.
Having laid out the bottom strip 0.6-0.8 meters long from additional panels, then the corridor wall can be sheathed with the main panels up to the ceiling. The horizontally facing connection is closed onto the plinth. Vertically directed joints at a certain interval are fastened with parts of the same product, and it is launched further along the laminate-covered top. This creates the romance of the Middle Ages, appropriate both in the bedroom and in the living room. Fluorescent lamps can replace torches.
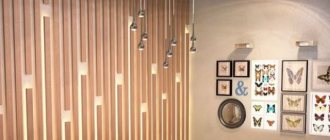
If the main blocks are used at the bottom of the hallway walls, and a completely white strip is left above, you can create a backlight screen using LED strips. It is not at all necessary that such a screen be at the top. Another design option for the apartment: the wall is light at the top and bottom, and there is a dark stripe in the very middle. You can play up dark colors with paintings and interesting photographs, decorative ceramics, appliqués and other original solutions.
The design of the attic will look good if you cut off the complementary strips by a third of the total length, put a comb on top and bottom, and occupy the middle part with the main panels. Depending on the color, they create light or dark surfaces
For the bathroom and toilet, walls that imitate the appearance of a chessboard are well suited: the main and auxiliary strips are used in equal quantities, cut into squares. You can add originality by gluing symbolic images of sheet plastic figures onto individual “cells” or even imitating a set of sketches.
For quite a long time, there was a widespread stereotype that laminate is intended exclusively for flooring. Indeed, this material is incredibly comfortable and also easy to care for.
However, in a fairly short period, designers were able to prove that laminate is not only a very practical, but also a super stylish solution for decorating a room.
Over time, it was used to decorate a variety of surfaces, including walls. Today we will talk in detail about this popular trend, as well as the features and characteristics of laminate for wall decoration.
The widespread use of this finishing material is very easy to explain. Laminate flooring is easier to care for than carpet, tiles or paper wallpaper.
For example, on a floor covered with laminate, there will be no traces left from rearranging furniture - it can literally be dragged along the floor.
Laminated boards used in the design of wall and floor coverings are very durable, because they are not so easy to damage or break.
So, the main advantages of this material include:
- Environmentally friendly raw materials;
- Service life exceeding 10 years;
- The surface does not absorb surrounding odors;
- Minimal accumulation of dust;
- A variety of colors and many textures;
- Simplicity of installation work.
Despite the obvious advantages, the material also has significant disadvantages:
- Laminate reacts to moisture, which can lead to its deformation on the walls;
- Laminate coating can swell when constantly exposed to high temperatures, and can also crack when exposed to cold;
The material is not a budget option. Ordinary wallpaper, paint or plaster will cost you much less.
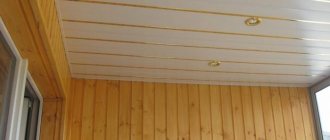
To decorate a hallway, there are two optimal ways to use laminate flooring. The first option involves using a combination of a variety of materials, alternating them along the entire perimeter of the walls.
In the second option, one of the walls is selected on which the emphasis will be placed. It is she who finishes with laminate.
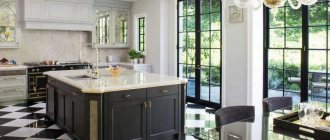
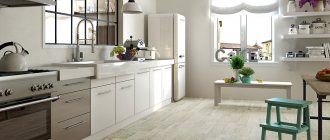
If we talk about decorating a kitchen space, laminate is most often used to decorate an apron near the work surface. The shade and texture of the material can be any, the main thing is that the laminate area is in harmony with the kitchen set and the overall interior design.
The use of such surfaces in the kitchen is in wide demand - they are very easy to clean, and they are also not afraid of treatment with chemicals.
Finishing all four walls in the living room with laminate is not the best idea. However, using it to highlight one of the side surfaces would be very appropriate in this room.
As a rule, laminate panels are used to decorate the wall on which the TV is attached.
Laminate flooring in the bedroom will look no less elegant. Most often they decorate the wall at the head of the bed.
You can harmonize the interior by selecting furniture and accessories in shades identical to the laminate. On the same wall, small sconces, lamps or wooden shelves for various little things will look good.
If you have not yet decided on the option for decorating the walls in your home, we recommend that you take a closer look at the laminate. For clarity, you can view several different photos where laminated surfaces are present.
Proper use of laminate allows you to emphasize the advantages of the room, as well as hide the flaws in the room. This is one of the few materials with which you can create a truly original and stylish interior.
What to do if the walls are uneven?
First of all, you need to carefully check whether they are really uneven. Take a lath, the size of which is equal to the height of the wall without taking into account the baseboard. Important: before starting the test measurement, the plaster layer and trims should be removed so that they do not distort the result. The rail is moved vertically, the slightest bulges and dips are marked with a pencil. Protruding parts must be scraped off or knocked down with a chisel.
The holes are filled with putty and rubbed over. Such simple methods will allow you to strengthen even the most uneven and chaotic wall. Assessing how smooth the control rail itself is is also not particularly difficult. Attach it to the wall and trace the outline with a pencil, turn it 180 degrees and attach the ends of the strip to the end points of the line. If both lines completely coincide, you can safely use this tool in your work. But the slightest deflection or bend indicates that you need a different rail (which, of course, is checked in the same way).
Plasterboard wall covering
When the condition of the surfaces in the bathroom leaves much to be desired, they have to be smoothed using plaster. Recently, dirty and labor-intensive work has been replaced by sheathing with gypsum sheets. Toilet walls made of plasterboard are perfectly smooth and can be finished with any materials.
To prevent newly laid cladding from swelling and failing, moisture-resistant types of sheets should be used. They can be treated with a primer and coated with any finishing material.
Installation of drywall can be carried out on an assembled frame made of metal profiles and directly on the wall using polyurethane foam. In the first case, the fixation will be as reliable as possible, but the frame will reduce the area of the room by 10 - 15 cm on each side.
If the room is already small, it is better to use the second installation option. But in this case, you should not place heavy cladding such as ceramic tiles and mosaics on the wall.
How and with what to fasten?
The adhesive laminate must be attached to flat surfaces. Liquid nails or construction silicone are used to hold it in place. The wrong side of the panel is covered with glue in the form of a zigzag, after laying the strip, coat the end with the same glue, and proceed to the next chain. If adhesive liquid appears at the boundaries of blocks and lines, it is immediately removed with a soft cloth made of natural fabric soaked in culinary acetic acid.
Laminate that is installed with glue cannot be fixed to the sheathing; it has too little contact strip with the support.
The tongue and groove type of laminate is equipped with a lock of the same name. This coating can be laid out without smearing the tongue with adhesives. Therefore, the borders of individual boards will not be stained with adhesive. If you don’t want to glue at all, you can nail the product to the surface in the manner of a regular lining. It is attached to a wood lattice using furniture nails or gluers (the second option is also suitable for an iron base).
For wall laying, you can also use click format laminate - this is an improved version of tongue and groove covering. The cut of the ridge is pear-shaped, as is the structure of the channels. The connecting structures push the ridge lobe of the lock into the niche, having first tilted the block. Then they twist the product towards the base and at the same time press lightly, due to which the lock closes. The click type of laminate is good for its high hardness.
Click coated gluers are not compatible. If you use them, you will not be able to latch the lock. But it is quite possible to glue the block onto a wooden sheathing yourself.
Liquid wallpaper
When choosing a material for bathroom walls, you should consider using liquid wallpaper. This option has an acceptable cost and is characterized by a presentable appearance. Cotton and cellulose fibers combined with mica create surfaces of incredible beauty.
The ability to simultaneously use several colors on one wall allows you to create an original and unique design for a bathroom with toilet. Additional advantages of this finishing option include:
- the ability of the composition to fill small cracks in walls;
- resistance to cracking during building shrinkage;
- Possibility of application on uneven surfaces;
- ease of use in rooms with a large number of corners;
- ease of installation;
- the ability to replace damaged coating in certain areas without the need to change the entire sheet;
- long service life.
To prevent the walls in the toilet from absorbing odors and moisture, it is recommended to cover liquid wallpaper with a layer of colorless varnish. This will save the finish from damage and keep it in its original form for a long time.
Methods
You can attach the laminate to the walls either with glue and liquid nails (but you will need to thoroughly level the base and prime it), or using slatted lathing (but it will take up some of the space, so it is not recommended in small rooms). If you decide to nail the covering to the entire wall or to its upper part, work begins from the ceiling to the floor; Decoration of the lower half of the walls is carried out from the floor upward. To ensure that the planks are firmly fixed, check their correct installation using a building level. When there are locks in the panels, they should be glued like this: first coat the surface with glue, then connect them into a lock, and only then attach them to the wall.
If you think that glue alone is not enough, additional reinforcement of the structure with nails or staples is acceptable. The tongue and groove board is attached to the sheathing with clamps at the top and bottom.
Why laminate
Among the variety of materials for wall decoration, laminate is considered almost the last, and there are reasons for this. This coating was originally intended for flooring. At the same time, the material seems unsuitable to many due to the fact that moisture can become the enemy of the coating. In general, everything is correct, however, if we consider the main properties of the coating in more detail, we get a completely different picture:
- Laminate can be of various types, among which there are also waterproof modifications - the problem with moisture is solved immediately.
- The fact that it is intended for floors is also not a problem - porcelain stoneware was originally invented specifically for finishing the surface underfoot, and only then models for walls appeared.
- Strength is not in question - if the material can be walked on, then a much lower load on the walls will allow it to last for a very long time.
- Externally, the material looks like wood. At the same time, the use of natural materials and their imitations is now a very fashionable idea.
- The color and texture are selected from hundreds of options - you can find one suitable for absolutely any style and design.
- You can attach the coating in several ways and this will help solve several other related problems. For example, you don’t have to level the planes, as is necessary when laying tiles.
- The originality of the solution will be one of the main trump cards - finishing the walls in the toilet with laminate is almost unique, and beautiful options for laying out the parts can be found on the Internet.
- In large combined bathrooms, you can zone the space, using either materials of different colors, or highlighting a specific part of the room with laminate.
- You can do everything yourself if you have a minimum set of simple tools.
- The cost of coverage can vary greatly depending on various factors. However, you can find both very expensive and quite budget models.
- In terms of time, such repairs will only take a couple of days, if you are not in a hurry. In principle, finishing can be completed in one day.
Additional items
The choice of items to strengthen and hold the structure is extremely important. The most common seemingly ordinary clamps are available in a wide range, and if you purchase the wrong product, you will devalue all your work. The thicker the panel that needs to be held, the larger the diameter of the tongue should be . Compared to other types of mechanical fasteners, clamps have the advantage of having a low risk of panels splitting. They are great even in rooms with significant humidity. A bracket with a jagged protrusion is driven into the board and held in place with self-tapping screws; a bracket with a flat protrusion will help press the protruding part of the click lock against the wall or sheathing.
Plastic panels
Second place in the ranking of the most affordable finishes is occupied by plastic panels. It is possible to create a rather interesting design for a bathroom with a toilet. Modern panels are characterized by a rich range of colors and a variety of patterns. There are options with imitation tiles, marble and stone, allowing you to create the impression of an expensive finish.
The main advantages of the material include:
- long service life;
- resistance to moisture;
- ease of installation;
- affordability;
- a wide range of;
- the ability to install without leveling the surface.
Any owner can repair a toilet room using panels. To do this, you just need to install the starting and finishing slats (in the corners of the room, under the ceiling, along the floor), fix them on the wall and assemble the cladding using the finished frame.
As for the disadvantages, these include the possibility of abrasion of the design as a result of the use of powder cleaning agents. It is also worth mentioning the synthetic origin of the material, which indicates its fire hazard.
Otherwise, the plastic panels for the walls in the toilet showed themselves to be good. At a low cost, they have a fairly presentable appearance, which is very important for a modest budget.
Cost of materials
The financial component is especially important when choosing materials for walls in the toilet. The cost of each type of finishing may vary slightly in different regions of Russia, but the average figure can be determined.
So, the price tag for 1 m2 of cladding made of moisture-resistant wallpaper starts from 90 rubles. The price is for canvases of simple design (excluding installation work).
The cost of the simplest varieties of plastic panels starts from 100 rubles per square. Options with a more complex and interesting pattern will cost much more.
For the services of a specialist in installing plastic slats on walls, owners will have to pay from 300 to 450 rubles per square meter.
Moisture-resistant paint will be cheaper than all options. The cost of 1 m2 is 30 - 40 rubles. You will have to pay a little more for an unusual color of the walls in the toilet. The services of masters for painting surfaces are estimated at 150 rubles per square.
The price tag of laminated panels starts from 350 rubles per square. Since the material on the walls is not subject to mechanical influence, you can purchase the simplest options. The cost of installing laminate flooring is 250 rubles per square meter.
Services for applying decorative plaster will cost home owners from 650 rubles per square meter. The final cost may vary significantly due to the complexity of the design and depending on the chosen technology for applying the composition. The materials themselves are very diverse, so it is impossible to announce the average cost.
High quality ceramic tiles cost from 600 rubles per square. To this amount should be added the costs of purchasing glue, mounting corners and grout.
Wall cladding services will cost the owners 650 - 850 rubles. The final price tag is influenced by the number of corners in the room and the method of arrangement of elements. For a mosaic you will have to pay from 1300 rubles per square.