The procedure for creating a String Art painting
- First, prepare the base: polish the edges with sandpaper, cover with stain, paint or varnish, if the artistic design requires it.
- The second step is to transfer the drawing to the board. Draw the lines with a very hard simple pencil, barely touching the surface. If the design is very complex, print it on paper, attach it to the base, when finished, you can remove the sheet with tweezers in parts.
- Mark the nail locations. They should be placed at an equal distance from each other.
- Drive the nails in to a shallow depth. Try to keep them strictly perpendicular to the base. If you do not want to injure your fingers, hold the nails with pliers.
- Now that the outline is ready, you can start stretching the threads. To do this, tie a thread to the central top nail. The knot should be small and neat, cut off the tip. Pull the thread diagonally to create an acute angle. Thus, connect all the carnations with a thread. When finished, secure the tip and trim.
To make the drawing process more comfortable, thread the thread through an old ballpoint pen barrel (with holes on both ends) and use it as a “needle”.
How to do everything correctly is shown in the video below. After watching it, you will quickly master the basics of string art. We also suggest that you study elementary thread tensioning patterns:
What to do if you need to change the thread?
Secure the tip of the old thread to a nail and trim the tip. Tie a new one of a different color to the same carnation. Using multi-colored threads, you can create very beautiful multi-layered designs. However, melange-dyed threads are also suitable for this.
More details in the video:
It is important to prepare the base correctly: drive the nails so that they stick out high enough and at the same level.
By the way, several different paintings can be made using the same stencil. You can fill with threads either the drawing itself or just the background, then it will seem to envelop the image.
There is a third option, when certain parts of the pattern are filled with threads of different colors or different thicknesses. The latter gives the image volume. Don't be afraid to experiment with the direction of pulling the threads.
Bright heart
You can make a variety of pictures from threads and nails, the main thing is to find suitable patterns, templates, etc. Of course, it’s better to start with something simpler, so in this master class we’ll try to make a simple but very cute heart.
To work you need to prepare:
- A piece of fairly dense foam;
- Nails - pins;
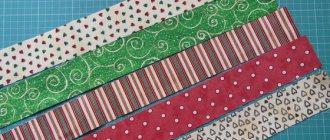
- Colored threads (it is advisable to take woolen threads, as they are quite thick and the picture will be more expressive);
- Glue;
- Acrylic paints;
- Brushes;
- Adhesive tape;
- Paper sheet;
- Beads.
So, when all the tools necessary for work are prepared, you can begin. First you need to draw a smooth, beautiful heart on a piece of paper. Now you need to take a sheet of foam plastic, it should be smooth. If this is not the case, all irregularities should be removed with sandpaper. When the foam is prepared, it should be coated with acrylic paints.
We wait for the base to dry and place a piece of paper with a drawn heart on it. Using pins, carefully attach the sheet to the foam along the contour of the pattern. Leave a small distance of one to two cm between the carnations, see the size of the picture. Once the template is attached, you need to carefully tear off the paper.
Now let's get to the fun part - decorating with threads. On one of the nails you need to secure the thread with a neat, almost invisible knot. We give freedom to creativity and begin to wrap all the carnations in a chaotic order.
Here it is important to ensure that the threads are distributed evenly; if on one side the layer of threads is thick and on the other - scanty, then it will not look very nice.
You can leave the picture as is, or you can decorate the background with all kinds of beads, pebbles, etc.
Related article: How to sew a chiffon dress with a sun skirt: pattern and sewing master class
Examples of works using the String Art technique
Modern style
Now let's move on to a more complex lesson in the string art technique (this is the name for the technique of creating paintings from threads and nails). Making this picture will be more difficult, but the process of work itself is very exciting.
So, you need to prepare:
- Plywood, in this master class a sheet of size 60×60 was used;
- White acrylic paint;
- Picture template;
- Nails;
- Hammer;
- Threads – floss or yarn;
- Pencil.
First you need to prepare the board itself, remove all rough edges and paint it with white paint. Now you need to prepare a template, the same as shown in the picture below.
The template needs to be attached to the board, hammer in nails in those places where there are black dots on the template. Hammer the nails so that the heads are approximately at the same level. Now you need to very carefully remove the template, all jammed paper should be removed. We will start work with the letter “O”. Using the template, count how many nails you need to retreat from each edge, and start winding the threads.
It is very important: the contours of the letters must be outlined, otherwise the drawing will be inexpressive and the appearance will deteriorate. In general, the principle of operation is the same as in the first lesson.
When you finish working on the letter “O”, move on to “K”, here the principle of work is exactly the same as with the previous letter. Remember to wrap the thread around each stud. Now you can begin to design the background of the picture. Everything is simple here, you only need to follow one rule: the threads should not go into the letters, we work only with the background of the image.
There is no need to make bright transitions in color; it is advisable to use similar colors, even if they differ only in tonality, otherwise the picture will turn out too clumsy. There is no need to make the thread coating too dense; the white background should be visible through them. You can look at your painting from afar, so you will immediately notice where you need to add and where you need to remove unnecessary things.
Related article: DIY shoe stand made of wood with photos and videos
When you are done with the background, you need to fill in the gaps in the letters in the same way so that they take on their final form. All that remains is to come up with fasteners for your painting and you can safely decorate your interior with it.
As you can see, making a picture from nails and threads is not at all difficult; you just need to choose a suitable template and transfer it efficiently to the support. We bring to your attention several templates for paintings made from threads and nails.
Creating silhouette drawings and complex patterns
Silhouette images look no less attractive when only the background is filled with threads, while the central composition remains empty. To create such a panel you will need all the same materials.
Creating a Silhouette Drawing by Filling the Background
When doing this, a frame is necessarily made, that is, nails are driven in along the contour of the substrate, and then, as in the previous case, along the contour of the drawing itself. The thread is tied on the nails running along the edge and pulled to those that form the outline of the design. It turns out very beautiful and unusual.
An amazing panel can be created without a sketch. You need to take a dark base and bright threads. Nails or pins are driven only along the contour of the substrate. The essence of the technique is that the thread is pulled to the opposite edge, wrapped around a nail, returns back and clings to the adjacent nail.
Accent panels on the wall in a modern interior
The process continues until all the space is filled. The result is a regular figure, twisted in a spiral. This technique produces very complex panels with a 3D effect.