What materials can artificial stone be made from?
The choice of stone material depends on where you intend to use it.
Plaster or acrylic is used for interior decoration of the apartment.
For outdoor work, you need a material that is not afraid of moisture. The most suitable option here is a cement base.
In terms of cost, the most expensive is acrylic stone, followed by gypsum, cement is the cheapest.
To give the product strength and save basic consumables, fillers are added to the pouring mixture - sand, fine crushed stone, marble chips.
Also, to increase strength, fiber is added - special microfibers. Fiber fiber prevents cracking of finished tiles.
To improve the physical properties of stone, plasticizers are used. The use of plasticizers makes it possible to reduce the amount of water in the solution, thereby increasing its density.
Hyperplasticizer MELFLUX 2651 F (Manufacturer Germany) - presented in the form of a yellowish powder. Used for gypsum and cement mixtures. Add from 0.15 to 0.2% to the total mass of the batch.
Molds for making stone
You can buy a ready-made form or make it yourself.
Ready-made forms are usually sold complete with the materials necessary for making stone - pigments, plasticizers, fiberglass.
Forms made of polyurethane, silicone, rubber are easy to use - after the mass hardens, the finished stone is easily removed from the flexible molds. For the manufacture of paving slabs, a matrix made of hard plastic is better suited.
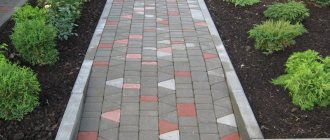
Matrices are produced according to the types of stone for every taste - slate, brick, rock, torn stone, sandstone, cobblestone. The choice is very large - in terms of stone size, thickness and appearance.
Prices for ready-made forms are high - from 3 to 6 thousand. One form is designed to prepare 4-6 stones. The disadvantage of flexible forms is their wear and tear. After repeated fillings, the relief loses its former outlines.
It will be much cheaper to make a matrix from silicone or polyurethane yourself. The cost of a package of polyurethane weighing 7 kg is about 3 thousand rubles. One package is enough for you to create several forms.
To make the mold, use acetic-based silicone or polyurethane Por-A-Mold SX (gray), Duramould ET 30A (yellow), ET 45A (red) - Duramold (Manufacturer England) or Poramold polyurethanes made in the USA. The color of the polyurethane does not matter.
Polyurethane from these companies is convenient because it does not set very quickly after mixing the components. You will have enough time to fully use the prepared mixture.
In order for the finished form to easily move away from the model and formwork, a matrix separator is used.
You can prepare the separator for the matrix yourself - in the following proportions:
- Beeswax 1 tsp.
- Paraffin 3 hours
- Gum turpentine.
Melt the wax and paraffin in a water bath and add turpentine. Lubricate the surface of the stone and sides with this mixture before pouring.
- Select samples of stones that will serve as your model.
- Place them on a solid base with the smooth side down at a distance of 1.5-2 cm from each other. This is necessary for the formation of matrix partitions. For the base, fiberboard or a sheet of furniture chipboard with a smooth surface is suitable. Outline the outline of the stones with a pencil.
- Apply silicone to the smooth side of the samples and press to the surface.
- Apply sealant along the contour of the stones. This is necessary to prevent air and polyurethane from getting under the stones when pouring. Use silicone for aquariums - it reliably fills all the cracks and you will not have leaks.
- Allow drying time - about 2 hours.
- Install and secure the side boards - formwork, keeping a distance of 2 cm from the edge of the stone.
- Seal all corners with silicone to prevent polyurethane leakage.
- Leave the matrix for 12 hours for the sealant to dry completely.
- Treat the sides and surface of the models with a wax-based matrix separator. Drying time 2 hours.
- Mix the polyurethane components.
- Fill the matrix with polyurethane or fill it with silicone. Pour polyurethane in a thin stream to avoid the formation of air bubbles.
- When using silicone, tamp it down with a brush dipped in soapy water. For soap solution, detergents that do not contain alkali are suitable.
- After 24 hours, disassemble the sides of the structure and remove the samples from the finished mold. Silicone molds need to dry for 2 weeks; they can be used for work after 24 hours.
How to make a mold from polyurethane is shown in the video.
Characteristics and Features
Cement, of course, weighs much more than fiberglass and plastic, but this disadvantage is more than compensated for by its appearance.
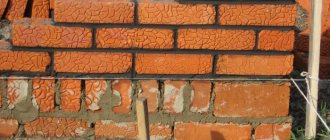
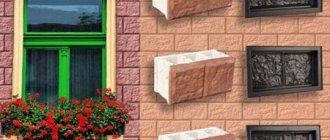
In purely external terms, artificial and natural stone are almost identical to each other, but at the same time, all the disadvantages of natural stone are absent and it can be made with an imitation of absolutely any natural stone, even repeating the texture. According to its external appearance, the surface of an artificial product can be:
- Sawed wood with smooth edges.
- Chip, with an uneven surface and edges as if beaten with a hammer.
- Free-form, embodying all design fantasies regarding shape and surface.
- Rubble, reminiscent of ordinary boulders.
- Decorative.
Making an artificial stone with your own hands begins with selecting an initial sample, creating or choosing a form in which the stone will be cast in the future.
For specific tasks, for example, to finish an arch, fireplace, column, various types of surfaces may be required. Therefore, when making an artificial product from cement, it is necessary to know exactly for which surfaces it will be used in the future (cladding, road surface, decorative element), and not deviate from the plan.
In order to make an artificial element from cement, the following materials and tools are needed:
- Portland cement is white.
- Clean dry sand.
- White quartz sand.
- Foam balls.
- Tools used for carving.
- Small wire mesh.
- Container for mixing cement mixture.
- Cardboard box.
- Water.
- Kitchen gloves (rubber).
- Container for dye.
- Brush.
- Spray.
Artificial stone made of cement can be of absolutely any size and different colors. Such stones can be used to cover unsightly elements located in your yard, for example, gas meters.
Most artificial elements are made for decoration or for waterfalls, you can make an artificial stone from which a stream of water will flow into the pool, or an ordinary stone made as a decorative element.
How to give a stone the desired color?
It is better to add pigment when mixing the mass.
Also, the diluted pigment is applied to the mold before pouring the solution. The form is not painted over completely, but in separate fragments. This gives the tiles an individual pattern, which helps create a high-quality imitation of natural stone.
Please note that you need exactly the pigment, and not the usual color for paints. Pigments are iron oxide inorganic dyes. Pigments from Hermann Ter Hell & CO Gmbh (Germany) have a pure color, are easily diluted with water and mix well with the components of the solution. Different colors can be mixed together.
When applying the pigment directly to the mold, the paint is mixed with the solution that has not yet set and penetrates 2-3 mm deep into the stone. This is enough so that the paint does not wash off or peel off.
The amount of pigment is added by trial method. You can see what color you get only after the solution has completely dried. Make the first batch of pigment for one mold, after drying, decide how much pigment you need to add. Do not forget that its share in the composition should not exceed 3% of the total mass of the solution.
Procedure for producing stone from cement or gypsum
- Place the molds on a horizontal surface.
- When working with gypsum mortar, lubricate the molds with oil or grease.
- Dilute the pigment in a small amount of water.
- Apply pigment to the molds if you want an unevenly colored stone.
- Move plaster or cement with filler.
- Pour the required amount of water into the container.
- Add the diluted pigment and plasticizer to the water.
- Add the main ingredients and mix thoroughly.
- Fill the molds with the resulting mixture.
- Run a spatula along the edges of the matrix to remove excess solution.
- After the solution has hardened, release the stone from the mold and fold it for final drying.
- Rinse the molds for the next batch.
Features of working with cement mortar
- Cement is mixed with river sand in a ratio of 3:1.
- Fine crushed stone or expanded clay sand is added to cement mortars as a filler. Crushed stone is added if the stone is made for paths or steps. Expanded clay sand is used in the manufacture of tiles for vertical surfaces.
- A metal mesh will help increase the strength of the stone. In this case, the mold is filled halfway with the solution, then a mesh is placed on top and the solution is added to the edges of the mold. The use of mesh is necessary when producing stone of large thickness.
- When the solution begins to harden - after about 3-4 hours, draw grooves with the corner of a spatula or a screwdriver - this is done to improve the adhesion of the stone to the surface during installation.
- The setting time of the cement mortar is 12 hours. It takes 2 weeks to completely dry and harden. Do not leave the finished stone in the sun. Lay it out on a level place, cover with film. In hot weather, spray with water periodically.
Features of working with gypsum mixture
- Products made of gypsum without fillers and additives are fragile. For strength, add 1 part slaked lime and 0.5 parts fine sand to 6 parts of gypsum.
- Gypsum sets quickly, so batches are made in small portions.
- The form can be released after an hour. Complete drying time: 24 hours.
- Adding a plasticizer or citric acid to the water slows down the setting process.
Step by Step Actions
The process of making stone is quite simple and affordable. Depending on the materials, the technology may differ slightly, but the following algorithm of actions remains unchanged:
- preparation of the workplace and necessary equipment;
- selection and preparation of the form;
- mixing the solution;
- pouring into the mold and distributing the mixture;
- releasing the cast from the mold;
- cleaning the mold;
- grinding, finishing and painting of stone;
- preparing a wall or other area for installation;
- installation of stone slabs;
- finishing of the finished wall.
Artificial stone is a great way to create an exclusive design for the interior or exterior of your home. The wealth of colors and materials leaves room for experimentation and embodiment of your ideas.
Similar articles
- Using 3D panels in room design
- What wallpaper to choose for the living room
- How to paint walls yourself
- Wallpaper for a children's room
- Pasting different types of wallpaper: features, tips, instructions
- How and with what to insulate the walls of a house and apartment