DSP for floor screed has been and remains the most popular screed option. Its relevance in modern apartments does not lose its position, although the technology has been around for more than a century. The quality of the mixture depends on many factors, the most important of which is proper mixing. It is very easy to overdo the ingredients and spoil the mixture. To avoid this, you need to observe all proportions exactly. How to correctly calculate the consumption of sand concrete per 1 m2 of screed with a thickness of 5 cm, we will discuss in the article.
Features of the material
Screed is used in almost all apartments, so this type of work is one of the most common. It is laid under the facing covering. Thus, the thermal insulation of the room increases, which is very important in modern apartments.
The screed also acts as a leveling base. Nowadays it’s rare to find even relatively flat floors, and many facings require a perfectly flat surface underneath. In such cases, cement screed is irreplaceable.
Also, a cement-sand floor screed protects the base of the floor, strengthening it. This layer is not afraid of any mechanical damage and loads. It will be quite difficult to get rid of it, so when replacing the layer you will have to work carefully.
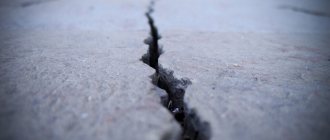
The durability of the material goes hand in hand with eternity. The service life of the screed can outlive several generations of residents. But this is only if it is installed correctly; it is easy to spoil the mixture if you do not follow the technology for its preparation.
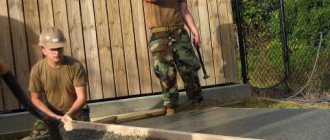
The material is not afraid of water. If the integrity of the layer is not compromised, then even a spilled bucket will not become a problem and cause flooding of neighbors. This is especially important for the kitchen or bathroom, where the risk of water leakage is quite high. The base will absorb huge amounts of water without damage. The screed installation process is not complicated. Even a beginner can do high-quality work. But it requires painstakingness, it is important to check the mixture and not deviate from the installation instructions, otherwise you risk damage to both the screed and the facing coating.
In terms of price, the materials are relatively cheap and affordable for everyone. There are also disadvantages to cement-sand mortar. First of all, this concerns water. When preparing, the solution is wetted with copious amounts of water, which can lead to leakage if a layer of waterproofing is not laid under the screed. During the process of pouring the solution, a lot of dirt is formed. It is difficult to work with the mixture, since the bags weigh 50 kg.
Leveling the composition is also not so easy, and if the work is done incorrectly, this will lead to the futility of the work done and the money spent.
Another disadvantage of the solution is its final weight. It puts significant pressure on the base. And it cannot be used in wooden houses. To facilitate the construction, expanded clay is placed under the solution.
All cement-based solutions take a very long time to dry. Complete curing may take a month, increasing repair time. In addition, if you need to repair the screed, you will have to dismantle the old layer and fill in a new one in most cases.
All of the above applies to mixtures installed using the wet method. There is also a variant of semi-dry screed, which differs fundamentally from wet screed. Semi-dry screed is made on the basis of the same DSP. But it dries much faster than the wet method. Within a week you can begin cladding. The process is cleaner as opposed to wet.
Frequently asked questions when pouring cement-sand screed
An important question: how long does it take for the screed to dry? Concrete reaches 70% of its brand strength during the first week, the remaining 30% is achieved in 21 days. Those. 100% brand strength of the screed is achieved in 28 days.
Is it possible to independently use plasticizers or other chemical additives for concrete? It is possible, but you should very strictly follow the proportions specified in the recipe. Since additive consumption is measured in milliliters or milligrams, it is very difficult to take accurate measurements at home. Therefore, for special construction work, it is recommended to buy ready-made building mixtures.
How long can an opened bag of sand concrete be stored? During long-term storage, sand concrete significantly loses its activity. If the opened bag is packed in polyethylene and left in a dry, heated room, the shelf life is 6 months.
Consumption of cement and sand per 1 sq.m.
Knowing the consumption of material, you can get rid of the need to purchase excess. And the materials are not cheap. You will also avoid the need to run for an extra bag in the middle of work. Therefore, the stage of proofreading material consumption is very important.
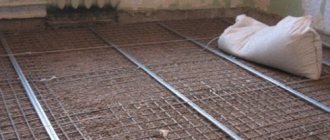
First of all, you need to hit the zero level and decide on the thickness of the screed. Usually the thickness is 3-5 cm. Then calculate the area of the room, multiply the result by the thickness of the screed layer. For example, an area of 10 sq.m. with a layer thickness of 5 cm. 10*0.05=0.5. Half a cube of cement will go into a room of 10 sq.m. You can calculate the amount of mixture in kilograms in this way. The consumption of sand concrete per 1 m2 of screed with a thickness of 5 cm is about 20 kg per 1 sq.m. per 1 cm of screed. 10*0.05*20= 1000 kg. We divide 1000 kg by the approximate weight of a bag of 50 kg and we get 20 bags per room of 10 sq.m. During the work process, the material clogs even small cracks, which means that the material must be taken in excess of 25-30 percent.
Proportions of cement and sand for floor screed
Calculation of sand concrete for floor screed is the most important stage of work, because the quality of the screed depends on the resulting mixture.
All you need is cement, sand and water. Sometimes various plasticizers are added to the solution, but this is optional. The mixture is made on the basis of cement, which acts as a guarantor of strength.
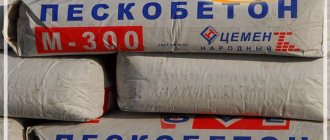
The material has different markings. Starting from M50 to M500. The numbers in this case indicate the weight of the permissible load. So cement marked M50 will withstand no more than 50 kg per 1 sq.m. But the best option is M500. True, it will cost more, but if the loads in the room are small, then it is quite possible to buy material with less marking. But for screeding they do not use less than M300.
The best option is the ratio of cement and sand 1:3. And water flows in a 2:1 ratio. The more cement, the stronger the structure, but at the same time the lower quality. An excess of sand and water, on the contrary, leads to a loss of strength. Therefore, the 1:3 ratio has been tested and has been in demand for decades.
Dry screed consumption
The dry screed technology proposed by Knauf has been used relatively recently. Such a screed can be completed in a shorter time and with less labor. It is dust-free, gives the floor additional thermal insulation and is easy to install. The disadvantage of such a screed is the high cost of consumables. In addition, the thickness of such a screed compared to a cement screed is much greater and therefore cannot be used in rooms with low ceilings.
The procedure for performing such a screed is as follows:
“Cake” of dry screed
Sometimes it is possible to replace gypsum-fiber sheets with chipboard, asbestos-cement boards or thick plywood. Expanded clay can be replaced with slag or sand.
Let's calculate the consumption of materials for floor screed in a standard room with an area of 17 m2 (3x5.65 m).
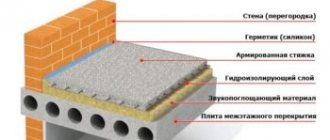
Waterproofing
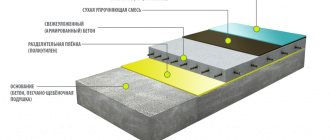
For waterproofing, both sheet materials are taken: polyethylene film, special membrane material hydrobarrier, roofing felt, and special mastics based on liquid glass or bitumen are used. Let's make a calculation for waterproofing from ordinary polyethylene film. This material is sold folded in sleeves, in rolls of 1.5 m. The film must be taken with a margin of about 15%, since allowances will need to be made.
We will take waterproofing as a basis using sheet material - polyethylene film. The film is calculated for the area of the room with a margin for allowances, that is, 15% more. If you lay the film lengthwise, then its width will not be enough for the allowances, so we will lay the film across the room. As a result, you need 3.20 * 2 = 6.4 m of film. It is better to round up and take 6.5 of plastic film.
Gypsum fiber sheets
When calculating, it is also necessary to take into account a small margin for cutting. Taking into account the reserve of about 5%, we obtain a floor area of 18.2 m. The area of one gypsum plasterboard: 1.2*0.6=0.72 m2. We divide the floor area by the area of one element and get the required number of sheets: 18.2 / 0.72 = 25.3 pcs. We round up to a whole sheet and find that we need to purchase 26 sheets.
Laying gypsum fiber sheets
If we take into account the engineering error coefficient, we find that we need 1 more spare sheet, that is, we will need 27 sheets of gypsum fiber sheets. If gypsum fiber sheets are replaced with another material, then the calculations are carried out in a similar way.
Edge tape and glue
The length of the required edge strip is equal to the perimeter of the room minus the width of the doorways. Thus, taking into account the stock, we need to buy 17 meters of edge tape. For these purposes, it is better to take a tape with a thickness of 8-12 mm.
When calculating the amount of glue, it is taken into account that 50 grams of it are needed for each square meter of gypsum plasterboard. Thus, one kilogram package will be enough for our room. If glue is purchased in tubes, then their quantity is calculated depending on the weight of 1 package.
Self-tapping screws for fastening
For a small-format sheet you will need at least 6 pieces of self-tapping screws. Taking into account docking, we will increase this number to 10 pieces. on one sheet. As a result, we find that we will need about 270-300 screws.
According to dry screed technology, the length of the screws should be 19 mm. In some cases, self-tapping screws 25 or 30 mm long can be used.
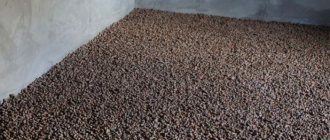
Expanded clay
According to the project, for every square meter of floor area 1 cm thick, 0.01 cubic meters of expanded clay are consumed. Considering that the room has an area of 17 m2, and the height of the backfill will be at least 3-4 cm in height, we find that 0.51-0.68 m2 will be required. This is about 500-700 liters. Taking into account the run-up, we take a large number and find that we need to purchase 0.7 m2 or 14 bags of 50 kg each.
If the room has a slope, then the consumption of expanded clay will increase, as the associated task of leveling the surface of the room will arise. In addition, you will also need profiles for beacons and various tools for performing dry screed.
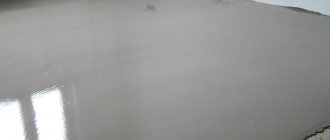
By following all the recommendations of specialists, you will receive a smooth, strong base of the floor.
Using specific examples, we showed you how to calculate the amount of materials required for both classic cement screed and dry screed. By correctly calculating the materials and performing all operations taking into account the recommendations of specialists, you will receive an even monolithic coating that will last for many years.
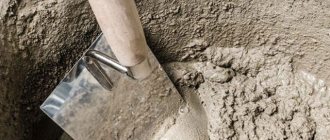
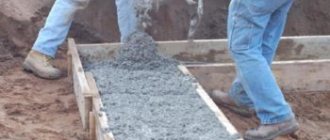
How to prepare the mixture
The solution begins to set within 2 hours. Therefore, make the mixture for a working period of two hours, otherwise the leftovers can be thrown away. The dry mixture should be poured into a large container. Cement and sand are first sifted through a sieve to get rid of debris and heterogeneous particles.
You can knead it using a drill with a mixer attachment. Do not stir by hand under any circumstances. No matter how hard you try, you will not be able to bring the solution to the desired state.
The poured solution is filled with water and mixed. If you plan to add something to the solution, then first, their additives are diluted in water and only then added to the mixture. The resulting solution should resemble thick sour cream in consistency. Leave the mixture for 5-10 minutes and then stir again. The mixture is ready.
Price for the finished product
The price of ready-made mixtures will depend on the labeling of the mixture and the manufacturer. And also about the weight of the bag. If you are going to fill the floors throughout the entire apartment, then look for wholesale stores, it will be cheaper. The price for 30 kg bags can vary from 50 to 300, depending on the labeling. The larger the coverage area, the more profitable it is to buy the mixture. If you take the most expensive solution for 300 rubles, then for a room of 10 sq.m. a layer of 5 cm will cost 6,000 rubles, and the cheapest one will cost 1,000 rubles.