It is advisable to carry out repairs only when the area of destruction is no more than 30% of the surface of the concrete floor. Otherwise, the old screed should be replaced with a new one.
You can read about the main defects in a concrete floor in the article Main defects in a concrete floor and the reasons for their occurrence
Concrete floor repairs are carried out in each individual case using individually selected solutions. Only a specialist can determine which mixture will be most effective and justified.
Causes of cracks in the floor
Before repairing a concrete surface, the causes of defects are identified. Defects on floors appear for the following reasons:
- Changes in the level of concrete screed. This is observed if it was laid directly on the ground and succumbed to seasonal fluctuations, which led to unevenness.
- Floor moisture. This disadvantage is caused by the hygroscopicity that concrete has, because due to the water absorbed by the solution, the floor material swells.
- Mechanical damage in the form of chips and cracks. Appear due to possible impacts or heavy loads on the surface.
- The appearance of cracks and potholes on the basis of the floor covering is possible due to the lack of shrinkage joints, filling with a solution of incorrect consistency and the absence of a reinforcing structure during construction.
- The formation of small holes around the entire perimeter occurs due to remaining air bubbles that were not compacted sufficiently when pouring the concrete.
- Peeling of the screed occurs due to insufficiently cleaned surfaces before pouring the solution.
- Dust on the screed is a consequence of pouring low-quality concrete.
Even if the concrete surface laying technique has been followed, cracks and chips may appear on it over time. The depth of such defects may indicate errors made during curing of the decked mortar. Thus, small cracks between two tiles most often appear due to temperature changes.
Even if the cracks are microscopic, the concrete floor must still be sealed
When, in addition to a crack, there is a difference in levels between the slabs, the problem is hidden in the “frame” of the floor, namely, incorrectly laid reinforcement. If a crack along its length is accompanied by changes in level, restoration of the damaged area may be more difficult than if the cracks occurred as a result of a sharp change in temperature in the room.
Every concrete worker's nightmare
A clear classification of the causes of cracks in the floor will help you understand this issue in more detail.
The reason that most often leads to the appearance of unevenness on a concrete surface is a violation of the ratio of the number of components included in the concrete solution. Namely, excess water content.
Yes, the mixture became more plastic, but during hydration, the evaporation of excess moisture caused defects. Typically, such cracks are shallow and have a capillary nature.
When dosing water into a solution, you should not be guided by the principle: “you can’t spoil the porridge with oil”
Inaccuracies during concrete formwork can also lead to unevenness and chipping. We must not forget about the characteristics of the soil that covers your area: incorrect calculations of this factor also lead to a violation of the integrity of the floor. Pouring mortar without precise calculation can lead to a difference in surface height.
It is necessary to correctly carry out calculations for laying concrete in a certain area. When making calculations, rely on SNiP standards. Excessive load on the coating and the lack of reinforcement that underlies it also have a detrimental effect on this solution.
Damage to reinforcement is a sure path to the speedy destruction of any reinforced concrete structure
When the reinforcement in a concrete solution rusts, the volume of metal components increases, as a result of which they break through the floor surface. This in turn leads to the formation of deep cracks.
Concrete, like any other substance, needs the right curing conditions. This helps maintain the normal consistency of the solution. Thus, laying the mixture in very hot weather is fraught with negative consequences for the floor, because the remaining moisture on its surface evaporates too quickly.
This leads to overdrying of the coating, the appearance of defects and excess dust, characteristic of an excessive increase in room temperature. Therefore, it is recommended to water the freshly laid base with plenty of water every day for 5-7 days from the moment of pouring.
Sometimes proper care of the laid base eliminates the question of how to repair cracks in a concrete floor in the future.
If the concrete was in conditions of high humidity, or waterproofing was not done, the material may also become covered with cracks and begin to “dust.”
Moving to a new level of quality
The basic requirements for a concrete coating are its mechanical strength, evenness of the surface and absence of dust.
An important factor determining the choice of a concrete floor is its relatively low cost (both of the materials themselves and of construction work) while ensuring a fairly long service life. Concrete floors in their pure form, that is, without an additional decorative and protective layer, find their application when it comes to large rooms and open-air areas. These are mainly warehouse and production areas, plus those related to automobile and other transport (hangars, garages, parking lots), as well as open warehouses, summer cafes, etc.
Moreover, open areas are in the most vulnerable position, since in addition to the standard set of loads they are subject to the destructive effects of ultraviolet radiation and changes in temperature and humidity. In this case, the concrete floor is destroyed, a network of small cracks, chips and sinkholes appears. Through the opening pores, aggressive components penetrate into the concrete body, which only increase the intensity of destruction.
If the concrete surface is subject to vehicle traffic, resistance to damage comes to the fore. When high-grade concrete (M300 or M400) is used to construct the screed, this creates a certain margin of strength for the coating for some time. But the use of low-grade concrete very quickly leads to problems.
The degree of damage to the floor depends on many parameters, but any coating will be scratched and worn out. Therefore, the main task is not so much to counteract abrasion, but to provide the surface with such quality that damage to the top layer will not be visible and will affect the strength of the coating as such.
Regardless of the brand, constant and very significant dust formation also occurs on the concrete surface. The reason lies in the composition of cement, or more precisely, the result of its interaction with the atmosphere. It is the salt compounds formed in large quantities that cause dust. Moreover, this process can continue indefinitely.
As a rule, for most concrete floors decorative surface design is not required, therefore the use of expensive polymer coatings is not entirely justified. However, the requirements for strength, durability, moisture resistance and lack of dust formation remain. Therefore, special compounds come into play - strengthening and dust-removing impregnations for concrete.
Preparatory stage
The basic preparatory process for all methods is as follows. The first step is to dismantle the floor covering. It is advisable to dry the floor for a day or several days before carrying out repair work, and then carefully remove all debris.
Rust, mold and old primer are removed with a wire brush. Grease stains and paint are removed with chemicals. The better the surface is prepared, the better the repair will be done. If the reinforcement is “exposed,” it is cleaned and anti-corrosion treatment is carried out. The further repair process depends on the damage.
Repairing Potholes
Leveling out a pothole.
As a result of the incorrect technological process of pouring concrete onto floor surfaces during operation, potholes are formed. Regardless of the nature of the damage, you should not delay repairing the resulting depressions. They begin to eliminate potholes as soon as possible, then the integrity of the structure will be preserved and further destruction of concrete coverings will not follow.
The purpose of repairing potholes in concrete screed is to seal the depressions as follows. Rectangular cuts are made along the perimeter of the formed recess with a depth of no more than 2 cm. The cuts are made using a grinder, after which the old coating and damaged areas of hardened concrete are removed.
For a natural, uniform setting of the repaired potholes, the special mixture is left to harden for the required time. After acquiring a mixture of its strength characteristics, the patches are polished with a grinding machine.
Features of dry screed restoration
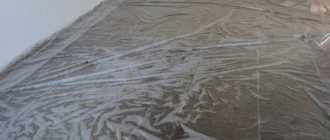
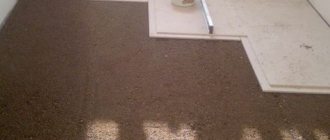
Eliminating defects in dry screed is fundamentally different from repairing wet and semi-dry self-leveling foundations. The first step is to dismantle the old floor and clear the floor or soil of debris. Then you need to cover the base with plastic film with a thickness of at least 50 microns. This will provide reliable vapor barrier and prevent the entry of moisture. Next, you need to install the aluminum U-shaped profile with the sharp edges up and fix it with gypsum mortar.
The next step should be filling the dry mixture, which can be expanded clay or quartz sand. The thickness of the backfill varies from 2 to 12 cm and depends on the type of structure and quality of the base. Next, lay the sheets of screed material, glue them with tile adhesive and fasten them with self-tapping screws.
Repairing Potholes
If the technology for installing concrete floors is violated, potholes appear in it over time. They can also form under high mechanical loads. Such damage should be repaired immediately to prevent further deterioration of the coating.
Before repairing, the pothole is cut around the perimeter to a depth of at least 2 cm. To perform this stage more thoroughly and accurately, a diamond disc is used.
The pothole around the perimeter is cut to a depth of at least 2 cm
The old coating is removed from the damaged area using a hammer drill and available tools. Debris is removed from the resulting recess. To remove dust from the area being cleaned, use a sandblaster or an industrial vacuum cleaner. The resulting cavity is coated with an epoxy primer and then filled with a repair compound. Then the mixture is leveled with a lath or rule. After the composition has gained sufficient strength, the area is sanded flush with the floor.
We suggest you read: Laying tiles on a wooden floor
How to make a base screed
On a pre-prepared and cleaned area, the solution is poured and a monolithic structure is made, absolutely even and smooth. It is made for both residential and industrial buildings and structures. The composition of the mixture may be different:
- Cement-sand;
- Cellular concrete;
- Self-leveling solutions, ready for use.
The peculiarity of the work is compliance with the technology of mixing the components, if it is not a ready-made purchased solution. The technique is simple, but requires strength and patience. This is hard work, and also dirty and wet, so it is carried out at the first stage of repair.
- Bound - poured directly onto a concrete base. Before this, it is coated with a deep penetration primer for better adhesion.
- With a separating or insulating layer - a layer is placed between the solid part and the solution - this can be thermal insulation, heated floor rolls. It is a more fragile structure.
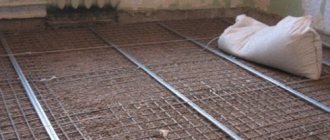
To enhance the strength of the entire structure, reinforcing objects are used. This is especially important if the thickness is large. Previously, metal mesh was used as reinforcement, selecting the thickness of the wire and the size of the cells. Today, more modern fiber fiber is used for these purposes. This synthetic fiber can be used as a mesh or added to the mixture as a binder. This is often used, but if the technology is violated in the future, the base surface may crumble.
Fiber fiber is more in demand in private buildings with light loads due to its lower price compared to metal mesh reinforcement. To avoid the negative consequences of improper installation and destruction, you need to adhere to the instructions and rules.
Removing irregularities
During the operation of a concrete floor, unevenness may appear that negatively affects the floor covering. Such defects often occur in new houses. To eliminate this drawback, it is necessary to level the floor. For this purpose, a milling machine is used, with which the surface is leveled, going deeper by 1 cm, and the prepared area is polished.
Using a milling machine, level the surface
After removing dust from the treated surface, the concrete floor is impregnated. To do this, use a polyurethane or epoxy primer diluted with solvent R-646 or solvent in a ratio of 1 to 10. The treated surfaces are filled with the solution and leveled with a lath or rule. The final sanding of the floor begins after the solution has hardened.
A type of defect on a concrete floor is uneven formations resulting from violations of the mortar laying technology. They worsen the strength characteristics of the structure, so it is important to remove them in a timely manner. This can be done with a milling device.
The process of removing unevenness begins with making recesses at the lower level of the floor and sanding them down. Remove the resulting dust and strengthen the problem area with a primer with the addition of polyurethane or resin.
Self-sealing cracks in concrete floors
In order to bridge cracks in concrete surfaces, prepare the following necessary tools:
- grinding machine;
- metal iron;
- wire;
- wooden slats;
- trowel;
- paint brush;
- putty knife;
- special gloves;
- brush;
- chisel;
- hammer.
A few instructions to help you deal with sealing cracks:
- Prepare your workspace. Inspect not only the crack itself, but also the areas adjacent to it. Otherwise, the places near the crack may eventually turn into depressions that will disrupt the integrity and symmetry of the floor.
- Using a hammer and chisel, work into the defective space and widen the cracks. If, when inspecting the floor, you find a hidden chipped part, remove the damaged surface completely. Cracks can be deepened using diamond wheels for cutting reinforced concrete.
- Treat the floor near the defect. A vacuum cleaner will help clean the surface from dust, also clean it with a brush and soapy water. Next, rinse the floor with water and proceed to the next step.
- Make a deepening in the crack so that the new solution can penetrate firmly and deeply into all fragile places. In this case, the restored part will last a long time and without problems.
- Now start preparing the solution. Its components should be as follows: sand and water (3:1) with the addition of PVA glue. The resulting mixture should not be too thick, or, on the contrary, too runny.
- Using a trowel, place the prepared mixture into the recess and fill the resulting mass with water. If you purchased a mixture of polymer compounds, wetting with water is not required.
- If the cracks are large, the components of the reinforcement can be visible through them. In this case, you need to clean the surface with a vacuum cleaner and soapy water, and then pour a specialized liquid into the damaged elements to prevent corrosion. In addition, small pieces of wire can be placed in the recesses.
- Prepare the adhesive compound and distribute it evenly over the damaged floor surface. The layer of adhesive solution should not be too thick (about 3 millimeters).
- Continue filling the cracks until the liquid begins to dry. Fill the surface gradually, without rushing: in this case, the liquid will fall more evenly on the surface.
- Level off the top of the applied compound. Use a rack to skim off excess mixture.
To properly seal cracks in a concrete base, it is better to make them wider
In the case when you want to know how to repair a hole in a large concrete floor, the answer is simple - distribute the layers gradually one after another, periodically moistening them with water between applying a new layer.
When laying the mortar, you need to know the following rule: the layer that you apply on top of the damage should be slightly higher than the floor level, which is why you should not overuse “trimming” the surface.
The fact is that when the solution dries, it settles a little and becomes flush with the rest of the surface. Using a sanding machine will help you adjust the floor more accurately.
The photo shows a freshly renovated concrete base
After completing the floor preparation, you can begin laying the laminate. This can be done 24 hours after completion of work, however, laying ceramic tiles usually requires more drying time for the composition. The video in this article will tell you in more detail about the reproduction of crack sealing work.
To seal cracks that have appeared on the surface, special sealants (most often silicone) are often used. Such devices correct defects of very different lengths and depths.
The process of working with silicone sealants is similar to the algorithm for working with classic mixtures: you need to clean out the cracks, make them a little larger and pour the prepared liquid into them.
Pouring the composition that comes in a special tube is convenient, practical, but more expensive than using a regular mixture
While spreading the layer, it is necessary to thoroughly wet the floor with water. The advantage of using sealant is its ability to dry faster compared to the previous option.
Did you find out how to repair cracks in a concrete floor quickly, effectively and relatively cheaply? So why not start this process right now, saving valuable time in the construction process.
Repair of cracks must also be carried out immediately after discovery of a defect. This is necessary in order to prevent the crack from enlarging, the edges from being painted, and liquid and debris from getting into the crack. In addition, a crack in the concrete floor can damage the floor covering. The smaller the defect, the easier it is to repair.
To repair a large crack, it is necessary to deepen the excavation.
The next stage is cleaning and removing dust using a construction vacuum cleaner. After these procedures, the edges of the seam are coated with a primer (epoxy or polyurethane), diluted with a solvent in a ratio of 1 to 10. Next, the crack is filled with a repair composition, which is an epoxy or polyurethane base and quartz sand as a filler.
The crack is filled with a repair compound
After the first layer shrinks, another crack is filled with the same composition. After the solution has hardened, the surface is sanded flush with the floor. Cracks that are too wide must be reinforced with metal staples.
We invite you to familiarize yourself with: Do-it-yourself well made of concrete rings: technology
For which two-centimeter recesses one and a half centimeters wide are cut into the cracks every 25 cm with a grinding machine. After adding the repair compound to the slots, reinforcement is laid, which is covered on top with the same compound.
Choosing the type of impregnation for concrete
The choice of impregnation type depends on several factors. It is necessary to take into account the surface quality, concrete grade, application conditions (humidity of the base being treated, temperature of application and polymerization of the composition) and operating conditions of the floor.
Silicate impregnation
One of the most popular is the silicate dust-removing impregnation Antidust. Its peculiarity is that the composition does not create its own film on the surface of the concrete floor. Strengthening occurs due to deep penetration of the material directly into the concrete structure itself and binding of salts, slags and other particles present there.
The concrete components are held together by approximately the same bonds as those present in its own crystal lattice. As a result, density and hardness increase, and the surface is sealed for the entire service life. During use, such floors acquire a velvety shine and an elegant appearance. The more the floor is used, the better it looks, the surface seems to be polished.
The silicate impregnation itself is water-based, so excess moisture in the screed does not interfere with it. However, this also imposes certain restrictions on the temperature range during use and during the period of concrete strengthening. The temperature at which the silicate composition is applied must not be lower than 5C (impregnation is most active at a temperature not lower than 10C).
Strengthening of concrete (14 days) should also occur at positive temperatures. A necessary condition is also the presence in the concrete body of the required concentration of cement binder corresponding to a concrete grade not lower than M200 (class B15). The fact is that impregnation uses them to create a continuous crystal lattice and if there is a lack of components, the processing efficiency is sharply reduced. Antidust is most effective when working with freshly laid concrete floors.
A polyurethane composition (for example, VL-Floor impregnation) creates a special layer on the concrete surface that is radically different from the structure created by impregnation with silicate material. The grade of concrete is no longer so important here. Polyurethane impregnation is a one-component highly dispersed material and is intended for processing and strengthening porous and weak concrete bases, preventing dust formation, priming screeds before laying decorative floor coverings and roll waterproofing. The composition is easy to use, has excellent adhesion to any concrete surfaces, and quickly polymerizes.
Penetrating deep into the concrete structure, the impregnation interacts with atmospheric moisture and polymerizes, forming a durable polymer concrete layer. This coating is elastic and can withstand small movements of the base, is frost-resistant and insensitive to prolonged exposure to water. The penetration depth of polyurethane depends on the openness of the concrete pores and the fluidity of the composition.
In weak porous concrete foundations, the material is able to penetrate to a fairly large depth. The higher the temperature, the higher the fluidity of the impregnation and its penetrating ability. But even low negative temperatures do not prevent the material from penetrating deep into the concrete to the depth necessary to ensure the required qualities.
Epoxy impregnation
The binder in the two-component water-based epoxy impregnation WB-Floor is epoxy resin. When the composition interacts with concrete, a mechanically strong and chemically resistant polymer concrete compound is formed. Since the impregnation is water-based, the moisture content of the concrete does not matter much. This is an easy-to-use, water-soluble material that has exceptionally high adhesion to all types of substrates.
We suggest you read: Dry floor screed as needed
A layer with unique characteristics is created in the upper part of the coating. It is capable of increasing the strength of weak concrete tenfold; the floor surface becomes chemically resistant and absolutely impervious to moisture, even maintaining negative hydrostatic pressure. The main restrictions are imposed by temperature. Application of the material and its complete polymerization must occur at positive temperatures.
End: Technology of applying impregnations to concrete surfaces
Dust removal of concrete floor screed
The essence of dust removal is treatment with special penetrating compounds.
With frequent, intensive use of concrete surfaces, increased dust formation occurs. Cement dust can greatly harm human health and compromise the integrity of the floor, which deteriorates over time. Such floor problems can only be corrected by repairing the base.
Dust removal can be ensured by applying coloring agents or a special composition to the surface, which is used to cover problem areas to reduce the formation of dust. The coloring composition impregnates the screed to a depth of half a centimeter and serves as a barrier to dust. The use of coloring materials creates the ability to withstand the effects of negative temperatures.
Such compounds resist chemical compounds and increase the wear resistance of materials under various friction conditions. Repairing the floor in this way will not require large financial costs and physical effort. Painting the floor to prevent excessive dust formation is popular due to the ease of work and the possibility of doing it yourself.
Carrying out screed repairs: cracks are widened, reinforced, puttied.
During operation, repairs to the floor screed may be required. However, repair work depends on the type of defect. One of the most popular defects in screeds are chips and cracks, as well as peeling and hidden empty formations. To detect voids, you need to tap on the floor with a metal rod; broken areas of the screed will have a distinctive dull sound.
If the damaged area is large, a major repair of the screed will be required, i.e. its complete replacement. Installing a new screed does not require much effort, but requires compliance with certain rules:
- The area of the screed that requires repair is cleaned of possible debris, dust and other contaminants. This can be done using cleaning solutions designed for concrete.
- To ensure strong adhesion of the repair mixture to the problem area of concrete, primers are used. If the room humidity is high, water-repellent primers are used.
- In order not to compromise the strength of the laid new concrete screed, operation begins 28 days after pouring the solution; premature use will lead to a decrease in the strength characteristics of the concrete.
- Before starting work on pouring the screed, the floor must be sanded with specially designed machines and get rid of dust and debris.
- The cleaned and sanded area is coated with a primer and then with a surface self-leveling agent.
- After pouring concrete mortar, air bubbles often form on the screed; to remove them, go over the top with a needle roller. If necessary, apply another layer of solution.
When replacing the floor covering, apartment owners often have to deal with the need to repair the concrete floor, which can be either a concrete screed or the interfloor floor slab itself. Despite the fact that concrete is a durable and reliable material, under the influence of various factors, potholes and cracks can appear on it.
Defects on a concrete floor can form for various reasons, which are primarily associated with violations in the process of its arrangement.
Cracks often appear due to the absence, untimely cutting or incorrect calculation of the thickness of joints in concrete floors, designed to prevent stress on the concrete during thermal expansion and shrinkage. A correctly made temperature-shrinkable seam will avoid many problems.
Other reasons for the appearance of cracks include:
- a large amount of water in the solution when pouring a concrete screed or a lack of it;
- poor quality reinforcement;
- lack of waterproofing of the base.
Defects can occur even with quality work done. Any coating is subject to natural wear and tear and is negatively affected by excess moisture. Potholes are caused by physical forces. The influence of external factors on the concrete floor cannot be ruled out. The weak point is the junction of the wall and the floor; cracks often appear there.
It is necessary to determine the type of damage. This will allow you to draw up a work plan and select the right material. The following types are often encountered:
- small depressions, potholes;
- cracks of various sizes;
- the finest cracks and chips.
Repairs should not be delayed for a long time. The size of the defects may gradually increase, the concrete will begin to crumble and come off in pieces, which will complicate the repair of problem areas.
Before you start repairing the floor in an apartment with your own hands, you need to prepare a mixture for restoring concrete surfaces and structures. They are presented in large quantities in construction stores. In order to choose the right brand of mixture, you need to determine the degree of damage to the concrete surface:
- First degree - there are cavities and shrinkage cracks.
- Second degree – surface peeling, small chips.
- Third degree - cracks within 2 mm with a depth of no more than 40 mm.
- Fourth degree – cracks more than 2 mm, depth up to 10 cm.
- Fifth degree - large potholes and cracks, depth more than 20 cm.
The purpose of the repair mixture must be indicated on the packaging. Such manufacturers of mixtures for restoring concrete surfaces as Emaco, Birss, Ceresit, and Bars deserve attention.
You can use universal repair mixtures, such as Ivsil Render.
Since the price of special thixotropic compositions containing reinforcing microfibers and polymers is quite high, for a small amount of work the mixture can be prepared independently. To do this, take 1 part PVA glue and mix it with 4 parts water. Using this solution, using a construction mixer or a special attachment on a drill, mix the sand-cement mixture in a ratio of 1:3.
We suggest you read: How to make a concrete floor screed with your own hands
After choosing the material for repairing concrete floors, you should begin the repair. First comes the preparatory stage:
- All foreign objects are removed from the room.
- Existing debris, concrete chips and dust are swept away. Potholes and cracks are thoroughly cleaned with a vacuum cleaner.
- Any dirt, rust, mold or old soil is removed with a stiff metal brush.
- To remove grease stains, you need to use a special solution.
- The concrete floor is swept with a wet broom, then it needs to be dried.
- If the reinforcement is visible, it should be cleaned with sandpaper and primed with a compound with anti-corrosion properties.
It is better to tap areas of the concrete surface that have lost strength with a hammer and clear them. The rule also applies to the edges of problem areas.
Repairing concrete floors begins with widening and deepening the pothole around the perimeter. It is better to use a grinder with a diamond blade for this.
- The cut is made 1 cm deeper than the defect. The pothole widens to the sides by 2–3 cm. If necessary, these figures are increased.
- Using a hammer drill or a hammer with a chisel, a recess is made at the site of the pothole; a rectangular depression should be obtained. If a hammer drill is used, it is better for strangers to move away.
- The recess is thoroughly cleaned with a vacuum cleaner and primed.
- You can fill the pothole after the soil has dried. The mixture is carefully leveled and pierced several times to remove air. You can use a metal pin or trowel. Level the surface using the rule.
The depth of the pothole matters. If it is more than 5–6 cm, then the composition is poured in several layers. The maximum layer thickness is 2 cm.
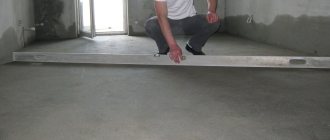
- After hardening, they proceed to grinding. A building level will help you achieve a level concrete base.
It is recommended to carry out work wearing a respirator, safety glasses and gloves. Windows must be open during renovation. The floor can be coated with concrete paint, which will provide additional protection. It is selected specifically for residential premises. A floor repaired in this way will last a long time.
The process for sealing cracks in a concrete floor varies depending on their size.
- Small cracks expand in depth and width by 2–5 cm. To do this, you can use a chisel or grinder.
- The recess is cleared of pieces of concrete and dust, then treated with a primer.
- To repair cracks in a concrete floor, use a homemade mixture based on PVA. They fill the crack with it and wait for it to shrink.
- A second layer is applied, dried and sanded.
In cases where cutting is accompanied by heavy dusting, which indicates that the concrete is weakened, it is necessary to use only special thixotropic compounds.
Repairing cracks in concrete floors should not be put off for too long. If they are deformable, then they need to be treated with special attention. You can determine their type using strips of paper. Several months before repairs, they are glued to cracks in the concrete floor. With shrinkage cracks, the paper will remain intact; with deformation cracks, the strips will break, which indicates their expansion.
- Such a crack is sawn 5 cm deep and 3 cm wide.
- The edges of the cut get knocked down and a triangular notch is formed.
- After thorough cleaning, the recess is primed.
- Markers are inserted into the crack in 3 m increments.
Markers are thin, smooth metal rods. You can make them yourself from spokes from a bicycle wheel.
- The crack is filled with a thixotropic compound; the use of homemade mixtures in such cases is not recommended
- The concreted area is sanded after drying.
- The marker rods are removed, and a new expansion joint is cut through the holes left behind them.
- Dust is removed from the seam, and a Viloterm cord or its equivalent is placed in it.
- The seam is finally sealed with silicone or polyurethane based sealant.
https://www.youtube.com/watch?v=
Some people notice small cobweb-like cracks on the floor, as in the next photo. Over time they may become wider. When the concrete weakens in this part, they are cleaned and covered with soil. To seal, you can prepare your own composition or use a store-bought one.
Main types of defects
To properly repair cracks in a concrete floor, you need to know what they are.
The size of the cracks directly determines the choice of method to eliminate the problem.
- Microcracks. These are defects less than 1.5 cm in size. Most often they occur due to improper drying of the coating. If there are few such defects on the screed, then you can simply cover them with tile adhesive.
- Large cracks. The size of such defects is from 2 cm. They usually appear due to incorrectly made expansion joints and the absence of a damper tape. To seal such cracks in the floor screed, use a cement-sand mortar or a special sealant.
- "Movable" concrete. When walking on such a surface, you feel like it is “walking.” This is due to the presence of air cavities inside. In this case, you need to remove the exfoliated fragments and seal the potholes with a solution.
- Bulges and potholes no larger than 5 mm. In this case, cracks in concrete are eliminated using cement mortar, and bulges are cleaned off with a grinding machine.
- Irregularities of more than 1.5 cm. Correcting each such defect is time-consuming and labor-intensive, so it’s easier to pour a new screed about 4 cm thick on top.
If a large number of defects are detected, it is cheaper to fill in a continuous layer of self-leveling mortar
Restoration of expansion joints
The strength of concrete has been tested for years, but over time, during operation, problems begin with the seams of the concrete base. Damage to seals and the formation of destruction can be corrected as follows:
- widen the problem area of the seam using a diamond disc and trim off the sloppy edges;
- remove accumulated debris, dust and flaking areas;
- apply an epoxy primer to the inside of the seam;
- fill the seam with a solution of cement and polymer;
- Marks are placed to identify the seam using a special marker-rod along the length of the seam, a step of at least three meters is observed;
- after the special repair composition has hardened, the seams are sanded;
- the previously fixed marker-rods are taken out and a new expansion joint is cut in that place;
- the resulting dust is removed from the seam and sealed using silicone sealant.
Concrete floor overhaul
The described methods are applicable if the damage is minor. In case of major damage, major repairs of the concrete floor are required. The best option in this case would be to make a new concrete screed. The process is not very complicated, but it requires compliance with some rules:
- The surface to be repaired must be as clean as possible from debris and dust; special mixtures for cleaning concrete surfaces can help with this;
- For maximum adhesion of the solution to the surface, be sure to use a primer; for wet rooms it should be water-repellent;
- Complete hardening of the screed lasts about a month, during which time it is forbidden to influence the coating.
Before screeding, the entire floor surface is sanded using a grinding machine and cleaned of debris and dust. The prepared area is impregnated with epoxy or polyurethane primer. A self-leveling compound is applied to the surface of the base in a layer of 5 to 10 cm. After which it is recommended to walk over the surface with a needle roller to remove air bubbles. If necessary, apply a second layer of the mixture.
After applying the composition, it is recommended to walk over the surface with a needle roller
A defect in the concrete coating noticed in time and its immediate elimination will significantly increase the service life of the structure. Using the described technologies in each specific situation, you can extend the life of the floor and avoid significant financial costs. And taking the correct measures for the operation of the coating (dust removal of the floor) will help reduce dust in the premises and eliminate harmful effects on the human body.
Modern topping technology
If the use of impregnations often refers specifically to the repair of concrete floors, then strengthening the floor even at the pouring stage is possible using reinforcement and other means. Reinforcement has already been discussed above. But another option is to use a topping technique, which makes it possible to provide the concrete structure with greater resistance to various adverse factors.
We suggest you read: How to glue isolon to a concrete wall?
The topping is represented by dry mixtures, including cement, polymer additives and fillers of various natures (for example, quartz).
Research conducted on the use of topping has shown that concrete floors reinforced using this method are able to withstand significant loads and become impact-resistant.
It is noted that the level of wear resistance of concrete reinforced using topping technology is 8 times higher than M350 concrete, approaching its characteristics to M800 concrete.
Concrete reinforced using this method is able to withstand the influence of diesel fuel and gasoline, but is slightly less resistant to aggressive chemicals (for example, acids).
Using this amplification technology, the process is also divided into preparation of the base and main work. First, prepare a concrete cushion from high-quality compacted crushed stone and sand. After this, a concrete screed is performed. In accordance with the project, reinforcement is carried out or formwork is installed, and a vapor barrier layer is laid.
The concrete laid on the surface of the cushion is leveled using special devices. Today, beacons or vibrating screeds are often used.
After laying the screed and drying it, wait a while to allow the concrete to acquire the necessary strength. Next, the concrete is rubbed with specialized mechanisms, achieving its ideal smoothness.
Concrete grouting is done twice. First, a rough grout is performed to eliminate significant surface errors. For the second time, finishing grouting is already carried out using the blades of troweling mechanisms, also called “helicopters”. It is at this moment that topping technology is introduced: the topping mixture is scattered on the concrete layer and then it is rubbed into the concrete thickness using the same mechanisms.
As a result of applying the topping, the floor surface becomes smooth and resistant to abrasion.
To strengthen the base screeds for further installation of the finishing, topping is often used - these are dry substances that are applied on top of the areas. This method is suitable for strengthening only the prepared screed before it hardens. The toppings are mashed and pressed into the hardening base using a machine.
- Increases the wear resistance of screed concrete - grade 400 becomes equal to 800;
- Improved performance characteristics and ease of further maintenance;
- Obtaining an antistatic effect;
- The ability to change the texture - grainy, smooth or mirror-like using grouting equipment.
The rubbed topping mixture may include cement, color pigments, and various fillers; the quality of the technique and the result obtained depend on this. They come in quartz (concrete floors in shops, garages, parking lots and warehouses), metallized (in workshops) and corundum (also increased strength, but moisture resistant).
