Cement-sand screed (CSS) is used to level stone and concrete floors and create a base for a final coating. At the same time, it improves the sound and heat insulation properties of the base.
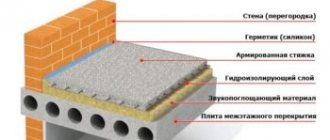
The use of this leveling method is limited by the large specific gravity of the DSP. With a screed thickness of 10 mm, its weight per square meter can reach 20 kg. Taking into account the fact that its minimum thickness cannot be less than 30 mm (this thickness avoids cracking of the screed and its crumbling), and also taking into account the weight of the thermal insulation and the finishing coating, one square meter of floor will weigh about 70-75 kg. This is the weight of the floor at the minimum permissible thickness of the DSP. A 50 mm thick layer with tiles as a finishing coating will increase this value to 130-140 kg. Therefore, cement-sand screeds are used to level floors in buildings where the structure of load-bearing floors is designed for a payload of 300-400 kg/m².
The large weight of the DSP structure is, to a certain extent, its main disadvantage. Another disadvantage of cement-sand screed is the significant time required for it to dry completely. 40 mm thick DSP dries in 7 days, but each subsequent 10 mm thick requires an additional 15 days for each of them to dry.
Cement-sand screed: composition, methods of execution
In terms of its composition, CPS can be a regular cement-sand mortar or made from dry mixtures. The composition of such ready-made mixtures varies for different types of screed.
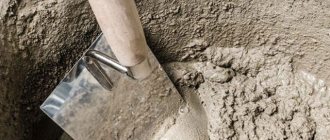
The solution for the cement paste is mixed from a mixture of cement (1 part) and sand (2.5-3 parts) with the addition of water (0.5 liters per 1 kg of cement). Plasticizers, modifiers and fillers are added to such a solution. The addition of these components to a cement-sand mortar eliminates the threat of cracks, increases the ductility of the screed and promotes rapid strength gain compared to a mortar mixed without additives.
In construction, ready-made dry mixtures are mainly used to prepare mortar. The packaging of the finished mixture indicates the volume of water required to prepare the solution and the consumption of the mixture per unit area for different screed thicknesses.
Requirements for the composition of mortars are determined by GOST 28013-98 “Construction Mortars”.
There are the following methods for constructing a DSP:
- Wet. A ready-made mixture is used for screeding.
- Semi-dry. The mixture is mixed at the work site.
- Dry. Dry backfill is used and then covered with sheet materials.
The popularity of semi-dry DSP is explained by the ability to significantly reduce surface hardening time. Typically this time is several hours. The use of semi-dry screed minimizes the risk of subsequent cracking and avoids leakage of water from the solution through the floors.
What is dry screed
The name “dry floor screed” indicates that no water is used in its implementation. The classic “wet” version involves the use of a semi-liquid mixture of sand, cement and water. Due to the force of gravity, which forces the liquid to be evenly distributed over the volume it occupies, a perfectly flat surface is ensured. It would seem that you could come up with something better? However, specialists managed to create a fundamentally new technology, the implementation of which is accessible to the average person.
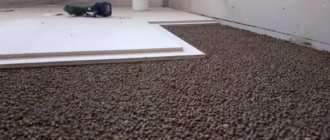
The floor, made on the basis of dry screed, is a multi-layer structure. The first layer is dry backfill, then gypsum fiber sheets (GVL). This dry-pressed floor screed creates excellent sound insulation and retains heat well. It will take no more than 2 days to create it, depending on the volume of work. The only limitation for doing dry floor screed with your own hands is wet rooms. Absorbing moisture from the air, expanded clay or other filler loses its shape and swells. As a result, the floor is no longer level and the finish is deformed.
Manufacturers offer several options for dry mix for floor screed. They differ in the complexity of preparation and purpose. They are selected taking into account the characteristics of the base:
- Alpha - suitable for smooth floors;
- Beta - for a flat base covered with a layer of porous or soundproofing material;
- Vega - laid on a leveling, soundproofing layer;
- Gamma - designed for laying on a leveling layer of backfill, after laying thermal insulation materials with a layer of gypsum boards.
The finished screed is somewhat reminiscent of a layer cake. It can be laid on a concrete or even wooden base. You can safely lay communications inside it. It is perfect for installing heated floors and has a positive effect on its energy efficiency.
Features of semi-dry DSP with fiber fiber
Our method of installing cement-sand screed is relatively new. In addition to plasticizers and modifiers, fiber fiber is added to the mixture of cement (in this case Portland cement is used) and fine quartz sand. As a result, the structure is reinforced using this component of the solution and traditional mesh reinforcement becomes unnecessary.
This technology (also called German) provides additional advantages:
- The cost of installing a cement-sand screed with fiber fiber is less than the cost of installing a screed with conventional reinforcement.
- The installation of such a screed takes significantly less time due to the reduction in the drying time of the surface. This is achieved by reducing the volume of water used when mixing the solution. The screed is ready for laying the topcoat after 4 days.
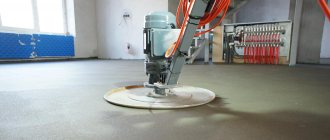
- The DSP device with fiber fiber results in a completely flat base surface. This is achieved using a trowel, which eliminates all microdefects on the surface of the screed.
- In terms of impact resistance, such a screed fully complies with SNiP 22.03.13-88.
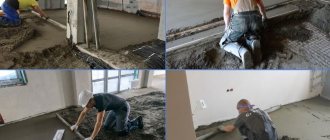
Installation of cement-sand screed
To obtain a high-quality screed, compliance with the technology of its construction is required.
Surface preparation
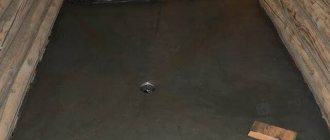
The surface under the screed device is thoroughly cleaned beforehand, pieces that flake off when tapped are removed. The surface to be prepared should be swept and, if possible, cleaned with a vacuum cleaner. Technological holes in the base and potholes are sealed with mortar and leveled.
Then the surface is primed. Using a primer will increase adhesion between the screed and the base. The primer eliminates the possibility of displacement of the lower layers of the screed during operation. The primer is applied in two layers, the second layer should be applied after the first has dried.
The damping tape is laid around the perimeter of the room after the applied primer has dried. The tape serves to seal the room and protect the screed.
Screed level marking
Marking is faster and more convenient to do using a laser level. Do not forget that the thickness of the cement-sand screed cannot be less than 30 mm, otherwise the screed will crumble and crack. The thickness of the screed in a particular room is determined by the design or, in its absence, by the need to solve specific problems (hide communications, level the level of the base with a large slope, etc.). The laser level is installed on a base in the center of the room and marks are made on the walls at the desired height. The point where the laser level is installed should have the maximum height in the room.
Installation of beacons
Beacons are the guides along which the surface of the screed is leveled. Accordingly, the quality of the cement-sand screed directly depends on the correct placement of the beacons.
To install screeds, ready-made metal or mortar beacons are used. The use of ready-made metal beacons greatly simplifies the work process.
The beacons are laid out strictly parallel along the surface. The width between the beacons depends on the length of the rule used and should be 200 millimeters shorter. If the rule has a length of 2000 mm, the beacons are laid out at a distance of 1800 mm from each other.
After marking the level, the beacons are raised to the required height and fixed using the mortar from which the screed will be made, building plaster or alabaster. Important! Beacons should not have deflections along their entire length. In places of deflections, gaskets are installed so that they are at the desired height, and the beacons are fixed.
Very important! If there is no door installed in the room, the level of the screed installed should not overlap the level of the future door. This can be avoided by starting work from the doorway.
Domostroy42
The quality of the screed has a huge impact on the quality of the floor. Screeds can be solid from cement-sand mortar (they are called wet) and prefabricated (dry). The traditional screed is made of cement-sand or concrete mortar. However, dry technology turned out to be more economically attractive compared to cement-sand technology and has recently been increasingly introduced into construction practice. This option for flooring is used both in the construction of new buildings and in the renovation of old buildings. The essence of a prefabricated floor with a dry screed is as follows. A fairly thick layer of dry backfill is applied to the floor slabs. The top is covered with durable sheet material (dry screed). And the finishing floor is already laid on it. The number of layers and materials used may vary depending on the characteristics of the floor and the requirements for its quality. Dry backfill flooring can be laid not only on slab floors, but also on floors with joists (both stationary and adjustable). In general, the idea of backfill prefabricated floors has been known for a long time and was widely used in our mass housing construction 30-40 years ago (for example, floors like P-71g-2, Pd-66v-2 MNIITEP). In recent years, prefabricated dry floors have received a new round of development thanks to the development of a comprehensive material system from KNAUF and OPTIROC. Why are such floors attractive? Why do they turn to them again and again? The answer follows from their very name. The main thing is that during installation it is possible to avoid wet processes associated with concrete work. As a result, the labor intensity and duration of the construction cycle are reduced, it becomes possible to easily lay communication lines in the screed, provide high heat-insulating properties of the floor, and sometimes the required sound insulation.
Such floor subfloors are preferable in the following cases: • during reconstruction and repair of old buildings, especially with wooden floors, since it becomes possible to reduce the load on supporting structures; • when it is necessary to prepare the base of the floor at an accelerated pace; • in winter, when it is impossible to perform a wet cement-sand screed; • when installing heated wooden floors.
The main problem with these foundations is the fear of moisture, and leaks are simply fatal for them. That is why a vapor and moisture insulation layer is always laid under the base of the floor, on the ceiling. Next, bulk material is applied to it, which serves to create a flat surface for the flooring, as well as to provide the necessary level of thermal insulation and sound absorption. The vapor and moisture insulation layer protects the backfill located on it from moisture, which inevitably occurs in direct contact with the ceiling. Why does moisture appear on the ceiling? There are two main reasons. Firstly, vapors always penetrate from the room below. Secondly, moisture can be released from the concrete floor (due to excess water in the mixture or suction from the walls). For vapor and moisture protection, ordinary polyethylene film with a thickness of 200-250 microns is most often used (in the case of reinforced concrete floors), glassine or bituminized paper (for wooden floors), as well as more modern universal vapor barriers such as “Yutafol N”, “Svetofol”, etc.
For backfilling of prefabricated floors, materials are suitable that have: • an optimal granular composition, ensuring their minimal settlement under the influence of static (furniture) and dynamic (dancing, morning exercises) loads; • high porosity, which determines their thermal insulation properties and sound absorption; • good flowability - for guaranteed leveling; • low hygroscopicity - to avoid increased humidity; • mineral composition - for fire safety purposes.
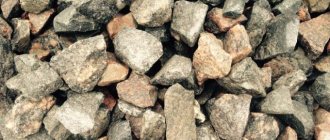
Such backfills are materials specially selected according to grain gradations. Expanded clay production screenings, expanded perlite sand, quartz and silica sands, fine-grained slag and similar dry inorganic bulk materials with a maximum particle size of 2-5 mm and a moisture content of about 1% can be used. If the surface of the floor slab on which the floor base rests does not require leveling, instead of backfill you can use slabs of extruded polystyrene foam (PSB-35, PSB-50) laid tightly together. Also, polystyrene foam boards are used in addition to the backfill to provide the required thermal protection and sound insulation, if the backfill itself does not provide them (for example, quartz sand).
The thickness of the backfill depends on the quality (quantity and size of irregularities) of the surface of the floor slab, as well as on the presence and features of utilities and other equipment. Usually the layer thickness is 30-50 mm, but it can be more. With a thickness of over 60 mm, the dry screed is reinforced with an additional layer of slabs. You can make a dry screed from moisture-resistant gypsum fiber sheets (GVLV) of both regular and reduced size, from waterproof plywood, from chipboard (chipboard), tongue-and-groove oriented particle boards (OSB), asbestos-cement sheets. Recently, prefabricated floor elements made from two gypsum fiber sheets glued together and combined prefabricated elements with an additional polystyrene foam layer (KNAUF) have appeared on sale.
When installing a dry screed, you must keep in mind that in the event of an emergency leak, the slabs may swell, and then the front covering will deteriorate. Therefore, if you do not exclude leaks, you should consider applying waterproofing. In addition, it is advisable to coat wood-based materials with a fire retardant compound. The installation of floors with dry screed begins after all sanitary, electrical and finishing work has been completed. Testing of plumbing and heating systems must also be completed.
Installation of a prefabricated floor begins with preparing the floor surface. First, remove the old floor (if any), seal the gaps between the floor slabs, the gaps between the floor and the walls, mounting recesses and potholes with a cement-sand mortar of at least 100-150 grade, and thoroughly clean the floor from construction debris. Then, using a hydraulic or laser level, a mark of the surface of the backfill is applied to the wall and a polyethylene film is used to protect it from vapor and moisture. To do this, the film is laid with an overlap of adjacent strips of at least 15-25 cm so that near the walls it rises to the dry screed. To eliminate “sound bridges” and curvature of the finished floor from thermal expansion of the base, a gap of 8-10 mm wide is left along the walls along the entire perimeter of the floor. Sound insulation is placed in it - usually in the form of an edge strip made of M75 or M100 mineral or glass wool, polyethylene foam or other similar material. The backfill is placed on the film and leveled using a rack according to the marking level.
The laying technology is determined by the type of sheets used. Gypsum fiber sheets are laid over the backfill in two layers, firmly fastening them together during installation with glue and self-tapping screws. The seams from the fasteners are puttied and sanded. A floor with a base laid in this way can withstand the same loads as floors with a concrete screed. The base has an impact noise reduction index of 18-22 dB.
Floor elements made of factory-glued moisture-resistant gypsum fiber sheets offset relative to each other in two directions, as well as particle boards, plywood and other sheet materials are laid, depending on thickness, in one or two layers. The surface of the screed is covered with bitumen waterproofing. Cable and film electric heaters can be used with dry screed. A dry prefabricated floor with materials and labor costs approximately $10/m2.
Material consumption for the installation of 1 m 2 floor using leveling backfill and gypsum fiber sheets (excluding losses) Polyethylene film 1.15 m 2 Edge tape Depends on the perimeter of the room Dry backfill with a thickness of 10 mm 0.01 m 3 Gypsum fiber sheet 2 m 2 Adhesive mastic 0.5 kg Screws for fastening sheets 3.9 * 19 m 24 pcs. Putty "Fugenfüller GV" 0.1 kg Primer "Tiefengrund" ("KNAUF") 0.2 l
Installation of a dry prefabricated floor using gypsum fiber sheets and dry backfill on a slab base
The design of a prefabricated dry floor, where a dry screed is laid on a layer of foam material - polystyrene foam. The surface of the floor slab did not require leveling
Layout of a floor with prefabricated slabs: 1 - base; 2 - logs; 3 - rough flooring; 4 - waterproofing; 5 - dry backfill; 6 - floor element; 7 - edge tape
The grain composition, the strength of the granules, and their moisture content have a decisive influence on the load-bearing capacity and settlement of the floor. Not much dust is released during the filling process, and the room is easily cleaned of it.
Prefabricated dry floor made of gypsum fiber boards on a wooden base, laid on joists with a wax-impregnated paper lining and carpet covering
Mixing the solution and installing the screed
After the solution under the beacons has dried, the surface of the base is moistened with water. An ordinary cement-sand mortar is mixed based on the proportion of 1 part cement to 3 parts sand with the addition of water at the rate of 0.5 liters per 1 kg of cement. The solution is mixed using a mixer or a drill attachment.
The solution from ready-made dry mixtures is mixed according to the instructions on the package. Plasticizers and modifiers are also added according to the instructions.
Important! Work on installing the screed begins from the most inaccessible places in the room, from the wall opposite the entrance, and is carried out towards the door to the room.
The solution is poured onto the base and pulled out using the rule.
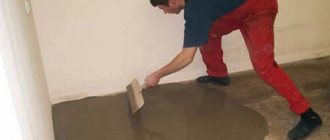
Leveling the surface of the screed can be done with a trowel or manually. In the second case, a grouting mixture is prepared (in a ratio of 1 part cement to 1 part sand). The result should be a smooth surface of the cement-sand screed.
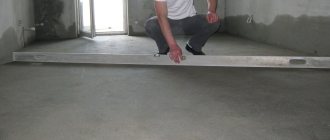
Important! The horizontality of the screed is checked after completion of work on its construction. You can use a laser or regular construction level.
After completing the screed installation, its surface should be moistened with a wet roller and covered with plastic wrap for a day. Repeat the procedure a day later. The drying time of the cement-sand screed is determined based on the thickness of its layer: 7 days for complete drying of a 40 mm thick layer, plus 15 additional days for drying of each next 10 mm of screed layer.
Adding modifiers and plasticizers to the solution will significantly reduce the time between completion of the screed and the start of finishing work on the floor in the room. In addition, the screed will not crack.
How to make a dry floor screed
When starting a repair, each master decides the question: what can be done independently, and what work will require the involvement of specialists? Dry floor screeding is completely doable with your own hands. The technology is simple and does not require the use of complex equipment. If you carefully study the order of execution, there will be no difficulties. Here it is important to adhere to the accepted rules and use materials recommended for dry floor screed.
A common mistake made by craftsmen is to neglect the installation of damper tape. Its absence will make itself felt immediately after the floor begins to be used: creaks and sounds will prevent you from enjoying the new renovation. The tape can be glued to PVA, double-sided tape, or secured directly to polyethylene with a stapler.
Another important question: what to choose as backfill? There is no strict requirement - sand, expanded clay or slag. These materials have similar characteristics: they do not burn, retain heat, and do not shrink. The thickness of the layer should be at least 3, but not more than 6 cm. If the floor is flat, you can do without it altogether. Then, instead of backfill, slabs of extruded polystyrene foam are used.
When starting to install a dry floor screed made from gypsum fiber board sheets, it is important to avoid directly walking on the backfill. Therefore, the sheets begin to be placed immediately from the door. When one sheet is laid, the floor still “moves” under your feet. There is no need to be upset: each subsequent sheet gives the structure the required stability.
Installation work can be carried out at any time of the year. The main thing is to follow the technology exactly, laying out “layers” of waterproofing film, a leveling layer, surrounded by a damper tape, and sheet material as the basis for the finishing coating.
