- In the interior
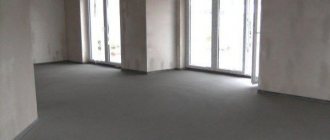
After the construction of a private house, they begin to lay utilities and interior decoration. One of the important stages of the work is screeding the floor in the cottage, the execution of which largely determines the quality and aesthetics of the flooring.
There are a number of technologies for installing screeds in the house, each of which is effective in specific conditions. Any type of screed foundation can be used in cottages; to choose the best option, it is useful to know their types, physical parameters, installation and operation features.
Fig.1. Pulling semi-dry screed in cottages is a rule
Screed mortar
Let's try to do this seemingly complex type of work, such as floor screed, with our own hands. There are a large number of different ready-made floor screed mixtures on sale. But if we decide to completely do it ourselves, we will prepare the mortar mixture in the traditional way, cement and sand.
The amount of this material directly depends on the thickness of our screed. The solution is usually prepared in proportions of one to three, one part cement to three parts sand. Cement can be used PC - 400 D 20, i.e. with various additives. Sometimes they use ShPC, the so-called slag cement - Portland cement, we will use regular PC.
Types, device technologies and features
Each of the screeds discussed below is applicable for leveling the base in any type of cottage premises. The choice of option depends on the owner’s finances, operating conditions, coating requirements (thermal, noise, sound, hydraulic insulation).
Dry
The technology of dry (bulk) screed is one of the innovative developments of the German company Knauf, which produces a full range of building materials and tools for its installation. The sequence of laying bulk floors according to the Knauf method consists of the following steps:
Fig.3. Stages of installation of backfill floors
- A polyethylene (PE) film with a thickness of 100 to 200 microns is laid on a base cleared of dirt and dust (usually a concrete floor slab). Its edges, 70 - 100 mm long, are placed on the walls and secured with a stapler (painting tape, tape).
- A damper strip with a width of 70 mm or more is attached in a similar way along the perimeter of the walls.
- Metal beacons from a rack profile for plasterboard or specialized ones from Knauf for surface broaching are installed on the base using a laser level; their height from the slab is taken to be at least 50 mm.
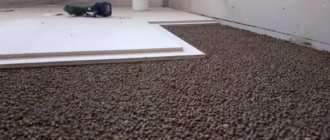
- Next, expanded clay backfill from bags is poured onto the floor and leveled using a rule along the lighthouse guides, periodically compacting it with a polymer trowel.
- After filling the expanded clay, the beacons are removed, and reinforcing sheets made of moisture-resistant (letter B at the end of the designation) gypsum fiber (GVLV) or gypsum particle board (GSPV) are placed on the filling. Cuttings of these sheets are placed to pass along the filling to avoid its pressing.
- Reinforcing sheets are placed joint-to-joint with spacing.
- Next, floor elements made of GVLV with teeth are mounted on the sheets, allowing them to be mounted overlapping each other. The sheet elements are fastened using PVA glue and cone-shaped self-tapping screws using gypsum plasterboard; they are placed with a spacing and overlapping seams of the reinforcing base.
- Upon completion of the work, the loose floor is ready for the placement of any finishing material, either directly on its surface or by gluing or screwing.
The advantages of a backfill floor are the low weight of the backfill, high speed of installation and the absence of wet processes, the ability to lay out any floor covering immediately after the PVA glue has dried, and good sound insulation.
The widespread use of Knauf technology is hampered by a number of significant disadvantages, the main of which are: the high cost of building materials, the possibility of subsidence due to long-term physical impact (heavy furniture), poor biostability (mice dig holes and insects breed), fear of flooding.
Fig.4. Mechanized screed pouring
Wet
Wet screed is a classic and has been known since Soviet times. The components for its construction are sand and cement in a ratio of 3 to 1, as well as water, which is used to dilute the mixed mixture to the state of sour cream.
The technical process of laying wet screed consists of the following operations:
- Factory coupling beacons are installed on a dust-free and necessarily primed surface using a laser level. They are attached to gypsum binder, plaster, cement-sand mortar or tile adhesive.
- The solution is mixed manually or using a concrete mixer; when preparing building materials, it is assumed that 25 kg of cement and 75 kg of sand are consumed per m2 of 50 mm screed.
- Then the solution is poured between the beacon strips and pulled through as a rule.
- In order for the mass to acquire the necessary strength characteristics, hydration must occur in it - a chemical reaction of cement with water with the formation of crystalline hydrates. To do this, after the screed has dried (the next day), it is moistened with water from a watering can and covered with PE film.
The generally accepted period for gaining acceptable strength for further work is considered to be a time interval of 28 days.
Recently, a more advanced (wet-2) technology has begun to be used, in which 5 parts of screenings are added to the cement-sand mass in a ratio of 1 to 3. The screening itself consists of small (average diameter 5 mm) granules from waste from the production of marble, crushed stone, and marl.
The technical process for pouring the mixture with screenings is similar to that given above; to mix it, you definitely need a concrete mixer.
There is also a mechanized high-speed (100 m2 in 1 hour) method of pouring screed, in which the liquid mixture from a mixer is fed through a flexible hose into the work area using a pneumatic blower. After pouring onto the floor, it is distributed over the surface using a manual or mechanical hydraulic rack; the level is controlled by point beacons or a measuring bar.
Floor screed using wet technology in a cottage allows you to lay any type of covering on it, has high strength, and is effective for pouring heated floors. Its disadvantages include wet processes with dirt, shrinkage (up to 2 mm) after drying (it is reduced by adding fiber fibers and plasticizers), and poor surface quality when pouring.
Fig.5. Filling the self-leveler
Self-leveling
Filled self-levelers can be classified as screeds; their main area of application is leveling floors with small differences in level (no more than 10 mm) or with numerous small bumps and holes. The procedure for filling a self-leveler includes the following operations:
- In a large container, use a mixer to mix dry level from bags in the ratio with water indicated on the packaging.
- Next, the solution is poured onto a cleaned, pre-primed base, and evenly distributed over the surface with a toothed roller.
- After drying, in about a day, the leveled surface is ready for laying out any floor coverings.
Self-levelers are indispensable in situations where a thin leveling layer is required. Their disadvantages include the high cost of dry mixtures, a toothed roller and the requirement of highly professional skills from the worker, despite the apparent simplicity of the operations.
Fig.6. Equipment and additional materials for semi-dry pouring
Semi-dry
The building materials for forming a semi-dry floor screed in a cottage are sand, cement and polypropylene fiber, and liquid plasticizers for cement mortars are often used. The ratio of sand and cement depends on the requirements for grade strength and includes 4.5 - 6 parts of sand to 1 part of cement grade M400 or M500.
If fiber fiber is added according to the instructions, then 1 cubic meter of cement-sand mixture accounts for 60 - 80 grams of fibers; the same volume requires 2 - 3 liters of water.
The mixture is usually prepared outdoors using a mixer; a pneumatic blower is used to deliver it to the site through a long pressure hose. The semi-dry screed device consists of the following steps:
- The base is cleaned of dirt and dust, a PE film is placed on top of it, and it is placed on the walls. Attach a damper tape of the required height (80 - 100 mm) to the bottom of the walls.
- From a damper installed in the center of the room, the solution is scattered with shovels along the perimeter of the walls and the middle of the room. Then, using a laser, mortar beacons are formed from the strips, leveling them with a rule, rubbing and compacting with a plastic trowel.
- After the formation of the beacon strips, they begin to draw the mixture. The solution is poured between the guides and tightened with a rule, the layer is periodically compacted with a grater and the mixture is poured into the holes with repeated pulling.
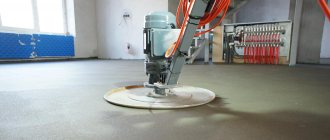
- After the screed has dried (the next day), it is compacted using a special device called a helicopter.
- At the end of the procedure, the slab is poured generously with water from a hose and covered with film, gluing it to the walls with tape. The optimal settling time for screed according to general construction standards is 28 days.
A semi-dry floor screed laid in a cottage can also be formed manually using the method described above. Often, to reduce labor costs, ready-made mixtures are used in bags, which are stirred with a construction mixer.
Read more about all types of screeds here.
Fig.7. Sectional screed
List of required tools
The tools we need first of all are a trowel (trowel), a level, a rule and a shovel for mixing and spreading the mortar. Many people will ask about the container for mixing the solution, let's try to do without it. We will use a minimum set of tools and available means, the correct use of which will give a positive result. You can use a rule of great length, but since all the work will have to be done alone, using a rule of one meter in size will be quite sufficient.
Beacon for screed
It is clear that it will not be possible to perform an even screed by eye; beacons will be required. Here we will also make do with the minimum set. There are special strips on sale - beacons that are installed along the entire length of the room and subsequently remain under the screed. We will use available materials as beacons. Guides, which are usually used for installing drywall, are quite suitable for this. By purchasing two guides, we will save significantly and will be able to perform this type of work, such as do-it -yourself floor screed
.
Method of laying self-leveling floor over screed
Self-leveling floors are a modern, durable and reliable material. It can be used to decorate completely different rooms. As a rough and fine finish. This is a new solution in the field of renovation. It is not only a high-quality option, but also especially beautiful.
The use of a self-leveling floor made the process of leveling the base quite simple. It is used to smooth the surface, as a design decoration for the room.
Surface marking
First of all, let's carefully examine our surface. Naturally, screeding is usually done in rooms with significant flaws. But we need to determine the highest point in the room. Typically this work is done using a water level. But if you don’t have it, you shouldn’t buy it; we’ll make do with twine and a couple of nails.
We drive a 100 mm nail halfway into the floor, into the corner of the room farthest from the exit. Make a self-tightening loop at one end of the twine and place it over the nail. We stretch the twine diagonally across the room. We wrap the other end of the twine around the second nail and rest it on the floor, apply a level. If necessary, move the twine up or down the nail. Having determined the approximate vertical line, we look at the distance from the floor to the string. We move to another corner and repeat the operation. This way you can accurately find the highest point in the room.
The next step will be to transfer the level mark of the highest point to the wall closest to it. This is done using the same guides. We install one end of the guide at the highest point, and rest the other end against the nearest wall. Using a level, set the guide strictly horizontally and make a mark on the wall on top of the guide. Now you need to draw a line parallel to the surface to be poured on the wall around the entire perimeter of the room. That's it, the marks are ready, you can install the guides.
The nuances of installing semi-dry screeds in cottages
Unlike apartments, cottages include rooms that are in unequal operating conditions. In addition, it is not always rational to use a screed layer with a thickness of 50 mm or more.
It is worth noting that dry screed is not designed for significant loads; for example, for installation in garages, the most reliable option in terms of strength characteristics is the wet variety with the addition of screenings.
In the interior
The instructions for the produced dry mixtures for screeds in bags indicate that the thickness of their layer can be 10 mm or more. This means that a dry, finely dispersed screed should be used to level floors with a high degree of adhesion to the base.
This is achieved by priming and applying a thin layer of tile adhesive to the concrete slab during the pouring process. After drying, it reliably glues the screed to the base.
Under heated floors
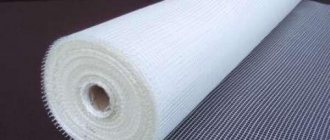
The method of installing heated floors involves placing a flexible pipeline in a foam substrate with symmetrical protrusions that set the direction of the line. After installing the heating pipeline and insulating tape from the bottom of the walls, a mesh is laid upward at a certain height from it (the distance is regulated by special posts or pads), and then the solution is stretched along the beacons.
To avoid deformation of flexible polymer pipes from a large mass of solution, hot water is run through them during installation. After 2 - 3 hours, heating and coolant circulation are stopped. During this time, a dense crust will form around the pipes, preventing them from being compressed, and the mixture will continue to dry slowly at room temperature.
Fig.8. Examples of installing semi-dry screeds under heated floors and foam insulation
For soundproofing and in cold rooms on lower floors
To obtain high sound and thermal insulation of the floors of the lower floors, the screed is laid on foam insulation. They try to select slabs of high rigidity and density, the best option is extruded polystyrene foam (Penoplex) of orange color.
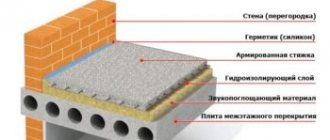
After laying the foam and insulating strip around the perimeter, install the mesh, prepare the beacons and pull the solution along them. The metal mesh should be located at some distance from the foam insulation in the screed layer. To do this, posts are placed under it, which is not convenient when walking. Some workers use a more practical option - they lift the mesh with a special hook before pouring the mixture.
In rooms with high humidity or electrical heating
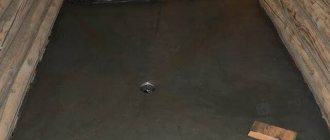
If the screed is used in bathrooms or swimming pools, and it is not floating with a waterproofing film, the base must be covered with one or two layers of waterproofing.
Sometimes electric floor heating is used in bathrooms, balconies and loggias. If the semi-dry floor screed in the cottage is floating, placing a waterproofing PE film under it and the cable can lead to its melting. In this case, the concrete floor is covered with waterproofing or a heat-resistant foil backing is used. After placing the cable, it is covered with a tie without any additional procedures.
Installation of beacons
Start pouring the screed
necessary from the farthest part of the room in relation to the exit. We install the first guide flush against the wall. Align it with the mark you made. To adjust it, you can use pieces of foam or other available material. To ensure that the guide does not slip off the underlying material, we drill one hole at its ends for the nails we have. 50mm nails will do. By threading them through the holes of the guide and the underlying material, we will thus secure the guide. After installing the first guide, you need to install the second. Since our rule is one meter long, the distance between the guides should not be more than 900 mm. You can adjust the second guide by placing a rule on it so that its second end lies on the first guide. Using a level, we will achieve the exact relationship of the two guides relative to each other.
Preparation of the solution
You can start filling. Many may wonder what to dilute the solution with? The answer is simple, on the floor. This may seem strange to some, but this method will allow you to avoid the use of bulky baths and prepare a fairly voluminous batch. First of all, pour sand into the free space and add the required amount of cement. After gentle mixing, collect the entire mixture into a mound and make a small depression in the upper part. Thus, many housewives knead the dough. Add water to the resulting funnel and begin to gradually mix the solution. The edges of our mixture will act as a kind of bathtub and will not allow water to spread to the sides. Gradually adding water, we knead the entire mixture. The very consistency of the solution will not allow it to spread over the surface.
Rearrangement of beacons
After waiting about ten minutes, you can move the guides. To do this, we pull out the nails and, slowly swinging the guide, move it, without removing it, to the required distance. In place of the guide installed near the wall itself, a gutter is formed. It’s okay, after the screed mortar has dried, it’s easy to cover it with mortar and a trowel. An important advantage here is that the resulting space will act as a compensator when the screed hardens and will not allow it to crack.
Features of screed and insulation
If it is necessary to raise the floor level, it is very beneficial to use expanded clay for this purpose. A screed using this material is very durable, which is superior to the use of sand and cement for leveling the floor. In addition, thanks to the use of expanded clay, the screed does not allow steam and air to pass through. It is quite resistant to heat and frost. This means that it can be used in all weather conditions.
The advantages of expanded clay screed include the fact that it is resistant to burning, rusting and rotting. It is a lightweight material so it is not difficult to ship. With its help it is easy to level the most curved surface, while other mixtures do not allow this goal to be achieved.
End of pouring
Thus, we fill
to the end of the wall. Then we completely remove the first guide installed flush against the wall. If we are pouring in a standard apartment measuring 5x3 meters, we will need to lay out three stripes. Of course, at the very end at the door, you will need a small container for the solution, but you can find one in any home. But by mixing the solution on the floor, we will save ourselves from the need to use large containers. Imagine that the work is being carried out on the fifth or ninth floor of an apartment building. When mixing in a small container, we will spend much more time, and this is not entirely convenient; while we are making the next solution, the first one will begin to set. Yes, and it will not be possible to achieve uniformity of the screed.
Requirements for screeds in cottages
Any screed is designed to level the rough base, which is most often reinforced concrete floor slabs, and create a suitable surface for laying the finishing coating. If the floor screed is carried out in a cottage, the following requirements apply to it:
- Although cottage owners are classified as people with good incomes, many cannot afford the installation of an expensive leveling coating over large areas from 100 to 500 square meters. Therefore, the cost of the screed should not be high unless absolutely necessary.
- It is desirable that screeding work does not take much time from workers.
- Any standard covering - ceramic tiles, laminate, linoleum, floorboard or parquet - can be easily laid on prepared floors without additional preparation.
- In many cottages, water-heated floors are installed for heating. The purpose of the screed under a heated floor is to ensure the best heat transfer.
- When laying electrical cables, water supply and heating networks underground, the leveling layer should not have a negative physical and chemical effect on the sheath of pipes or cables.
- Often, especially on the lower floors or attics of cottages, thermal protection of premises from the cold environment in winter is required. The technical process for leveling the base must provide for this possibility.
- The cottages are located directly on plots of land, where the influence of wildlife is much stronger. Therefore, unlike a screed in an apartment, a screed structure in which insects and bacterial colonies do not breed, and rodents do not create passages is welcome for a private house.
Fig.2. Scheme of bulk technology
Non-retrievable beacons
There are special beacons that are installed directly throughout the room before pouring begins. They are installed in the same way as described earlier. It all starts with finding the highest point. The difference is that these are not retrievable beacons. They remain in the screed itself and at the same time reinforce it. Everyone can use beacons at their own discretion. Such beacons are usually installed and secured using plaster. Stretched throughout the room, they eliminate the need to constantly drag the beacon and level it. Quite convenient. Once installed, all that remains is to pour the solution and level it.
Selection of beacons
But it is worth knowing one important thing. When choosing non-removable beacons, you should take into account the material from which they are made. Since there is water in the screed solution, and water and iron are bad neighbors. When choosing lighthouses, do not forget this. Maybe someone will think that this is not so important, because a decorative coating is usually laid on the screed and rust will not be visible. This is not entirely true. When metal rusts, it tends to expand. Over time, this will lead to cracking of the screed. Many builders know how dangerous untreated rusty reinforcement in concrete structures is. The service life of such buildings and structures is an order of magnitude lower than usual.
Disadvantages of sand-cement screed
Previously, solid screeds were made, as a rule, from cement-sand mortar. The main disadvantage of such screeds was the need for a long period of exposure in order for the solution to gain strength and dry before laying the finishing layer, which increases the period of work. And if you try to shorten this time period, you will end up with a marriage.
Currently, quick-setting mixtures are available on the market. If after installing a cement-sand screed, for example, under parquet, it used to take at least two months to obtain the required level of humidity, but today the use of a sand-cement mixture with polymer additives requires only two days of exposure. Modern screeds are, as a rule, a two-layer structure, consisting of: a rough first leveling layer, and a second, thin finishing layer.
Final revision
After about ten days, you can seal the gutters left over from our lighthouses. To do this, dilute a solution similar to our screed in a small container and use a trowel to fill and level the surface.
Of course, using the larger size rule will get rid of the gutters in the middle of the room. But it is worth considering our own strengths. Dragging a three-meter-long rule with mortar alone will be quite difficult and almost impossible. Of course, everything depends on the physical strength of a particular person. Here, everyone can choose their own rules according to their own strength. The only thing is that its size does not affect the final result when performing this type of work, such as do-it -yourself floor screed
.
Pouring technology
Laying self-leveling floors does not require special knowledge and skills. It's quite simple. Necessary:
- prepare the base well;
- follow instructions;
- Mix correctly and follow the drying schedule.
The cement screed must be undamaged and intact. There are no tubercles allowed on it. All defects must be repaired with mortar and rubbed down. Next, the surface is primed. It will fill the pores and prevent moisture penetration.
When installing, a damper tape is stretched around the perimeter of the room. To form a gap and relieve stress. The room must be maintained at a constant temperature. The most optimal is 15 C. At lower temperatures, the fluidity of the mixture decreases. This makes it difficult to form an even layer. Particularly important for colored formulations. At higher temperatures, you will have to work very quickly to prevent the solution from thickening. The floor should dry in the absence of drafts. It is necessary to monitor the humidity in the room and maintain it at the required level.
Mortar consistency
Another important parameter is the consistency of the mortar mass. As previously mentioned, there are three parts sand to one part cement. The sand should be clean, without large stones. Otherwise, when the mortar is pulled through as a rule, they form grooves in the screed. As for the amount of water, this must be selected experimentally. The solution should be plastic enough so that it can be stretched freely, but at the same time, excess water will spread across the floor, forming additional dampness.
Dry mixes
Nowadays, there are a sufficient number of different ready-made floor screed mixtures on sale. Of course, you can use them too. When choosing, carefully read the instructions and consult with the sales consultant. The use of this type of mixture is much more convenient in terms of their readiness for preparing a solution. The only thing you need to do is add the required amount of water. As with any other building material, you should avoid fakes; the consequences can be unpredictable.
From an economic point of view, a completely self-prepared solution of cement and sand will cost you much less. Its preparation itself does not promise you any difficulties. If you use high-quality cement, the screed will be strong and will serve you for many years. The only condition is to accurately maintain the period of its complete setting. Another thing I would like to add is that if for some reason you have to interrupt the pouring of the floor, install a threshold made of a wooden block at the end of the pouring. It will protect the edge from spreading and forming depressions on the surface of the screed. When you continue working, simply remove the threshold and you can continue pouring.
Using the above recommendations, applying your own experience, dexterity, intelligence and patience, you will achieve excellent results in this type of work, such as do-it- yourself floor screed
.
Online video on how to make a floor screed with your own hands
Share on social media networks
RќСЂР°РІРёС‚СЃСЏ
How to make a semi-dry floor screed with your own hands: step-by-step instructions
Step 1. Preparing the base . The base on which the screed will be installed in an apartment or house is cleaned of dust, grease, large stones and other debris. Then the primer is applied. It takes 24-48 hours for the primer to dry (indicated on the package). Sometimes the drying time is reduced to speed up the process. In a non-critical situation, if the primer is needed only to create a moisture-resistant film on the surface to prevent excessive moisture absorption into the ceiling, the time can be reduced. But it is recommended to follow the instructions.
Step 2. Determining the level of the screed surface. The simplest thing is to set the laser level. But, since there is most likely no laser level on the farm, you can use any other method. Use a water level or bubble level to mark all walls. You can stretch a fishing line between the walls. You can also place small beacons on the floor from scrap materials (pieces of tile, for example).
Step 3. Preparation of cement-sand mixture . For the screed, a cement-sand mixture is prepared in proportions of 1:4 or 1:3. One part cement and 3 or 4 parts sand. If a semi-dry screed is prepared for final finishing (for example, for laying tiles), then it is better to take a ratio of 1:3. If this is the first leveling screed, and then a warm floor will be laid on it, then you can take a ratio of 1:4.
First, mix cement and sand in the required ratio. Water is added in small portions, gradually, as if wetting the mixture. Water is added, constantly stirring the mixture, until breasts appear. The amount of water depends on the moisture content of the sand. The finished mixture should not crumble when squeezing it in your fist and should not “give up” water.
Step 5. Making cement-sand beacons. The subsequent screed technology will look like this. First, small areas are made from a cement-sand mixture. The size of the platform is approximately 40 by 40 cm. The surface of these platforms is clearly leveled and must correspond to the required level of the top of the screed. These will be beacons for laying screeds between them.
Step 6. Applying a contact layer for the beacon. To improve the adhesion of the screed to the base, a contact layer of glue is applied to the base. For the contact layer, you can use ceramic tile adhesive diluted with water to a medium thick sour cream. It is applied using a brush or spatula. The area of the spot is approximately equal to the area of the lighthouse.
Step 7. Tamping, compacting and polishing the lighthouse. A layer of mixture is poured onto the contact layer
The mixture is evenly distributed and loosened using a metal comb.
Then the embankment is carefully compacted. Convenient to tamp with feet. The result should be a platform approximately equal to the height of the future screed, slightly higher.
Next, using a grater, the surface of the lighthouse is polished and compacted in a circular motion. In this way, grinding is carried out until a smooth surface corresponding to the design level is achieved.
To obtain the correct, even surface, when sanding, add a small amount of the mixture under the grater and rub it in until the desired result is obtained.
The next beacon is made at a distance of the length of the rule, so that the rule can rest well on the beacons.
Step 8. Filling the space between the beacons. After making the beacons, they begin to fill the space between them. The sequence is the same as when constructing a beacon. A contact layer is applied to the area between the beacons.
The mixture is poured onto it, loosened and compacted.
The mixture is poured a little while approaching the lighthouses. Now, using the rule, excess mixture is removed.
This is done in several passes. When the surface of the embankment is level with the surface of the lighthouses, grinding begins. Sand, constantly adding a small amount of mixture until the surface is level.
A screed strip is formed between the two beacons, the surface of which corresponds to the design level. It will serve as a beacon for further installation of the screed.
Step 9. Further installation of the screed. Now we need to make two more beacons at a distance of the length of the rule from the existing strip. First, the space between the beacons is filled as described above.
Then the space between the stripes. A contact layer is applied.
The mixture is poured, loosened, and compacted.
The excess is removed by the rule and grinding is carried out.
The surface level is constantly checked by the rule. The rule should lie tightly on the surface, without gaps.
When approaching areas with already compacted mixture, their edges must be loosened using a metal comb.
This is necessary for better adhesion between the old and fresh layers and obtaining a homogeneous screed mass.
Important! To obtain a homogeneous mass of screed, it is imperative to loosen the edge of the already compacted area. New portions of the mixture are added only to loosened areas.
Step 10. Correcting errors. If a depression has formed during the grinding process, it must be corrected.
To do this, the area of the depression is loosened, the required amount of mixture is added, compacted, the excess is removed using a rule and sanded.
Step 11. Completing the work and hardening the screed. After the screed is made, it must be moistened with water and covered with film.
The drying and hardening time of such a screed is 7-14 days. But careful movements along the screed can be done after 24 hours. And, if absolutely necessary, you can carefully begin finishing the floor with tiles or choose another material. But it’s better to let the semi-dry screed sit for at least 3-4 days before adding further layers to it. Now everything is ready, and most importantly, do it yourself.
