On the modern building materials market there is a large selection of plasters that have a variety of properties and characteristics. A very interesting and popular material is a plaster mixture based on perlite, which has a number of advantages.
Next, we will look at the features and types of this coating, and also learn how to apply perlite plaster with your own hands on the surface of the walls.
- 1 General information
- 2 Features of perlite plaster
- 3 Types of perlite plaster 3.1 Cement based
- 3.2 Gypsum based
- 3.3 Based on lime mortar
- 4.1 Preparation
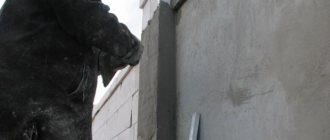
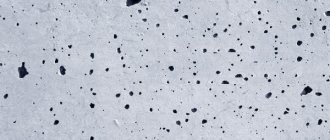
Wall covered with perlite plaster
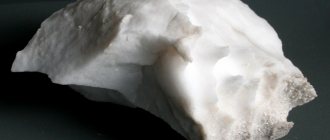
What is perlite plaster
Perlite plaster is a finishing material made from perlite sand. The raw material is acidic volcanic rock. Perlite contains no more than 1% liquid. When heated, the base component increases in volume, swells and becomes several times larger, this explains the characteristics of warm mixtures. Perlite plaster may contain modifiers and polymer additives, this allows the material to be classified into different types. On sale you can find gypsum and cement varieties of mixtures.
“Warm” solutions with perlite: optimal, improved formulation
The thermal insulation solution combines specially selected mineral fillers, one of which is perlite. Thanks to this highly effective formula, the solution has a number of advantages: lightness, ease of processing, and high plasticity. This ensures durability, reliability and high strength of the masonry.
“Warm” perlite mortar is ideal for use when laying walls made of porous bricks and other similar materials. At the same time, the combination of “porous brick and warm mortar with perlite” provides effective, uniform thermal insulation of the wall. In this case, the wall will be protected from the formation of so-called “cold bridges”, which sharply reduce the thermal insulation properties of the masonry and contribute to its gradual destruction.
The use of LM heat-saving mortar with perlite guarantees a significant reduction in heat loss, while allowing savings on additional thermal insulation of the masonry.
LM Heat-saving mortar for masonry with perlite is used for laying “warm” wall materials with high thermal insulation characteristics. The solution is also used to fill voids and cracks during the laying process.
Advantages and disadvantages of perlite plaster
Perlite plaster has the advantage of not requiring a master to have special skills during the work process. There is no need to level the walls during preparation, but to increase adhesion they are moistened with water. The work is also simplified by the fact that the reinforcing mesh is not used over the entire surface, but only in difficult places. This plaster composition is also good because it has excellent adhesion to almost all materials. It is highly plastic and non-flammable, and is also biologically stable. The last factor eliminates the occurrence of fungus and mold on the surface. Rodents and insects do not grow in the plaster layer.
The walls become thermally insulating, but do not lose their ability to breathe. Perlite plaster is simply irreplaceable when it is necessary to provide a building with the ability to effectively remove moisture - the porous structure copes with this perfectly due to the presence of capillaries. The material can be used under sudden changes in external conditions, for example, an increase or decrease in temperature and humidity. Ultraviolet radiation is converted into heat, which is evenly distributed over the entire finished surface.
Attention! If you also care about environmental safety, perlite plaster will suit you better than others; construction waste is often used in its production, for example:
- sawdust;
- expanded clay chips;
- additions of silk and cotton.
Mother-of-pearl plaster, however, also has its disadvantages. One of them is the higher cost compared to other materials of similar purpose. But even this minus cannot be taken seriously, since the cost is more than justified by the excellent operational features.
If we consider gypsum plaster with perlite, it is not very suitable for beginners, since it sets quickly after mixing and requires special skills from the master. In addition, the raw material is afraid of water, so the mixture is most often used for interior work.
It is also important to pay attention to the not so impressive thermal insulation performance of the gypsum composition. Its specific gravity is 800 kg/m3, since if it is necessary to create a truly warm layer, you need to use a composition with an indicator within 500 kg/m3. The density of such a solution when mixed independently increases, so the consumption increases, because when mixing, the perlite grains are destroyed, reducing the volume of the mass.
To knead it yourself, you will need one part dry mixture, one part water, one part 3, and 6 parts perlite. Before you decide to use such a mixture, you should consider that it will not fit well and will turn out quite dry. In view of the above-mentioned circumstances, it is best to purchase perlite gypsum plaster in the form of a ready-made dry composition, to which you only need to add liquid.
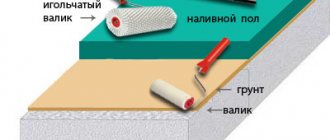
Primer for plastering work
The first thing to note is that the primer will protect the walls from peeling plaster. Therefore, you should not once again raise the question of whether the walls should be primed before this, since the answer will be affirmative and unequivocal. Because the walls quickly absorb water, the plaster does not always set well; in this case, a primer comes to the rescue. So, plaster and putty are similar to each other, but the adhesion of plaster is much worse, so it is necessary to prime the walls before doing so to prevent peeling.
There are different types of primer; they differ in the result of surface treatment.
One type of primer protects walls from moisture, the second has the characteristics of a natural antiseptic. For example, a primer from Grundiermittel will provide excellent adhesion and ensure the desired level of liquid absorption.
Primer work before plastering will ensure an even layer of plaster is applied.
If the walls of your house are made of different building materials, then buy several types of primer, it won’t hurt.
Wall priming work
This is a responsible job that needs to be taken seriously.
- Strengthening primer is used for loose (loose) and crumbly surfaces (“Acryl-Hidrosol”).
- A primer that penetrates deeply is an ideal option for walls that are made of asbestos cement or only plastered surfaces (“Tiefgrund TV”).
- An anti-corrosion primer is necessary for metal structures.
- An antiseptic primer will be needed for wooden walls and lumber.
If there are stains of various origins on the walls, it is necessary to apply an anti-stain primer.
If you are going to glue wallpaper on the walls after plastering, then you need to apply a primer to the plaster. Under plaster, a decorative primer is applied with certain solutions that will provide a layer between the base and the decorative coating (“Ceresit16”).
Types of perlite plaster
Silk-effect plaster is offered for sale in several varieties. Its basis is mineral, and the raw materials can be:
- gypsum;
- cement;
- cement and lime;
- lime.
The filler binds well to binders. If you need to cover a wall made of porous materials, pearlescent plaster is better suited than others. It fits well on:
- expanded clay concrete;
- aerated concrete;
- slag concrete;
- sand-lime brick;
- ordinary brick.
Cement based
This pearlescent composition is capable of forming a waterproof layer with pearlescent effects. It is better to apply the material to buildings that are operated in conditions with high humidity. You can use one of two technologies - manual or mechanized. Strengthening will take about a month, and thermal insulation properties will appear when perlite polymerizes, this can take up to 60 days.
Gypsum based
Silk plaster can also be intended for application to the interior walls of a house. We are talking about a mixture based on gypsum. It hardens quickly, so to extend the life of the composition you need to use a mixture with special additives, which is sold in ready-made dry form. If you need plaster with such properties, it is better not to make it yourself.
Based on lime mortar
If you want to finish a wall, achieving a silky effect on the surface, you can also use lime mortar. When sealing it yourself, you should use high-quality slaked lime. The mixture is universal, bactericidal and completely harmless. If it is necessary to increase the strength characteristics, cement should be added. It is used in the amount of 1 part, to which fluff and perlite are added in the amount of 2 and 8 parts, respectively.
Attention! If there is a partition in the house that connects a heated room with an unheated room, you need to think about how to make the wall warmer. At the same time, home craftsmen often wonder what to choose for insulation - drywall or plaster. The clear answer would be the second option, since it allows you to form a warmer layer.
Application area
If you like the silk effect on the wall surface, you should use perlite plaster, which has a wide range of uses. It is used on buildings of any purpose, as well as in basements and enclosing structures. This mixture is especially common when finishing external walls, in private construction and agriculture. This is due to the low thermal conductivity of the layer, which can be laid 3 cm thick, and it will be equal to 15 cm of brickwork. In this case, the building will also be one and a half times more soundproof. Application can be carried out on wooden walls, reinforcing steel mesh or concrete, brick surfaces, as well as lightweight concrete products.
Expanded perlite
Perlite, as a rock, is practically not used in construction. It acquires its unique properties only as a result of heat treatment, namely, heating at temperatures from 900 to 1100 degrees Celsius. At the same time, it swells, increases in size by 5–15 times and breaks up into small, round particles, which are called expanded perlite. Heat treatment is carried out in 1÷2 stages: it all depends on the amount of water in obsidian hydroxide. If its content is high, at the first stage, excess liquid is removed, keeping the material at temperatures of 300÷400˚C.
Foamed perlite is powder (particles less than 0.14 mm in size), sand (fraction size less than 5 mm) or crushed stone (granules 5÷20 mm in size). The density of sand is 50÷200 kg/mᶟ, and crushed stone is about 500 kg/mᶟ. The color varies from snow-white to grayish-white.
Due to its properties, expanded perlite is used in construction, the metallurgical industry, oil refining, the food industry and agriculture.
Do it yourself
Warm plaster, which provides a fabric effect on the surface, may contain not only:
- lime;
- cement;
- gypsum;
- combination of materials.
In order to achieve improved quality characteristics, polymer ingredients are also used.
Attention! It is better to prepare a solution from one package, using the entire volume of material at once, otherwise you may encounter a violation of the proportions.
Stirring should be carried out until lumps can be eliminated. The mass should be homogeneous. The composition should be developed within 3 hours, after which it will begin to polymerize.
Four parts of filler will require part of cement and water. Liquid is added in the volume to achieve the desired consistency. PVA glue can act as a plasticizer. It is added in a volume of 1% of the total mass. First you need to combine the glue with water, and then mix the cement and sand. The dry mixture is then combined with the liquid and left for 15 minutes, but then mixed well again.
How to insulate a house using perlite
Perlite is used as insulation in the form of sand (bulk insulation); component in thermal insulation products and dry ready-made building mixtures.
Perlite sand as insulation for walls
Perlite sand for arranging thermal insulation of a house is an excellent material with which you can not only effectively insulate a home (heat loss is reduced by 50%), but also significantly lighten the structure of the building.
We begin installing thermal insulation from foamed perlite after part of the load-bearing wall (internal) and external brickwork (4-5 rows) have already been erected. We pour coarse expanded perlite sand (with a granule size of about 6 mm), previously dust-free, into the gap between these two walls and compact it thoroughly (the volume should decrease by 10%). We fill the sand manually or using a sandblasting machine. We repeat this operation several times until the walls are completely erected. By the way, in terms of heat-saving properties, a perlite layer about 3 cm thick corresponds to a 25 cm thick brick wall. When building panel houses, we pour sand between the sheathing sheets (internal and external).
If you are insulating an old house with voids in the walls, then backfilling with sand can be done in two ways:
- carefully pull out several bricks from the wall and pour perlite through the resulting hole;
- drill a hole in the wall (diameter 30÷40 mm) and through it, using a special installation, inject heat-insulating material.
Perlite sand is a universal non-combustible building material that has a number of advantages:
- excellent sound, noise and heat insulation properties (and can be used to insulate walls made of any material);
- environmental friendliness;
- lightness (by weight);
- resistance to temperature changes;
- durability.
Advice! You should not use perlite sand, which is a very moisture-intensive material, as insulation in places with high humidity.
The only disadvantage of sand is that it is very dusty: therefore, it is recommended to slightly moisten it before use.
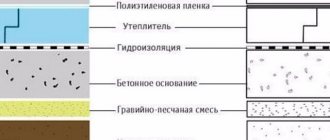
For thermal insulation of floors, we use expanded perlite, which is poured onto the cement-sand base of the floor and leveled according to building regulations. The height of the thermal insulation layer of sand is the desired thickness plus 20% additional volume for shrinkage.
We embed uneven areas and pipelines in a layer of bulk material, and lay slabs and flooring on top. If there is no basement under the house, then in order for moisture to accumulate and be removed, we place drainage pipes and absorbent pads under the perlite.
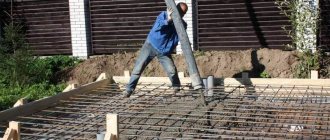
Another effective way to insulate a concrete floor can be to lay a kind of “pie”: we install a perlite screed between two layers of concrete. First, prepare a perlite solution with the following components:
- cement – 1 mᶟ;
- perlite – 3 mᶟ (grade M75 or M100);
- sand – 2.2 mᶟ;
- water – 1.5 mᶟ;
- plasticizers – 3÷3.5 l.
Stir all the components of the mixture until water comes to the surface: this is a sure sign that the solution (perlite screed) is ready for use.
Advice! Since perlite is a very light material, it is recommended to carry out all work with this material indoors so that the wind does not in any way interfere with the work process.
After the perlite screed is applied to the concrete base, we leave it to harden. After 1 week we get an excellent thermal insulation layer for the floor that will last for many years. We lay a second layer of concrete on top of it.
Roof insulation
If you do not intend to equip a living space in the attic, then it will be quite enough to insulate only the attic floor with expanded perlite. Otherwise, we pour perlite between the beams of the roof slope into boxes that are specially made for this purpose; then compact the sand thoroughly. The work does not require specific skills or knowledge.
Also, for thermal insulation of sloping roofs, perlite is used, which is treated with bitumen in the factory. We add a solvent to this bituminized perlite and get an adhesive solution, with which you can create a durable thermal insulation layer.
Tools
To work with the mixture you will need a metal spatula and a trowel. The composition is thrown onto the surface, and to level it you should use a grater and a rule. Only the final layer needs to be leveled if it is necessary to apply the plaster in several approaches.
When only one layer is applied, the material is leveled immediately. If you have to work with a large surface area, it is better to use the machine method, as the quality of work improves and the speed of application increases.
Preparing walls before application
You need to start working with plaster three days after completing the preparatory work. Contaminants, including dust, grease and flaking areas of old finishing, are removed from the walls. Contamination can be removed from concrete using hydrochloric acid, then the walls are washed with plain water. Sludges of solution are removed with a brush with metal bristles.
Attention! Preparing gas silicate before applying plaster involves wetting the surface.
Technological process
The walls should first be coated with a primer. Wooden surfaces are prepared by installing shingles. This will increase the adhesion of the materials. Concrete and brick walls are wetted with water. Porous surfaces are primed to reduce their absorption. Application is carried out with a trowel and spatula, leveling is the rule. After just 2 hours, the surface can be treated with a sponge dipped in water to make it smooth. If you plan to paint the wall, you can start this work after three days. Within a month, strength will be gained, which is exactly what is needed for cement to harden.
Plaster can be applied with a reinforcing layer, but if it is not provided, the permissible wall finishing thickness is 50 mm. This plaster can also be applied to ceilings, but without a mesh the thickness of the cladding will be 30 mm maximum. It is important to observe the application temperature, which varies from + 5 to + 30 ˚С. It is necessary to maintain relative humidity, which should not exceed 75%.
The preparation of wooden walls must necessarily include the installation of shingles, otherwise you may encounter peeling of the decorative layer. Thermal insulation properties will increase over time, and will gain strength only after two months, when the surface has completely dried. If work is planned for autumn, this feature of the material should be taken into account.
It is important to eliminate rust stains on the surface, as well as layers of poorly maintained finish. The mixture does not need to be prepared in advance. When mixing the solution with a drill, set it to low speed, as the composition may become saturated with air, which will make it less plastic.