Features and varieties
Cable channels are boxes for laying wires made of metal or plastic. The scope of their application is quite wide: interior decoration of offices and apartments, external wiring and ensuring the safety of cables in enterprises.
The functional purpose of such structures is to protect wiring from mechanical damage and open interaction with the environment. Elegant design and ease of use are additional advantages.
All cable channels according to types and sizes are divided into two large subgroups:
- rigid for electrical wiring;
- flexible from corrugated pipes or sections.
In construction, a metal modification of the cable channel is common, where the box body is cast or perforated.
In everyday life, plastic structures are used that are sufficiently rigid to perform their direct functions and have an attractive appearance.
Installation of cable channel
Required tools:
- Ruler and pencil;
- tool for sawing profiles depending on the material (wood file or metal hacksaw). To make a cut at 45 degrees you will need a miter box;
- drill or screwdriver for drilling holes;
- appropriate hardware;
- You can use a level to accurately place boxes.
Cable channels are primarily used for wiring on such surfaces that exclude other installation methods:
- Metal surfaces require preliminary drilling in the places where the box is attached. To attach the cable duct to such a surface, buy special self-tapping screws with a frequent thread pitch.
- Wooden, plasterboard and plasterboard floors do not need to be drilled if you use wood screws. To install using dowel screws, you must first make holes with a drill with a drill of the appropriate diameter.
- Concrete slabs and brick walls are very strong and hard objects. To work with them, you will have to resort to using impact drills. Fastening is done exclusively with dowel screws.
Preparatory work:
- Take measurements of the route for laying communications.
- Mark the places where the cable channels are attached. The marking is made taking into account all turns and features of walls and ceilings. Checking the level readings, use a pencil to mark the future locations of the cable channels. You should not lay it in places where it will often be injured; choose the least accessible places.
- Make profile blanks of the required size, taking into account the values obtained as a result of marking. To ensure that the final result looks neat and the joints fit perfectly together, clean the cut areas from burrs.
- If necessary, drill holes in the places of intended fastenings.
Installation and filling of cable channels:
- Fasten the workpieces using hardware appropriate for the wall materials.
- When filling finished boxes with electrical wiring, make sure that it is de-energized.
- Place each wire in a separate niche of the box so that they are isolated from each other and do not intertwine.
- Close the fixed boxes with lids of the appropriate size.
It is permissible to fasten plastic products to a smooth and durable surface, such as metal, using liquid nails, after first cleaning the adjacent surfaces from dirt and degreasing them.
Dowel-nails
Well, the last way to attach a cable channel in an apartment or house is with special glue “liquid nails”. The need to glue the cable channel to the wall arises if another installation option is not possible. Most often, liquid nails are used when installing electrical boxes on bathroom tiles or a smooth metal surface.
There is a very important nuance in attaching the cable channel with glue - first you must apply the adhesive mixture to the surface of the box, and then lean it against the wall according to the markings. Once you have the back panel against the wall, remove it and wait a few minutes for the glue to thicken a little on both surfaces to be glued.
Fastening the cable channel with glue is not very reliable; it is used where others cannot be used, for example, for fastening to tiles. You can combine it with others - with fastening with self-tapping screws or dowel-nails.
To glue the box to the wall, glue is applied to it in a zigzag line, as in the figure, then pressed against the wall along the markings so that the glue is imprinted on the surface, and removed. After a few minutes, when the liquid nails have set a little (the time depends on the specific type of glue, this can be read in the instructions on the package), the box is pressed firmly against the wall again.
We suggest you read: How to glue tiles to a stove with your own hands
Basic selection rules
The choice of a specific product depends on the following factors:
- purpose of the premises;
- installation locations;
- colors;
- size;
- type of lock.
For different types of premises, depending on the installation location, a different type of cable channel is selected:
- for industrial plants and outdoor installations, usually made of aluminum or steel;
- for installation in private properties, offices, apartments - made of impact-resistant, self-extinguishing plastic.
Metal products are more reliable in terms of fire resistance than those made of PVC, so they are used in the creation of warning systems and fire alarm systems, access control, and external video surveillance. Aluminum cable channels do not corrode during operation, while steel ones require careful handling (any scratch will lead to oxidation processes over time, which will negatively affect its appearance and strength). The color of the product is selected depending on the design of the room, the color of the outer wall of the building, or they try to choose one that will harmonize with them.
The choice of size and number of sections depends on the diameter of the conductors being laid and their number. They always select a product with some reserve so that, in the case of laying additional communications, it is possible to use the existing main route. The standard dimensions of cable channels in mm are as follows:
- width from 12 to 100 (12; 15; 16; 20; 25; 40; 50; 60; 70; 80; 100);
- height from 10 to 60 (10; 12; 16; 25; 40; 60);
- length - 2000.
Locks for cable ducts can be very different. This depends on the production technology adopted by the manufacturer. You need to choose one that latches well without much effort, and the opening and closing operations can be performed repeatedly. This makes it easier not only to install, but also to dismantle. It is also necessary to remember that a cable channel with a two-way snap-on cover is better than one with a cover that opens in one direction.
Fastening methods
Attaching the cable to the wall is done in various ways. The choice of a specific option depends on the composition of the working surface. The materials used and work with them are discussed in the table.
| Fastening method | Operating procedure, tips | Mounting surface |
| using self-tapping screws | wood screws are screwed in with a screwdriver on average every 50 cm; It is recommended to use them with a length of about 40 mm; used for quick installation of plastic channels; no pre-drilling required | |
| dowel-nails (quick installation) | the lid is removed from the box; holes are drilled in it in increments of about 45 cm; it is adjusted to the surface, marking the location of the drilling points on it; use a hammer drill to make a hole in the wall; the plastic part of the nail is inserted through the box into the hole, the metal part is then hammered in | allows you to securely attach it to a concrete wall, brick, stone |
| "bugs" | screwed with a screwdriver through the distance indicated above | thin metal (less than 2 mm) |
| glue (liquid nails) | apply the adhesive inside out the prepared section; lean it against the marked place for a few seconds, move it away; wait for the glue to thicken; pressed back; additionally it is required to use dowels and screws | wood, drywall, wallpaper, tiles, can also be glued to a concrete surface |
The step width is adjusted based on surface unevenness. For more information on how to select and install a cable channel, watch this video:
It is recommended to install wiring in the cable channel after all finishing work has been carried out (pasting wallpaper, applying decorative plaster).
With this method of laying lines, the rules of the PUE are observed, and you can easily get to the place of the problem.
The presented fastening options reliably join the surfaces. The variety of materials fits the laid routes into the apartment’s decor.
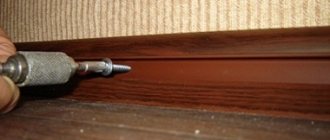
Method No. 3 – “Screws with a press washer”
If you decide to install electrical wiring in a wooden house or apartment with plasterboard partitions, then the installation of the cable channel must be done with special wood screws.
The fastening step depends on what load will be placed on the plastic box, or more precisely, how many wires need to be stretched inside, and what their cross-section is. You should not choose screws that are too long to install the cable channel yourself. To securely fix the box in the wall, it will be enough to screw in fasteners about 40 mm long. For screwing, it is best to use a screwdriver with a Phillips bit. We talked about how to choose a screwdriver for home repairs in the corresponding article!
https://www.youtube.com/watch?v=iN-13_LDSNg
If there is a need to attach a cable channel to metal less than 2 mm thick or an aluminum profile, then we advise you to use metal screws, also called “bugs,” for fastening. By the way, the correct name for bedbugs is self-tapping screws with a press washer. They do not require pre-drilling a hole. There is nothing difficult about installing an electrical box on a metal surface; the main thing is to choose good screws and charge the screwdriver.
Cable channels are plastic or metal boxes for hidden or open laying of wires and cables. Can be used both outdoors and indoors. They are also called cable trays and boxes, sometimes the word “electrical” is added.
Consists of a body and a cover. The cross-section is mainly rectangular and square, but there are others, more specific. The body can be solid, or perforated. Perforated housings are rarely needed for better ventilation and faster cooling. In this article we will talk about how to attach a cable channel to your wall in the house.
If you decide to install a cable channel in a wooden house or apartment with plasterboard partitions, then the installation must be done with special wood screws. The fastening step depends on what load will be placed on the plastic box, or more precisely, how many wires need to be stretched inside, and what their cross-section is.
As a rule, to securely fasten a cable channel to a wooden wall or drywall, it is enough to screw screws every 40-50 cm. If the walls are uneven, it is better to reduce the fastening step, this will hide all defects and gaps.
You should not choose too long self-tapping screws for installing the cable channel. To securely fix the box in the wall, it will be enough to screw in fasteners about 40 mm long. For screwing, it is best to use a screwdriver with a Phillips bit.
You will need the following tools:
- Hammer.
- Dowel-nails.
- Sharp knife.
- Level and pencil.
- Screwdriver.
To begin, draw a straight line on the wall (ceiling) (for walls at a level) and prepare dowel-nails for work, from which you need to cut off the plastic cap with a sharp knife. This is done so that the channel fits tightly to the wall. We will use a concrete drill with a diameter of 6 mm and, accordingly, dowel-nails No. 6.
Next, attach the cable channel to the line and punch it with a hammer drill, going deep into the wall to the length of the dowel. Insert the cut plastic insert and screw the dowel-nail with a screwdriver until it stops. The next attachment point is located 40-50 cm, the extreme one 5-7 cm from the edge of the box. Insert the wire into the channel and snap the cover on.
Fastening with glue is not very reliable; it is used where others cannot be used, for example, for fastening to tiles. You can combine it with others - with fastening with self-tapping screws or dowel - nails.
To glue the box to the wall, glue is applied to it in a zigzag line, then pressed against the wall along the markings so that the glue is imprinted on the surface, and removed. After a few minutes, when the liquid nails have set a little (the time depends on the specific type of glue, this can be read in the instructions on the package), the box is pressed firmly against the wall again.
Remember that dismantling a cable channel glued to the wall with liquid air without damaging the coating or the electrical box itself is impossible. The cable can only be laid after the adhesive has completely hardened.
If there is a need to attach a cable channel to metal less than 2 mm thick or an aluminum profile, then we advise you to use metal screws, also called “bugs,” for fastening. There is nothing difficult about installing an electrical box on a metal surface; the main thing is to choose good screws and charge the screwdriver.
Depending on the room, the schematic arrangement of the wiring lines and the number of wires in them, it is recommended to use boxes of various types.
Main cable channel options:
- Pipe-based channels, further divided into horizontal and vertical. Similar channels will also include subchannels. The term “conduit” is used quite often;
- Box. PUE, clause 2.1.10 defines a box as a closed hollow structure of rectangular or other cross-section, intended for laying wires and cables in it. Boxes can be blind or with openable lids, with solid or perforated walls and lids. Blind boxes should have only solid walls on all sides and no lids.
- Trays. PUE, clause 2.1.11 defines a tray as an open structure intended for laying wires and cables on it. The tray does not protect against external mechanical damage to the wires and cables laid on it. Trays must be made of fireproof materials. They can be solid, perforated or lattice;
- Channels for laying cable harnesses, most often made on the basis of various types of discrete fastenings (brackets).
Separately, we note that the installation of external electrical wiring is carried out last, after all finishing work has been completed.
It is almost impossible to fit openly hanging wires into the interior. About 40 years ago, there were two ways to conduct electricity in an apartment - bury the wires in the walls or leave them in sight, securing them to insulators. Leaving it in plain sight is unsightly and dangerous. Bricking it into walls means there will be difficulties with replacing the wire and moving the sockets to a convenient place. Installation of cable channels eliminates these inconveniences.
The cable channel is a rectangular, usually U-shaped profile, closed with a flat snap-on cover made of the same material. Sometimes they are called boxes. Installation of cable channels is carried out around the perimeter of the rooms under the ceiling at a distance of 15 cm with vertical outlets to sockets and switches. To lay wires through the walls, holes are drilled in the opposite channels and the wall.
To lay power and low-current wires in one box, profiles with one or two partitions are produced. The standard length of the box for walls and ceilings is 2 meters, the minimum profile section is 8x8 mm, the maximum is 100x60 mm. For laying a small number of wires, usually low-current, in the corners between the floor and walls, there are specially designed skirting boards. If you need to connect the wire to a device far from the walls, there are floor-mounted options with a rounded surface.
Boxes vary in cost and performance characteristics depending on the material. Products are produced by:
- made of plastic. The most common option and the cheapest. For rooms with high humidity and on the external walls of a building, IP 55 plastic with a high degree of protection can be used. The color palette of plastic boxes allows you to choose the desired tone;
- aluminum with polyethylene coating. More expensive, but stronger and more durable than plastic ones. The number of cycles of opening and closing the lid is small due to the extension of the locks. The polyethylene coating is easily destroyed by mechanical stress. The color is given to the channels by a polyethylene coating and is quite varied;
- galvanized steel. Such structures are the most durable and expensive. Mainly used under high load conditions. For example, with floor wiring and in the external environment. The color of the products is varied.
The choice of the type and size of boxes begins with determining the wiring throughout the house from the electrical panel and entry points for television, computer network, telephone and security alarm cables to sockets, switches and lamps, drawing the wire lines on the drawing of the apartment or house. Depending on the power of the connected equipment, the wires will be of different thicknesses; this should be noted on the drawing.
You should immediately calculate for each section of the box the number of internal and external corners along the wiring line, the number of end transitions of the plugs, the number of T-shaped transitions to the branches and their cross-section. Of course, you can do without them, but the gaps at the joints and the difference in cross-sections will be noticeable. Using sealant to seal cracks will lead to difficulties when necessary, for example, adding or replacing a wire in the main.
We suggest you familiarize yourself with How to attach a door frame to a wall
The wiring will take on an aesthetically finished look if sockets and switches are installed from the same manufacturer. They are ideal in both size and design.
We advise you to pay attention to the walls. The unevenness of the walls will be especially visible when installing the boxes. If the appearance of the room is important, in this case it is worth considering installing the structure along the wall along the floor.
How to attach the cable duct to the wall depends on the material of the walls, since they have different strengths. The weight of the structure is determined mainly by the weight of the cable in the main box and ranges from 100 grams in the lightest case to several kilograms per linear meter. The distance between the screws should not exceed half a meter.
- turn off the power supply,
- remove the box cover,
- unscrew the fasteners.
| Fastening method | Operating procedure, tips | Mounting surface |
| using self-tapping screws | wood screws are screwed in with a screwdriver on average every 50 cm; It is recommended to use them with a length of about 40 mm; used for quick installation of plastic channels; no pre-drilling required | |
| dowel-nails (quick installation) | the lid is removed from the box; holes are drilled in it in increments of about 45 cm; it is adjusted to the surface, marking the location of the drilling points on it; use a hammer drill to make a hole in the wall; the plastic part of the nail is inserted through the box into the hole, the metal part is then hammered in | allows you to securely attach it to a concrete wall, brick, stone |
| "bugs" | screwed with a screwdriver through the distance indicated above | thin metal (less than 2 mm) |
| glue (liquid nails) | apply the adhesive inside out the prepared section; lean it against the marked place for a few seconds, move it away; wait for the glue to thicken; pressed back; additionally it is required to use dowels and screws | wood, drywall, wallpaper, tiles, can also be glued to a concrete surface |
- Size. There are small products for laying one wire of a small cross-section or large boxes designed to mount up to eight conductors of different cross-sections on the wall;
- Material of manufacture. They produce aluminum, steel and plastic structures. For indoor installation, plastic models are more in demand, and fastening steel and aluminum boxes is more often used when laying electrical wiring along the facade of a house;
- Location. The cable channel can be fastened in several places. The design of the product is maximally adaptable depending on the installation location. There are plinth, parapet, main and floor models.
| Classification feature | Kinds | Description |
| installation location | floor | in their shape and appearance they are optimally adapted to the installation location; |
| main | ||
| skirting | ||
| color | Available in different colors and shades | fit harmoniously into the interior of the rooms |
| size | different channel volumes - for one, 2, 3 or more cables | dimensions from 12×12 to 100×60 mm; have different shapes of corners - from sharp to rounded |
| number of locks | with one | 2 latches – more securely hold the cover on the channel, reducing the possibility of deformation; |
| with two | ||
| product material | aluminum | covered with film; a variety of shades gives an attractive look; fireproof |
| steel | installed indoors or outdoors; Available with a galvanized surface in different colors; do not burn; susceptible to corrosion when scratched |
- for self-tapping screws,
- for liquid nails,
- on dowels.
Purpose of cable channel
If the apartment has open wiring, then the wires are located on the surface of the walls, pass under the ceiling or near the floor. Of course, this does not mean that they should be nailed to wallpaper or tiles and left in that form. To hide the wires, you need to install a special protective box - cable channel.
This solution has a lot of advantages, starting from the fact that you will need less time to organize the wiring, ending with quick and simple repair of the faulty area. In addition, with open wiring, you can make an additional electrical point or draw another line at any time. Wires hidden in the cable channel look neat and do not pose a danger to children and pets.
However, open wiring also has its disadvantages. One of the most noticeable is the reduction of free space. If there is a cable duct on the wall or near the floor, you will not be able to move the furniture close. Of course, we are talking only about a couple of centimeters, but for apartments with a modest square footage this can become a problem. Also, open wiring is not suitable for every interior - the strict outlines of the protective box give the room a certain “office” feel, and look awkward on expensive wallpaper and among exquisite furniture.
The width of the cable channel should allow any wire to be hidden in it, but the best option would be products with flexible stranded cores. Flexible cables are much easier to lay in a longitudinal groove and bend at the corners.
The cable channel consists of side walls and a back connecting them. The open part is closed with a special lid with latches and a double lock. There are many types of wire ducts, differing in shape, size and material from which they are made. They can be U-shaped, round, triangular and even curved in shape. There may be partitions inside that form grooves for individual cables.
Most often, cable channels are made and sold in 2 m long sections. But in order to hide exposed wiring, it is not enough to just buy them - you need to purchase a whole set of related accessories - corner and rotary inserts, plugs, socket modules, etc.
Select cable channel
As we have already said, cable channels vary in shape, structure and material from which they are made. Thus, you can find steel, plastic and aluminum products on the market.
Let's look at each option in more detail:
- Metal cable channel - suitable for external and internal work. The main advantage is the wide color palette, allowing you to choose an option for any interior. Protected from rust by galvanized steel coating.
- Galvanized cable duct is made of aluminum, which is known to be resistant to corrosion, so it can be safely used to protect cables outside the home. They are distinguished by enviable durability and aesthetics. Aluminum and steel cable channels are completely fireproof, unlike the next “candidate”.
- Plastic cable duct is the cheapest and therefore the most popular option for use inside the house. Made of plastic with various additives that increase strength and durability. They can be of different colors, but mostly white products are used. If the choice fell on a PVC box, it should be taken into account that only one wire can be placed in one cell. For small channel cable cross-sections, a double lock is not necessary.
Attaching the cable to the wall
During the construction of a house, electrical wiring is installed in a hidden way, under the plaster. A complete replacement of the electrical wiring is usually carried out during a major overhaul. In this case, grooves are made in the wall, into which the wire is laid.
But what to do when there is no opportunity or desire to engage in dusty wall slitting? Or do you need to connect a recently installed powerful electrical appliance, such as a water heater? In this case, many choose the open method of laying electrical wiring, and fastening to the wall is carried out using a cable channel.
Several criteria are used to classify a cable channel:
- Size. There are small products for laying one wire of a small cross-section or large boxes designed to mount up to eight conductors of different cross-sections on the wall;
- Material of manufacture. They produce aluminum, steel and plastic structures. For indoor installation, plastic models are more in demand, and fastening steel and aluminum boxes is more often used when laying electrical wiring along the facade of a house;
- Location. The cable channel can be fastened in several places. The design of the product is maximally adaptable depending on the installation location. There are plinth, parapet, main and floor models.
Note! In terms of color design, the cable channel most often has a neutral white color, suitable for any decoration. Models that imitate a wooden structure are also popular.
How to attach the cable duct to the wall depends on the material from which the walls are made. Plastic cable channels can mask minor surface defects, but it is advisable to lay them on a leveled base. There are several main methods of fastening.
This method is suitable for wooden walls or plasterboard partitions. To do this, take special wood screws about 40 mm long. You should not use screws that are too long. The fastening step is usually made equal to 40-50 cm; if there are a lot of wires in the box, that is, the load on it will increase, or the walls are uneven and defects need to be hidden, the step is made smaller. The screws are tightened using a screwdriver. There is no need to make holes in the cable duct or wall before doing this.
To conveniently lay the cable in the electrical box, you can use temporary holders, for example, pieces of a cover. Before installing the cover in place, they are removed. It is convenient to lay the cable and immediately snap the part of the cover over it. It is recommended to start from the corners. Small sections of the cover are installed in the corners, then longer sections are measured and installed on the straight parts of the channel.
A plinth with a cable channel is a convenient solution that allows you to simultaneously install a cable channel and create a seam between the wall and the floor.
To find out how long the baseboard you need, accurately measure the perimeter of the room and add 9% to the resulting length for scraps. You will also need fittings: external and internal corners, special connectors, end caps. The profile is available in standard length - 2.5 m.
The plinth can have a cable channel in the middle or consist of a profile attached to the wall and a plug (upper part); in the second case, the cable channel is located between the profile and the plug.
Regardless of the design, you can install such a plinth in several ways:
- for self-tapping screws,
- for liquid nails,
- on dowels.
You can attach a plinth with cable duct to drywall using self-tapping screws or glue; in a brick or concrete wall you will need to drill holes and hammer dowels into them. It is recommended to glue the cable channel only on smooth walls: in areas with defects, it may come off after a while. To mask wall defects, it is recommended to additionally secure the baseboard in these places to prevent a gap from appearing.
Unlike a conventional cable channel, you can drill holes in the wall directly through the baseboard. They are placed every 30 cm. To do this, the profile (the upper part or the decorative plug covering the channel must be removed) is pressed against the wall, carefully ensuring that there is no gap between it and the floor. Before attaching the plinth, remove debris with a vacuum cleaner. Press the profile back and insert dowel plugs into the holes, and then screw in the screws with a screwdriver.
To install the plinth on the outer corners, press it against the wall and make a mark at a distance of 3 mm from the corner. Then, following this mark, the profile and the plug are sawed off (for this it is convenient to use a miter box and a hacksaw for metal or wood) and installed on the wall. After laying the plinth, a special corner is placed on the corner. Corners can be with brackets or simply inserted.
It is better to install the baseboard starting from the corner of the room. It is advisable to install entire skirting boards in visible places. If you need to carefully join two sections within a wall, use special plastic connectors. Plugs are placed at the ends.
The plinth makes it possible to distribute wires into groups. For example, wires that do not require frequent access (Internet, cable TV) can be placed under the base of the baseboard. The rest can be placed in a cable channel closed with a plug. In the version with a completely removable top, you can place the wires under and above the rib to which the plug is attached.
Install a threshold with a cable channel in the gap between the floor coverings of two rooms. Like the baseboard, it consists of a base and a cover. Depending on the model, the base can be mounted using self-tapping screws or be self-adhesive.
If the cable channel is damaged or during repairs, it becomes necessary to dismantle it. For this:
- turn off the power supply,
- remove the box cover,
- unscrew the fasteners.
Once the undamaged cable channel has been removed, it can be used again.
Thus, you can install a cable channel with your own hands, without professional skills. It is important to choose a fastening method that matches the wall materials and perform the work carefully.
When laying cables on walls or ceilings, it is recommended to follow the following rules:
- When using screws, dowels and self-tapping screws, try to tighten them all the way. Otherwise, the protruding cap may damage the insulation.
- The maximum distance between fastening points should not exceed 50 cm, and at bending points (turns) it can be reduced to 5 - 10 cm.
- Laying is carried out without humps, evenly and preferably in a straight line (horizontally or vertically).
- If a margin is provided, it should be made less noticeable.
- When laying cables hidden in a groove, they are laid so that they do not interfere with further finishing of the walls.
- If you have suspended or suspended ceilings, there is no need to make grooves under them.
- The main tools that should be used during installation are a drill, a hammer drill, a screwdriver, screwdrivers and a hammer.
All these recommendations are universal and easy to implement.
Types of cable channels
When installing a channel cable, first mark it on the wall, then fasten it using self-tapping screws, dowel nails or “liquid nails”. The video shows how to properly install a PVC box.
Design and benefits
The cable channel is a structure consisting of 2 parts:
- grounds;
- covers.
The profile of the assembled structure can be rectangular, triangular, or rounded. The base is always flat, because mounted on a flat surface, most often on a wall. It may have partitions inside that allow you to separate conductors for different purposes and facilitate their installation. The cover is inserted into special grooves in the base and securely connected to it. This design allows you to quickly dismantle or expand the network when modernizing it.
The materials for making products are:
- metal (cold-rolled or galvanized steel, aluminum);
- plastic (most often polyvinyl chloride - PVC).
Cable channel made of PVC and metal profile
To install routes of various configurations, electrical boxes are equipped with special accessories (plugs, transitions, joints, etc.). This allows corners, joints, various transitions and bends to be aesthetically beautiful, so as not to spoil the interior. Accessories are compatible with a specific type of box and are selected depending on the route of open wiring. They are produced by domestic and foreign manufacturers in different sizes in a wide range of colors with varying degrees of protection (from IP00 to IP44).
The main advantages include:
- ease of installation and dismantling;
- the ability to lay conductors along a route with a complex configuration;
- easy access to conductors;
- protection of wires and cables from fire, damage, moisture, rodents and other negative factors;
- the ability to install switches and sockets directly on the surface of the product;
- a wide range of manufactured products, which makes it possible to choose for specific needs.
Installation Tips
So, so that you can install the cable channel correctly and at the same time quickly, we recommend that you familiarize yourself with the following installation nuances:
- First of all, carefully align the wall with the ceiling and prepare it for attaching the plastic box. The smoother the surface, the larger the pitch between fasteners can be. In addition, the absence of gaps will have a positive effect on the interior of the room.
- To connect the cable duct at corners (external, internal, the junction of a vertical route with a horizontal one), make special angles at 45 o. To do this, you can use a miter box, as shown in the photo.
- In addition to point 2 - in order not to bother with cutting out identical corners, use ready-made components from the manufacturer: internal and external plastic corners, T-shaped connectors, plugs, etc.
- The cable channel must be fastened evenly, both vertically and horizontally. To attach the box horizontally and level, use a building level. To level the route vertically, it is best to use a plumb line.
- Before installing a cable channel on the wall with your own hands, you need to mark these walls. There are certain standards on this issue, which we discussed in detail in the article - how to install open electrical wiring.
- If you need to mount a plastic electrical box on a plasterboard or wooden wall, do not drill holes in the surface in advance. The self-tapping screws will fit into the wall well without this. As you understand, this option for attaching the cable box will not work with concrete and brick.
- If possible, start laying the cable duct from a corner, so that later it will be easier to join sections and trim them if necessary.
- There is not much difference in when you decide to install the cable duct - before or after the decorative finishing of the walls. We recommend laying the product last, because... Installing a cable channel on wallpaper is much easier to do than gluing wallpaper, cutting it due to the already laid route.
- If you decide to place plastic wire protection on the ceiling, do not forget to prepare the ceiling surface in the same way as the walls. The cable channel is attached to the ceiling in the same way as on the walls.
That's all you need to know about how to attach a cable channel to a wall with your own hands. We hope that the provided detailed description with photos and video examples was useful for you!
We invite you to familiarize yourself with: Cable power calculation formula
Main varieties
Depending on the modification, the dimensions of the cable channels, their shape, material of manufacture and technical parameters vary. In everyday life or for registration of wiring in offices, the following are most often found:
| Name | Peculiarities | Areas of application |
| Mini | Box with a small cross-section. They hold up to 3 small cables. Installation of mini cable channels is carried out using self-tapping screws. When turning the wires, the joints are poured at an angle of 45° or plugs are installed. Typical sizes range from 10x10 mm to 60x80 mm | Most often used for Internet, television and telephony. |
| Flattened floor | An oval profile, which is used if it is not possible to route cables around the perimeter of an office or apartment. When installing, one edge of the box is attached to the floor with self-tapping screws, then it is closed with a lid and plugs are placed at the joints. Made from aluminum, galvanized or hard plastic. Size variations: from 16×6.5 cm to 7.5×1.5 cm. Colors include white, black grey, brown and a natural wood option. | They are laid in offices where it is necessary to run the wire to office equipment or a workplace in the center of the wall. Suitable for one or more medium sized cables. |
| Parapet guides | Main (parapet) boxes are made of plastic. There are several variations depending on the type of profile: similar to the “P” burka without a partition, “W” - with three sections, “G” for corners, curly and universal. The main advantage is the ability to adjust the rotation angle from 7 to 45° using adapters. Dimensions from 10×6 cm to 1×2 cm. | Can be used in any domestic premises. |
| Perforated with open access | Made of plastic or metal, it is 30-40% lighter than conventional options with easier installation. They provide good air circulation, have constant access to the wire in different parts of the network and can be installed on curved surfaces. | They are used to connect wires to each other when entering electrical panels or in production workshops, where the appearance of the wiring is not important. |
| Skirting floors | This type of cable duct is fastened using self-tapping screws to the walls or floor. Their design resembles hollow sections with a lid on top. The main selection parameter is the width of the diagonal wall (5 and 7 cm). The advantages include versatility for residential and office premises, variability of colors and immunity to ultraviolet rays. After dismantling the plinth cable channel, it can be reused. | Offices, administrative buildings, apartments and private houses. |
| Flexible | Prefabricated structures made of metal or plastic. Available in different colors, there are corrugated models. Such cable channels protect against mechanical damage, vibration or chemical reactions with the external environment. Such a box is flexible, can reduce noise levels and provide free access to wiring. At the same time, it is easy to replace a separate element, and installation does not require much time. By diameter you can find the following subtypes:
| When connecting wires to machines and other equipment in production. |
| Corner under the ceiling | Installation of the corner cable channel is carried out at the joint between the wall and the ceiling. The triangular shape of the structure fits perfectly into a flat corner. The maximum dimensions of the internal cavity are 4 by 4 cm. Simple installation and light weight of the structure are among the positive aspects of the box. Such cable channels are fixed only under the ceiling due to their fragility. | Any office and residential premises. |
| Transparent with backlight | Externally similar to corner ceiling models. They have a completely transparent lid, tilted at an angle of 45°. They have built-in lighting. | They are used to decorate lighting systems under the ceiling, frame kitchen cabinets and other decorative elements. |
| Industrial wire | Made from metal wire. They provide free air circulation, quick access to wires and do not accumulate dust inside the structure. | Installed in warehouses and workshops, as well as behind suspended ceilings. |
The types of cable channels listed can be divided according to the degree of rigidity, the presence of a cover or the type of locks at the joints. However, installation of wiring boxes in an apartment is carried out according to the same principle and with general rules.
Nuances of installation to a concrete wall
How to attach the cable duct to the wall depends on the material of the walls, since they have different strengths. The weight of the structure is determined mainly by the weight of the cable in the main box and ranges from 100 grams in the lightest case to several kilograms per linear meter. The distance between the screws should not exceed half a meter. If the base of the box does not have holes for fastening, it is better to drill them immediately before installing each section. Let's consider each type of wall material and installation features.
There are several ways to attach a cable duct to a concrete wall. You can choose the most suitable one:
- Professionals do this work using an air gun and special nails. The fastest option, but dismantling will be difficult and the tool is expensive.
- We drill holes with a hammer drill in the pre-marked places where the cable channel is attached. We insert plastic dowels and secure the channel with self-tapping screws. The most common installation method for small volumes of work.
- Adhesive connection. For use only on flat surfaces. Subsequent dismantling clearly renders the cable channels unusable. Procedure: special glue (liquid nails) is applied to the base of the cable channel of the required length along a sinusoid and for a second it is applied to the place marked on the wall. After 2 minutes, the cable channel must be pressed firmly for the glue hardening time indicated on the package.
Fastening the cable channel to a brick wall can be done in the same way as for concrete walls. It should be taken into account that dismantling the glued structures will lead to tearing off the plaster.
Installation of a cable channel on a wall made of wood or gypsum fiber board is almost the same. No drilling is required; the screws are screwed directly into the wall material.
It is worth noting that due to the fragility of gypsum fiber, the distance between the screws can be reduced. The adhesive method when applied to wood and gypsum fiber board has the same advantages and disadvantages as when applied to other materials.
If it is necessary to fasten the cable channels to a metal partition, you can use special metal screws 1.5-2.0 cm long with a drill at the end. If the surface is smooth, you can use the glue method.
Types and purpose
The materials from which the boxes are made usually have fire-resistant characteristics. This is usually galvanized steel, aluminum or plastic.
1.Plastic cable channels are quite versatile in use, as they have good flexibility and softness of the material, as well as exceptional moisture resistance.
These qualities allow them to be used on relatively uneven surfaces, in rooms with high humidity or outdoors. They can be easily sawed using a regular wood saw with a medium-sized tooth. In addition, the plastic profile is the cheapest existing box option.
When choosing plastic boxes, you should consider the thickness and quantity of your wiring. It is recommended to use a separate cell inside the channel for each wire.
Note! Cheap cable channels that have only one lock are very short-lived, since the plastic on the moving bends easily wears out, so it is better to buy devices with two locks.
2. Products made of steel are durable and have decorative colors, which allows you to choose the box of the required color.
This profile is made of galvanized steel to prevent corrosion and increase the service life of the structure.
When choosing a steel channel, you need to pay attention to the presence or absence of scratches on the body or cover. Since damage to the protective layer can lead to oxidation of the metal, their presence on the product is not permissible, especially if you are going to use the product for outdoor installation
The steel frame profile often has a perforated base to avoid drilling holes when installing the structure.
3. Aluminum boxes, like steel ones, have excellent fire resistance properties, which allows them to be used in industrial premises. It is also worth noting that aluminum is a very light metal, so using cable ducts made from it allows you to reduce the load on the wall surface.
Do not forget that the cable channel made of metal should be fastened on a flat surface, in order to avoid deformation and breaks of the profile and ensure its tight fit and easy latching of the cover lock.
Note! It is better not to purchase aluminum products with excessively thin walls. Since this is an extremely soft material, the locks and latches on such boxes will quickly fail. The choice of shape and color depends only on your preferences and interior features.
Preparation for installation
Necessary tools and equipment
To install the cable channel, the following tools are required:
The fastening of the channels depends on the surface. For wood, self-tapping screws are used; for stone or concrete surfaces, the channels are attached to dowel-nails. Liquid nails are used to attach the cable duct to smooth tiles or metal.
Before starting installation of the cable channel, it is necessary to perform calculations.
- First, decide on the material and type of channels. Create a plan of your room, which will indicate the necessary types of ducts for all rooms. In the plan, show the route of each cable, the location of additional accessories in the form of connectors or bends. All this should be recorded in footage. Consider outlets and switches in your plan. Also, when drawing up a plan, keep in mind that the main canal should be thicker than the adjacent canals.
- The cable channel can be placed at any wall level. The location of the channel depends on the interior of the room. If you plan to attach the channels with glue, make sure the walls are level in advance. Adhesive fastening can only be used for small channel models containing no more than 3 wires.
- Before starting work on installing cable ducts, prepare fasteners suitable for your surface. For a concrete wall, use dowels; for a wooden wall, use regular metal screws. For gypsum board, butterfly dowels are most often used.
- After preparing the fastening materials and necessary tools, the last preparatory step will be marking the wall. Mark the straight lines of the future channel with a pencil. Use a level to get straight lines.
- Another important preparatory step is to determine the location of the base, as well as an idea of which wires will go into the cable duct. The cables must be freely located inside the channel. A large number of wires can cause them to overheat.
- If the walls are uneven, the base may become bent and the lid may be difficult to snap into place. When installing the system after finishing work, do not stain the channels.
- If you do not have the opportunity to purchase fasteners, you can purchase special channels in the store with adhesive tape attached to the base. These fasteners are considered temporary, as they are not capable of performing their function for a long time. You need to cut such channels with the lid latched.
Hiding the wires in a box
If, after all, ditching a wall is too radical a way for you to solve the problem of wires getting tangled and interfering with comfortable viewing, then this option can confidently be called a compromise. First, let’s talk about all the advantages of using it.
- extremely simple installation;
- magnificent aesthetic appearance;
- compliance with all fire safety standards.
Let's touch on the cons:
- the cost of purchasing a decorative box or cable duct;
- the need to make holes in the wall.
In order to disguise the wires from the TV on the wall, you can use it as a cable channel
, and a full-fledged decorative
box
. The photo below demonstrates the difference between these two elements.
The basic material from which the box can be made is:
- plastic;
- metal.
However, combined options using two of these materials are also often found.
What will be the procedure?
- calculate the required amount of material, taking into account the direction of the wires and the size of the room;
- fix the box on the wall, make the necessary cuts in corners and transitions;
- keep in mind that the wire should lie freely in the box, so select the appropriate channel for it in diameter;
- After installation is complete, you can repaint the cable channel or box in accordance with your preferences or interior design logic.
The whole process is on video
You can do without painting, and simply select in advance a box of a suitable color design with the wall. Fortunately, the choice in construction stores is now more than wide and can satisfy even the most extravagant requests.
Installation technology
The main advantage is ease of installation. At the same time, the structure can be fixed on any surface: wall, floor or ceiling. The surface material is of greater importance: the method of best fastening depends on this. Let's consider the main installation options, as well as the types of surfaces to which the channel cable is attached.
Surface marking
Before you begin to attach the cable channel, you need to make markings on the surface: the location of the electrical wiring boxes is marked on the wall. This can be done using a pencil or chalk and a building level
It is important to maintain horizontal and vertical lines, since after installation the unevenness of the gasket will be evident
Self-tapping installation
To secure the box to a wooden wall, use ordinary self-tapping screws. The recommended length is 2–3 cm. This method is suitable for wooden houses, bathhouses and other buildings. Self-tapping screws are also suitable for walls covered with wooden clapboard.
When performing installation, holes are pre-drilled in the bottom of the box, into which self-tapping screws are then screwed. In plastic structures, holes can be made directly with a self-tapping screw during fastening. The optimal distance between installation points is 30–50 cm, depending on the expected load on the cable channel (the number of electrical wires placed in the box).
Fastening with dowels
Installing cable ducts on a concrete surface requires a more serious approach and additional tools. This will require plastic anchors and a hammer drill or impact drill to make holes in the concrete wall. This method is suitable for installing any profile: both metal and plastic, indoors or outside the building. The order of work is as follows:
- Holes for fastening are drilled at the bottom of the box. The distance between them, as in the previous version, is 30–50 cm;
- Then the cable channel is applied to the wall along the previously marked line;
- Using an awl or nail, the location of the fasteners is marked on the wall surface;
- Then, using a puncher, holes of the required diameter are drilled along the marks in the wall, into which plastic dowels are driven;
- After this, all that remains is to secure the profile using self-tapping screws.
Glue method
Another option for securing the cable channel is to use mounting adhesive for fixation. Most often, the adhesive composition “liquid nails”, produced under the Moment brand, is used for these purposes. This glue is available in tubes for a mounting gun or in ordinary tubes for manual application.
The adhesive installation method is used for attaching cable channels to plasterboard, PVC wall cladding (plastic lining or panels), as well as in bathrooms on ceramic tiles. It is worth noting that only plastic wiring boxes are suitable for this method, since their weight is minimal. It is also desirable that the number of wires laid in the cable channel be minimal and do not create significant loads on the structure.
The technology of the adhesive fixation method is as follows:
- An adhesive is applied to the back of the profile. To ensure maximum adhesion area, the glue is distributed in waves;
- Then the cable channel is carefully applied to the wall along the marking line and immediately removed;
- After 2–3 minutes, when the glue has begun to dry, the strip is reapplied and pressed firmly for several minutes.
After the adhesive has completely set, additional fixation is performed in problem areas. For fastening, use small screws or hammer nails.
In conclusion, here are a few recommendations that will come in handy when...
To facilitate profile connection, use additional elements offered by the manufacturer: T-shaped and corner structures, strip connectors, various bends and other accessories.
To install sockets and switches, it is best to use overhead versions of these products or use box models with built-in structures.
Separately, we note that the installation of external electrical wiring is carried out last, after all finishing work has been completed.
Method No. 2 – Dowel-nails
If you need to attach a cable channel to a concrete or brick wall, which is a typical situation for an apartment or a house, you cannot do without dowel nails, also called “quick installation”. In addition, for fastening you will need a hammer drill with a 6 mm drill. So, in order to independently fix the electrical box for the cable on a wall made of concrete or brick, you need to perform the following steps:
- Pre-drill 6 mm holes in the bottom of the cable channel every 40-50 cm.
- Attach the box to the wall according to the markings (more on this later) and mark the drilling points that coincide with the finished holes in the cable channel.
- Drill holes according to the marks on the wall.
- Place the plastic box and drive the dowels into the appropriate places.
- Hammer the nails.
Using these simple instructions, you can install the cable duct yourself in a wall made of concrete or brick. We draw your attention to one very important point - you should not drill holes with a drill while leaning the box against the wall. When drilling plastic, the impact mode can provoke the appearance of cracks, which will have a negative impact both from the visual side and from the durability of the finished wiring.
You can secure the cable duct on a brick or concrete wall using dowel nails. To do this, you need a hammer drill with a 6 mm thick drill.
- First, holes are made in the box itself every 40-50 mm.
This method is also called “quick installation”.
The box can also be attached to a concrete wall using a special gun.
If there is a need to attach a cable channel to a metal profile or metal up to 2 mm thick, so-called “bugs” are used - metal screws. The method is similar to fastening using wood screws.
Using these simple instructions, you can install the cable channel in a wall made of concrete or brick yourself.
- — Hammer,
- — Dowel-nails,
- - Sharp knife
- — Level and pencil,
- - Screwdriver.
A cable channel is a special plastic box that is attached to the outside of the wall (ceiling), and wiring is passed inside it. The channel consists of two parts - the first is fixed to the surface, a wire is inserted into it and a plastic cover is snapped on top (the second part).
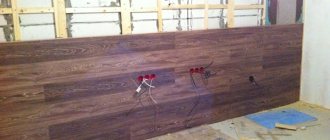
The house that is being renovated is old; most of the wiring has outlived its usefulness and had to be replaced. Along the partitions made of gas silicate blocks, we buried the wire in the grooves and sealed them, but there was no desire to groove the load-bearing concrete walls, and we ran the wire outside through the cable channel.
To begin, draw a straight line on the wall (ceiling) (for walls at a level) and prepare dowel-nails for work, from which you need to cut off the plastic cap with a sharp knife (photo 2). This is done so that the channel fits tightly to the wall. We will use a concrete drill with a diameter of 6 mm and, accordingly, dowel-nails No. 6.
Next, attach the cable channel to the line and punch it with a hammer drill, going deep into the wall to the length of the dowel. Insert the cut plastic insert and screw the dowel-nail with a screwdriver until it stops. The next attachment point is located 40-50 cm, the extreme one 5-7 cm from the edge of the box (photo 1).
Insert the wire into the channel and snap the cover (photo 3-4).
Attaching a plastic cable channel to a wall or ceiling can be done before or after the final finishing, that is, before wallpapering or painting, or after - whichever is more convenient for you. If wiring is routed to several walls at once, then special inserts must be used at the corners, otherwise it will be difficult to connect the channels.
In a similar way, you can attach a cable channel to a wooden or plastered wall; only the drill is changed. In our case, small unevenness on the wall can be repaired with putty during further finishing of the walls (it will not be possible to straighten it if you are attaching the channel to the wallpaper).
Classification of cable channels.
Depending on the room, the schematic arrangement of the wiring lines and the number of wires in them, it is recommended to use boxes of various types.
Main cable channel options:
- Pipe-based channels, further divided into horizontal and vertical. Similar channels will also include subchannels. The term “conduit” is used quite often;
- Box. PUE, clause 2.1.10 defines a box as a closed hollow structure of rectangular or other cross-section, intended for laying wires and cables in it. Boxes can be blind or with openable lids, with solid or perforated walls and lids. Blind boxes should have only solid walls on all sides and no lids.
- Trays. PUE, clause 2.1.11 defines a tray as an open structure intended for laying wires and cables on it. The tray does not protect against external mechanical damage to the wires and cables laid on it. Trays must be made of fireproof materials. They can be solid, perforated or lattice;
- Channels for laying cable harnesses, most often made on the basis of various types of discrete fastenings (brackets).
Channel cable size chart:
Dimensions of the cable channel.
Separately, we note that the installation of external electrical wiring is carried out last, after all finishing work has been completed.
How to fix a cable duct to a concrete wall
During the construction of a house, electrical wiring is installed in a hidden way, under the plaster. A complete replacement of the electrical wiring is usually carried out during a major overhaul. In this case, grooves are made in the wall, into which the wire is laid.
We invite you to find out which foundation is best for a bathhouse
But what to do when there is no opportunity or desire to engage in dusty wall slitting? Or do you need to connect a recently installed powerful electrical appliance, such as a water heater? In this case, many choose the open method of laying electrical wiring, and fastening to the wall is carried out using a cable channel.