Home / Leveling / Installation, repair, maintenance / What are ceiling rusts and how are they sealed?
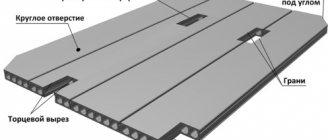
In a modern house, such a problem as the non-parallel arrangement of floor slabs has long been solved. In older houses, this could cause some inconvenience. Therefore, the builders left small depressions on the ceiling plane - rustications. In fact, rustics on the ceiling are a way to visually hide the unevenness of the slabs. But not everyone likes their presence and many are looking for ways to get rid of this not very beautiful detail.
The main sequence of work for leveling the ceiling
The work of leveling the ceiling involves a comprehensive step-by-step solution to the problem:
- Sealing rust on the ceiling, as well as preparing the entire ceiling surface.
- If necessary, you need to install a plaster mesh.
- Installation of beacons.
- Plastering the ceiling.
- If necessary.
Required materials and tools
- Hammer.
- Rotary hammer with a “shovel” attachment.
- Chisel.
- Overlay spatula (narrow).
- The spatula is wide (with a blade width of 45 cm).
- Polyacrylic seamless roller, with a pile thickness of at least 11 mm.
- Rectangular brush.
- Polyurethane foam.
- Serpyanka (mesh for reinforcing seams, 20 cm wide).
- Skin.
- Primer.
- Plaster of two types:
- starting;
- finishing;
- Polyurethane foam.
- Construction mixer (with its help it is much easier and faster to prepare solutions).
Sequence of work
It is necessary not only to repair the rustications on the ceiling, but also to prepare the entire surface, install beacons and perform plaster.
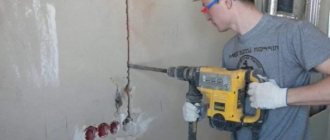
The rust on the ceiling must first be expanded in width and depth using a chisel and spatula. This must be done without fail so that the quality does not deteriorate later.
After this, the rustications need to be primed. You can use a brush for this. Next, polyurethane foam is applied inside the rustics. After 24 hours, trim off excess foam. Then we prime again.
Next, use a spatula to apply the plaster. To do this, it is better to use a ready-made mixture from well-known manufacturers. When the layer has dried, apply serpyanka along the seam. Such work should be carried out in all problem areas on the ceiling.
When the rustics are completely sealed, you can begin the subsequent processes of finishing the entire surface of the ceiling. To do this, first prepare (remove the old layer, clean, prime) the surface. It is worth noting that in some cases old plaster can hold up very well, so it is not always advisable to touch it. If it can withstand hammer blows, it can be left.
High-quality rust removal is the key to the beauty and reliability of the finish
If everything is done correctly and consistently, the rustications will be imperceptibly hidden behind the finishing layer of finishing material. Additionally, you can watch a video of the process to better understand how the process occurs. And then the ceiling will acquire unprecedented evenness and smoothness. If the differences in the slabs do not allow you to resort to plastering, you can make a structure from plasterboard or stretch PVC film. This will avoid lengthy and labor-intensive processes. And the quality of the ceiling will be no worse, and perhaps even better.
Any building changes over time. This is a natural process caused by both weather factors - freezing and thawing of the soil, wind and low temperatures, and gradual wear and tear of the structure - displacement of the foundation, subsidence of walls. The latter creates an additional tensile or compressive load, which contributes to the deformation of concrete slabs.
As a result, the walls and ceiling of a residential building gradually become covered with cracks.
How to properly seal ceiling rusts
Let's consider the sequence of stages of work on sealing the ceiling rust:
- Ceiling rustics must first be expanded in depth and width
. To do this, we recommend using a spatula and chisel for small cracks:
A little advice: you need to expand a small rust until construction debris stops falling out of the crack.
Large rust, as a rule, needs to be expanded to 3-5 cm in width, or even more.
A little advice: do not hesitate to open cracks in the ceiling, otherwise when finishing the ceiling, they will not behave in the best way. It’s better to work hard once and do everything so that later the ceiling does not need additional repairs.
- Rustic areas cleared of construction debris must be primed
. This work is most conveniently done using a regular paint brush. There is no shortage of primer choices on the construction market.
A little advice: buy primer (and all finishing materials) from branded, trusted manufacturers. This is a guarantee that the repaired ceiling surface will last a long time, without unpleasant surprises.
- We wipe the rust with a damp cloth after the primer has completely dried.
- We apply polyurethane foam inside the seams.
- After a 24-hour break, we cut off the mounting foam with a knife.
- We re-prime the cut area.
- We fill the hollow in place of the rust with plaster, applying it with an overlay spatula. Many novice builders, when choosing a finishing material, have doubts about how to repair the rustications on the ceiling? We recommend choosing dry plaster compositions from trusted manufacturers whose products have been on the market for more than one year and have positive reviews from experienced and novice builders. As an option, we recommend using KNAUF-Rotband plaster to seal up rust.
Please note: the plaster must be applied very tightly.
- We wait for the entire layer of plaster to dry completely and apply and plaster the serpyanka using a single piece along the seam.
Tip: adding a primer to the plaster solution increases its strength.
- We carry out similar stages of work:
- on all large cracks in the ceiling;
- in the corners;
- at the junctions between the ceiling and the wall.
So, the ceiling rusts have been completely eliminated, now you can start preparing the entire surface.
Rusts are the seams between the floor slabs that are on the ceiling. They can still be seen in many apartments built during Soviet times. Knowing how to seal them, apartment owners will be able to get rid of this type of “decoration”, and the resulting ceiling will be beautiful and smooth. In this article we will look at a technology with which you can easily get rid of rust with your own hands.
What is needed to seal rusts?
To repair rust we will need the following tools and materials:
- primer;
- gypsum plaster (for example “Rotband”);
- several spatulas;
- mixer to mix the solution;
- brush.
Preliminary work
Before the process of sealing rusts itself, it is necessary to get rid of the whitewash on the ceiling and thoroughly clean the ceiling seams so that there is good adhesion between the concrete base and the building material. We are now talking about whitewashed ceilings, since already painted bases in most cases are free from rust, thanks to the preparatory work before painting with acrylic paint.
Instructions for sealing rust yourself
So we looked at how you can get rid of the “decorations” of Soviet times, which have always been a source of irritation for many people.
When installing interfloor floors from prefabricated reinforced concrete flooring slabs, seams remain between the slabs, which are not sealed flush, but are embroidered - pulled out or cut in the form of rustications. Rusts hide the cracks that form.
Before jointing begins, the seams between the slabs are filled with tow and compacted - the windows are sealed so that the tow is recessed into the seam to a depth of 15-20 mm.
For jointing, a simplified board template is used (Fig. 80, a), one side of which is cut into a “mustache” at an angle of 45°, and in the middle of the board, on both sides, reinforcing wire 10 mm thick is secured with nails. The wire is first bent. You can make a regular, small template (Fig. 80, b). Rusts are pulled out using templates using fresh mortar.
Rice. 80. Templates for drawing out or cutting rustications: a - simplified template, b - regular, c - rustication-half-grater
Rusts can be cut using a special rustication cutter (Fig. 80, c) of small sizes with a cutout on the canvas.
A steel plate, curved in the form of a half ring with bent edges, is attached to the cutout.
There are holes punched in the edges for attaching the half ring to the canvas with nails.
The rules are attached to the ceiling using two or three thin slats 10-15 cm long greater than the height of the room (Fig. 81). The slats are placed at an angle on the floor. First, the ends of the rule 1 are pressed with two slats 2, and then the middle of the rule is pressed with an additional slat. Spring slats firmly hold the rule. If the flooring slabs are accidentally not laid at the same level, then make a second template, with one groove lower than the other. Cement or cement-lime mortar is used to fill the joints. To ensure fast setting, no more than 10% gypsum is added to it.
Rice. 81. Fastening the rule using flexible slats: 1 - rule, 2 - slats
The mortar is filled into the joint flush with the slabs and rubbed well. After this, a mortar is attached to the ceiling so that the rustication is in the center of the seam, a rustication trowel is placed on it, and, pressing it with the necessary force, the steel half-ring is moved forward, cutting off the mortar. This operation is repeated several times until the mortar is completely cut off and rust has formed. The cut rust is corrected and rubbed with a small grater.
A smooth and perfectly finished ceiling surface in your apartment is the result of the renovation. Well made, it immediately catches the eye. Your friends, when evaluating the repairs you have made, will first of all pay attention to the ceiling. If there are noticeable flaws on it, then the entire impression of a good repair will be blurred. Sealing rust between floor slabs is an important part of ceiling repair.
Layout diagram of prestressed reinforcement of the floor slab.
Do this work efficiently, do not be afraid to waste a lot of time and effort; the ceiling you have brought to a magnificent appearance will serve you for many years.
Finding a good plasterer can take a long time. Try to repair the ceiling yourself. To do this, study the entire technology of the process of this work.
You can use different materials to repair rustications, but the list of main works is the same for all options.
You can order the installation of a stretch ceiling on the website art-master.net.
Floor panel installation diagram.
- Removing everything that remains of the old cement screed and plaster. To do this, use a drill, chisel, or spatula. Clean off old filler.
- Clean the surface from dust. The deep penetration primer is diluted as written on the label. The width of the hole to be sealed should correspond to the width of the brush. That is, it should go inside easily.
- According to the instructions written on the package, we dilute the dry construction mixture. This is easy to do with a mixer.
- All cracks are filled with the solution you prepared. In deep rust, apply several layers of solution. Allow each new layer to dry completely. If the seam is wide enough, use other materials to pre-fill it.
- After the solution has dried, coat the entire rust with PVA glue and glue the sickle onto it. Its width should be 2 cm larger than the hole itself. Apply putty to the serpyanka, followed by sanding with fine sandpaper.
How to repair rust on the ceiling so that cracks do not appear on the surface?
You need to go from the opposite, and since it is impossible to prevent cracks, they need to be “smeared”, i.e. make sure that the resulting deformation cannot come out.
In other words, the crack is still there, but it is not visible behind the finishing coating of the ceiling.
When sealing rust on the ceiling, it is necessary to use reinforcing materials that have a fibrous structure and sufficient thickness.
Fiberglass has optimal qualities for such work.
The smooth and beautiful surface of the ceiling above your head is the crown of a high-quality renovation.
Without it, the entire impression of the work done will be blurred.
Therefore, it is better to spend enough time and effort today to bring your ceiling to the desired shine for many years to come. Leveling the ceiling with plaster is quite a labor-intensive job that is best left to professionals. But you still need to look for a good plasterer, and you can distinguish a professional from an amateur only if you understand the technology for performing this work.
Many people want to do your repairs, but only a few know how to do it and want to do it right.
Besides, we are used to doing everything with our own hands. After reading this article, you will learn how to level a ceiling using plaster and putty without having professional skills.
Leveling the ceiling with plaster is done using installed beacons and plastering at a level, or simply by pulling the solution into a plane as a rule to level out small differences. In the second case, without certain skills, it is impossible to achieve a sufficiently flat surface over the entire ceiling area.
We will perform the work in the following sequence:
1. Sealing rusts and preparing the surface.
4. Puttying the ceiling (if necessary).
Sealing rusts and surface preparation
First of all, you need to prepare the ceiling surface for plastering work. In old apartments, the main problem for a level ceiling is differences in floor slabs and cracks (rusts) that arise due to displacement of the slabs due to natural movements.
The tools we will need are:
- hammer;
- chisel;
- perforator with a “shovel”;
- narrow thick spatula.
The materials we will need are:
- Polyurethane foam;
Serpyanka 20 cm wide;
Primer;
Plaster on a gypsum or cement base;
Skin
Each rust or crack must be expanded (expanded in width and depth).
Minor cracks are simply picked out with a spatula and a chisel until debris stops spilling out of them. Large cracks and rusts are expanded up to 3-5 cm in width or more. It is worth remembering that it is better to spend time and completely open cracks or rusts than to later show themselves on a freshly painted ceiling.
Prime the cleaned rust using a brush. If we are preparing the surface for gypsum plaster, then it is better to use a primer from KNAUF-Betokontakt (in the Russian version Betokontakt) or a primer from PUFAS:
After the primer has dried, we wipe the rustics with a damp cloth and apply polyurethane foam inside the seams.
The next day, cut off the excess foam with a mounting knife and re-prime.
We spread the KNAUF-Rotband plaster and, using a spatula, fill the hollow at the junction of the slabs as tightly as possible. After the layer of plaster has dried, we apply a single piece of serpentine to the surface along the seam, trying to place it in the middle of the rustication, and plaster it. The plaster can be strengthened by adding a little primer when mixing the solution. We do the same with large cracks, joints of wall panels between the ceiling and in the corners. Fill small embroidered cracks with mortar, apply sickle and plaster over it.
Do I need to completely remove the old plaster?
There are at least 3 options possible here:
1. If you have cement-sand plaster on a concrete base, you can test its strength using a chisel and hammer or a hatchet. If it doesn’t come off easily, you can leave it. The main thing is that between the concrete and the cement-sand plaster there is no layer in the form of whitewash or paint.
2. If the ceiling has differences of more than 10 mm and we have to level the ceiling using new plaster, then we will definitely have to remove the old one down to the concrete base. The easiest and fastest way to do this is to use a hammer drill with a “spatula”, knocking down the old plaster along with the paint (whitewash).
3. If the ceiling is fairly even and we only want to bring it to perfection with the help of putty, we need to “tap” the old plaster in order to identify voids, cracks, clean weak spots to create strong plaster, and wash off the old whitewash.
IMPORTANT! Knocking down old plaster or protruding corners of floor slabs is not the same thing! It is strictly forbidden to touch the corners and convexities of reinforced concrete floor slabs!
Do I need to remove old paint?
Old paint should always be removed. This is best done using a hammer drill along with old plaster. If the painted surface is very durable and the decision is made to leave it, then the surface must be roughened and primed with high-quality Concrete Contact.
In the case when, under all equal conditions of wear of the coating, in some places significant pieces of plaster fall off when tapping, the guarantees that in other places the plaster will not fall in the coming years are extremely small. The smartest thing to do would be to remove it completely.
How to remove old paint (whitewash)?
We remove old whitewash by moistening the surface with hot water and then removing it with a spatula.
With paint it is much more difficult, as practice has shown, various paint removers (washes) are not effective enough. The thermal method of removing old paint from the surface of concrete and plaster using a hair dryer is practically useless. You can try soaking water-based paint with a roller with an iodine solution (one bottle of iodine per bucket of water) and scraping off the swollen paint with a spatula.
The best way is to mechanically treat the surface using a power tool, the most common of which is an angle grinder (angle grinder), or as it is commonly called a “grinder”. To clean the surface, instead of a disk, a wire brush is attached to the angle grinder. True, the mechanical method is quite dusty. There are also more specialized tools - surface grinders and stripping milling cutters. Not every home has such a tool, but you can borrow it, for example, from a familiar car mechanic.
After we have removed the weak plaster and sealed all the cracks, we clean the plastered areas with sandpaper, sweep the surface from dust using a wide brush and use a roller to completely prime it in two layers with intermediate drying.
The ceiling surface ready for plastering must be dry, hard, free of dust, dirt, grease stains and peelings of previous coatings.
Technical characteristics of the materials used:
Installation of a two-level suspended ceiling made of plasterboard - drawing up a ceiling project and preparing the surface - part 1 Sealing the joints of a plasterboard ceiling using putty, paper tape and fiberglass mesh, installing a corner protection profile - part 5 Making a side for ceiling lighting (light cornice), preparing holes for lamps , installation of plasterboard sheets to a metal ceiling frame - part 4
How to determine the quality of repair? There are many criteria for this. One of them is the evenness of the surface on the ceiling. This question is especially relevant if all the operations were performed with your own hands, which are not “professional”.
If there are comments about the evenness of the ceiling surface, then the impression of the overall picture may be spoiled. Therefore, it is worth considering the question of what needs to be done to repair rust on the ceiling with your own hands.
Preparation for the process
Monolithic floor slab with cold joint.
Rusts are seams between ceiling slabs. They are very common in houses built in the last century. Sealing rust is mandatory if you want to give the ceiling in your room a decent look. An untidy seam on the ceiling will spoil the entire appearance of the room.
It is impossible to repair the ceiling well if you do not properly repair the rusts between the ceiling slabs. During operation, the house may undergo shrinkage, which often leads to differences and displacement of slabs, and the formation of rust. To properly repair and seal them, you will need the following tools:
- hammer;
- chisel;
- perforator;
- narrow spatula;
- metal brush.
To carry out work on sealing these elements between the ceiling slabs, you must purchase the necessary materials from a hardware store:
- polyurethane foam;
- primer;
- serpyanka;
- skin;
- plaster;
- gloves, safety glasses.
The work ahead of you will be carried out on the ceiling. If you are not going to change the floor, then cover it with paper, oilcloth or cardboard.
- Do the preparatory work. Remove old plaster or whitewash. Take a good look at the seams that you have to seal, determine what work needs to be done to ensure that the seal between the slabs is of high quality.
- After inspecting the seams, you begin to prepare them for work. To ensure a high-quality seal, you need to expand them. This is done using the tools that you have prepared.
- Small seams between the slabs are simply picked out with a spatula or cut with a chisel. Don’t be afraid to make them wider. Level their walls; to do this, use a hammer drill by inserting a spatula-shaped attachment into it.
The configuration between the floor slabs should resemble a cone; this will make the seal stick much better.
Use a wire brush to clean the seams between the slabs until no more debris comes out.
Preparations for the work of sealing the rusts have been completed.
Painting works
Further painting work or sheathing around the perimeter with plasterboard can be carried out no earlier than a day after completion of the plastering, even if it is Rotband gypsum plaster, which is believed to dry relatively quickly. Rotband sets quickly, but it needs time to dry completely and the moment of possible continuation of work will be clearly visible by the change in color of the plaster, which dries to light gray.
So, with the help of a simple repair operation, you can get rid of the latest “decorations” of the Soviet era, which, admittedly, were out of place and did not decorate the ceiling or the apartment as a whole, and for most residents were simply a source of additional irritation.
Sealing rusts
The seams are sealed with gypsum plaster. Its price varies from 150 rubles and above, it all depends on its weight.
Make it medium thick, without lumps, evenly kneading.
Some home craftsmen use cement plaster, to which polymer additives have been added, but gypsum material is better suited for interior work. It is flexible and sets quickly, making the work much easier.
Floor slab installation diagram.
- Before you start sealing the joints, apply a primer between the floor slabs. Do this with a brush, carefully observing so that there are no unprimed areas left.
- Without waiting for it to dry, you start sealing the rust. Applying the solution to a fresh primer will provide excellent adhesion to the concrete surface.
- Apply the solution with small strokes of the spatula, do it with light pressure, try to make sure that the solution fills the entire cavity between the plates.
- Remove all excess mortar with a spatula, while moving it along the rust. When working crosswise, indentations may form.
In parallel with this work, correct other defects on the ceiling, just do not forget to prime them.
- Without waiting for the solution to dry completely, perform additional reinforcement; for this, use a serpyanka. Place it so that the seam between the plates is in the middle.
- Coat it with a layer of solution not exceeding a few millimeters. Otherwise, instead of an unsightly seam, you will end up with an unsightly hump.
- If, when jointing, it turns out to be wide and deep enough, then tow can be used to fill it. Pre-wet it in a liquid gypsum solution and compact it well inside the seam.
- Apply the serpyanka on top and cover it with a thin layer of mortar. Make sure that the solution completely fills the empty volume between the tow and sickle.
Sealing technology
After the surface of the ceiling to be repaired is prepared, you can begin mixing the gypsum plaster, which should be of medium thickness and uniform mixing to complete the work, that is, without lumps and poorly mixed parts. You can immediately mix the plaster mixture for the entire room, since sealing rust is a relatively quick process, although labor-intensive.
After the solution is ready, we coat the ceiling rustics with a brush dipped in primer, carefully while doing this, making sure that there are no gaps. There is no need to soak the primer and we begin plastering immediately. To do this, apply the solution to the seam in small strokes with an 8-12 cm spatula, and when the plastered strip is a meter long, take a wide spatula and remove the excess gypsum plaster by moving along (!) the rust
. There is no need to try to level the mixture by running a spatula across the seam of the floor slabs, as we will end up with a hole, which can then be visually visible.
In the course of this work, you can immediately straighten out large holes in the ceiling, if there are any, while filling up the rust, just do not forget to coat the required area with a primer before plastering, otherwise the solution may simply fall off due to poor adhesion.
SEALING ON THE CEILING
Sealing with mounting tape guarantees reliability.
- The rust from the previous finish is cleared. Then, using various tools (drill, chisel, knife), it is prepared and expanded.
- The rust is cleared of small debris with a knife, and cleaned with a metal brush.
- After cleaning, coat the inner surface with a primer solution. It is very convenient to do this with a paint brush.
The primer solution should have a deep penetration effect.
- After the primer has dried, proceed to sealing the ceiling rusts. The best way to do this is with a construction gun. With its help, the foam will fill to its entire depth;
- wait until the foam dries, and then cut off the excess with a sharp construction knife;
- prepare the construction mixture. Make sure there are no lumps. You can find out how to dilute it in the instructions written on the package;
- Serpyanka will help to give the seam greater aesthetics. You apply it to the rust, apply a leveling layer of mortar on top of it;
- After complete drying, you can perform final leveling with putty.
If you carry out all the work on sealing rust between the ceiling slabs in accordance with the given rules and instructions, then you will forget about the problems with your ceiling for a long time.
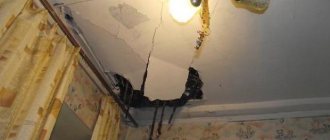
When renovating an apartment, one of the most difficult areas is the ceiling. Due to the shrinkage of the house, subsidence or soil movement, cracks of varying depths form between the floors. It will not be possible to create a beautiful interior with cracks in the ceiling; therefore, the seams between the floor slabs will have to be sealed. The procedure can be done manually, but has a number of features.
What causes rust on the ceiling?
Due to the difference in floor slabs, a rust (seam) appears on the ceiling.
Many believe that such a seam between the slabs is the weakest point in the ceiling decoration, and its sealing is a temporary measure and not at all durable.
However, this opinion was formed due to ignorance of the causes of crack formation.
The floor slabs are a structure made of durable reinforced concrete, and the resulting seam has a decorative function.
It is not possible to connect the slabs to each other with any material, much less give such a connection the strength characteristics of the slab.
Since it is impossible to exclude the occurrence of minimal dimensional changes and fluctuations.
The reasons for the formation of cracks in rusts are:
- temperature fluctuations,
- sudden change in humidity level,
- increase in load
- and the process of house shrinkage.
Many people use this method of strengthening the seam between slabs, such as sickle reinforcement. But this does not guarantee the absence of cracks in rustications.
The rigidity of this material is not sufficient to withstand the changes that occur.
The mesh is designed to inhibit the growth of cracks that form and prevent the plaster layer from crumbling.
Tools and materials
Sealing the seams on the ceiling will require the preparation of tools and materials. They should be prepared before starting work on the ceiling slabs.
Spatula with flexible elastic blade
How to seal the seams on the ceiling between the slabs? This type of work requires:
- deep penetration primer is better. The soil is intended to improve the adhesion of the concrete surface and the material with which it is planned to seal the cracks;
- cement brand NTs, it is used to eliminate deep recesses. The main difference from the standard composition is the ability to expand and fill holes during the solidification process;
- for wide cracks, thermal insulation material is useful; the filler is construction foam, polyurethane or polyethylene foam;
- putty with elastic material (latex);
- sealant;
- reinforced mesh with a width of 4-5 cm, if the width of the crack allows you to place a metal base inside;
- starting and finishing putty.
When treating the ceiling, as well as the floor and walls, you will need basic electrical appliances. The type of tool depends on the seam sealing technology; usually it is enough:
- spatulas of various sizes;
- metal brush;
- spray bottle;
- construction knife;
- hammer drill, easy to replace with a drill with impact mode;
- sandpaper.
What tools will be useful to us
Before closing the joints of the slabs on the ceiling, you should take care of personal safety: eye protection glasses, a respirator, comfortable gloves and overalls.
The actual sealing of the seam
Dry tow can also be suitable for sealing the seams between the slabs, but it is better to first moisten it in liquid gypsum dough, which is prepared for this in small quantities. Thoroughly compact the tow. When hardening, the gypsum increases in volume and presses the tow even more tightly against the walls of the slabs.
Also, when sealing seams, you can use polyurethane foam, but this is the worst option. Suitable fillers include any mineral or polymer fillers, strips of drywall residues, mineral wool (if you use it, take precautions and protect your respiratory tract), polystyrene foam and even crumpled coated paper.
After this, the seams between the slabs must be carefully covered with a lime-gypsum solution of the consistency of sour cream, flush with the slabs. Then smooth them out and rub them in. To ensure that sedimentary cracks between the slabs are not so noticeable, rustling is performed to give the seam the required shape. You should not use acrylic primers, as they often make the adhesion of the plaster to the surface worse and the seal will not be strong. It is best to use putty or plaster.
Plaster is a dry gypsum mixture, often called coarse putty.
When using plaster, a layer of up to 5 cm can be applied without reinforcement. And it is better to apply it with a trowel - a trowel, a trowel, because this tool is more accurate than a spatula, and is designed for applying plaster when leveling surfaces (the actual sealing).
Return to contents
How to remove seams on the ceiling: preparatory stage
Before sealing the seams on the ceiling, it is important to carry out the coating preparation stage. The surface should be durable and primed. It is better to remove any coatings with weak fixation: old putty, paint, wallpaper, cement, lime, etc.
It is better to seal the seams of floor slabs in a clean room (after wet cleaning). To achieve better adhesion and normal mineralization of the working solution, the room must be dry. Primer is applied on top of the cleaned ceiling surface.
Before proceeding to apply the next layer, it is important to wait until the previous one has hardened. The amount of time depends on the temperature and type of material.
Preparatory stage
No matter what method is tested on the ceiling, it will definitely have to be cleaned of traces of previous painting or whitewashing. To do this, you will need a simple spatula, thoroughly moistened with warm water. It is worth noting that all ceiling debris will fly down, so it is better to protect yourself as much as possible by wearing special clothing and a protective mask.
There can be much more problems with paint than with whitewash. You can tear it off along with the plaster, or try to sand it with a special machine.
You cannot approach the question “how to repair rust on the ceiling” without deciding what to do with the old plaster.
- The old layer can stay firmly on the ceiling. Then there is no point in chipping it off. Otherwise, if the coating crumbles and falls off, it is better to remove it completely.
- If you are only sealing rust on the ceiling, then it is enough to find weak spots in the ceilings. Having discovered them, it is necessary to partially peel off the plaster in those places and seal the resulting cavity (about
Working with a wide, shallow joint
If there are shallow cracks between floor slabs with a width of 3 cm or more, it is better to use filler, polyurethane foam.
Repairing a seam is quite a labor-intensive job that must be done scrupulously, otherwise the bad work will be visible later
How to seal a seam between ceiling tiles using foam? For this:
- A mounting gun is inserted into the recess and the hole is filled with foam.
- Wait for the foam to dry, usually takes about 2-4 hours.
- All protruding parts are removed with a construction knife; it is better to make a recess of a few millimeters for better grip, but the depth should not exceed 5 mm.
- The recess is treated with elastic putty. It is convenient to use the material using 2 spatulas: narrow and wide. The mixture is stored on a wide tool, and the putty is applied with a narrow spatula.
- Cover the seams on the ceiling with a wide spatula, removing excess and other defects.
Preparation and determination of the scope of necessary work with the ceiling
Any repair of ceiling rusts begins with preparation. The decorative coating is removed, whitewash and water-soluble paints are washed away. Here .
The seam is opened with a spatula. The crack expands and all crumbling areas are removed. If the solution chips easily, then it is worth removing it completely to the concrete, this will prevent further peeling when painting the ceiling.
Before sealing the seams on the ceiling, a visual inspection of the damage is carried out and displacement is measured. In cases where the difference does not exceed 5–7 mm, and the width of the crack is small, it can simply be restored without subsequent leveling of all surfaces. If the difference is significant, 7–10 mm, then after sealing the rust on the ceiling, you will have to pull out the surface to level out the difference. For more significant defects, it is recommended to install false ceilings. It is possible to level out large differences using a solution, and some materials allow you to apply large layers, but this will cost more. In this case, it is much more rational to use plasterboard systems or suspended ceilings.
Work order
Proper repair of ceiling rusts guarantees the absence of cracks for several years. For work we will need:
- a primer that increases the adhesion of materials, preferably concrete contact and its analogues;
- fiberglass mesh (serpyanka);
- steel spatula;
- plaster plaster mixture (Rotband, Prospectors, etc.);
- for large gap widths - polyurethane foam.
Thoroughly moisten the surface of the rust with a primer and wait until it dries completely. If the crack is large, carefully fill it with foam so that it does not protrude below the surface of the ceiling, and leave for a day. Before repairing a crack in the ceiling, it is necessary to fill it with plaster mortar, ideally Rotband, about a third and lay a serpyanka ,
so that the middle of the tape coincides with the center of the rustication. Fiberglass tape will serve as reinforcement; it will protect against cracking, even with small movements of the slabs, which are inevitable in the future.
After this, the rustication depression is carefully filled with gypsum plaster and leveled. If there is a small difference, then it is necessary to putty the entire surface area that is higher. To level the layer it is convenient to use a steel rule. If plastering experience allows, you can use a more convenient and lightweight wide spatula.
After drying, the entire putty surface is leveled using a special grater or grinder. The further order of work depends on the finishing method. They also act to eliminate any defects. If you need to repair a hole, crack or chip in the ceiling, they also need to be cleaned. For defects of a large area, use reinforcement with fiberglass or metal plaster mesh.
Working with a wide joint of great depth
If you have to seal a seam between tiles on a ceiling with a width of more than 3 cm and a relatively large depth, you should not use foam.
Work algorithm:
- Filling the recess with heat-insulating material. Foamed polyethylene and polyurethane foam are suitable for this purpose.
- Fixing the insulation using a sealant with maximum resistance to moisture.
- After sealing the crack, the gap is sealed with NC cement, but a small groove with a depth of up to 5 mm is left.
- After the cement has completely hardened, a latex type of putty is applied on top, and the plane of the slab is leveled with it.
- Using a spatula, remove the excess layer of preliminary putty and level it as much as possible.
Instead of foam, you can use ceramic tile adhesive to seal deep cracks.
Video instruction: how to properly repair cracks in the ceiling
“The operation was successful. The ceiling rust has been eliminated,” amuse yourself and the serious master before realizing your grandiose plans. The updated, flat ceiling needs a decent frame - good luck with your labors and beautiful interiors!
How to repair rust on a ceiling: sequence of work, necessary materials and tools, recommendations for preparing the ceiling surface
The result of a high-quality renovation is a beautiful and smooth surface on the ceiling. Otherwise, the impression of all the work done will be crossed out. Let's talk about how to repair rust on the ceiling so that the ceiling has a perfectly flat surface.
In old-built houses, the ceilings have peculiar grooves-recesses, the so-called rustications. In those days, the ceiling leveling technologies that are used today did not yet exist. Therefore, the builders left such special grooves, with the help of which it was possible to decorate the transition from one ceiling slab to another.
Sequence of work on sealing rusts and cracks on the ceiling
It is important to remember: if you decide to eliminate rust on your own, you must remember: ceiling tiles do not always fit together perfectly. As a rule, there are differences between the ceiling slabs. Therefore, without special surface leveling skills, it is very difficult to achieve ideal surface evenness.
We suggest considering the option of leveling the ceiling using one of two methods of plastering the surface:
This is what rust on the ceiling looks like
With the installation of beacons and plastering of the ceiling surface according to the level.
- The method of pulling the solution, usually into a plane. This method is more relevant for ceilings with small differences. If the differences between the ceiling slabs are large, then without certain skills it is unlikely that it will be possible to create a perfectly flat surface.
Working with deep and narrow joints
It is better to seal narrow but deep seams between floor slabs using the same method as in the previous case.
How to seal the seams on the ceiling between the slabs? The sequence of work is as follows:
- A sealant is applied to a piece of insulation and placed inside the groove. The material should be pushed firmly into the recess.
- After high-quality compaction with insulation, there should be about 1 cm of depth left for adding NC cement. It is important to leave a 5mm recess.
- Latex putty is applied to the hardened cement mortar and leveled with a spatula.
Rust repair
You have successfully completed the preparatory work, now you can begin to repair the cracks between the ceilings. To do this, you must have:
- serpyanka 200 mm wide,
- polyurethane foam,
- plaster.
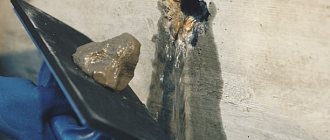
To properly seal a crack, it is cleaned and deepened. If the crack is small, use a chisel or spatula to clear it of debris, dust, pieces of plaster or old whitewash.
The size of the rustication is significant or the shift between the plates is 10 mm, it must be embroidered. An ideal rustication should look like a recess with a triangular cross-section 50 mm wide. To give it the desired look, use a chisel, then remove all debris from it, and treat the rust with a polymer primer.
After drying, take a damp cloth and wipe the rust, and then seal it with foam. After a day, cut off the remaining foam, making sure that it does not extend beyond the level of the ceiling surface.
Prepare cement mortar. Use a spatula to place it inside the crack. Try to ensure that it tightly fills the depression of the rust. After the solution has set, cover the surface of the rust with a strip of sickle tape, making sure that its middle coincides with the center of the crack.
Rusts are the seams between the floor slabs on the ceiling, which still decorate many apartments built during the Soviet Union. When finishing, sealing rusts helps
get rid of this “decoration” and make the ceiling smooth and beautiful, since these seams can rarely fit into the interior of a modern room.
Next steps
Sealing the seams between the panels is not completed in the previous steps. It is important to carry out the entire processing complex so that defects do not appear in the future. Otherwise, when the soil and the base of the building move, the floor seams will crack again, and all work will be in vain.
The reason for the appearance of cracks may be incorrect calculation of the load on the structure or neglect of construction technology, which causes the building to shrink. At the stage of building a house, it is important to take into account the weight of the house’s insulation and lay the water supply system in advance to prevent the destruction of load-bearing walls and foundations later.
Latex putty. This kind of putty is more suitable for sealing seams.
Protection of joints between floor slabs from destruction is carried out in stages:
- Wait for the latex putty to harden; complete drying takes about 2 days.
- Preparation for reinforcement of the recess. Apply a starting layer of putty, it is laid with a small protrusion beyond the edges of 4-5 cm.
- A reinforcing mesh is pressed into the material; a roller or narrow spatula will do.
- Use a spatula to run along the putty to remove excess.
- After the material has hardened, the surface should be treated with fine or medium-grain sandpaper.
- Repeated application of the starting putty will help create an ideal plane; cleaning is done with fine-grained sandpaper.
- A finishing putty coating is applied on top.
- After hardening, re-treat with sandpaper.
- The final stage is painting or gluing the ceiling.
Closing the hole
As a result of ignoring building codes, defects may appear on the ceiling; one of the most dangerous is a hole. Sealing ceiling joints between slabs is done using one of two methods.
First way:
- Use a brush with an extended handle to clean the hole from the inside.
- It is important to remove loose dust, creating a strong adhesion; to do this, thoroughly spray the entire surface with a spray bottle containing soil.
- Polyurethane foam is blown inside.
- After complete hardening, cut off areas with excess material using a sharp knife.
- Cut out a cone-shaped recess with a height of 4-5 cm.
- The recess is sealed with NTs grade cement and the material is allowed to harden.
- The surface is leveled with a layer of putty, and a sickle mesh is placed inside.
- Subsequent operations are no different from sealing the seams on the ceiling between the slabs.
There is a second method for sealing the joints of floor slabs with holes:
- An improvised frame is created that fits flush into the hole, and it is placed inside the defective area. Any metal wire can be used.
- The frame is fixed using sealant; it is better to use one intended for repairing plumbing fixtures and walls in wet rooms. If the purpose of the material is damp walls, its use for ceiling repair often leads to a better result.
- After hardening, a lattice is formed in the cavity; it will ensure strong fixation of the solution.
- Prepare a mixture of NC solution; you can use the classic composition, but it is better to add an additive that will improve the setting of the solution. To prevent the cement from falling out, it is supported from below with a piece of plywood.
- The plywood is secured from below with a support; it will hold the cement in the required position until it dries.
- The wooden board is removed only after hardening, then finishing is carried out.
The most important thing is to strictly follow the sequence and be careful
How to seal the seams between floor slabs?
- A special cement solution of the NTs brand, capable of expanding when hardening and thus filling all the voids. But the gap is not completely covered with this mixture. After the cement is completely dry.
- Thus, in two cases, a groove remains in the form of a groove. Latex putty is applied to them until it is perfectly aligned with the surface of the slab.
- For ease of application of the building mixture, it is better to use two spatulas at the same time. Use a wide spatula to apply putty in the required amount, and use a narrow spatula to push the solution inside the seam. This way the mixture is better compacted and smoothed in the seam itself. All excess is removed with a wide spatula.
- After a couple of days, the seams are reinforced with sickle mesh. The mesh is glued to the ceiling with putty, and a leveling layer of the same solution is applied on top of it. Drying in progress.
- The entire surface of the ceiling is now primed. For best effect, it is recommended to apply the primer twice. Again you need to wait until it dries completely and only then proceed to the last stage of work.
- Gypsum plaster is applied in two layers: primary and final finishing. The ceiling is dried, leveled with sandpaper and painted.
Joint between wall and ceiling: sealing methods
Characteristically, there are not only noticeable defects in the joints between the floor slabs, but also in the walls. It will not be possible to properly finish the surface without eliminating cracks.
- construction foam;
- gypsum mortar;
- synthetic putty;
- putty for exterior use.
The simplest and most effective material is foam, which expands during the hardening process and fills voids.
If the joints are quite large, it is worth taking care of further protection against cracking. Reinforcing mesh and alternative materials - cotton, linen fabrics that are soaked in an adhesive solution will help prevent the appearance of cracks. The fabrics are laid over the hole. At the final stage, a layer of plaster is laid.
What to do if joints are visible on the ceiling: final leveling of the surface
Regardless of the method used to remove defects, it is important to create a high-quality finishing coating. Abrasive mixtures are used to level the surface.
The process of applying latex putty
To create a perfectly smooth and even surface, it is recommended to use non-woven fabric. It is glued to the ceiling up to the finishing layer of putty. The material helps eliminate small irregularities.
It is important to cover the ceiling with primer after the final leveling layer; this will help prevent the destruction of the coating and increase the durability of the putty layer. Now you can paint the ceiling, paste it over or whitewash it.
Construction of a building and creation of an attractive appearance is a complex task that requires taking into account many factors:
- creating a reliable foundation will prevent cracks from appearing at corners and between floor slabs. Before doing this, it is important to carefully carry out the preparatory work: examining the soil, studying the level of soil freezing, creating the correct markings and compacting the surface. provides a service life of up to 150 years only if the installation technology is followed;
- To maintain heat in the room, it is worth eliminating the leakage of thermal energy through the floor. One of the best ways is;
- in multi-storey buildings, it is better to first study the plan of the floor slabs, this will help to identify potential vulnerabilities of the structure and eliminate them at the repair stage;
- when building housing, it is better to use composite concrete, it has high technical characteristics and is absolutely safe for health;
- working with concrete in the cold season with a standard cement composition is unacceptable by the manufacturer, but not all companies are ready to stop construction for the winter. So is it possible to pour concrete in winter? – Yes, but you will need to add special mixtures to the composition or electrically heat the concrete;
- if you plan to build a house from aerated concrete, be sure to reinforce it every 2-3 rows. The reinforcement is placed inside the block recesses that are created by the wall chaser for aerated concrete;
Holes of various sizes can be sealed if the technology is followed correctly. It is recommended to choose one of the existing methods for eliminating ceiling defects; they are easy to use and durable.
Methods for obtaining rustications
The first method is that the seams between the slabs are sealed using incompletely set mortar, which was previously rubbed, and the rustication is cut through with a special tool - a rustication tool. It is very easy to make a rustication yourself.
The second method is to stretch the rust over fresh, uncured mortar using simple templates made from boards of the required width, cut on one side at an angle of 45°.
Rusts are made according to the rule, which must be fixed to the ceiling using 2-3 thin slats 15 cm long greater than the height of the room. The slats are installed obliquely on the floor and press the ends of the rule with them, and the additional rail serves as a support for the middle of the rule. The slats bend slightly, spring and press the rule very tightly against the ceiling. Rustication is carried out according to the rule, cutting through the rustication.
If the rust is not clean enough, it can be corrected with a trowel. In some cases, the rustication is carried out using a trowel with a strip nailed to the canvas. In this case, the rail should have a rustic shape. This is done to ensure that the rustics are straight. Everything is moistened with water in advance, which makes the rust cleaner.
If the rust is pulled out with a template, then this is done in several stages, applying the solution in a thin layer. After cutting or pulling, the rule is removed, then stripping and grouting is performed. The rust should be located exactly opposite the seams between the floor slabs.
Also, instead of lime-gypsum mortar, cement mortar can be used, but the execution process is delayed due to technical interruptions associated with the time required for the mortar to set.
Dreams of a beautiful modern ceiling crumbled like fireworks. “Repair only after liquidation!” – the stern master categorically does not like cracks and depressions. Don’t look for a professional liquidator of construction defects; fixing rust on the ceiling is not a difficult task, you can handle it just fine on your own.
