Read: 6,328
The kitchen is the place where culinary magic happens, as well as a favorite place for many to meet with friends and family. This room has a special meaning, and therefore requires the same special treatment in terms of creating comfort. That is why many people want to do a kitchen design project on their own, in order to put a piece of their soul and all their creative potential into this process. However, in order for the project to turn out to be of high quality, you need to understand what details to focus on, how to work with specialized programs, what design techniques to use and, in general, what ideas you can actually implement yourself. Well, let's discuss all these issues, which for many are quite pressing when it comes to renovating the kitchen.
Ways to create a project
We would highlight three real ways that will help you create a kitchen design project yourself:
- Draw everything on paper.
- Design in a specialized program.
- Use ready-made standard projects.
The first option, as you understand, requires the most creative approach, since, in addition to coming up with the ideas themselves, they will also need to be beautifully implemented on paper, which not everyone will be able to do. However, if you have such talent, then you can combine business with pleasure and make the process of creating a project a real “hand job”.
If we talk about the third option, then the widest choice of options opens up, since today on the Internet you can freely find many options for standard projects for literally every type of layout. This is very convenient if you have a typical Soviet-style layout, but even if you have a new building or some kind of personal project, then you can definitely find something similar. Now there are ready-made solutions for every taste, you just need to adapt it a little to your desires, since the kitchen should not only be visually attractive and comfortable, but also functional.
You can also contact a modern furniture showroom, express your wishes to them and show them the actual layout in a photo. There they will select furniture for you based on your preferences and financial capabilities, take measurements of the room, assemble the furniture and advise on any issue. This is the simplest option when there is no particular point in remodeling or replacing the finishing, but you only want to make cosmetic repairs and update furniture or appliances.
Well, if you want to approach the matter with full responsibility, then you will have to resort to the second option. Of course, working with programs takes time to learn all the functionality, but today there is a lot of specialized software and online services where everything is intuitive and you can start working in just five minutes.
Design project with redevelopment
A redevelopment project is essentially not much different from an ordinary “sketch”. The only thing that needs to be taken into account is the dismantling of walls or their individual parts. On the plan, these places may be beautifully marked as free, but in reality their absence can lead to catastrophic consequences. Before you demolish something yourself, you need to prepare a project for future work. It is first given to architects, who make adjustments and approve the finished plan. Then you will have to go through a number of other authorities (fire department, sanitary service and management company). You will also need a package of documents to present to various authorities. All this redevelopment “whirlwind” can drag on for a long time. Be patient and take time. Typically, combined projects involve kitchens, living rooms and dining rooms. In the interior, it is worth taking into account not only the features of the new space, but also the zoning of the room, without which the picture will not look complete.
Algorithm of actions
To ensure that your kitchen design project is independently developed in accordance with modern requirements and meets fashion trends, we offer you an action algorithm consisting of ten points:
- We are deciding whether a bar counter is needed in the interior. Regular dining tables are becoming a thing of the past, and wide bar counters are rich in functionality, so they are definitely worth considering.
- We evaluate the layout and decide on the placement of furniture along the walls.
- We create a clear list of all necessary furniture and equipment.
- In the created list, we indicate the dimensions of furniture and equipment, which will allow us to determine whether it fits into the actual volume of the room, taking into account its layout.
- We divide the walls into modules for lower drawers, taking into account built-in appliances.
- We divide the wall into modules of equal width for the top drawers.
- We sketch out options for the location of the largest equipment - a refrigerator, a washing machine, if installed in the kitchen, a hob and a sink. It is advisable to come up with several arrangement options and then choose the most comfortable and practical one from the point of view of daily use of equipment.
- We decide on the type of fittings for each designated module, taking into account the fact that they can interfere with each other.
- We decide on the lighting, choose the location of the lamps, their number and the method of switching on and powering.
- If possible, we show our project to friends for evaluation, so that we can hear constructive criticism from a different point of view and, if necessary, make some adjustments.
It is important that the selected furniture does not eat up the usable area of the kitchen and is harmoniously combined with each other. Use built-in appliances that can fit seamlessly into any design. You can play with the height of the countertop in relation to your height and the personal preferences of your roommates, because if you spend a lot of time cooking, its incorrectly chosen height will be critical for you. The elbows should be slightly bent when cooking, so the countertop should generally be located in the range of 82-91 cm, taking into account the standard height difference between men and women.
Instructions for making a sketch
Before you design the kitchen of your dreams, you need to stock up on some sheets of paper, a pen, pencil, cardboard, glue, scissors, a ruler and a tape measure.
Stage 1: measurements
The first step is to measure the room. To do this, it is necessary to determine the length and width of the floor, the height, length and width of walls, doors, windows, balconies, all protrusions and depressions present on each surface. Before starting measurements, it is recommended to completely complete the repair with leveling the walls, decorating the ceiling and screeding the floor. This will allow you to take into account every centimeter and prevent inaccuracies in the sketch. Walls must be measured at the level of the floor, ceiling and at the middle of the width, the floor must also be determined at the threshold, in the center and at the opposite wall. Transfer all this data onto paper. If the repair is not done well enough, you can correct mistakes before you begin arranging the furniture, avoiding unforeseen issues with uneven walls or ceilings.
The sketch must display all objects: meters, pipes, windows, batteries, switches, etc.
All dimensions are shown in the drawing.
Stage 2: drawings
The next step is to draw the top view. To do this, it is necessary to determine the exact scale, arbitrarily chosen by the master for convenience. It could be 1:10, 1:20, 1:30, etc.
Another sheet will be a sketch of the wall, which will show how to draw and arrange a set of kitchen furniture as conveniently as possible.
Then you should one by one make sketches of all the walls with designations of doors, windows, balconies, etc. It is recommended to make several photocopies of each such drawing. This will help to realize all the ideas as much as possible, because changing the design on paper is much easier than subsequently moving the furniture in reality.
Drawings are made on graph paper or on a checkered sheet
Example of a four-wall scan
Stage 3: electrical wiring design
The wiring diagram is very important and should be carefully considered. In addition to full lighting, care must be taken to have the required number of sockets
To do this, it is recommended to think about how many household appliances are planned in the kitchen, and where they will be located.
Recommended locations for sockets and switches in the kitchen
Stage 3: furniture arrangement
The next step is to actually arrange the furniture, and you should start the project from the top view. Having decided on the layout, you need to arm yourself with the required dimensions of each furniture block. In this case, there are standard parameters that it is advisable to adhere to for ease of use, but individual production allows you to deviate from the templates and arrange furniture in the kitchen of the most unusual shape. At the same time as arranging the headset, you should take care of the built-in equipment, which is presented in stores in a huge assortment and allows you to choose the most suitable model in size.
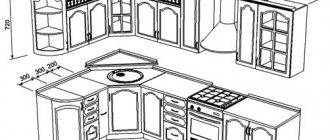
Standard sizes of some kitchen modulesAfter drawing up the drawing from above, you should start designing the wall with the arrangement of the furniture set in front view. This sketch will show the entire front part of furniture and household appliances with the corresponding parameters.
Next, you need to similarly repeat the design of the remaining walls with appliances and furniture, done on an appropriate scale.
First the tabletop is drawn
Then the lower cabinets and the locations of the sink, stove, oven and other appliances are drawn onto the sketch. Lastly, hanging cabinets and a hood are drawn
Stage 4: layout
Armed with sheets of sketches of kitchen views from all sides with the required dimensions, you can begin making mock-ups of furniture and appliances from cardboard, having previously cut out the required shapes and sizes. After drying, the glued models of furniture sections and household appliances should be arranged as expected in a real kitchen. If desired, the initial sketches can be loaded into a special design development system in 3D mode on a computer and look at the result of your work in the final version. But psychologists recommend making a model, because... this will be a fun activity for all family members, especially if there are children in it. The kitchen area and furnishings can be decorated in the same colors as the future kitchen, so it will become even more realistic.
Cardboard kitchen layout
What is important to note on the drawing?
Yes, sketches are sketches, but creating a drawing is an important process if you want to create a kitchen design project, and it was accurately implemented not only on paper, but also in life. Let's outline what important points should be displayed in the drawing:
- Location of all sockets . The number and location of sockets depends on the amount of equipment and its placement throughout the kitchen. Do not forget that there should always be one or two sockets left just in case.
- Contours of light . It is desirable that all light sources have separate switches, which will allow zoning of lighting and its intensity according to the area of the room. There must be a separate switch for overhead lighting and a separate one for each additional lamp. This could be, for example, backlight lighting or a lamp above the bar counter.
- Pens . Many people leave them for later, but not everyone understands how much the appearance of the interior depends on them, and they can also be a problem when opening the doors correctly in small or corner kitchens.
- Hood . It is important not only to determine its correct location, but also to indicate its connection. For this task, you need a tee with a check valve, which must be diverted somewhere. If the furniture under the ceiling has a suitable distance, then this eliminates this problem. But today many people choose kitchens up to the ceiling, so this aspect of the location of the tee should be thought out in advance and indicated on the drawing.
By the way, it is not necessary to draw a drawing manually; there are simple programs for this on the Internet that greatly facilitate this task.
Tips for arranging a kitchen
The kitchen area should be equipped depending on the size and layout of the kitchen, taking into account the boundaries of the functional areas (working and dining areas). Small kitchens in Khrushchev buildings 4–7 sq.m. m require an individual approach to interior planning, because the space must accommodate the necessary household appliances and leave room for a dining table. Designers recommend first making a list of devices that you cannot do without. First of all, this is a stove. If there is not a lot of cooking in the house, 4 burners can be replaced with 2 and the surface can be turned vertically. This will significantly increase the working surface area. If possible, it is recommended to move the refrigerator to the balcony or corridor, or replace it with a compact mini-model.
For medium-sized kitchens of 10–12 square meters. m suitable for corner, linear and G-shaped headsets. To make the interior look stylish and modern, it is advisable to select furniture with built-in household appliances. Designers should be notified in advance about the presence of a dishwasher or washing machine in order to make special niches for them. The vertical arrangement of cabinets from floor to ceiling visually narrows the space, while the horizontal arrangement increases it. But the ceiling visually seems lower than it actually is.
The most budget-friendly solution is to purchase a standard set with the optimal dimensions for your kitchen. Making a set to order is the most expensive option, but in this case you will get a kitchen that best suits your needs
Large spacious kitchens over 12 square meters. m provide wide scope for imagination, because here you can choose any layout: from island to banal linear. Designers advise allocating 4–7 square meters for the work area. m so that the hostess feels as comfortable as possible
In the case of an island layout, care should be taken to ensure unobstructed access to the module from all sides. The passage must be at least 1.2 m, otherwise it will be inconvenient to work behind the surface
Is redevelopment necessary?
This is a purely individual matter, but it is important to understand whether it is necessary to change the geometry of the room and how this change will affect the improvement of its convenience and functionality. To more accurately understand whether redevelopment is necessary, answer the following questions:
- How many people will use the kitchen at the same time?
- How actively do you use the kitchen, how often do you cook, or is the kitchen just a place for the refrigerator for you?
- Is it possible to organize the exit points of all communications differently if they are affected by redevelopment?
- Will it be possible to hide communications during repairs?
- If the kitchen is very important and a lot of people constantly gather there, then perhaps it makes sense to combine it with an adjoining room (usually the living room)?
By answering these questions, you will understand whether redevelopment provides at least some advantages. If they exist, then it makes sense to start this business, which many perceive as something complicated and expensive. In fact, the dismantling and construction of partitions does not take much time and does not require large financial investments. The most difficult thing is to correctly distribute communications, so that they are not visible and always function effectively.
What measurements will be needed?
To create a diagram, you need to use a tape measure to measure the length and height of the room, the distance of the window to the corner and the floor. The standard depth of kitchen cabinets is 50 cm, height 85 cm.
The width depends on the individual parameters of the room and the design of the headset. If the room has non-standard dimensions, it is necessary to take additional measurements and make calculations.
Ergonomics
This word is not clear to everyone, but still, ergonomics is about practicality and style at the same time. This is a thoughtful organization of space, where everything is in its place, nothing interferes with movement, everything is at hand and every detail is thought out.
Have you heard anything about the triangle rule? Many people think that it answers the question of how to design a kitchen project yourself. However, this rule practically does not work in life, since it does not carry any practical meaning. Also, in fact, the rule defines only three zones in the kitchen, but in reality there are four:
- Storage area consisting of a variety of drawers, wall cabinets, shelves and a refrigerator.
- Wash area: sink itself, dishwasher and dish dryer.
- Cooking area including hob, oven, multicooker and microwave.
- The free movement zone is the space between the three above zones.
Based on this, let's define some rules of ergonomics in the kitchen. There must be a surface where you can put some object. We don’t do anything by weight, so there should always be a surface at hand where you can quickly put a ready-made dish, food from the refrigerator, or that same hot brewed tea. Let's call this a work area and it is advisable that it be in the center of the kitchen - this is the most practical location, proven in practice.
It is also important to think about which direction all the doors of appliances and furniture open, which will allow you to correctly arrange everything together so that the “neighbors” do not interfere with each other’s normal functioning. If something gets in the way, the doors can be re-hung, which is easily done in the refrigerator and in some cabinet designs.
Otherwise, all the prescribed ergonomic rules are purely individual, since the interior must be equipped for specific users. It is important that everything is at hand and at the same time freedom of movement is maintained, and there is also the right number of seats for eating.
Kitchen plan with dimensions and furniture
Kitchen layout options - online guide
The most popular types of kitchen layouts, designer recommendations, 5 main rules of kitchen layout and photos of projects are in this article.
5 main rules for a convenient layout
The layout of the kitchen is influenced by many factors: location in the apartment, its size and shape, the number of family members and, of course, the location of utilities. All these points must be taken into account at the stage of developing a design project and before purchasing furniture. There are a number of rules, compliance with which will be the key to creating a functional and safe space.
- "Rule of the triangle." The main components of the kitchen work area - the sink, refrigerator and stove - should be located so that the housewife does not have to waste energy and time on obviously unnecessary movements. It is optimal to place these kitchen elements at the vertices of an imaginary triangle, the length of each side of which should not exceed 2 meters.
- First of all, you should determine a place for the sink, which requires connection to communications and acts as the main center of activity in the kitchen. And only after this can you plan where the furniture and appliances will be located.
- The stove is installed in such a way that there is at least 40 centimeters of working surface on both sides of it. It is unsafe to place the stove next to the sink and window, but its close proximity to the dining table is not the worst layout option.
- It is better to place the refrigerator in one of the corners of the kitchen so as not to tear the work surfaces into small areas. Naturally, its door, being open, should not block the free space.
- Tall pieces of furniture or household appliances should be placed so that they do not end up in the kitchen work area, otherwise this will lead to a significant reduction in its size.
- Draw up a detailed diagram of the room, on which you indicate all the details - its exact dimensions, door and window openings, location of water and sewer pipes, ventilation holes, electrical sockets.
- Make a plan for the future kitchen. Today, this can be done not only in the old-fashioned way (pencil on a piece of paper), but also with the help of online planners and special programs that allow even a beginner to arrange a virtual room: arrange furniture, choose flooring, wall color, etc.
- Seek advice from professionals. Experienced designer consultants and managers in kitchen showrooms will easily offer you not one, but several kitchen layout options, from which you just have to choose the one that matches your ideas about your dream kitchen. Most companies offer this service for free, but some of them may charge a small fee for the calculation and development of a design project for a future set, which will be credited when purchasing a kitchen set from that company.
- determining the location of furniture installation - the shape of the kitchen unit and dining area;
- choosing a style (find a photo of a design you like);
- choice of colors;
- definition with types of wall decoration, apron for the work area. ceiling;
- lighting development;
- window decoration in the kitchen.
Types of kitchen layouts
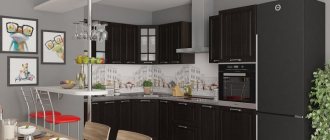
L-/L-shaped (corner) A universal layout option suitable for almost any room. But it will be most advantageous for medium-sized square kitchens (from 8 to 10 square meters). From the point of view of implementing the “rule of the triangle”, the corner kitchen is the most ergonomic: furniture and appliances, being placed along two adjacent walls, create a very convenient separate work area.
Pros: you can easily organize a full-fledged dining area and install built-in appliances.
Cons: not suitable for very narrow and very large rooms
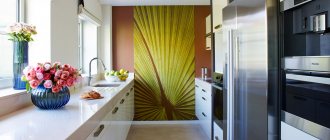
Single-row (linear) This layout scheme is mainly used in small, narrow kitchens and small studio apartments. Furniture and household appliances are installed along one of the walls, preferably in such a way that the stove and refrigerator are located on opposite sides of the sink. If the total length of the working surface in a linear kitchen exceeds 3.5 meters, then such a layout cannot be called ergonomic.
Pros: the possibility of using the layout in small kitchens
Cons: limited space for cooking, no space for additional equipment.
Double-row (parallel) This layout option is suitable for decorating a fairly spacious kitchen (12-15 square meters), which can be used as a walk-through room. The stove and sink are usually located along one wall, and the refrigerator and cabinets are located along another, parallel to it.
Pros: spaciousness, ability to accommodate a significant amount of built-in equipment
Cons: Limited space makes it difficult to find a place for a dining table.
U or U-shaped A convenient type of layout that can be used in rooms of various sizes, but will fit most successfully into a kitchen with an area of 10-12 square meters. meters. Kitchen furniture and appliances are grouped along three walls, each of which has one element of the working triangle.
Pros: no through traffic, plenty of space for placing household appliances.
Cons: not suitable for both very small and overly large kitchens, difficult to organize a dining area.
Island This option is exclusively for large kitchens (from 16 square meters), which are often combined with dining rooms. In fact, we are talking about any of the layouts mentioned above, complemented by an island. It refers to a work area or dining table that is placed in the center of the kitchen. The optimal size of the island, which can be of a wide variety of configurations and sizes. At the same time, it should be placed so as not to share access to the elements of the working triangle.
Pros: Functionality, creating an atmosphere of a single space in large rooms
Cons: Not suitable for small kitchens.
Peninsular A type of layout that is a modification of a kitchen with an island. Here, the central element is adjacent to the wall at its end and forms a kind of ledge, which, as a rule, is used to separate the work area from the dining area.
The pros and cons of this type of layout are largely the same as the “island” layout. True, the peninsula is a little more economical in terms of space.
Free (non-fixed) This layout presupposes the presence in the kitchen of cutting tables, bedside tables and other elements equipped with wheels, which allows you to freely move them from one place to another.
Pros: easier work in the kitchen, the ability to periodically modify the interior.
Cons: requires a lot of free space for maneuvers.
For small kitchens, a good solution would be single-row placement of furniture elements; in large rooms, the space will be perfectly combined and zoned using an “island” or “peninsula,” and corner and U-shaped layouts are suitable for decorating almost any kitchen.
How to choose?
How to choose the one that is ideal for your kitchen from the existing variety of layouts? Kitchen ergonomics experts recommend:
Did you like the article? Save the link and share with your friends!
KITCHEN MANUFACTURERS
Home » Kitchen » Kitchen layout and design: we develop it ourselves
Kitchen layout and design: we develop it ourselves
The kitchen is classified as a technical or auxiliary room. But not only do housewives spend a significant amount of their “free” time there, but also all the inhabitants of the apartment like to sit there with a cup of tea or coffee. Often this small room, usually in size, is the center of the entire apartment or house. Therefore, kitchen planning and design development are carried out taking into account all requirements. It should be practical, comfortable, beautiful and cozy. The task is not easy, and when “inexpensive” is added, it becomes even more difficult. However, it is possible to find an acceptable solution in such a situation.
Non-standard solutions for the kitchen - photo printing on cabinets
Planning Basics
It is difficult to create a completely original design solution in kitchen design without the appropriate education, but it is possible to remake the interior seen in the picture to your liking. The main thing is to find the photo that will become the basis. It is necessary to make adjustments to what you see in accordance with the existing conditions, and now, the unique kitchen design is ready.
Kitchen layout can be divided into several stages:
If you are comfortable with computer technology, you can model in one of the free design programs. There you can evaluate the proportions, dimensions, general impression - most utilities provide the ability to display three-dimensional images. After this, you can begin to implement the created project.
Types of furniture arrangement in the kitchen work area
First of all, you need to decide what appearance the kitchen area will have. Depending on the geometry of the room and the placement of communications (water supply, sewerage, electrical outlets), first of all, choose the method of placing cabinets, cabinets and equipment.
We arrange equipment according to the triangle principle
When planning, keep in mind that it is desirable that the stove, sink and refrigerator form a triangle. Scientists analyzed the housewives' movements around the kitchen and found that she spends most of her time near the sink, near the stove and refrigerator - a little less. But it moves mainly between these three objects.
To make work convenient, the sink is placed in the center, and the stove and refrigerator are on the sides of it. They can be located in one line or create a true triangle, but between them it is advisable to place cabinets with working surfaces of at least 80 cm. Having solved this problem, you will get a perfectly planned work area.
Linear kitchen layout
As the name suggests, cabinets and appliances are lined up along one wall. This type of kitchen layout is also called single-row or straight. This option is used in small rooms with an area of 6-8 square meters. meters. It is convenient for a small number of people - 1-2, but no more. Since there is little space, you can’t fit a lot of equipment here. Whether you like it or not, it is best to buy built-in equipment, as it is more compact.
Linear or single-row kitchen layout
Usually there are two or three cabinets, one of which has a sink and a stove. In theory, you need to fit a refrigerator into the same wall, but this does not always work out and it is placed wherever there is room.
Corner or L- or L-shaped
A universal method of arrangement that allows you to more fully use the space. It is most advantageous in square rooms. Also, with this device, the housewife’s forced movements around the kitchen are reduced: everything is close at hand.
You can use both the wall with the window and the one with the doors. Just when thinking about what to put under the window, try not to limit the amount of light that enters the room.
In a square kitchen it is convenient to place the furniture at an angle
You can plan your kitchen in this way even with a small area: 7 meters is already enough. Maybe there won’t be many cabinets, but everything should fit. Often, in an L-shaped kitchen, the sink is placed in the corner, with a compartment underneath for storing a trash can, detergents and technical equipment.
Double row
This layout method is suitable for a long and narrow kitchen with a window in a short wall. In order not to block access to the window, leave the radiator open, cabinets and appliances are placed along two walls. We are forced to do the same if the room is a walk-through.
Two-row kitchen furniture layout is suitable for long kitchens
This is a good option for a narrow kitchen if the window and doors are located on short walls. The dining area is moved closer to the window, and the remaining space is occupied by work surfaces and appliances. Just when determining the dimensions of the furniture, keep in mind that the distance between the rows should be at least 80-90 cm. To increase functionality, it is better to make the doors in the lower tier sliding, and in the upper tier sliding or opening upwards. This will further reduce the likelihood of bruises from open doors.
U- or U-shaped
This layout is convenient in more or less spacious kitchens, but can also be used in long, narrow ones.
U-shaped kitchen option
For a small family, you can organize a dining area using multi-level tabletops, as in the photo above. If the room is square or wide, the dining table can be placed in the middle.
In a wide kitchen, a U-shaped layout is convenient because you can place a dining table in the center
In general, with such an organization there are options. You can experiment if the area allows in the program, or by cutting out squares from cardboard according to the size of the planned furniture and moving them according to the plan drawn on a sheet of paper. Just keep in mind that everything must be drawn to the same scale.
This layout is most often found in kitchens combined with living or dining rooms. To any of the above layouts, a free-standing “island” is added, which can accommodate a sink, stove, or just a work table.
Island - free-standing table
This option can be implemented on an area of more than 16 meters. With smaller dimensions, this space is usually occupied by the dining area. The minimum size of the island is at least 1.2-1.2 m, and it is also worth adding a distance from the cabinets of the working wall of at least 80-90 cm, otherwise it will be inconvenient to work.
Peninsular or G-shaped
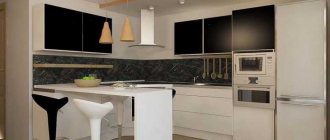
This is a modification of the island when a protrusion - a peninsula - is added to one of the sides. If dimensions allow, you can expand the functionality in this simple way. This ledge is used as a separation of the dining area, and at the same time it can be used as a counter or bar counter. If you place high chairs nearby, it is convenient to have a snack or drink tea and coffee.
Layout option with a peninsula
Small kitchen layout
If the available area is only 5-6 meters, you have to use not just every meter, but every centimeter. That’s why wall cabinets are often made in two rows – right up to the ceiling. Frequently used items and equipment are located in the lower tier, and those that are rarely used are located in the upper tier. They also make cabinets or shelves above the refrigerator: why should the place go to waste?
In a small kitchen, use all available wall space
If there is access to a balcony, by insulating and glazing it, you can move the dining area there. A recently popular redevelopment option: due to the advent of new insulation materials, it is possible to maintain a normal temperature even if the neighbors above and below have open balconies/loggias.
Also in small rooms, various devices are used - drawers, rotating shelves, folding or pull-out tabletops. In general, they transform an ordinary kitchen into a transformable one.
By the way, please note: in order not to hit the corners, it is better to make the tabletops rounded. This, by the way, is one of the latest trends - round kitchens and circular design.
Photos of kitchen layouts
In this section we tried to collect photographs of different kitchen layouts - both large and small, in different styles and options. Many photos of real apartments. This is a clear example of how designers' ideas can be implemented in real conditions.
First, a few ideas from designers. For example, how to visually expand a narrow kitchen. One option is to make a wall with a reflective surface. If possible, paint it with paint with a metallic sheen, and cover the top with sheet (not cellular) transparent polycarbonate. A more budget option is shiny plastic.
A shiny wall makes the room visually less narrow
The latest design trends are smooth curved lines rather than sharp corners and straight lines. It looks interesting, and this construction is definitely safer: you won’t hurt yourself on the corners. Here another technique is used: glass doors soften the bright colors.
Nonlinear surfaces - a new trend
A waterfall on the kitchen apron in the work area and lighting of the furniture from below are interesting and unusual. And the harsh contrast of color - black and white - is broken up by floral patterns.
Classic furniture in non-classical colors. In this photo, the kitchen layout is island, but this idea is easy to transform: try to beat up traditional furniture with some unusual color.
Indigo color is rarely found in the kitchen
Next are photos of kitchens in apartments. Some rooms are very small, others are larger. Although the kitchens are typical, there are differences in size and layout, but you can spot some interesting ideas. Moreover, these are already actually implemented projects.
Unusual layout of kitchen cabinets: both drawers and wall cabinets are placed for a reason
Small kitchen layout with refrigerator
Unusual design: alternating evenly painted doors and decorative elements
Kitchen layout with a balcony - corner arrangement of furniture
Layout of the kitchen space in a standard apartment
Even near the hood there are narrow cabinets. Rational use
Open and closed wall cabinets - interesting
L-shaped kitchen layout options
Kitchen layout is not as simple as it might seem at first glance. A lot depends on the proper arrangement of furniture and appliances in the kitchen.
For example, you might try to stuff a bunch of different kitchen items into a small kitchen in the wrong order. Thus, you then walk around and bump into the corners of kitchen utensils.
Or, on the contrary, try to arrange the furniture correctly in a spacious kitchen. And then run around it like a football field in search of the right plate.
Any kitchen layout begins with setting goals and objectives. As well as the individual characteristics of the household and housewife.
- The size of your family;
- How often do you cook in the kitchen?
- Do you greet guests in the kitchen;
- Do you like to sit in the kitchen in the evening with your family;
- Physiological characteristics of a person;
- Character.
All this should be taken into account in order to properly plan the kitchen. For example, if you do not take into account the height of the housewife, it may turn out that she simply will not reach the kitchen cabinet.
And at lunchtime, someone may not get a seat at the kitchen table. It's funny isn't it? But I hope you understood the main idea.
Now let's talk about how to properly place kitchen units and household appliances in the kitchen.
Conventionally, the kitchen can be divided into five main zones:
- storage area;
- food preparation area;
- cooking area;
- dishwashing area;
- eating area.
Storage area. The storage area includes two main objects in the kitchen. This is a refrigerator for foods that quickly spoil. And a cabinet for non-perishable food items.
This area also includes space for storing household goods. It is advisable that the washing area be located close to the storage area. This will allow you to quickly put the dishes in their places after washing them.
Product preparation area. The main element of the food preparation area is the countertop. Usually it is located between the washing areas and the food preparation area.
It would be correct if you place those kitchen items that are most often used nearby. knives, cutlery, spices and other items. The area should be well lit and spacious.
Food preparation area. This zone includes a hob, microwave, oven and hood. Kitchen utensils, frying pans, pots are also located in this area. You can hang a towel and oven mitts next to the stove.
Dish washing area. The main elements of this area are the sink and dishwasher, if available. As a rule, there is a trash can located at the bottom of the cabinet under the sink. cleaning and detergents.
Eating area . The food reception area suggests a place where all family members will gather together and thereby eat food. Such a place should be comfortable. And get ready to eat.
Kitchen planning. "Work triangle"
As a rule when preparing food, we most often find ourselves in three main zones:
- storage area;
- cooking area;
- dishwashing area.
If we mentally draw a line between these zones, we get the “Work Triangle”.
IMPORTANT: The distance between the extreme points of the “Working Triangle” should be no more than 360cm. and not less than 60cm. In this option, you don’t have to organize “marathons” in the kitchen. Just like you won’t have to jostle in tight spaces.
ATTENTION! You cannot place a gas stove in front of a window. This can be dangerous as the wind can extinguish the fire.
Kitchen layout
Professionals have four main types of kitchen layout:
- linear kitchen layout;
- island layout;
- L-shaped layout;
- U-shaped layout.
Linear kitchen layout
The most common method is a linear kitchen layout. This is due to the small size of our standard kitchens. All furniture and appliances are placed along one wall.
Ideal for long rooms. But you shouldn't abuse this. The working surface of this kitchen layout should not exceed 360 cm.
As a rule, all attention with such a layout is concentrated on the dining area. The work area remains invisible. In a linear kitchen layout, the sink is usually located in the center. and at the edges there is a stove with a refrigerator.
Island or peninsula kitchen layout
This is a very fashionable solution that will surely surprise your guests. Island layout or kitchen - an island allows you to move one of the kitchen work areas separately (see picture).
This layout requires a large area and good lighting. There is also an alternative solution - a peninsular kitchen. The role of a peninsula usually includes a dining table or a cabinet with food.
Peninsula kitchen layout
L-shaped kitchen layout
An L-shaped or corner layout is very convenient and suits many kitchens. At the same time, it is convenient to separate the dining area from the working area. It is also worth paying attention to the fact that most furniture factories produce kitchen sets specifically for this layout. Which is undoubtedly a big plus.
U-shaped layout
The U-shaped layout is good in large, spacious kitchens; there is an opportunity to place a lot of the most modern appliances for all occasions.
- Kitchens "Mebelkomplekt" Country of origin: Russia. Catalog of models KindSunnyExoticComfortableModernAffableNobleAmenableAristocratic RichHospitableJuicyKindTraditionalGentleColorfulAiryBright
- Kitchens Grattarola Country of origin: Italy. Catalog of models UraliaCanardCeresium CeresiumEssenziaAxisUllaUraliaAxisEssenziaTundraCeresiumUralia
- Kitchens Antares Country of origin: Italy. Catalog of models OperaOperaOperaOperaPetraToscaToscaOperaOperaOperaOperaBrio PetraPetraPetraPetraSistemaSistemaPetraToscaSistema Sistema
- Kitchens Cesar Country of origin: Italy. Catalog of models YaraYaraMegMegArielArielElleElitLuceGioElitLuceYaraMayaMaya MayaMayaYara VipMayaFridaYaraYaraLuceArielMegArielArielElleFridaYara GioElitYaraFridaGioYaraYara
What can modern planners do?
If we are talking about how to make a kitchen design project yourself using computer programs called planners, then we must indicate what they can do. This will demonstrate their capabilities and you will understand whether it is worth working with them or whether it is better to turn to specialists.
We will not focus on any competitive program, since they all have similar functionality and may differ only visually and in the number of tools offered for work. But, as a rule, they are all united by the following points;
- simple interface;
- Availability of Russian language;
- high detail;
- realistic picture at the output;
- a wide variety of design tools;
- ease of management, where everything comes down to assembling a simple constructor;
- a large selection of interior elements to suit every taste;
- the ability to create any layout and set the dimensions of each element;
- integration of ready-made standard projects that can be edited to suit your needs;
- a high-quality visual model of the interior as a result.
Kitchen cost calculation
After choosing an interior design, you should pay attention to the “Accessories” section, where cabinet opening mechanisms, hinges, etc. are located, as well as the “Handles” section, where you can choose the models you like. All this will subsequently allow you to calculate the cost of the kitchen as accurately as possible.
When you have completely created a 3D model of your kitchen, you can send it to us absolutely free of charge for verification. Our specialists will check the ergonomics of your kitchen project and contact you as soon as possible.
An important feature of our online kitchen planner is the ability to save a project . We recommend that you save the created layout in any case. Many clients often require the help of professional designers when designing and choosing an interior. We can always open your saved project, conduct a consultation and bring it to perfection. All this is absolutely free!
Call a surveyor
Step-by-step process for creating a project
Well, let’s say you have decided on a program or service where you will create your first design project, so it is important to outline the algorithm of work, the sequence of which should look something like this:
- We draw the room, creating a model of the kitchen indicating the actual dimensions. Most often, programs offer ready-made versions of popular layouts that can be easily edited or you can draw everything manually using a special tool.
- We choose the finish by reviewing the available material options. Most often, program catalogs include many options to suit every taste, and sometimes even show prices for the materials you like. This way we create the style of the room.
- We add appliances and furniture. In the same way, we look at the equipment and choose its location, not forgetting about practicality, ergonomics, comfort and our own preferences.
- You save your work, after which the program will show you a finished three-dimensional visualization where you can make various edits. The final result can always be printed or saved as an electronic file if you are comfortable working on a tablet/smartphone.
Don’t forget about the opportunity to experiment with the choice of materials, equipment and furniture. Try any options that come to mind, because only by comparison will you understand that in the end you made the most correct and rational choice. Also, feel free to use ready-made templates that you can always adapt to your needs. Sometimes ready-made solutions offer the most unusual ideas for implementation, since they were prepared by experienced designers and use various tricks that are rarely available to ordinary users.
As you can see, the process of independently creating a studio design project is not as complicated as it might seem at first glance, but it requires perseverance and a creative approach. Modern programs greatly simplify this process, but you should understand that if you have started a serious renovation with redevelopment and want to end up with something unusual, then you should contact a specialist, since it is his experience that will guarantee that at the end of the repair work you you will get exactly what you expected. Paying for a designer's services is not comparable to the risks when everything looks good on paper, but in the end there are many offensive discrepancies or defects.
Variety of sketches
A 4 meter long kitchen drawing is no different from a typical construction. This method of arrangement is the most common, suitable for any room, distinguished by its laconicism and the presence of free space.
- The linear layout has one row and is placed along one of the walls. A two-row, four-meter sketch is suitable for large apartments and elongated rooms.
- It features a large work area, versatility, spaciousness, and allows you to create a variety of interior solutions.
- Among the advantages, one can note the saving of space, the reduction in the cost of the headset, since corner, shaped designs will always cost more and have complex fittings.
- Disadvantages include the need to move a lot along the row and the lack of a working triangle.
- When designing, they start from the location of the sink. Be sure to place the working surface of the tabletops at 40-80 cm between the devices.
- You can visually break up the room with the help of an island onto which you can move a stove or sink.
A well-drawn drawing will help you effortlessly set up a kitchen the first time without alterations or modifications. It will be much easier and easier to work according to the plan.
Drawing
It is worth starting the drawing with a kind of diagram, on the basis of which a full-fledged project will then be drawn up in more detail with dimensions.
It is worth assessing whether additional partitions will be necessary or, conversely, whether some unnecessary structures will need to be removed. Then you need to arrange the proposed kitchen furniture, schematically arrange the cabinets and storage areas.
After that, they determine the need to add various decorative elements to the project, for example, glass or metal inserts, select and calculate the number of fittings.
Choosing kitchen color
When drawing up projects for one-story houses with a kitchen, you can often encounter the difficulty of choosing a color palette.
As such, restrictions are not indicated here, but still, when determining with preference, you should not choose a range of cold shades, since these colors will not only not increase appetite, but will also have a kind of negative perception of the overall atmosphere in the kitchen. Warm, perhaps even rich tones are preferable.
It is worth remembering that all saturated colors can quickly get boring, so you need to be guided by the time for which you plan to install this headset.
