Application of moisture-resistant self-leveling floors
Moisture-resistant coatings are not affected by moisture. So, the areas of application of such structures are quite wide.
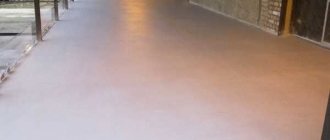
The systems are used in all rooms where a large amount of vapor and liquid is expected to be present: you will find such coatings in swimming pools, canteens, workshops, and on ramps. Some people pour a moisture-resistant floor in their bathroom, if the square footage allows it. Such coatings are good because if they get wet, they do not swell and do not lose their appearance. This distinguishes waterproof self-leveling flooring from other types of coatings. For example, if a liquid gets on it, parquet flooring can bulge, a painted floor can crack, laminate flooring can bubble. But a moisture-resistant self-leveling floor will not care, so such designs can be called very popular.
In addition, liquid floors:
- are not afraid of exposure to chemicals;
- liquids do not penetrate through such coatings;
- “flooring” is not afraid of mechanical influences;
- withstands large temperature fluctuations;
- are distinguished by durability and attractive appearance.
Moisture-resistant self-leveling coatings differ depending on the materials used. Floors can be acrylic-cement, polyurethane, or methyl methacrylate resin coatings. Quartz sand is widely used; the color of the coating directly depends on its color.
Where are the most expensive new buildings in the Moscow region?
When is waterproofing needed?
Additional waterproofing is provided by special polymer additives.
So is additional waterproofing needed for a liquid floor and why? Let's start with the second part of the question: waterproofing is necessary so that there is a large amount of moisture on the floor and the liquid does not penetrate into the base of the covering.
For most types of floors, waterproofing is represented by a separate layer of water-repellent material located between the subfloor and the decorative coating. A polymer self-leveling floor is essentially a waterproofing material itself, but if the surface is subjected to “attack” of liquid in large quantities, no floor, even the most waterproof one, will be able to withstand.
Help: Additional waterproofing of a liquid floor is provided by additional additives added to the mixture itself for pouring the floor. Such additives consist of mixtures of bituminous mastics or waterproofing plasters.
In this case, the coating will be 100% not afraid of either precipitation or a bucket of water accidentally spilled on the floor. The waterproofing self-leveling floor will last a long time without losing its appearance.
Features of moisture-resistant self-leveling floors
Moisture-resistant coatings have high strength.
In addition to all the advantages of coatings described above, we note that these systems are extremely easy to maintain, and they are practically not afraid of open fire. You can drop heavy things on waterproof structures: no dents will be left. The floors are not afraid of vibrations, for example, from a washing machine, which are usually installed exactly where a moisture-resistant floor is required.
How much does a self-leveling floor cost and the cost of work?
And the fact that the moisture-resistant self-leveling floor has no seams is a completely excellent circumstance. After all, as a rule, it is in the seams that various pests accumulate - fungi and mold, and it is in the joints that moisture tends to penetrate, which can “undermine” the coating. And where there are no seams, there is no “infection” or excess dirt.
Well, if we talk about what’s bad about such floors, let’s just mention the fact of a rather meager color palette and the too “simple” appearance of liquid moisture-resistant structures. But this drawback pales in comparison to a number of advantages. So if you decide to purchase a self-leveling floor, this will be an excellent finishing option.
Help save the floor!
Help save the floor!
Elena » July 05, 2006, 12:40
Re: Help save the floor!
Yuri Demin » July 11, 2006, 01:15
Unfortunately, I was on a business trip and therefore was somewhat delayed in responding.
Bitumen mastic has a number of specific properties, of which we are interested in two:
1) It has practically no adhesion (the property of “sticking”) with all materials containing water. Therefore, any aqueous solution applied to bitumen mastic will peel off. The only way out is to create a fairly thick (about 50 mm), reinforced layer of screed that will lie on the bitumen without sticking to it, but maintaining strength due to the thickness and reinforcement. However, in your case this is not applicable, as far as I understand. We are making a children's room, not a bomb shelter.
2) Bitumen mastic has the property of being absorbed quite deeply (several mm) into the dry (!) cement layer, which makes its cleaning extremely difficult. Solvents won't help here either. they can only dilute the mastic, but not remove it.
In your case, the cheapest and most practical way to resolve the issue may be to replace the “self-leveling” floor with a leveling base made of plywood or fiberboard (hardboard). The thickness of the floor will increase by the same 12 mm (if you use plywood).
1. Thoroughly clean the entire floor from remnants of the “self-leveling” floor;
2. Prepare a primer (a special priming composition) from bitumen mastic, highly diluted with any solvent (for example, gasoline or diesel fuel);
3. Using a brush or roller, carefully and thoroughly treat the entire floor with primer, removing dust and creating good adhesion for further work;
4. Take 12 mm thick plywood and glue it to the floor using thick bitumen mastic. Accuracy is very important here because... bitumen mastic can greatly stain everything around;
5. Additionally secure the plywood using dowel nails.
You can read more about laying plywood on the floor, under the finishing coating, HERE
6. Lay the finishing coat on top.
If you use something soft as a finishing coating (for example, carpet), which is natural for a child’s room, then you do not need to leave damper gaps between the individual sheets of plywood - they are more important for parquet. On the contrary, the sheets need to be fitted as tightly as possible to each other, and after fastening with dowels and nails, putty the seams and sand the plywood with a sander over the entire plane. After this, it is better to additionally seal the seams with good tape to prevent the putty from falling out of the seams. Damper gaps of 8-10 mm along the walls should be left. It is better to take carpet with a foam base and thick pile - to completely prevent the appearance of seams.
If you have any additional questions, I will be glad to answer them.
Elena » 02 Aug 2006, 12:05
Yuri, good afternoon! Please recommend craftsmen who would take on this work and do everything right. We can’t find mothers on our own, and now we’re scared. Thank you in advance.
Yuri Demin » 02 Aug 2006, 12:13
I will try to help you, but it will take some time (1-3 days) because... Now is the height of the season and the vast majority of decent craftsmen are very, very busy. The amount of work is small, which also creates certain difficulties when finding a master. Immediately the question is - will you be able to deliver the necessary materials yourself, or will this be the task of the master?
Elena » 02 Aug 2006, 15:13
It’s better, of course, with delivery and purchase, but we can buy and deliver it ourselves if they tell us what to buy.
Thank you, I will wait for your answer.
Yuri Demin » 03 Aug 2006, 14:23
The master whom I would like to recommend to you is now at a suburban facility in the Moscow region. He should return tomorrow, after which he will contact me and we will discuss your problem.
Yuri Demin » 03 Aug 2006, 14:52
As soon as I wrote to you, the master who was recommended to me for you showed up.
I sent you his coordinates by mail.
Who's at the conference now?
Currently browsing this forum: no registered users and guests: 1
Results
Let's summarize. Polymer self-leveling flooring is a fairly moisture-resistant coating in itself. Additional waterproofing may be needed in places where there is constant accumulation of abundant moisture - in bathrooms, bathtubs, swimming pools; as well as in the open air - open areas of cafes and shopping centers, penthouses, sports complexes, etc.
But remember that to purchase a system, it is better to contact time-tested companies and not let crooks screw you over. Only in this case will the self-leveling moisture-resistant polymer coating meet all the declared qualities.
Design and quality of waterproofing
The penetration of liquids into the base of the floor is prevented by both the finishing coating and other layers of the self-leveling floor. Coatings of this type are excellent for bathrooms, kitchens, and industrial premises where water or other liquids will often come into contact with the surface. There are no seams or joints in self-leveling floors, so this type of floor is a good surface insulating from moisture.
However, for additional protection of the base, various types of floor waterproofing can be used:
- liquid (mastics made on the basis of bitumen and rubber);
- coating or plastering (special dry mixtures);
- pasted or rolled (made from roll materials).
Use of roll materials
Waterproofing under self-leveling floors using roll or film materials is one of the most convenient, simple and effective methods. It provides a continuous waterproof layer, while the joints of the rolled sheets must be glued or fused with a construction hairdryer. In addition, it is necessary to provide high-quality insulation at the joints of the floor and walls to prevent water penetration. Such waterproofing materials are not exposed to temperature changes and have an impressive service life.
Cement-based coating type waterproofing technology
Step 1. The waterproofing layer is applied to the surface of the previously poured screed or self-leveling mixture (if used) after complete drying. It is best to pre-treat the surface with a primer (for better adhesion of the waterproofing layer to the base). Work on applying waterproofing begins from the corners of the room. To begin with, the walls (about 10 cm in height) and the floor along them are treated with a wet brush. Otherwise, the base will begin to draw water from the solution, and this will deteriorate the quality of the waterproofing layer.
Applying primer
Step 2. Prepare the waterproofing solution in accordance with the instructions indicated on the package. Usually the mixture is added to the water gradually and immediately stirred with a construction mixer. The container with the mixture should form a homogeneous mass.
Preparation of waterproofing solution
Important! When preparing the solution, it is important to observe all the necessary proportions of the mixture and water.
Step 3. The solution is applied with a brush or spatula and thoroughly rubbed into the base to ensure maximum penetration. The solution is applied to the walls to a height of about 10 cm and along them, all corners are thoroughly coated. The mixture sets quickly - this process begins just 20-30 minutes after application.
The solution is applied to the walls to a height of about 10 cm and along them
Step 4. Next, the waterproofing tape is installed. The glue for it will be the same cement mortar. The required length of tape is measured. It should be enough to seal the entire length of the joints between the walls and floor.
Waterproofing tape
Attention! Several pieces of tape cannot be used along one wall - the piece must be whole.
Step 5. The tape is applied to the previously applied solution and pressed forcefully into it. Its edges are smoothed out.
The tape is pressed into the solution
Step 6. Fabric mesh inserts along the edges of the tape are recessed in the solution.
Mesh inserts along the edges are recessed in the solution
Step 7. A small amount of cement mortar is applied to the edges of the tape.
The solution is applied to the edges of the tape
Step 8. Then two layers of solution are applied to the entire surface that needs waterproofing with an interval of about 6-12 hours.
Video - Waterproofing floors
Waterproofing floors under screed in residential premises
When waterproofing a floor under a screed in residential premises, it is necessary to take into account not only such properties of the material used as water resistance, adhesion and elasticity; of course, this is important for future operation. But when choosing insulation, I would recommend first of all paying attention to the composition of the material. It must be remembered that if the material used is located in a residential area, its fumes or other chemical emissions will have a negative and inconspicuous effect on the residents. And then people don’t understand why they constantly have headaches or feel unwell. Therefore, we recommend using products for waterproofing floors under screed, preferably water-based, which do not contain solvents or other unsafe volatile substances. Water-based insulating materials can be safely and confidently used for waterproofing floors under screeds in enclosed living spaces without respiratory protection, and subsequently this membrane does not emit harmful substances.
What types of coating waterproofing materials are there?
- Polymer materials They are applied to the floor in a thin layer, they are very elastic and reliable, and can withstand a wide variety of loads well. Including temperature. Today this is one of the best options.
- Cement mixtures The solution, which is quite complex in composition, is prepared very simply. The result is a rather plastic mass somewhat reminiscent of plasticine. One of the striking examples of such a material is the Maxsil cement mixture. It is extremely important to accurately observe all proportions and prevent dust and other foreign bodies and impurities from getting into the solution.
- Bitumen-containing materials have a decent set of disadvantages, ranging from vulnerability to low temperatures and difficulty in application. However, recently options have begun to appear on the market that eliminate most of these disadvantages.
- Cement-polymer mixtures A mixture of the first and second options. Cement is organically supplemented with mineral additives.
In fact, the choice is quite wide. Let's take a closer look at the main options:
Why do you need floor waterproofing?
In an apartment, waterproofing is done before installing a wet screed so that water does not leave the cement mortar and the screed dries evenly. In a private house, special attention is paid to waterproofing the basement, garage and first floor. In the basement, waterproofing protects the house from the penetration of groundwater, stormwater, drainage and sewage water. If you made a cesspool incorrectly or built a toilet with a pit instead of a filtration system, then sooner or later the wastewater will reach your home.
