DIY wooden shed
A do-it-yourself shed using frame technology is a simple and economical construction option. Initially, you need to decide on the location on the site where the future shed will stand. Then we decide on the choice of foundation. All actions can be divided into several stages.
Here are the main stages of building a barn with your own hands:
- Preparing the area when building a barn with your own hands . This stage includes clearing the area of bushes, trees, stumps and large rocks;
- Preparatory work before building the foundation when building a barn with your own hands . If piles or support beams are selected, no additional ground manipulation is required. When pouring a block, strip foundation or foundation slab, it is necessary to dig a pit, the depth of which is at least half a meter;
- The bottom trim, floor joists, subfloor, bottom beam must be coated with a composition that prevents wood from rotting, keeps it dry and prevents the penetration of insects;
- Mounting piles or laying timber on roofing felt when building a barn with your own hands . If a monolithic foundation is chosen, then you must first lay geotextiles that prevent sand from washing out, pour and compact a sand cushion (minimum 300 mm thick), a crushed stone cushion (minimum 200 mm thick), and then proceed to installing the formwork. As a rule, the formwork is made from 50x100 boards, with stops every meter, spacers along the inner perimeter and with fixing bars on top of the formwork perpendicular to the length of the boards. The reinforcement is made from corrugated reinforcement rods, the thickness used is 12 mm, 10 mm, 8 mm. Next, the cement-sand mixture is poured. Cover the top with technical film until the concrete mixture has completely hardened. If the weather is hot. Then the surface must be watered, not allowing it to dry out too quickly. Under the influence of the sun, water evaporates from the surface layer of the poured foundation, which leads to a change in composition. Consequently. Cracking appears and the foundation is not suitable for use.
- Mounting the bottom frame and floor joists when building a barn with your own hands . Floor joists are laid in increments of 600 mm. This allows you to avoid sagging floors, and if necessary, the insulation can be comfortably laid in the space between the joists;
- Next, the wall frame stand made of 50x100, 40x100 bars is attached. Additionally, crossbars are installed in window and door openings to distribute loads. Jib beams are cut into the corners of the walls on each side, making the shed more stable and stronger. The lower and upper strapping of the frame posts is performed;
- The first floor ceiling is being installed. This will be the future ceiling;
- Next, the rafter system is installed using a single or double slope system. The pitch between the rafters is 600 mm;
- The roof sheathing and roof covering are being laid;
- External and internal finishing is installed. The materials can be very varied, depending on the future use of the shed;
- Before installing the interior decoration, when building a barn with your own hands , insulation is laid, if necessary. Be sure to install a wind and vapor barrier.
Creating a leveling screed
Often, when pouring a concrete floor, it is not possible to obtain a perfectly flat surface, so you have to apply a screed. The best option would be to use self-leveling compounds. Simply pour them onto the base and smooth them out using a special brush. Air bubbles are removed from the solution using a needle roller. This screed takes an average of 1 week to dry, after which you can begin laying the finishing material.
If you are faced with the question of installing a concrete floor on the floors, as opposed to pouring mortar on the ground, there is no need to backfill it. The rest of the work is carried out by analogy.
Types of foundation for a barn
The shed can be placed on the same type of foundation as the house. But due to the small weight and size of the building, you can also find more exotic options, for example, from tires or sleepers, they also have their advantages.
The type of foundation should be selected based on the type of soil, as well as the design and purpose of the building. A barn in which animals or poultry are kept requires a different foundation than a woodshed. The cost of materials also matters: there is no point in making a foundation for a shed, which is several times more expensive than the outbuilding itself.
Columnar
A simple foundation for a barn is made from concrete, brick or wooden posts. It does not require equalization of small differences in height; it requires less material than tape. It should not be installed on moving soils - over time, the posts may tilt or move apart, which will lead to the collapse of the entire structure.
For a columnar foundation, it is necessary to dig holes in which the columns will be placed. The holes need to be dug 15 cm deeper than the freezing level of the soil. A cushion of crushed stone and sand is poured onto the bottom and compacted well. A metal rod is placed in the middle. The foundation columns for the barn are laid out from concrete blocks, bricks, you can use asbestos-cement pipes, into which concrete is poured. On loose soils, a reinforced concrete foundation is poured into the bottom of the holes so that the building does not sag over time. For brick columns, a thickness of one and a half bricks is sufficient. The internal cavity is filled with concrete. Brick pillars must be waterproofed - coated with bitumen or mastic. The joints of the foundation and the barn itself must also be waterproofed, especially if the outbuilding is wooden.
General principles of barn construction
Before starting construction, you will need to take into account some rules, namely:
- the location of the building is chosen taking into account the wind rose;
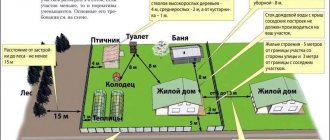
- the future farm should not be located near residential premises or water sources;
- the material chosen is high-quality, safe, with high thermal insulation;
- the project is drawn up taking into account heating, ventilation and lighting;
- The dimensions of the room must correspond to the needs of the animal; any movements should not cause difficulties.
Did you know? On the skin of the nose of the reproaches there are lines that are so similar to the pattern of human palms. They are unique, like prints, and are never repeated.
How to build a garage from sleepers yourself, step-by-step instructions
A garage made of sleepers is a lightweight structure, so you can install the simplest shallowly buried strip foundation under it (depth 30 - 40 cm, for soft soils - 50 cm, width 3 cm greater than the width of the sleeper).
Stage one - foundation construction
We dig a trench the size of the garage and arrange a sand and gravel cushion, 10 cm thick. On wet soils, you can add expanded clay or broken red brick to the cushion for better waterproofing.
Now we lay out the first row of sleepers in the foundation
An important rule is that the ends should not touch - you need a gap of 2 - 3 mm. We fasten the sleepers with metal staples
We fill in a standard tape of a shallow foundation, but there is one caveat. You will need to secure fastening bolts (40 mm diameter) in the foundation, cemented directly into the screed in increments of one meter along the entire perimeter, excluding the gate opening.
We install columnar supports, which we also embed into the foundation. We install supports at the corners of the structure, in the garage door frame and in the center of each long side of the structure.
Stage two – prepare the sleepers for installation
The first row of sleepers is attached to the foundation strip with bolts embedded in it. Therefore, it is necessary to drill holes in each sleeper so that they coincide with the pitch of the already installed bolted connections.
The bottom row of sleepers must be treated with bitumen for waterproofing, and rolled roofing felt should be laid in two layers on top of the first row. This will protect the walls from high humidity.
Stage three - installation of the first row
We install the first row of sleepers and, for the reliability of the structure, fasten them with metal staples at the junction of two sleepers and at the corners
It is important to select sleepers of equal length for each row so that the building looks neat
Important rule. Sleepers need to be laid flat, this will give stability to the structure, although it will increase material consumption
Stage four - installation of walls
Building a garage from sleepers is not difficult, but it is important to follow certain technology:
- we connect adjacent sleepers in a row into a tenon, but for this we need to cut out the desired shape of the ends, so it is easier to fasten the ends together with metal staples;
- The rows are also fastened together with staples or metal plates, which are fastened with self-tapping screws. The step between staples is 50 cm.
Important. The vertical fastening from the end of the sleeper should be at a distance of 50 cm, no less
- every three rows it is necessary to secure the structure at the corners with metal corners - this will add rigidity to the entire structure of such a garage;
- For window openings, you need to install a box made of timber - we mount it with self-tapping screws, strictly according to the level. The cracks can then be sealed with mounting foam or silicone putty.
To give the structure rigidity, you can additionally secure the sleepers diagonally with a metal strip - width 10 cm, thickness 3 - 4 mm.
Material selection
Capital buildings, built, as they say, to last, are built of stone or brick. Cinder blocks or foam concrete blocks are also often used. It is reliable, durable, but expensive, and when creating such a structure you cannot do without the skills of a builder, otherwise it will simply fall apart. In most cases, wood or a material based on it is chosen for a shed in a country house.
Boards and slabs
If you need to build a wooden shed with your own hands, but have financial difficulties, you can choose a budget option - a frame structure with cladding made of boards or wood-based slabs. Despite all its apparent simplicity and flimsiness, such a shed will last for decades, and if made well, it will fit perfectly into any backyard.
In this case, timber will serve as the material for the frame. It is easy to work with, and the resulting structure will have sufficient strength and reliability. This solution is perfect for wetlands, where it is impractical to build a permanent building on a foundation.
From all of the above we can conclude: wood is the best material for a shed. This is true. A wooden shed benefits from a number of characteristics:
- ease of manufacture;
- short work deadlines;
- availability of material;
- environmental cleanliness;
- the ability to build a cold and warm barn.
It is also worth noting the fact that the final finishing of a barn, like any other wooden structure, is characterized by extreme simplicity and an abundance of options. Any method is suitable here: from budget painting to original clapboard paneling.
Log
Since ancient times, logs have been used as a building material. This is an excellent choice for building a wooden shed, especially in wooded areas where this material is not in short supply. A log barn has an excellent appearance; it can be built in an ensemble, for example, with a bathhouse; it will be a good addition to a wooden house. The only significant drawback is that the work will require specific skills.
An excellent building material for the construction of any building. The characteristics of the timber are comparable to those of a log, but thanks to its rectangular profile it is much easier to work with. A barn made of timber will fit perfectly into a wooden courtyard; few people would dare to disparagingly call a masterfully built structure a barn.
Which foundation scheme for a shed to choose?
Of course, the design and type of foundation for a shed depends, first of all, on the design of the shed itself, more precisely, on the degree of its “capitalization”; the heavier the construction, the larger and deeper you will have to dig a foundation pit for the shed with your own hands. Typically four construction schemes are used:
- The classic columnar version of the foundation is used for lightweight structures made of boards, plywood, siding with a simple pitched roof. This is the simplest foundation for a barn in the country;
- A pile foundation can be called a universal design; it can be used for light sheds made of timber or a frame house;
- The strip version of the foundation base is used either for a box of blocks and bricks, or when arranging a basement.
Often a shed is erected without any support or anchorage to the ground. For example, if the site has heavy rocky soil with a high content of crushed limestone or limestone, marl-dolomite “tongues” come to the surface. In this case, it is easier and faster to build a foundation with your own hands on one sand bed.
Advice! It is enough to ensure proper drainage of rain flows and compact the sand backfill. On this basis, a shed without a foundation will last longer than on a shallow concrete strip laid on quicksand or loamy soil.
Building a shed without laying a foundation is faster and without major costs. But the results of such construction are difficult to predict, especially if the barn needs to be built on virgin soil, where there are no neighbors and there is no way to clarify the composition of the soil.
This is interesting: How to beautifully combine wallpaper for the hall and living room: let’s look at the question
timber
An excellent building material for the construction of any building. The characteristics of the timber are comparable to those of a log, but thanks to its rectangular profile it is much easier to work with. A barn made of timber will fit perfectly into a wooden courtyard; few people would dare to disparagingly call a masterfully built structure a barn.
Concrete floor
How to cover the floors in a barn? The most reliable option is a concrete coating. Every owner who has ever mixed cement mortar and made a screed is capable of implementing the project. The advantage of the solution is the protection of the premises from rodents and simple, quick cleaning after animals.
How to make a concrete floor? Carry out the work according to the following scheme:
- Remove the top layer of soil to a depth of about 20-30 cm.
- Fill the cleared, compacted area with a mixture of gravel and crushed stone.
- Along the perimeter of the barn, make formwork from boards that fit tightly to the walls.
- Fill the floor in the barn with a solution of M400 cement and sifted sand, following a ratio of 1:3.
- Level the surface with a board.
- Leave the solution alone for 2-3 days.
- When the concrete floor in the shed is thoroughly dry, remove the wooden formwork.
Frame shed on foundation
The best in terms of quality and ease of manufacture is a frame shed on a strip or pile foundation. This is a universal design. You can build a simple structure, located separately from other buildings, or, if desired, create a whole ensemble of courtyard buildings under one roof.
Floor and wall covering
As a material for the floor, as well as walls, you can use boards or all kinds of wood-based slabs. The boards are pre-treated to protect them from moisture; only water-resistant slabs are chosen, otherwise the durability of the structure is not guaranteed.
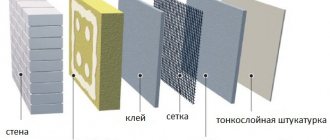
Sometimes you need to create a shed that retains heat; it needs to be additionally insulated. It is not difficult to reduce the heat loss of a wooden structure; to do this, you need to use two layers of wood, between which mineral wool or other insulation is placed. The result is a kind of sandwich that will help conserve heat without having to spend money on expensive materials.
Roof
Next you need to make and install the roof. Preference should be given to a gable design. It will require more time and material, but will provide greater protection in case of heavy rainfall and will not break under the weight of snow.
The supporting structures of the roof are made of boards; any modern solutions or the usual slate can be used as a roofing material. A roof of a small area can be covered with the same material as the walls; roofing felt or other rolled roofing material can be used to protect it from moisture.
Layer of dry bedding
Layer of dry bedding
Dry materials are used to prevent moisture from penetrating directly to the floor, and they also prevent soil subsidence. The backfill often consists of several layers of sand, gravel or crushed stone. Each layer must be 5-10 cm thick and must be leveled. Then we carry out the work according to plan:
- we isolate the communication box passing through the room;
- fill the first layer with fine gravel with fractions up to 0.5 cm. Then it needs to be moistened with clean water and compacted;
- Next, we create a layer of construction sand, which is also moistened and compacted;
- the last layer may be gravel or small crushed stone. After compaction, the crushed stone is carefully leveled, removing or turning over sharp stones.
Sometimes the third layer is sprinkled with a little sand or crushed stone chips. The end result should be a smooth surface.
In no case should you replace crushed stone with broken bricks, since the layer of construction waste cannot withstand the loads necessary in this situation, which can lead to deformation of the entire floor.
Also, you should not use expanded clay instead of gravel or crushed stone. It does not create waterproofing and is used only as a leveling material in cases where groundwater runs very deep.
What to pay attention to when bookmarking
High-quality sleepers for the foundation
The choice of sleepers for the foundation must be very careful. If they are very worn out, then the foundation will be of very low quality, and after a certain period of time it will have to be repaired.
And this will be quite expensive. And everything that was saved earlier will be reduced to zero. Therefore, if a house is not being built on its own, then it is necessary to strictly control the work of contractors.
You can also use reinforced concrete. They will last much longer than wooden ones. But in no case should you discount wooden ones. Especially if the foundation is built with your own hands.
