Professional builders and simple premises owners have long appreciated all the positive aspects of self-leveling mixtures for floors. With their help, you can quickly create a perfectly flat and smooth surface with a minimum of effort.
Manufacturers of leveling mixtures did not stop there, and today they are inviting us to evaluate the benefits of self-leveling floors for the street. Let's figure out what the features of this product are and what types of it can be used outdoors.
Characteristics of self-leveling rough-type mixtures
What are self-leveling floors for preparatory work?
This group includes compositions based on cement, cement-gypsum and gypsum. Scope of application - leveling the base for further finishing with laminate, parquet boards, linoleum, carpet, etc. They are also used to repair the underlying layer and eliminate minor defects on it. Mixes with water to form a highly mobile (liquid) solution that is easily applied and distributed over the floor. After hardening, a strong, even, dry base is obtained that meets the requirements of building regulations.
If you are faced with the question of which mixture to use for outdoor work , listen to the manufacturers' recommendations. - only cement self-leveling floor for the street. The composition is selected in such a way as to form a dense, moisture-resistant coating 6-10 cm thick, withstanding a compressive load of at least 200 kg/cm 2 (20 MPa).
Let us explain why you need to pay attention to this indicator when choosing a mixture. The load factor directly indicates the area of application of the building material. Let's give an example: Bergauf Erste Grund is declared as a self-leveling mass that works up to 8 cm thick. The strength of the finished coating after 28 days is determined by the manufacturer to be 20 MPa. That is, self-leveling flooring from Bergauf is suitable for constructing garden paths, areas for utility and entertainment purposes, and so on. Can be used as a screed for open gazebos, patios, etc.
For parking lots, open garages, campsites, finishing areas near residential, industrial and public buildings, Bergauf Boden Street is better suited, the compressive strength coefficient of which starts from 30 MPa, and the permissible layer thickness is from 6 to 70 mm.
Advice! All manufacturers of bulk mixtures for industrial use strongly recommend using a final protective coating for streets after curing (topping, polymer mastics, etc.).
Another important factor is frost resistance, designated by the letter F. The number of freezing-defrosting cycles that the canvas will withstand when completely immersed in water is always indicated next to it. This characteristic largely depends on the type and amount of modifying additives used. Of course, the more expensive the mixture, the better the components used. So, for Osnovit Nipline T42 the declared coefficient is F50, and for Ceresit CN178 – F100.
If you are not sure whether the purchased mixture can be used outdoors, and the degree of frost resistance of the material is not indicated on the packaging, check it yourself. The test is very simple:
- Pour a little dry mixture into a plastic cup with water, stir and pour onto a smooth surface.
Pieces of self-leveling floor are tested for water permeability.
A rough self-leveling floor on the street can also be formed from dry polymer-cement mixtures. Their difference from analogues is that a small percentage (from 5 to 15%) of the binder is replaced by synthetic water-soluble elastomers, which interact well with the cement “dough”.
The so-called polymer-cement stone is characterized by excellent adhesion to most substrates, low water permeability, chemical resistance, increased ductility and, most importantly, exceptional strength.
Let's summarize the above. Self-leveling floors marked “for outdoor use” are mixtures exclusively based on cement. The advantages:
- High level of strength - no less than M200 grade;
- Waterproof;
- Frost resistance;
- Layer thickness – from 5 cm;
- Possibility of use without additional coating;
- Operating mode: from -50 to +70 ºС.
Technology for pouring rough self-leveling floors on the street
Terrace in front of the house made of self-leveling floor.
Private parking lots, garden paths, sports and entertainment grounds, areas around buildings, commercial parking lots - the foundation of any object is formed according to the following scheme:
Step 1. Preparing the base
The construction of a self-leveling floor for external use differs significantly from the classical process. First of all, this is directly related to the base. Its temperature must be no lower than +5 ºС, and the humidity must comply with SP 29.13330.2011. The latter indicator is checked with a contact or non-contact moisture meter. The grade strength of the surface, according to the standards, is set in the range of M150 and above.
Recommended conditions: temperature from +5 to +30 ºС, relative air humidity – from 40 to 80%.
The base screed or concrete slab must be cleaned of dirt, dust, adhesive, oil and paint contaminants. That is, everything that can interfere with the adhesion of materials must be removed.
Grinding the concrete base.
Irregularities, protrusions, and weak areas are sanded with an emery belt, or even better, with a mosaic sander. Cracks and potholes are opened and filled with quick-drying compounds. The resulting dust and small debris is removed with a powerful construction vacuum cleaner. Next, the surface is treated with a deep penetration primer in 2-3 layers. All this work should be carried out a day before pouring.
Important! Priming is a mandatory process. If you skip this step, there is a high probability that the spreadability of the solution will worsen, and cracks and weak areas will form during the hardening period.
Natural or bulk soils (including weak ones) must be thoroughly compacted with a vibrating rammer or an artificial embankment must be created from crushed stone, gravel, or sand. The thickness of the underlying layer is calculated based on the expected loads according to the above sanitary rules. If there is a possibility of capillary rise of water (capillary suction), the base must be protected with cement waterproofing compounds (Bergauf Hydrostop, Penetron) or with a separating layer (polyethylene film, geotextile).
To limit the pouring area, wooden formwork can be installed around the perimeter.
Step 2. Preparation of the solution
All tools and containers must be clean. Pour water at a temperature of +10 to +20°C into a bucket in a pre-calculated amount (see instructions for the bulk mixture). Observe the proportions strictly, since excess leads to delamination and cracking, and deficiency leads to a decrease in strength.
Step 3. Formation of self-leveling floor
Carefully pour the solution, spread it with a spatula and level the squeegee with the extension handle. In the first 4-5 days after pouring, drafts and direct sunlight are contraindicated for the new floor, so the surface must be rolled with a needle roller to remove bubbles and covered with film or an awning (after the floor has set).
Cutting shrink seams.
How to level a concrete screed on the street
The strength and reliability of a concrete screed has its limits, and whether we like it or not, over time it may require repairs or a complete replacement of the screed.
Mechanical loads and time take their toll, cracks, potholes and peeling appear in the concrete screed, and dust appears on the surface.
Of course, it is possible to completely replace the concrete screed, but this is justified in the case when more than 35 - 40% of the total volume of the screed is damaged. The simplest solution would be to repair the floor screed.
In addition, you can repair the screed yourself, the main thing is to know what and how to do.
It makes sense to repair a concrete floor screed only if no more than 30% is damaged
Most often, damage to the screed can be detected when repairing or replacing the floor covering.
Only after completely tearing off the old coating do damage such as peeling and cracks in the screed, potholes, and an abundance of dust on the surface become apparent.
If the screed is made in a basement, garage or other utility room and is a finishing coating, then the damage described above can be detected visually and the necessary measures can be taken to eliminate it. By detecting the damaged area in time and repairing it, you can save not only effort, but also money by avoiding a complete replacement of the screed.
↑ Repair of cracks in screed
One of the most common damage to screeds is cracks. They most often appear in places of greatest stress on the screed.
Even in a recently poured screed, cracks may appear, which indicates a violation of the screed drying technology and non-compliance with the requirements for the concrete solution.
If this damage is detected in a timely manner and appropriate measures are taken, you can avoid the expansion and deepening of the crack, the penetration of moisture, and prevent the slow but sure destruction of the entire concrete screed.
If this damage is discovered when replacing or laying the finishing coating, you will have to first eliminate it and only then proceed with further work.
Otherwise, this will lead to destruction or deformation of the floor covering.
Cracks in concrete screed can be filled with a special repair compound
Repair of cracked concrete screed is carried out as follows:
- First of all, it is necessary to widen and deepen the crack slightly. This can be done with a grinder with a diamond blade. For small cracks, the recess is made up to 20 mm; if the crack is large, then the depth increases slightly.
- As the crack expands, its edges may crumble slightly. Therefore, it is necessary to clean such areas and ensure that all edges are strong.
Important! When expanding cracks in a concrete screed, the grinder will generate quite a lot of dust. Therefore, you should ensure that the room is well ventilated in advance and acquire respiratory and eye protection.
- Along the entire length of the crack, we make cuts perpendicular to the crack, 150 mm long and 20 mm deep. All cuts are made in increments of 200 - 250 mm.
- Now that the basic preparatory work has been completed, it is necessary to remove all dust and debris from the crack. An industrial vacuum cleaner is perfect for these purposes.
- Having completed the cleaning, we apply a deep penetration primer or a primer for mineral compounds.
- We fill the transverse cuts with a special repair compound for screeds and place metal brackets inside.
- After the repair compound has hardened in the transverse cuts, fill the crack and cuts to the floor level with freshly prepared repair compound, compare it with the floor level and let it dry completely.
- Finally, we sand the screed.
↑ Repair of potholes in screed
This type of damage occurs as a result of a violation of the screed pouring technology and a large mechanical load on the concrete. Most often, potholes are formed due to voids inside the screed during its operation.
They are more dangerous for the floor covering than cracks, since in places where there are potholes the floor sinks and becomes deformed, which in the near future will lead to its complete destruction.
Find out the best way to seal cracks in wood and concrete floors.
Potholes in concrete screed can also be filled with repair compound
Repair of concrete screed with potholes is carried out as follows:
- We take a grinder with a diamond blade and cut a hole along a rectangular perimeter to the entire depth of the screed.
- Using a chisel and a hammer, and for large volumes of work using a hammer drill, we remove the remaining concrete from the pothole.
Removing dust with a vacuum cleaner
- We remove the remaining screed and vacuum the resulting hole.
- Apply a deep penetration primer and let it dry.
- Mix the repair compound and use a spatula to fill the pothole.
- Without waiting for the repair compound to completely harden, use a lath or wide spatula to smooth the solution flush with the floor. And leave until completely dry.
Important! It is recommended to apply the repair solution in several stages when the pothole depth is more than 5 cm.
We grind the screed so that the pothole filled with repair material does not stand out against the general background
- After complete drying, sand the surface of the patch until it is completely level with the floor.
↑ Repair of delaminations in the screed
Another common damage is the detachment of part of the screed. In such places, the concrete begins to “spill”, and this is quite easy to detect.
You just need to take a hammer and lightly tap across the entire surface of the screed.
In those places where the concrete has peeled off, the sound from the impact will be dull, and where everything is in order, a loud blow will be heard.
When concrete peels off, “burrs” and cracks may appear, through which a cloud of dust will fly out when tapped.
Repairing a peeling screed can be done in two ways. The first is to cut out the entire damaged area and replace it completely.
This repair method is similar in technology to pothole repair.
The second is to inject the screed and is performed as follows:
Repairing delaminations in concrete screed can be done using epoxy resin injection
- First of all, we tap the screed in places of delamination to reveal the entire area of the damaged area.
- Using a marker, draw the approximate contour of the peeling.
- We take a drill or hammer drill and drill holes with a diameter of 6 - 10 mm and in increments of 25 mm over the entire area of delamination.
- Using a construction syringe, pump the repair compound into the holes. We use low-viscosity epoxy resin as a repair composition. We carry out all work in several passes, filling each hole evenly. This will make it possible for the repair composition to be partially absorbed into the concrete and then completely fill the area of delamination.
- We stop pumping after the level of repair material in the holes stops decreasing.
- Let the screed dry for 24 hours and then begin further work.
Important! If the area of delamination is more than 30% of the total area, it makes sense to completely remove the old screed and make a new one.
↑ Repair of dust screed
Over time, dust begins to appear on the surface of the screed.
This is especially noticeable in rooms where screed is the final covering, for example in a garage, basement or any other utility room.
Over time, the dust becomes more and more, and it is no longer possible to simply sweep it away.
The appearance of dust is a consequence of high mechanical loads on the surface of the screed and its “old age”.
Sometimes dust begins to appear literally a few weeks after the floor begins to be used, this indicates non-compliance with the pouring technology and low quality cement. If it is not possible to dismantle the screed and make a new one, you can repair the cement screed as follows:
- Vacuum the entire surface thoroughly.
- If cracks or potholes are found in the screed, they must be repaired using the technology described above.
- Sand the surface.
- Vacuum again.
- Apply a deep penetration primer and let it dry.
- Cover the entire area of the screed with a special polymer dedusting compound. The composition is applied in two layers.
Important! In cases where there is high humidity in the room, it is necessary to use a special water-emulsifying composition. Another option for removing dust from the screed is painting it. The main thing here is to choose a special paint.
Sometimes the method of fiberglass reinforcement is used, followed by filling with a self-leveling mixture. All work is performed as follows:
- Vacuum the surface.
- Apply a deep penetration primer and let it dry.
We lay fiberglass fabric on the dusty concrete screed with glue.
- We apply a layer of glue and, without allowing it to dry, roll out the fiberglass fabric on top with an overlap between the sheets.
- After the first layer of glue has completely dried, apply the finishing layer of glue and let it dry.
You can get rid of the “dustiness” of a concrete screed by filling it with a self-leveling mixture
- You can sand the surface, or you can simply pour a layer of self-leveling mixture on top and let it dry completely.
All concrete screed repair work is quite simple and does not require special knowledge.
Features of self-leveling floors for finishing
Self-leveling finishing mixtures: characteristics and types
Polyurethane self-leveling floor for outdoor use.
This category includes thin-layer, highly mobile polymer-based compounds. After curing, a seamless coating with increased strength properties is formed. They are used at the final stage to protect the surface from abrasive loads, strengthen and remove dust from concrete. They are often used to create an anti-slip floor with a beautiful decorative effect. In demand in garages, parking lots, terraces, home areas, etc.
Self-leveling finishing floors are one- or two-component compounds. In the first case, polymerization occurs as a result of the elastomer binding moisture from the air. In the second, the process begins by mixing the hardener (activator) with the base. There are mixtures:
- Polyurethane (Remmers PUR Aqua, Huntsman Poliplan);
- Epoxy (SdelaiPOL Etalon, Enekon Eneklad CFS);
- Polymer cement liquid (Remmers Crete, CMT PurCem);
- And etc.
The first two types are most widespread, since the rest are used mainly at large industrial facilities.
Epoxy self-leveling floor for outdoor use.
According to experts, polyurethane-based compounds are more elastic and cover small cracks and minor defects in the base well. Recommended for areas completely or partially protected from direct sunlight, as the coating turns yellow over time under their influence. Used for covered verandas, balconies, street cafes, exhibition facilities, etc.
Epoxy compounds create a very abrasion-resistant film, so they are well suited for parking lots, home areas with a high level of foot traffic, roadways, entertainment complexes, etc. The surface is partially repairable.
A coating based on epoxy resins can be used without a protective canopy, since neither heat nor rain and snow are harmful to such a floor. Many formulations contain UV protective additives, so they “hold” the color for a long time.
The difference between mixtures for interior and exterior use is frost resistance. To prevent the finished coating from cracking due to temperature changes, modifying additives are added to the compounds to provide the necessary elasticity to the coatings.
Polymer compositions are convenient because they can be applied to almost any material of mineral, cement or organic type: concrete, brick, stone, asphalt, slate, metal, wood and others. Some compounds work even on such capricious surfaces as marble and polished ceramic tiles. After application, the compound seals and strengthens the base and removes dust. Monolithic coating is very easy to keep clean, but difficult to damage. Minimum service life is 10 years or more.
Installation of thin-layer finishing self-leveling floors
The basic requirements for the base are identical for all manufacturers: an absolutely flat, durable (from 200 kgf/cm2), dry (up to 4% CM) surface. Must not be:
- Places with standing water, dew drops;
- Slope more than 3%;
- Cement laitance, traces of dirt, oil, dust;
- Weak or peeling areas.
All defects are eliminated by grinding, milling or sandblasting. Holes and potholes are filled with quick-drying repair compounds. The permissible base temperature for work is from +10 to +25 ° C, relative air humidity is no more than 80%.
Mixing the Base and Activator of the self-leveling coating
Before pouring, the surface can be primed 1-2 times. It is advisable to use materials from the same series. After drying, mix the components, pour over the surface, spread evenly with a spatula and roll with a needle roller to remove air bubbles.
Epoxy compounds are generally thicker than polyurethane compounds. Similar to mastic or floor enamel, only the layer is thicker - up to 3 mm. Therefore, it is applied with a paint roller. To create an anti-slip surface, after painting, chips or other decorative fine-grained fillers are scattered over it. After 3-7 days the floor is ready for use.
Advice! If you need repairmen, there is a very convenient service for selecting them. Just send in the form below a detailed description of the work that needs to be performed and you will receive proposals with prices from construction teams and companies by email. You can see reviews about each of them and photographs with examples of work. It's FREE and there's no obligation.
Painting a concrete floor
The technology for applying paint, regardless of its composition, is almost the same for all types. Painting is carried out in several stages. First you need to prepare the surface, that is, remove debris and dust from the surface.
Apply a layer of primer. If there are cracks and potholes, they must be repaired using a primer. Only after finishing the floor preparation can you start applying paint. It must be remembered that 2 to 4 layers of paint are applied to concrete floors.
Surface preparation
Proper surface preparation is the key to the long service life of the painted concrete floor surface.
So:
- Before starting preparation, you need to make sure that the floor is free of dirt, layers of old paint, oil stains and other obstacles. To remove some stains, it is enough to use traditional detergents. Some types of contaminants will have to be removed using a scraper, etc.
- Crumbs, dust and other small debris must be removed from the floor surface. After this operation, cracks, potholes and other surface defects will need to be repaired using putty.
- The next step is to sand the floor. This operation is performed using special equipment. By the way, it is advisable to use an industrial vacuum cleaner to remove debris and dust. A very important operation is dust removal. This technological operation can be performed using a vacuum cleaner. The greatest effect can be achieved by applying polymer compounds to the surface.
- After debris and other contaminants have been removed from the surface of the concrete floor, it makes sense to strengthen the floor. The strengthening substances include quartz and gh. In addition, the fixing mixture may include various pigments and additives. The use of such mixtures will ensure that the floor is covered with gloss. Toppings used to prepare concrete for painting completely fill the pores in its surface, thereby preventing the penetration of harmful substances.
Attention: This product is applied a week after pouring the floor. The use of concrete strengthening agents can increase the life of the floor by five years.
Primer coatings for concrete floors
To increase the adhesion of paint and concrete, primer mixtures must be used. There are many brands of such products on the market. Some of them can only be used indoors, some only outdoors and, of course, there are mixtures that can be used both.
Attention: Such mixtures are produced on the basis of acrylic resin. Their distinctive feature is that they dry quickly and successfully resist the effects of oil, petroleum products, etc.
- The primer is applied using foam rollers; they ensure uniform distribution of the primer over the concrete surface. When preparing the primer for application, it makes sense to add a little quartz sand to it. This additive is necessary to reduce the slipperiness of the floor. The volume of sand should not exceed 10% of the mass of the mixture.
- It is applied in one or two layers to a previously prepared surface. The use of the composition is permissible only at positive temperatures and normal humidity.
Painting the floor
The paint is applied using all acceptable painting tools and equipment - brushes, rollers, spray gun. The method of applying paint depends entirely on the type of paint material.
- Traditional paints and varnishes can be applied using a spray gun. By the way, one layer applied in this way can completely replace three layers applied with a brush or roller. When working with a spray gun, you must remember that it can be used to process large surfaces, but to apply paint to hard-to-reach places, you cannot do without brushes.
- Acrylic paint materials are applied to concrete using rollers. These can be simple so-called façade rollers, mounted on a long rod. Floor painting can be done at positive temperatures and normal humidity.
- It is permissible to apply paint to freshly poured floors, but for this you need to wait at least five days. During painting, the brush or roller must move in different directions, after which the paint must be rubbed into the surface of the concrete.
- There is no need to use thick paint; the thinner the layer, the faster it dries, and it looks better. Applying a second coat of paint can only be done after the first has dried. The optimal time after which you can paint a second time is 24 hours.
Waterproofing concrete
In addition to decorative and other functions, there are coatings that provide waterproofing of the floor. These are polyacrylic mastics. It contains antiseptic, etc.
- Such mastics dry quickly and do not emit unpleasant odors or harmful substances. In addition, when applying it there is no need to take protective measures. This mastic forms a water-moisture-proof layer that has high tensile strength and protects the concrete.
- Mastics of this class have high adhesion to the base material, but its effectiveness can be increased by using specialized impregnation.
Attention: When working with floors, you must remember that the primer and paint compositions must be from the same manufacturer. In this case, high quality paintwork will be guaranteed.
Now, how to cover a concrete floor to avoid dust, one thing can be said here is that the coating must have an oil base. And you can do all the work yourself and the price will not be significant. Look at photos and videos and choose the most suitable material. The instructions will help you in this matter.
Outdoor self-leveling floor
The use of self-leveling self-leveling floor technology already has a large number of fans both among professional builders and interior finishing specialists, and among the owners of apartments themselves where this method was used. However, now it is possible to make self-leveling floors for the street, which opens up enormous opportunities for designing access areas and personal plots.
Is it possible to pour self-leveling floors outdoors?
The answer to this question is, of course, yes. Filling technology can be used to finish paths in the garden, parking spaces, and areas under the gazebo. An outdoor self-leveling floor on a terrace is ideal. You just need to choose the appropriate mixtures for filling.
So, the conditions on the street differ significantly from the use of the floor in the house, and therefore the mixtures must be made taking this circumstance into account. If you live in a climate where temperatures can drop well below zero in winter and autumn, then you will need frost-resistant self-leveling floors for outdoor use.
In addition, ideal options should be resistant to moisture as well as aggressive chemicals. It is also worth choosing self-leveling floors that will not become slippery when wet; this is an important safety issue. For the convenience of working outdoors, it is necessary to purchase quick-hardening self-leveling outdoor floors that will not be damaged by sudden bad weather during the drying process.
Types of self-leveling floors for outdoors
All information about the properties and operating conditions of the self-leveling floor can most often be found directly on the packaging with the mixture. In addition, many companies, wanting to make it easier for their customers to choose, specially label the compositions “For outdoor use” and “For indoor use.”
Typically, for the construction of self-leveling floors for outdoor use: mixtures containing polymers (they are also called liquid linoleum), polymer-cement compositions, as well as mixtures containing cement, mineral fillers and modifiers (self-leveling floors based on MMA).
Types of car platforms
Do-it-yourself parking spaces can be made from various materials, they are:
- crushed stone or gravel;
- lawn;
- ecotextile;
- tiled;
- concrete.
Crushed stone, gravel or pebbles can be taken in medium fractions. The main thing is that pebbles do not get stuck in the tire treads. Such parking lots are constructed quite simply: a sandy base 15 cm high is poured onto the area marked out for cars, and geotextiles are laid on top. A crushed stone embankment is laid on the material, the height of the layer should be at least 15 cm, after which this “cushion” is leveled and compacted. The parking lot is ready; to mark its boundaries, you can line the embankment with sides made of brick or curb stone. It is advisable to use crushed stone.
Lawn parking for cars is distinguished by its simplicity: the car is simply parked on the grass; the parking area can also be marked with sides made of old tires.
Eco-textiles will look more aesthetically pleasing than lawn grass, which will develop wheel ruts over time. The construction of such a parking lot is also simple: a sand-gravel mixture with a total layer height of 15-20 cm is laid on a marked area, covered with geotextiles, and lawn honeycombs are attached on top. You only need to fill these forms with soil mixed with lawn seeds. By periodically spilling the soil backfill, you can have a cheerful parking lot with a neatly marked lattice of turf grass.
It is more difficult to build a parking lot from paving slabs than previous types of parking lots, but the laboriousness of the process is paid off by the durability of the parking lot and the increased service life of the site. The tiles are laid on a dry cement-sand mixture, pre-compacted, the boundaries are fenced with curbs. The aesthetic appearance of such a parking lot can only be spoiled by grass growing in the joints between the tiles.
Characteristics of self-leveling frost-resistant flooring for external use and its installation
Today, self-leveling floors are popular in the process of arranging buildings and structures inside and outside. Self-leveling outdoor flooring, unlike other types of flooring, must have special properties that allow it to maintain strength, reliability and wear resistance under adverse conditions.
This flooring is designed to withstand sudden temperature changes, frost, high humidity, precipitation and other microclimatic factors. Indeed, even in this situation, the floor must provide resistance to high loads and resistance to rapid wear.
Self-leveling floor on the street
Self-leveling flooring for outdoor use is used as flooring for garages, warehouses, workshops, sports fields, parking lots, as a floor for yard and driveways. The range of mixtures for external use is wide. These products are made on a polymer or cement base.
Self-leveling frost-resistant floor for outdoors
The self-leveling floor for external use must be frost-resistant. Since not all self-leveling compounds are suitable for the street. Liquid flooring for external use provides a protective layer for the concrete base, protecting it from premature destruction during operation and under the influence of unfavorable climatic factors.
For outdoor outdoor floors, compositions that meet the following requirements are suitable:
- outdoor flooring must be frost-resistant. Only such a self-leveling floor will retain its appearance and characteristics during long-term use;
- with the ability to withstand repeated cyclic freezing and thawing of the coating.
The quality marking of the self-leveling composition can be found on the product packaging.
Important! With an increase in the load to which a frost-resistant liquid self-leveling floor is exposed, the quality of the mixture used for leveling also increases. This means: the greater the load, the better quality the product is needed.
Requirements for self-leveling floors for outdoor use:
- Anti-slip effect. After all, this is safety: when it rains, it can be slippery, which is dangerous.
- Wear-resistant and anti-vandal. Otherwise, the outdoor flooring will deteriorate prematurely, losing its appearance.
- Resistance of the coating to unfavorable external environments: sudden temperature changes, heavy rains and frost.
- Moisture resistance of the flooring. Because it is impossible to avoid high humidity and rain.
The polymer resin in the coating makes it possible to pour in cold weather and wet weather, which will not affect the quality of the created coating. Layer thickness - from 0.3 cm to 10 cm.
From a technical point of view, this kind of product is considered attractive because it is more beautiful and smoother than ordinary concrete screed.
Concrete repair: elimination of cracks, chips. Concrete floor overhaul
Winter cold, and then a sharp thaw in spring, late frosts in March or heavy rains in May are one of the reasons why garden paths and paths lose their original appearance.
At the end of planting for the new season, when the time for planting seedlings of heat-loving crops in the ground has not yet come, it is the best time to repair concrete paths. And the article will tell you how best to do this.
Destruction of a concrete path
Concrete is a durable material, but despite this it is susceptible to destruction.
There are several reasons for this:
- When pouring the canvas, a very low quality solution was used;
- The main reason for the formation of deformations in concrete is water. The coating absorbs it well, and at subzero temperatures the liquid begins to freeze and expand in volume, filling the pores in the material. As the temperature rises, the water begins to thaw, freeing up space in the pores to be filled with new liquid. The process is repeated periodically, which leads to the destruction of concrete surfaces;
- When preparing the working solution, a lot of water was taken. Its excessive presence reduces the strength of the concrete surface;
- Errors were made during the work. After filling the working composition, it must be irrigated with liquid for the first three days. When pouring a solution into the formwork, it should be thoroughly compacted, which will give the structure of the mixture homogeneity and reduce the porosity of the concrete.
The main reasons why concrete paths deteriorate
Cracking of concrete surface
Concrete paths are crumbling, what should I do?
The following recommendations will help prevent this process:
- When preparing a concrete solution, special additives should be added that can repel liquids;
- Include plasticizers in the composition that provide the solution with a homogeneous structure and increase its strength;
- After pouring, the concrete surface must be impregnated with water-repellent agents in hot weather, without the use of special equipment.
Important! It is necessary to keep the concrete-filled path for at least 28 days until the solution gains its strength characteristics.
Path in need of repair
Often garden plots are equipped with concrete paths. This is an extremely strong, durable material, the price of which is relatively low. Concrete coating is unpretentious and practical, but from time to time it needs restoration or major repairs.
Therefore, after thoroughly cleaning the surface, it should be carefully inspected, paying attention to the following points:
- The presence of individual pieces that could break off along the edges of the path;
- The integrity of its top layer: cracking and crumbling of the material often lead to complete destruction of the coating;
- Formation of pits and potholes on the canvas. Sometimes such minor damage even adds decorative value. But very quickly these defects will begin to increase, and grass will grow in the cracks. If such a path is not repaired, it will very quickly collapse and become unusable.
Repair Tips
In order for concrete paths to be used for a long time, it is necessary to follow some recommendations from experts:
- Such repairs should not be carried out in rainy and damp weather;
- When performing repairs, you should not try to simply fill the unfinished cracks with cement mortar. Such repairs do not last long and the cement will soon crumble out of the cracks;
- You cannot simply pour cement screed on top of cracked concrete. Very soon such a screed will crack and then completely crumble from the old concrete;
- The durability of concrete garden paths is directly related to their proper construction. Concrete will deteriorate much less if water does not accumulate on its surface.
Restoring a concrete walkway begins with identifying its defects and acquiring the necessary materials and tools.
From your inventory you may need:
- Building level;
- Washing machine;
- Chisels;
- Boards;
- Wooden stakes;
- Container for preparing the solution;
- Master OK;
- Grater;
- Brush;
- Sackcloth.
We suggest you read How to raise a kitten from the street
Materials you will need:
- Fine sand;
- Cement;
- Putty for external use;
- Metal pipe;
- Portland cement.
Before repairing a concrete path, it is necessary to complete the preparatory stage. This includes not only purchasing the necessary tools and materials, but also cleaning the areas being repaired.
To do this, it is better to use a washing machine with a guide under a certain pressure and a stream of water. This unit makes it easy to remove moss, dirt, loose parts of concrete paths and other elements.
Advice: If there is severe damage and a large number of small cracks, the coating should be completely changed. And in case of single damage, small cracks are sealed with fresh mortar, which will ensure the durability of the coating for several years of its operation.
Most often, owners of their plots have to seal cracks in concrete paths.
Work instructions:
- Debris, dirt, mold and grass are carefully removed from the cracks;
- For high-quality adhesion of the mortar to the surfaces to be repaired, it is recommended to deepen the potholes to two centimeters, with a slight expansion of the crack;
- A solution is prepared in a prepared container. You can stir it by hand, but it is better to use an electric drill with a special attachment attached;
- For narrow cracks, sand and cement are mixed in a ratio of 3:1;
- A cement-gravel mixture with fine fractions is prepared for wide cracks;
- It is better to lay reinforcement made of large diameter wire into a deep crack.
- Small cracks and holes can be filled with an exterior compound. This can be quick-drying cement or mortar to which sifted fine sand has been added;
Tip: When sealing cracks in concrete, it is worth purchasing a set of a ready-made primer polymer composition for treating the edges of cracks and a dry ready-made mixture, which contains sand, cement and astringent polymer additives.
- The solution is brought to the consistency of sour cream;
- The composition is carefully poured into the crack and carefully leveled over its entire length;
- The mixture is pierced inside with a spatula to ensure that the entire volume is filled with the solution;
- The sealing areas are leveled with a metal trowel or trowel. In this case, you need to ensure that the edges of the cracks do not protrude too much above the surface of the main concrete covering;
- The surface is leveled with a regular brush, in the absence of special power tools. This will help push out the air and roughen the surface, making the areas less slippery;
- To enhance the adhesion of the mixture, it is recommended to apply PVA glue to the surface.
Tip: In hot weather, to prevent the seal from drying out too quickly, you should lay a sackcloth or a rag moistened with water on top of the crack.
Concrete surface repair
Along with the formation of cracks, pieces of the fabric break off on the side especially often. The reason for this is usually a missing curb when the concrete was poured.
To correct the situation you need to:
- Clean chipped areas;
- Remove all weak areas along the edges of the path;
- Treat surfaces with deep penetration primer. This will strengthen the surface, increase the adhesion of the base and repair mixture;
- Formwork is constructed around the path. It is usually assembled from boards and secured with small wooden stakes;
- All chips are repaired with a solution containing sand, cement and water in a ratio of 3:1:1. Its consistency should be similar to thick sour cream;
Concrete walkway edge defect
- After a day, the formwork is removed.
Construction of formwork around the walkway
To restore a badly damaged canvas to its original appearance, you must:
- Use a chisel to gouge out loose concrete pieces located on the damaged surface to obtain a solid monolith;
- Clean the canvas thoroughly;
- Prime the surface;
- It is almost always necessary to construct formwork when repairing concrete paths. This will hold the mortar until it has completely hardened;
- The path is filled with cement-sand mortar. Its consistency should be such that it easily fills all the cracks in the canvas, but is not very liquid. The layer of new coating must be at least 30 millimeters thick so that the canvas does not crack again;
- To increase the attractiveness of the path and reduce its slipping, small stones can be placed in the top layer of the coating;
- Before the concrete has completely hardened, it is worth making furrows on its surface with a stiff brush to reduce slipping on the surface in wet weather;
- After a day, the formwork is removed;
- Remove uneven surfaces from the new surface with a grater or burlap.
Many people wonder how to renew a concrete walkway?
If the old pavement on the paths has become worn out and covered with cracks that interfere with safe movement, sometimes it is more advisable to replace it altogether.
An inexpensive replacement is pouring concrete slabs using a silicone mold. Such slabs serve for quite a long time if they are placed correctly, and they look good, which is clearly visible in the photo.
The video in this article will show you how to properly make any repairs to garden paths made of concrete.
In order for concrete paths and paths in your garden to please you longer, you need to properly care for them with your own hands, following simple recommendations:
- Concrete sheets should be cleaned in winter without the use of salt or any reagents. They will not only destroy the coating, but can also harm plants located in the immediate vicinity of the paths;
- It is necessary to remove weeds that appear on the paths in a timely manner: they can destroy the base of the concrete pavement;
- Do not allow liquid to erode the paths. This can be prevented by installing special grooves along the edges or creating small grooves;
- You should try to keep garden paths clean, which will protect the coating from destruction and help maintain an attractive appearance for a long time.
This is a brief description of how to properly repair a concrete path and how to care for it. But it is always worth keeping in mind, in order not to invest a lot of money when repairing the coating, it is necessary not only to carry out its timely restoration, but also to ensure proper care of the structure.
Although concrete is a strong and durable material, sooner or later its surface still deteriorates. However, unlike many other building materials, concrete can be repaired. If you are faced with such a need, we recommend that you read this article, in which we will look in detail at how to repair concrete surfaces in certain cases.
Types of self-leveling floor coverings for external use
There are a huge number of self-leveling compounds that are used for arranging outdoor floors.
Metal methacrylic self-leveling floors
It is considered resistant to sudden temperature changes. The composition includes polymers and acrylic resins, making it moisture resistant and environmentally friendly. It is possible to install designer coverings and 3D floors as well.
Self-leveling metal methacrylic coating
Important! With a layer thickness of 0.3-0.5 cm, the metal methacrylic self-leveling floor can withstand intense loads of up to 15 tons.
Another feature and at the same time advantage of the flooring is the possibility of operation two hours after pouring. But provided that the layer of material is no more than 0.5 cm.
Polyurethane liquid floors for external use
It is characterized by wear resistance, the ability to withstand significant loads and not wear out during operation. It is used outdoors because it can withstand aggressive external environments and excess moisture.
Polyurethane coating
Since the material resists chemical aggressors, it is used in chemical warehouses.
Acrylic cement coating for outdoor use
Resistant to moisture, cold and hot water. Resistance to oils and acids can be traced. This is a wear-resistant flooring that can maintain operational and technical characteristics in temperatures ranging from -60 to +120 degrees Celsius.
Important! The main area of application of such liquid flooring is the food industry. The floor is especially popular in European countries.
Acrylic-cement self-leveling floor for outdoor use
Epoxy liquid floors
Epoxy liquid floors are popular. But it is not suitable as a material for external use. Although the coating has a high level of moisture resistance and wear resistance, the material did not show any results in terms of interaction with chemical reagents. It follows that the floor will have to be repaired frequently.
Epoxy self-leveling floors are not suitable for outdoor use
Do-it-yourself concreting of the yard
If you are faced with such a task as concreting a yard, do not rush to look for a master who will have to pay a lot of money for the work. Arranging your own territory with comfortable paths or hardy areas for a car can be done with your own hands.
Properly concreting the area around a private house does not mean facing an impossible task. It is enough to carefully study the technological rules and you can begin the construction process. Let’s try to present in detail the material on how to correctly carry out all stages of work and get the desired result, which will delight the owners for many years.
Digging up a large area of soil is labor-intensive and time-consuming work, but the technology provides for such a process and it is unlikely to be possible without it.
Of course, you can simply level the base and lay asphalt or concrete on top of it, but here you will have to bring in additional soil, otherwise the screed will not hold properly and will simply crumble.
Adding soil
If the soil around the house is infertile and you will in any case need to add good soil, then the top layer does not need to be removed. In this case, the preparatory work will consist of marking the area for pouring and filling it with crushed stone. If the base of the yard is clay, which does not shrink, you can do without crushed stone.
We invite you to find out what birds fly south in winter and why
Soil removal
If the yard is covered with fertile black soil, it would be more expedient to move it to the place of flower beds or beds, where it will be very useful, and it is better to arrange concrete or asphalt at the same level with the relief. To do this, at the very beginning, mark the boundaries of the paths or site and, guided by them, remove the soil.
On average, it is necessary to remove a layer of 20 cm. This may seem like too much, but you need to take into account the arrangement of drainage to dry out moisture, which negatively affects the concrete surface. This stage will be the next after removing the layer of earth.
Drainage system
In this case, drainage is nothing more than a backfill under a “cushion” of concrete, which consists of two identical layers of sand and gravel.
After the soil layer has been removed, add 5 cm of sand and compact it using a special device that you can easily make yourself. We will need a large channel onto which a pipe handle is welded.
To tamp, you need to lift and forcefully lower the tool onto the sand. Or you can align everything with a rule, but this will be somewhat inconvenient.
To simplify this type of work (tamping), you can pour a large amount of water on the sand, and it will settle down in a dense layer. There is one drawback: water is an expensive resource, and its consumption will be impressive.
Now you can fill in the next layer of crushed stone 5 - 7 cm. It is recommended to take a medium or small fraction, as it compacts better. Large stones will leave gaps, and this will be a violation of technology, and it will not be possible to properly concreting the yard.
All preparatory stages can be considered completed, and it’s time to lay asphalt or install concrete pavement. Like any construction, the pouring of paths and areas in the courtyard of a private house is carried out according to strict rules and is divided into several stages. To work you will need the following tools:
- shovel;
- profile for drywall;
- level;
- rule or board.
Formwork
To ensure that the concrete screed does not spread and hardens in the shape that it was decided to give it, it is necessary to build formwork. Any flat objects at hand are usually used as material, as long as they have a smooth surface. Here you may find it useful:
- boards (classic version);
- slate sheets;
- chipboard;
- plastic panels.
It is plastic that will become indispensable when pouring curved figured paths, since the PVC structure bends well and is pliable in work. The formwork structure is mounted along the edge of the site and defines its contour. Its installation is simple: the boards are laid in the shape we need and supported by stakes driven into the ground.
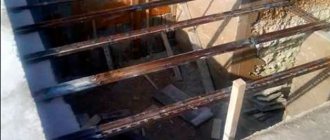
Reinforcement
Having completed the installation of the formwork, they move on to reinforcement, which will provide special strength and durability of the screed. Typically, the solution is reinforced using construction metal mesh or various metal products. You can use fittings, rods, pipe cuttings or steel wire.
Of course, it is better to perform this process using a ready-made mesh. It is convenient to work with it, because the material lies evenly on the surface of the crushed stone flooring with an overlap (otherwise the screed will become covered with cracks). The thickness of the rods is about 6 mm, and the cell sizes are around 15 cm.
In order for the concrete layer to have a sloping surface, it is necessary to use guide beacons in the work. The consumption of the solution increases significantly in this case, so this rule can only be partially applied in the local area.
Sloping surfaces of paths and platforms will drain rainwater in a timely and efficient manner and rid the yard of puddles and stagnant melt liquid. Following this principle, it is better to install beacons along the required plane, without reference to horizontal lines.
What is the best material to make lighthouses from? Here, profiles for drywall work would be most appropriate. They are affordable, and the use of such material will ensure a perfectly smooth front surface. Since we are forming a platform with a sloping surface, the metal profile is mounted on slides made of building mixture at different heights and, using a level, is set at the desired slope.
It is necessary to wait for the solution to dry completely and make sure that the beacons are securely fastened. On average, this takes one day. Once everything is ready for the next step, you can continue the process of laying concrete on the paths or platforms.
Concreting
Pouring mortar is a fairly simple but responsible process that can be carried out using ready-made concrete ordered at the factory, or by preparing the building mixture yourself. If you need to equip a large area of the yard, then the first option would be more appropriate.
But in the case where the area to be filled is not very impressive, it is better to do everything yourself. For such work you will need a concrete mixer or an old unnecessary trough, which you won’t mind throwing away later.
Proportions and shading
1 part of M400 cement is placed in a concrete mixer or trough (for external work it is better to take frost-resistant grade F 200). Sand (3 parts) and crushed stone (2 parts) are added to the cement.
First, all components are mixed without water, and only then can liquid be carefully introduced until a solution of medium thickness is obtained (usually ½ of the amount of cement is required). Using a shovel, the finished mixture is thrown onto the reinforcement between the profiles a few centimeters above the beacons. An even strip or plaster rule is stretched along the beacons, with the help of which the mortar is leveled.
In this way we remove excess concrete. Filling the paths must be done in one step, ensuring they dry evenly. If the screed sets in pieces, then cracks will appear at the joints of the material poured at different times.
In order to avoid damage to the coating during climate change, it is necessary to provide expansion joints. As is known, at low or high temperatures the material changes linear parameters (expands and contracts), so it is very important to create technological gaps. This is a simple process and will not cause any difficulties.
You can insert thin slats at the pouring stage and remove them until the concrete hardens. The second option involves “scraping out” strips of mortar before it hardens using a construction tool. If for some reason you did not provide technological seams, do not worry, it is easy to fix. Gaps can be cut with a grinder after the concrete has completely hardened.
Filling the yard with concrete is almost complete, all that remains is to wait for the surface to dry (on average 24 - 48 hours) and clean it with a spatula or sand-lime brick from sagging and unevenness. If no temperature gaps were provided during the screed pouring process, they are cut through the dried concrete with a grinder.
However, there is one more point from which the cement screed will gain strength - drying should be slow. What is needed for this?
Features of installation work
It is recommended to clean the concrete base thoroughly. And if the floor is smooth, then sand it to achieve better adhesion with the concrete screed. Oily areas are removed with solvent.
Apply the primer composition in several layers. Better - more than three times. Proceed to the next stage four hours after priming.
In case of pouring an area limited by walls, it is recommended to lay a damper tape around the perimeter, eliminating the possibility of cracking of the coating due to temperature changes.
After pouring the self-leveling compound, the floor stretches and levels itself. After half an hour, go over it with a needle-type roller. This will release any air bubbles.
After the self-leveling floor has dried outside, you can coat it with a protective varnish for additional protection. This will increase the resistance of the coating to abrasion.
Self-leveling floor on a sports ground
Self-leveling floor for the street: properties, purpose, installation
Self-leveling flooring is a high-quality seamless cement-polymer floor covering that is used to perfectly level the floor surface. Self-leveling outdoor flooring is used in the construction of parking lots, industrial warehouses and retail spaces.
- sealed;
- thin;
- frost-resistant;
- does not crack;
- fireproof;
- does not emit harmful substances;
- resistant to bacteriological attack and decay;
- has good adhesion to concrete surfaces.
Before installing the self-leveling floor, it is necessary to prepare the base - level, polish, clean from dirt and dust. Prime the seams and apply sealant using a roller, spatula or paint brush. Next, prepare the solution according to the instructions on the package and apply evenly.
The construction hypermarket "Master Tibot" sells a wide range of self-leveling floors at affordable prices from leading manufacturers of dry construction mixtures. We deliver goods throughout Moscow and the Moscow region. The current cost of poured flooring is indicated in our online store.
Do-it-yourself self-leveling outdoor floors correctly. +Video of filling
Is it possible to use self-leveling floors outdoors? Floor covering is the most pressing issue during construction, especially when it comes to self-leveling outdoor floors - first of all, you need to take into account the special conditions in which the floor covering finds itself - from high temperatures and sunlight to high humidity. Also, we must not forget about the characteristic properties of self-leveling floors.
How to choose the best polymer floors for outdoors? Where can I find frost-resistant self-leveling flooring? Can self-leveling floors be used outdoors? How not to make a mistake with the chosen material?
Is it possible to buy high-quality coating at a low price, and if so, how to choose it? And is it possible to follow the installation work or even carry it out yourself?
Let's answer these questions together in our article.