Why is external insulation better?
Qualified craftsmen advise insulating a cinder block house from the outside, since this option has many advantages:
- Extends the service life of the main structure. External thermal insulation must be protected from external influences. The trim not only becomes a barrier to the insulation, but also to the cinder blocks.
- Saves usable space in living spaces.
- Protects against the formation of dew on the walls of the house, and therefore prevents the appearance of fungus or mold.
- Allows you to save up to 70% of heat. Internal walls accumulate heat and release it back when the air temperature in the room drops.
We will begin to consider methods of insulating a cinder block house with external thermal insulation. Experienced specialists, whose field of activity is the insulation of buildings, claim that external finishing of cinder block walls with thermal insulation materials increases the ability to retain heat by 70%. Therefore, it is precisely this solution to the problem, which can reduce the thermal conductivity of the building frame, that will achieve a good result.
In most cases, the exterior of cinder block walls is finished with foam. The purchase of material implies a minimum level of costs (if you take into account the cost of polystyrene or penoplex), in addition, its thermal conductivity allows you to achieve a high thermal insulation effect.
External thermal insulation with such material has another great advantage - ease of work. It is enough to attach the foam to the wall surface using dowels. The length of the latter must be selected based on the thickness of the sheet. The length of each dowel should be equal to twice the width of the foam.
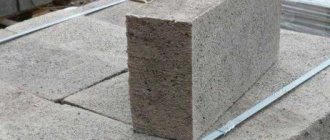
Scheme of insulation with mineral wool or polystyrene foam on glue
It must be taken into account that insulation with foam plastic from the outside requires that each sheet fit as tightly as possible to the wall surface. If the latter has some unevenness, then you can simply use additional glue during installation, which will help compensate for this deficiency. If damage appears on the cinder block wall before insulation, the surface must be puttied.
Conventionally, the entire insulation process can be built in the following algorithm:
- Leveling the surface (putty).
- Fastening insulation sheets.
- Installation of reinforcement mesh.
- Second alignment.
- Primer.
- Preparation before painting – finishing with “Finish”.
If you plan to paint the walls after insulation, you should use acrylic or silicone plaster to level the surface.
Start of construction
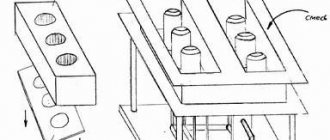
Proper ventilation in the cellar
Having decided on the location and size of the future cellar, you need to dig a hole/trench. It must be remembered that the size of the cellar perimeter will be smaller than the dug hole, because the distance from the ground to the cinder block walls will be covered with a waterproofing layer. The size of this space is 0.5 m. After the pit is ready, it is necessary to make a foundation. To do this, a ditch 35 cm wide and 30 cm deep is dug around the perimeter. Reinforcing rods are installed in the ditch and tied together with wire.
If possible, you can use a special tying gun. This will save time. The formwork is being formed. It should be made of wooden boards, which are installed around the perimeter of the foundation of the future cinder block cellar. Then a solution of cement and sand is prepared in a ratio of 1:3. For strength, you can add “sharp crushed stone” to the solution, that is, crushed stones that have sharp cuts. Then add water to this solution and mix well. The concrete solution must have a liquid consistency so that it can be conveniently poured into the ditch. A solution containing crushed stone has advantages over conventional mortar because it is a good waterproofing layer that does not allow moisture to pass through.
After removing the formwork after the foundation has dried, all cracks that may have remained after pouring the mortar must be covered.
A cinder block requires a very strong and durable foundation without any flaws.
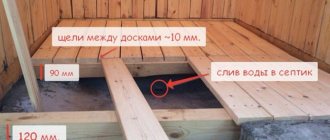
The next stage of construction is the flooring of the future cellar. The first thing you need to do is create a sand bed. The point is to spill sand around the entire perimeter of the cellar and compact it immediately. This can be done using a special machine or manually. The main condition is to compact the sand so that it does not press through. The compaction process will be better and faster if the sand is constantly wetted. But do not pour water on it, but spray it on it, for example, using a spray bottle.
The next layer, which also serves as a waterproofing layer, is the crushed stone layer. You need to do it as follows. The bottom surface is covered with a layer of crushed stone. The height of the crushed stone layer is not less than 5 cm, but not more than 8 cm. Important: this layer must be compacted as much as possible, just like the sand cushion. The future prevention of moisture from entering the cellar depends on this. You can compact the crushed stone well with an ordinary log. When the compaction work is completed, you can begin waterproofing with bitumen. Bitumen is poured hot along the entire perimeter of the cellar. The layer must dry. A concrete screed is poured on top of the bitumen. You can use the same cement mortar as for the foundation. The height of the screed after drying is 9-15 cm. Roofing felt is then laid on the screed. This is a good waterproofing material. Although experts have long ago consigned it to the last century, people do not stop using it because it is cheap and does not allow moisture to pass through.
DIY cinder block shed
Any construction process, especially of a capital nature, requires the construction of an additional structure that performs a diverse role. Storing materials and tools, protecting them from external influences and the prying eyes of others - these are the main reasons why so-called temporary sheds are built.
But it is worth approaching the issue creatively and organizing the construction of a structure, which in the future, after the completion of the main work, can be used for various needs. A do-it-yourself cinder block shed will not only satisfy all the required conditions, but will also significantly save money spent on construction. A country house, dacha, or ordinary plot of land cannot do without this element, the presence of which is sometimes simply necessary.
lack of special construction skills required for its construction; low cost of material; good sound insulation and high thermal conductivity; strength and fire resistance;
Some disadvantages, expressed in the presence of harmful emissions when combustion products are used as an element of a cinder block, will absolutely not affect the functioning of a structure of this type. Taking into account all the positive characteristics, such a barn can be used not only for storing various items, but also for breeding domestic animals, which will feel comfortable and cozy in it.
What do we mean by the word barn? Most often, when we talk about sheds, we can respect the crite of the non-living awakening, call without the ceiling barriers, the quiet room and about the place where we calmly feel that we do not need it! So this is the place where we can live as a domestic ruler! Just let us lie down with you, what kind of beautiful barn will it be?! Why are we going to vikorize him, but for whom we need to know how to build a shed of cinder blocks with our own hands.
Pochatkov's robots
To get started, we need to organize all the work, and first of all we need to start digging the foundation. Why do we rob the cinder block shed itself? Let's get to the core of cinder block?! This is a material that is obtained as a result of vibropressing of heavy and light concrete in forms. This name was taken from the origin of the distillation of household slag in the yakost of the same.
The thoughts of the rich fakhivts converge on the fact that it is much easier to work with him and much faster. Therefore, it is waterproof and easy to use.
Pouring the foundation
Ideal foundation: mix broken target and stone with broken cement. Pour the river for a few months, or even better, pour it into the rock. If the grapes are gone, add fresh ones and drain them from the ground.
Photo of the stitch foundation
It is important not to forget that the foundation is the basis of all everyday work! Just lay low, as long as I can serve you.
Wall masonry
How to go about everyday life or repairs is to start the trouble that we have already made. Next to the finished foundation, we begin laying the cinder block.
Lay the roofing felt over the overlap, add rhubarb, and after you have determined the maximum high point, start working on the cut. Pull a thread between them to help prevent the wall from falling through. Remember, work on the reinforcing dressing of the skin 3 rows when placing. Cover the window and door openings with wooden beams, then the balls will be placed on the cinder block, and the stench will be reduced.
Insulation
As you planned to build a barn to house the critters there, it would be a good idea to insulate them. To do this, place the walls in a row, filling them with insulation: laminated or foam. The simplest option: cinder block - sklovata - tsegla, or tsegla - sklovata - tsegla. Having completed this stage, make sure everything is in place correctly.
In the future, it is important not to rush, but rather to focus on the core of the work.
Coverings
You can avoid any innovations here, if you want the barn to serve you for a long time, then work without compromising technology.
- To install the roof on the tops of the walls, install wooden beams;
- It is necessary to screw the boards in the middle to them;
- Place cotton wool or foam rubber on top and cover with planks;
- Rivna slate with nakhil is the most elementary option for a shed;
- For this purpose, it is necessary to fasten boards from the opposite sides of our tree, on one side they are larger in diameter, at which end you remove the heel;
- Secure the slate.
We invite you to familiarize yourself with Materials for finishing the attic: types and features of work
A cinder block shed does not require plaster, but if you still want to, you can use original clay instead. The footings should be poured completely from the foundation. The most gentle option is to lay the beds with pallets and cover them with straw or lay linoleum.
Visnovok
Building a shed with a cinder block is not so difficult, but building a full-fledged shed is the same as building a cabin, only a smaller one. It is necessary to deprive your mother of the necessary material, knowledge and extremely important work to live a better life!
Away from waking life!
The technology of cinder block construction has been known to us for a long time. It was loved by many for its simplicity of execution and small investments compared to the unforgettable brick classics and luxurious wooden frame. As for the actual construction from this wall material, you don’t have to turn to professional masons; it will be enough to study the technique of how to build a house from cinder blocks with your own hands, buy high-quality material, arm yourself with desire and plunge headlong into the work, dreaming of the comfort of your future nest .
Before you begin the process itself, you need to know some features that can affect the entire project.
So, in addition to their low price, cinder blocks are also attractive because they do not require an expensive foundation. This wall material is also not difficult to transport. Again, you can do without using heavy equipment, and most importantly, houses built from it are not inferior in their characteristics to brick buildings.
Please note that cinder blocks are very afraid of water, so construction should be carried out only in dry weather, and upon completion, do not delay plastering the walls and facing the facade. Particular attention should be paid to its insulation, because cinder blocks themselves do not have a good thermal conductivity. Therefore, the material for external work must be selected correctly, corresponding to a certain level of water, heat and sound insulation.
There are many varieties of cinder blocks. They are monolithic and hollow. The first ones are used mainly for arranging the foundation. If you build main walls from such massive products, the weight of the building will increase significantly. The second type is cheaper due to the saving of raw materials on technical voids, and, of course, lighter.
According to their intended purpose, they can be full - for main walls and semi-blocks - for interior partitions. They have dimensions of 39*12*18.8 cm. Standard blocks have dimensions of 39*19*18.8 cm. Less common are products with dimensions of 40*20*20 cm.
Hollow cinder blocks come with two or four square, two or three round or various shapes, arranged in three rows of technical cavities.
Perhaps many people know that high-quality wall material makes up 50 percent of the success and reliability of the entire construction. Therefore, when purchasing blocks, pay attention to the following points:
- Be interested in the composition. The name of the cinder block speaks for itself. This material is made from recycled materials and industrial waste, so be careful, there is little that an unscrupulous manufacturer can mix into their wall products. The best fillers are shell rock, sawdust, crushed stone and expanded clay. So, for example, crushed stone and pebbles make the blocks heavier, but they provide a good coefficient of thermal conductivity and frost resistance, while expanded clay, perlite and shell rock, on the contrary, eat up weight and a high ability to retain heat;
- A reliable and durable block is not afraid of falling from a height of one and a half meters. Ask the seller to conduct a small experiment, lift the product above the ground about one and a half meters, and throw it without applying any force. A quality product should remain undamaged. Even small cracks and chips indicate a low-grade product;
- Take a close look at the products. All their faces must be of the correct shape without violating their integrity. Measure the sizes of random three sides, they should all match;
- Do not hesitate to ask the seller for test reports and quality certificates. From them you will learn about the true condition of the purchased products;
- Don't chase the lowest price. It is usually an indicator of poor quality. Before raiding construction sites in search of the perfect cinder blocks, do a little social work. a survey among your acquaintances and friends on the reputation of manufacturers of this wall material. Popular opinion is rarely wrong.
Building a house with your own hands from this material is not so difficult. You just need to follow professional recommendations.
Laying the foundation
The most important thing for the foundation of a cinder block house is that it must be high enough so that moisture cannot interact with the blocks. Depending on the condition of the soil, a monolithic or strip foundation is installed under a cinder block house. The technology for pouring the latter is presented in the article “laying cinder blocks with your own hands.” Let's look at the slab base option.
Make markings for the future base of the building and install pre-prepared formwork above ground level no more than 60 cm, but not less than 50 cm. Make a sand and gravel layer and compact it thoroughly. Its height should be approximately 50 cm.
Then mount the reinforcement frame and fill it all with concrete. Its composition should be taken in the following proportions: for one part of Portland cement M 400, take three parts of sand and three parts of medium-sized crushed stone.
If you decide to make a brick base, then you can do it immediately after pouring the foundation. It will be strong enough for walls only after a month of exposure. Be sure to thoroughly waterproof the foundation with roofing felt or roofing felt.
Walling
The construction of the building box begins by setting the corners and leveling them. When this painstaking work is done, a rope is stretched between them, along which the next rows will be aligned. Pay special attention to the first three rows of masonry, the evenness of the walls will depend on them.
How to properly build a shed with a pitched roof: the best options and technologies for their implementation
After a few days, when the foundation has hardened, you can dismantle the formwork and begin building the walls. First, you need to make the bottom frame of the building from timber. Before laying the wood, the foundation supports are covered with a double layer of roofing felt. At the corners, the timber is connected with metal brackets and checked for level. Install vertical supports in the corners of the barn, always checking the level.
They are fixed with temporary spacers. Taking into account the door and window openings, the entire frame of the barn is assembled from wooden beams. After assembling the frame, they begin covering the walls. This can be done with boards, moisture-resistant plywood or other sheet material. Before building a shed, wood must be treated with antiseptic agents to prevent it from rotting.
To protect against fire, fire retardants are used, which are also impregnated with beams and boards. There are two reasons for this. Firstly, the surface of a cinder block may have certain differences in heights; in order to level them, you have to use a larger layer of mortar.
Secondly, the volume of the solution increases due to voids in the blocks, which must be partially filled to increase the strength of the adhesion. Otherwise, the cinder block laying has no special features and is quite simple. There are no special requirements for erecting a roof on a cinder block shed.
Its standard designs are used. The most economical option would be a pitched roof. Its construction requires the least amount of effort, resources and time, and it will cope well with protecting the building from precipitation.
The main disadvantage of cinder block is the high thermal conductivity of this material. In this regard, structures built from it are quite cold and necessarily require wall insulation. This is especially true if the building is used as a barn for livestock. The most common materials for insulating cinder block walls are mineral wool or foam boards. The insulation procedure itself is quite simple. First you need to plaster the walls.
After the plaster has dried, the wall must be treated with a primer. Next, using glue, we attach mineral wool or foam tiles to the wall end-to-end. The next stage is gluing the reinforcing mesh to the layers, onto which the next layer of plaster will subsequently be applied. After it dries, you should paint the walls and you can consider that the construction is finished.
Based on the above data, we can conclude that there is nothing supernatural in building a shed yourself. Using cinder block in such construction will allow you to achieve high quality construction at a reasonable cost. By following all simple technologies during construction, the builder will receive a shed that will serve him for many years. Insulation Insulation Brick Blocks.
The suburban area must have auxiliary buildings necessary for storing equipment, firewood and other purposes. For example, you can build a bathhouse with your own hands from foam blocks or an ordinary shed, which will have side planes with low thermal conductivity.
Aerated concrete material can protect the interior from the effects of the external environment, especially if the installation and selection of elements is done correctly. At this stage, a location is selected and a design of the structure being manufactured is drawn up, that is, technical documentation is developed.
Along with this, all materials and tools necessary for construction are purchased. The site should have an area slightly larger than the square footage of the building itself, then delays can be avoided.
When buying foam concrete blocks for construction, you need to know everything about the size and density of the products, otherwise it is unlikely that you will be able to choose the best option. In addition, there is a risk of encountering counterfeit goods, because the material is quite popular.
Internal insulation
If you listen to the opinion of experts, it is preferable to carry out all insulation processes outside the structure. But this possibility is not always present, and external insulation does not always allow achieving the desired level of energy efficiency of a building.
The inside of a cinder block house is insulated using the same polystyrene foam or mineral wool.
Using the first will simplify the work and allow you to achieve high thermal insulation performance of the walls. In addition to high efficiency, it has disadvantages:
As for mineral wool, it does not contain substances harmful to the body, and pests do not breed in it. The material is also characterized by low flammability, small thickness and cost-effectiveness. Its main disadvantage, which can be called an advantage, is the ability to let air through. If the walls of a house are covered on both sides with such insulation, the house will “breathe,” but the level of thermal insulation characteristics will decrease.
Installing polystyrene foam is no different from insulating walls outside. The mineral wool is secured with special staples. If we take into account the choice of the majority, then preference is given to the second option, which is environmentally friendly and economical.
Cinder block shed - construction
Cinder block shed
For every owner of a private building, sooner or later the question arises of building a shed for household needs. For the construction of sheds they usually use inexpensive
We invite you to familiarize yourself with the DIY box for a cold smoked smoke generator
Construction materials
The most common budget option is a cinder block shed.
Let's take a closer look at how to build a cinder block shed.
Cinder block is an inexpensive building material, which is obtained by pressing a concrete solution with various inexpensive fillers (slag, ash, etc.), often to reduce costs, cinder blocks are made independently from scrap materials.
Cinder block masonry is characterized by ease of installation and a fast pace of construction.
since the cinder block is quite large in size compared to a brick. Working with cinder blocks requires practically no special construction skills, so you can build a shed yourself. walls made of cinder block have good sound permeability, are quite durable and are not subject to combustion.
1. size planning and calculation of materials.
2. construction of the foundation.
3. construction of walls.
4. roof installation.
5. plastering the walls.
Before you start building a shed, you need to clearly understand the size
future structure, depending on what needs the barn will be used for.
Depending on the size, a calculation is made of the materials required for construction; usually, a square meter of cinder block wall contains 13 standard cinder blocks. Based on this, a calculation is made of the number of cinder blocks required for construction.
After all the necessary materials have been prepared, you can begin construction.
For a cinder block shed, it is necessary to build a foundation to protect it from absorbing moisture from the soil, in order to protect the walls from premature destruction. The foundation is usually made of a strip type, that is, they dig a trench about 50 cm deep, install formwork, fill it with concrete, while strengthening it with reinforcement, along the entire perimeter of the building. Allow the foundation to dry thoroughly, periodically watering it with water to prevent cracks from appearing in the foundation.
Walling
Once the foundation is well strengthened, you can begin building the walls. The plinth should be raised to a high enough height to avoid
rainwater on the walls of the building. Before you begin laying cinder block, you need to waterproof the foundation. The masonry itself takes a very short period of time, due to the large size of the bricks.
After the walls are erected, you can begin installing the roof. The roof can be made single-pitch or gable. You can cover it with materials such as slate or corrugated sheeting, the main thing is that the roof is waterproof.
After all the main stages of construction are completed, you can begin plastering the walls, which is designed to further protect the walls from exposure to atmospheric humidity.
In this article, we looked at how to build a cinder block shed step by step. Compliance with these simple rules will allow you to erect outbuildings in the shortest possible time, at minimal cost.
16 out of 5
labor intensive to use
8 out of 5
aesthetic appearance
20 out of 5
ease of manufacture
14 out of 5
environmental friendliness
More than a hundred years ago, humanity discovered an inexpensive, fast and convenient way to erect buildings using cinder blocks. The material consists of ordinary slag, pressed into molds, the standard size of which is 390/190/188.
During the manufacturing process, water, some sand and a binding element – cement – are necessarily added. Despite the fact that cinder block cannot be called environmentally friendly, it is used in almost any construction.
Both industrial, military and civilian.
The strongest cinder block is one made from sand, crushed stone or pebbles.
This material is of high density, durable and has the ability to retain heat well, and at the same time cool. It is advisable to use it in the construction of external walls of a residential building.
At the same time, solid cinder block is used in the construction of external load-bearing walls in houses with more than one floor, but most often cinder block is used to build so-called country garden houses.
Cinder block for a bath
Many experts prefer not to use the word “cinder block” in everyday life, but to say “a type of silicate laying material.” Its versatility is recognized by everyone.
Cinder block is not susceptible to the destructive influence of fungus and has good contact with moisture. It is not susceptible to mold. It also has high fire safety. Therefore, cinder block is ideal for building a bathhouse. Most often, in this case, hollow blocks with voids up to 40% are chosen. But! If the bathhouse is insulated and, of course, lined.
To build a permanent garage, you don’t need to look for a better material than cinder block. Considering its impressive size, laying the walls of the garage, however, as in any other construction, will take place quite quickly.
Recommendations regarding which cinder block to choose—hollow or solid—should be based on where the garage will be located. The higher the percentage of voids, the colder the building will be, so this cinder block is suitable for a garage in a temperate climate zone.
A pre-prepared project will tell you how to build a garage from cinder blocks, in which all the nuances and wishes will be taken into account. To compile it, you can contact specialists, or you can use special computer programs.
Cinder block garage
Cinder block fence
For a fence that is supposed to be built for a long time, you need a cinder block, possibly hollow, but with good frost resistance and strength characteristics. Again, these data should fluctuate depending on the climate zone where the fence will be built.
Now we offer cinder block, or rather its subtype, decorative. In this case, one of the parties has a special texture. Decorative blocks are also called torn blocks. They can be painted in different colors. But more importantly, they must contain pebbles or metal slag. Then this material will be more resistant to atmospheric conditions.
Cinder block fences can be very diverse; their appearance depends on your imagination and capabilities.
a fence made of facing cinder block, a combination of various materials when constructing a cinder block fence, how you can paint a cinder block fence, a fence made of decorative colored cinder block
The strength of the foundation directly depends not only on the soil characteristics of the area, but also on the number of storeys of the building. Therefore, if it is planned to build a private house with three or more floors, and if all of them, as well as the internal partitions, are made of cinder block, the foundation must be made of concrete, but not of cinder block.
A cinder block foundation is appropriate only in stationary and dry soils in houses with a light load. An important condition is that groundwater must be located below the freezing level of the soil.
Wall masonry
On the one hand, laying a cinder block is much easier (it alone replaces 6 - 7 bricks), on the other hand it is heavier - the weight of each block is about 20 kilograms. Experts advise using solid blocks or those with 30% voids for external walls.
You can pour sawdust into the voids; this will somewhat reduce the thermal conductivity of the cinder block and make the house warmer. Every third row needs to be reinforced, which will strengthen the masonry. For internal partitions it is better to use semi-blocks, their sizes are 390/120/188 mm and 390/90/188 mm. Considering that cinder blocks retain heat poorly, after laying, it is better to insulate the walls from the outside.
We invite you to familiarize yourself with Garden Life
note
If the aesthetic beauty of the barn is not important, then any cinder block is quite suitable for its construction, even one containing coal ash or expanded clay. This material is relatively light in weight, but a shed whose walls are lined with cinder block, given that it allows moisture to pass through, is still better to be clad.
The question of how to build a barn can be answered in the same way as any other cinder block building, since the work process is not much different from building, for example, a garage or a bathhouse.
The gazebo is a rather elegant design in itself. There are, of course, varieties of closed gazebos with a barbecue inside, where the presence of permanent walls is assumed, but, probably, few people will risk laying them out of cinder block.
If there are people who want to have such a gazebo, then a cinder block even with a hollowness of 40% is suitable for them.
Cinder block and basement
Basements and cinder block are simply made for each other. The basement should be cool; the walls will still be plastered. Therefore, the masonry of the basement most often occurs from cinder block.
Considering that the basement must be dry, and if there is periodic water in it, for example, during spring floods, then cinder block is a material that is not susceptible to rotting or damage by fungus.
The basement will then just need to be dried. For basement walls, a standard cinder block with a hollowness of up to 30% is suitable.
The attached premises to a residential building can be made from cinder block, since this is the most affordable building material today. In addition, if you wish, you can make it yourself.
It should be remembered that if these parts of the building are residential, then it is better to lay them out of solid cinder block, but if they are used as utility rooms, then cinder block with a high percentage of voids is suitable.
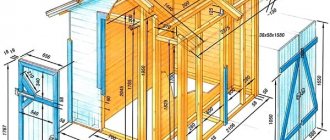
How to build a barn with your own hands with a pitched roof step by step - drawings, projects
As a rule, outbuildings are constructed from materials that remain after the construction of the house. The owner can only choose a drawing of the barn, decide on its size and roof structure.
The most optimal size for an outbuilding is 3x6 meters. This area is even enough to build a summer shower and toilet inside the building, and you can also arrange a summer kitchen here.
It is difficult to imagine a country house or dacha without outbuildings. Gardening tools, summer swings, hammocks and folding furniture are stored in the sheds; farm animals and poultry can also be housed here, hay and feed can be stored. As a rule, outbuildings are constructed from materials that remain after the construction of the house. The owner can only choose a drawing of the barn, decide on its size and roof structure.
You can make a drawing of a shed using photos found on the Internet, or come up with your own original shed, and then transfer the idea to paper. It is not recommended to build even the simplest buildings without a drawing. After all, all the dimensions and inconsistencies will become visible on paper. The roofs of barns are most often made pitched. A flat roof retains too much precipitation and snow masses and requires careful waterproofing. Roofs of complex shapes are also inappropriate for sheds, because this building is not intended to decorate the site, but to serve household needs.
The optimal solution for a shed would be a pitched roof. Unlike a gable roof, there is no need to install a ridge; you will need half as many rafters. It is easier to assemble a pitched roof, and precipitation and snow disappear from it very quickly, without threatening the waterproofing. The angle of inclination of a pitched roof should be greater than 18 degrees.
Such a slope will allow precipitation to freely leave the roof and protect the structure from winds and cold. If you need to buy materials for building a shed, it is better to opt for foam concrete.
Porous blocks have many advantages over other building materials:. Despite the lightness of foam blocks, it is imperative to build a foundation for the shed.
Considering the dimensions of the 3x6 building and the weight of the structures, it is better to choose a strip foundation. For stable, dry soils, a columnar base is also suitable. A strip foundation for a small outbuilding is poured to a depth of about cm, and it is necessary to take into account the depth of soil freezing on the site in winter.
The ground at the site chosen for construction is cleared of debris, roots and vegetation. They mark the perimeter of the barn and dig a trench for the strip foundation. Now you need to secure the formwork for the foundation from old boards, plywood or slate. Metal reinforcement is installed inside the boxes, which should strengthen the foundation. Concrete is poured.
Did you like the article? Follow our channel for new ideas of useful car tips. Subscribe to us on Yandex.
The solution is pierced in several places with a metal pin, ridding the foundation of excess air. Now you need to leave the foundation for several weeks so that the concrete can gain the necessary strength.
Blocks or bricks of the bottom row must be placed on a layer of waterproofing. The strip foundation is covered with a layer of roofing material or coated with bitumen mastic so that moisture from the concrete does not get onto the walls of the barn. In accordance with the building drawing, the walls are laid out, making window and door openings. The outbuilding box made of foam blocks is ready.
Much more often it turns out that the owner has leftover wood, and he decides to build a wood shed. For such work, at least minimal carpentry skills are required, because you will have to work with both a saw and a plane.
A building made of wood weighs very little; a columnar foundation can serve as its base. To do this, markings are made on the site, transferring the perimeter of the future building to the ground. Posts are installed at the corners of the barn. Several more supports should be located in the center of the rectangle. The distance between the supports is cm, depending on the size of the shed and the type of soil on the site. The depth of the supports depends on the level of soil freezing in the construction region; on average, see below.
Now you need to pour the concrete.
Choice of insulation
Houses made of cinder blocks do not retain heat well, so either polystyrene foam (or its cousins) or mineral wool are chosen as insulation. Each option has its own advantages and disadvantages. Let's take a closer look at each of them.
Styrofoam
If the question arises about how to insulate a cinder block house from the outside and spend a small amount, then it is better to use polystyrene foam. The material has excellent technical characteristics, but several shortcomings cause slight concern. Therefore, it is important to study all the positive and negative facts before choosing polystyrene foam for insulation.
Advantages:
- The smallest thermal conductivity coefficient.
- Light weight, which makes it easy to transport and install the material yourself.
- Low moisture absorption rate. Even if the foam is completely immersed in water, it can absorb only 4% of its own weight, and this is an excellent indicator.
- The material is not affected by mold, fungi, or insects.
- Long service life. If the foam is reliably protected from external influences, it can last up to 50 years.
Now let's look at the disadvantages:
- The insulation does not allow steam to pass through. The effect of a thermos is created. Heat is retained inside the house both in winter and summer.
- Low temperatures combined with a small amount of moisture destroy homemade foam insulation.
- Before starting installation, you need to level the base.
- Toxicity when burning. But for cinder block walls this drawback is not so important. Polystyrene foam burns only in the presence of a constant source of fire. In this case, there are no components of the structure that could quickly ignite and burn for a long time.
- Rodents love to make their homes in polystyrene foam.
Minvata
You can also insulate the house with mineral wool. Moreover, without unnecessary fears, you can choose any type of material proposed and get a good result. Qualified specialists recommend using this particular option for arranging thermal insulation for the walls of a cinder block house.
The main advantages of this insulation:
- Low thermal conductivity coefficient.
- Possibility to create additional sound insulation.
- Fire resistance.
- Can be mounted on walls with slight unevenness.
- Environmentally friendly.
The disadvantages include:
- High moisture absorption coefficient. Mineral wool must be treated on both sides with water-repellent glue. Difficulty in installation.
- If you lay and fasten mineral wool incorrectly, then in some places it may mat (shrink), which will lead to a decrease in thermal insulation properties.
Having become familiar with all the positive and negative aspects of using one or another insulation, each owner will choose the option that, in his opinion, is the most optimal.
The effectiveness of insulation depends not only on the selected material, but also on the thickness of the thermal insulation layer. In order to make an accurate calculation, you need to take into account the totality of the characteristics of the cinder block, insulation, as well as the climatic conditions of a particular region. Therefore, to simplify orientation, we present data based on the long-term experience of builders:
- The optimal level of thermal insulation thickness throughout Russia is 10 cm.
- In the southern regions, a layer of 5-7 cm is sufficient.
For a more accurate calculation, contact a specialist or ask for advice from local construction companies.
Masonry technology
You should start by choosing the right types of cinder blocks for the foundation.
Hollow material will not suit us, but blocks filled with crushed stone will come in handy. This variety is characterized by maximum strength; everything else is adjusted using additional materials. Taking into account the peculiarities of masonry work, the parameters of the blocks and other little things, one person can handle the construction of a cinder block foundation for a decent house with his own hands within a week. You just have to solve the issue of protecting the foundation from moisture, quickly erect walls and make a roof.
To equip the foundation for a house, you will need to follow a strict sequence of actions:
- first, a trench is dug and a bed of sand and gravel is laid;
- it is covered with roofing felt material in one layer. Instead, it is allowed to use bitumen or fiberglass.
When building a foundation from cinder blocks for a house with your own hands, you should understand that it must form a solid and durable structure, in which each element is connected with sand-cement mortar with a seam thickness of no more than one centimeter.
To prepare the mortar mass, use cement material M400, clean sand, and add clay or plasticizer components.
In most cases, the proportional relationship looks like this:
- cement - one share;
- sand - four shares;
- a third of the share of clay for every four is a sand-cement mixture.
The dry ingredients taken in the required quantities are mixed, then water is added. At the same time, mix the solution thoroughly to achieve the desired consistency and obtain a plastic mass.
Masonry work
Reinforced concrete blocks are installed on the roofing felt strip. On top of them, the first row of cinder block material begins to be laid out. Subsequent rows are laid out from the corners to the center; a solution is used to connect them. Reinforcement is performed on top of the last row.
As soon as the main part of the cinder block strip foundation is completed, mastic is used, on top of which the insulating material is mounted. Water protection should be provided on each side to prevent its penetration into the blocks.
We invite you to read: Foundation made of blocks, step-by-step instructions on how to make it yourself
The trench is filled in and construction of the walls begins.
This is how the foundation for a wooden house is made. The design will fully support an object with two or even three floors. For a barn, greenhouse and other outbuildings, you can build simpler foundations - columnar foundations made of cinder blocks.
The cinder block is placed staggered into the foundation, moving from the corners to the central part of the row. Horizontal deviations are allowed, which should not exceed one and a half centimeters. The masonry is done in half a block, with one or two stones. This takes into account the size of the stone and the thickness of the walls of the foundation being built. Metal mesh is excellent for reinforcement.
Joining areas and seams are completely filled with mortar.
Insulation using a spray solution
In order to simplify the thermal insulation process and achieve its high efficiency, modern insulation methods are being developed. These include treating walls with a special material – polyurethane foam. In addition to reducing the thermal conductivity of walls, it functions as a protective coating, which greatly simplifies and speeds up surface treatment.
Its peculiarity is that there are no fastening elements, which creates the effect of a continuous coating, without the presence of “weak points”: seams, dowel installation points, etc. The use of polyurethane foam is possible for the purpose of external and external thermal insulation.
It is worth noting that the sprayed surface will already have the most even structure for further processing, and the small thickness of the material will preserve the internal space of the structure and reduce the cost of purchasing external finishing elements.
The disadvantages include cost, but in some cases the use of sprayed thermal insulation will even be economically beneficial (if you take into account the additional characteristics of the material). The manufacturer also claims the durability of the coating (about 30 years), but the product is new and there is no actual confirmation of such statements yet.
When choosing a material for insulating a cinder block house, pay attention not only to the allocated budget, but also to the compliance of the material with the needs of a particular case. You should also not forget about the advice of experts and the level of harmful substances in some insulation materials. Always try to insulate the exterior first, and only then, if absolutely necessary, insulate it from the inside.
Cinder block cellar: advantages
Basement diagram with external drainage system.
Building a cellar or basement from cinder block is profitable in terms of the amount of time and money spent. The fact is that cinder block, being the cheapest and most accessible building material, is absolutely not inferior in strength to bricks. Of course, if manufacturers follow all the technology of the manufacturing process. Since cinder block is not an innovation in the construction world, there are a lot of pseudo-factories for the production of this material. For the sake of their profit, such manufacturers are negligent about the rules for making cinder blocks, violating technology. The quality of the cellar construction depends on this in the future. Often such structures are simply destroyed. Therefore, when choosing manufacturers, it is better to use trusted companies. But still, properly made cinder block stone has a lot of advantages.
Laying out such building blocks is faster because they are much larger in size than brick stone. But a cinder block basement must be immediately protected from moisture, because this building material does not tolerate dampness at all. When building a cinder block cellar, you need to take this individual feature into account. If the groundwater level is not problematic and the cellar location is dry and bright, a cinder block cellar is the best option as a room for storing food. By retaining heat, this building material will create excellent storage conditions and prevent temperature changes.