Foam concrete is one of the latest developments in the construction industry. This material has many undeniable advantages and is very popular. Its cellular fractional structure has low thermal conductivity, which allows you to avoid spending money on additional insulation. Light weight and dimensions larger than brick or sawn stone (standard foam block size is 600x300x200) can significantly save sand and cement during construction.
Due to their unique porous structure, foam blocks have good sound insulation. These same properties create the effect of a “breathing” wall, which protects the extension from condensation, which causes the formation of mold or mildew. For the production of foam concrete blocks, environmentally friendly natural components are used.
Planning and drawings of a foam concrete extension to the house
First of all, decide on the location of the extension, its size and height. It is important that the roof of the structure is slightly lower than the roof of the house.
- Provide and plan communication routes. This must be done at the initial planning stage, otherwise you will face the problem of laying them after the walls are built.
- It is also necessary to provide for the possibility of an expansion joint occurring at the junction of the extension and the main structure.
- The doorway in the extension can be arranged in the place where the window is located on the outer wall of the house, or it can be cut through the load-bearing wall. In this case, take into account external loads.
Arrangement of the foundation for the structure
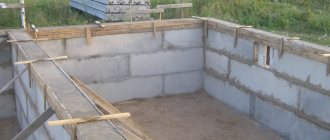
It is easier to build an extension to a house from foam blocks with your own hands than from traditional materials. The foundation for an extension made of foam blocks is made using the tape pouring method from concrete or from the elements of the future structure themselves.
- The depth of the base depends on the height and weight of the extension. For a small building, it is enough to dig a trench 50 cm deep and up to half a meter wide around the perimeter. When laying a foam block foundation, it is important to pay attention to the insulation and waterproofing of the underground part of the structure. The foundation is subject to the influence of groundwater and temperature changes.
- Moisture absorbed into the material in winter can freeze and contribute to the destruction of the base, and the condition of the walls depends on its strength. At the start of construction, at the zero cycle, work on insulation and waterproofing begins. For insulation, polystyrene foam, mineral wool, penoplex and other materials are used.
- Laying of heat-insulating boards is carried out immediately at the time of waterproofing. The dried foundation is coated with water-repellent mastic. Thermal insulation slabs covered with hot, about +70°C, bitumen are attached to it. There is no need to attach them additionally. When filling the trench, the earth will press the insulation to the base. Elements of thermal insulation material should protrude approximately 50 cm above ground level.
- There is another type of foundation insulation - polyurethane foam. This is a new and more expensive product, but its use solves the issue of maintaining temperature and implementing waterproofing at the same time. Using a special machine, polyurethane is sprayed in a layer of up to 5 cm onto the surface of the foundation. A coating of this thickness corresponds to 12 cm of ordinary polystyrene foam.
These materials successfully cope with the task of insulating and waterproofing the house and prevent the formation of cold bridges, which, in turn, protects the living space from the formation of mold and mildew on the internal walls.
Details
What houses can be attached to?
Extensions made of polystyrene concrete or foam concrete blocks can be attached to a brick, wooden, block or even frame type of house. There are no restrictions on the composition of the material.
Please note that the main requirement is that the existing structure must in no case be dilapidated, and its foundation must be very strong. The building being added will create additional load on the ground, and this can also cause unwanted shrinkage of the foundation of the old house, and even lead to its destruction.
The extension can be done in two ways:
- On an independent foundation - in heaving soil with high water levels, it would be more expedient to erect the building as a separate building. This helps to avoid cracks, as well as the appearance of deformation due to seasonal soil movements. The connecting seam between the two types of structures is a small gap that is filled with waterproofing material.
- On a base that is rigidly connected to the foundation of the house with reinforcement. The structure is a monolithic mass on which the building and extension will rest. This option is suitable for slightly heaving soils, and the water depth will be at least 2-2.5 meters.
Next, you should consider in more detail all the pros and cons.
Advantages and disadvantages of concrete blocks
Foam concrete blocks are produced from foam concrete by molding from a semi-liquid solution or by cutting a hardened mass of foam concrete. The composition, in addition to standard cement, sand and water, will include a foam former. Thanks to it, the structure of the material will become light and porous, so adding an extension to a house made of foam blocks with your own hands will be an ideal option. Foam concrete blocks are used in private construction for building partitions, walls, and insulating load-bearing structures. The material will have the following characteristics:
Density can be from 0.3 to 1.2 tons per cubic meter. The most porous concrete is used for thermal insulation, and the densest for the construction of load-bearing structures.- Light weight - foam concrete is 2 times lighter than brickwork.
- Low thermal conductivity, and in this indicator it is close to wood.
- The dimensions of standard blocks are 20*20*60 cm or 20*30*60 cm, and the weight ranges from 11 to 22 kg. With similar dimensions and weight, the laying of elements will be carried out without the use of additional construction equipment and much faster than with the same bricks.
The disadvantages include:
- Foam concrete is very hydrophobic, namely it absorbs moisture from the environment. This reduces its thermal insulation properties, and therefore the external walls must be protected by finishing.
- Not the highest frost resistance, it can be F15-F75. This will mean that it can withstand from 15 to 75 cycles of freezing and thawing without changes in strength or destruction. For comparison, high-frost concrete is graded F300-F1000.
The following varieties are made on the basis of foam concrete: polystyrene concrete, wood concrete, gas silicate, expanded clay concrete (chip concrete) and fiber foam concrete. They have a porous structure, high thermal insulation properties, and sufficient mechanical strength. In a room made from such materials, there is a favorable microclimate due to vapor permeability and environmental friendliness. They are much easier to process with tools - sawing, drilling and attaching staples.
Preparatory stage and planning
The preparatory construction stage includes work on cleaning and leveling the site. It is important to cut off the soil layer and transfer it for use in gardening needs. It is important to allocate space for storing building materials and transport access. Communications should in no way interfere with construction, and therefore they are temporarily turned off or even moved to a safe area. There must also be permissions from relevant organizations. Calculations must be made on the basis of pre-drawn drawings, the need for main building materials, as well as products. Purchase and store in a designated area. Before starting to build on a pre-prepared site, it is important to place the base using a cord, pegs and cast-offs. It is important to check the geometry using a construction tape measure or special devices - a theodolite or laser level. The diagonals must be equal.
How to make an extension with your own hands (main steps)
Consider the main stages of construction will include:
- Excavation work - you need to dig a trench, holes, or even drill wells under the foundation according to the selected design solution. It is desirable that a private house and an extension have the basic type of foundation, material and uniform laying depth.
- It is enough to deepen the base for the walls of an extension to a private house made of light foam blocks by 0.7 meters. A cushion of crushed stone and sand must be poured onto the bottom of the pit and compacted. Install reinforcement type frames and pour concrete. Pile foundations are installed by a special organization using professional equipment. Columnar ones are laid out from blocks, bricks, or even pipes are deepened into the ground with a further concreting process. Waterproof the top of the structure using rubemast, roofing material or bicrost.
- Block masonry should be carried out with bandaging of seams similar to brick masonry. Cement-sand mortar and plasticizers, frost-resistant tiles, or even a specialized adhesive composition for foam concrete are used as a binder. Along the top of the wall, prepare a reinforced concrete belt that can hold the structure together and also provides the required degree of strength and stability. The joint between the main wall and the extension is strengthened with embedded elements, staples with rigid adhesion, and to create a deformation-type seam it is filled with polystyrene foam, elastic bands, silicone/bitumen/acrylic compounds.
It is necessary to install lintels over the openings. The following applies here:
- Ready-made reinforced factory reinforced concrete or even aerated concrete beams.
- U-shaped elements made of foam concrete with a recess for concrete and reinforcement.
- Monolithic type lintels, which will be made on the construction site in formwork.
- Angle made of steel.
It is important to limit the maximum opening width to 1.75 meters, and the minimum support depth to 0.25 meters. Photos of foam block extensions to the house are attached as an example.
Installation of floors and roofs, facade decoration
After the strength of the concrete reinforcing belt has been gained, it is necessary to install the ceiling of the extension. They make ready-made panels from lightweight concrete or make a structure from boards and timber. You can pour a monolithic slab or even create a beam system and flooring with increased thermal insulation parameters. The roof of extensions is usually pitched.
It is made of a rafter system (rafter legs, mauerlat, sheathing and flooring) and a roof “pie”. The material used as a coating is usually the same or even similar in characteristics to the coating of the main building. When installing a roof, it is important to ensure that there are no leaks at the joints with the roof of a private house. For fastening, sliding elements (slides) or sliders are used.
They will help maintain the mobility of the roofing sheet during sedimentary deformation. It is important to pay special attention to the external type of finishing, because this helps protect the foam concrete from premature destruction, and also gives the house with an extension a finished look. Various types of façade cladding can be used:
Panels and slabs for exterior finishing.- Materials of natural origin - stone or wood.
- Decorative panels imitating brick or stone.
- Plaster.
- Siding.
Along with the installation of finishing materials, it is possible to additionally insulate the walls. The following building materials are used for this:
- Glass wool.
- Foamed polyethylene.
- Penoplex.
- Mineral wool.
- Expanded polystyrene.
Insulation boards are placed between the frame guides, protecting them with steam waterproofing if necessary. It is important to install finishing elements on the outside. You can see the installation of an extension to a house made of foam blocks in the video.
The cost of a turnkey house extension
It is impossible to say right away the exact cost of installing an extension to a private house, because many factors must be taken into account, including the type of foundation, the condition of the soil and the house. If we start only from the price of materials, then the dependence of cost on dimensions will be as follows:
| Extension dimensions, m | Cost, rub (from) |
| 2*4 | 110 000 |
| 6*2 | 175 000 |
| 6*3 | 255 000 |
| 7*3 | 278 000 |
| 4*6 | 316 000 |
| 7*4 | 368 000 |
Construction of walls for an extension from foam blocks
Roofing felt or rubemast can be laid along the frozen and established perimeter of the base. This layer, laid at the level of the dew point, prevents the penetration of moisture above the floor level.
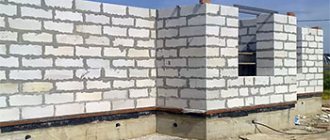
- When laying the first row of foam block walls, ordinary cement mortar is used. Construction, as usual, should start from the corner. 3-4 horizontal rows of foam concrete blocks are laid out and time is given for them to set. This ranges from an hour to three to four, depending on the cement adhesive composition used.
- At the points where the extension adjoins the wall of the house, connecting mortgages are driven in. For them, scraps of metal rod or reinforcement with a diameter of 8–10 mm and a length of about 30 cm are used. The rod is driven into the wall up to half its length, and its protruding part must fit exactly into the seam between the foam concrete blocks.
- When erecting walls, constantly check the horizontality of the rows and the verticality of the structure with a level and plumb line. The last row of the wall is made taking into account the laying of rafter beams for the roof. It is possible to make a gable or single-slope roof, as well as a cascade roof for the extension.
External and internal finishing of walls made of foam concrete
- Foam concrete itself has all the necessary technological properties for the construction of any structure. When creating extensions from foam blocks, the external walls only need decorative cladding.
- External walls can be plastered; the solution adheres well to foam concrete blocks and does not crumble during the operation of the building. A good option is to decorate the building with siding. It all depends on how the outer covering of the structure will be combined in style with the main building.
Interior decoration is done as in a regular house. A layer of plaster is applied, which is then putty for painting or wallpaper. Consider interior design options with plasterboard or wood paneling.
Owners of small cottages and wooden country houses often have to modernize their own housing. This is mainly due to the limited space, in which it is quite difficult to accommodate everything that can provide maximum comfort to the residents.
To improve the quality of life, owners are starting to look for solutions to expand the usable area of the building. The best option in this case may be an extension made of foam blocks to a wooden house,
as in
the photo
, which can be equipped as a change house, a room for a heating boiler or other equipment, as well as a kitchen, bathroom, bathhouse, garage, etc.
Foam concrete blocks: characteristics and features of the material
Foam block is cellular concrete or porous stone. This building material is often confused with aerated concrete, but it is incorrect to consider them identical. Foam concrete blocks are made by mechanically mixing cement, foam, sand and water. Thanks to this, closed pores are formed in the material, which increase waterproofing properties. Foam concrete is a ventilated material, so it helps create a unique microclimate in the room.
The main advantages of foam concrete blocks include the following:
- Democratic pricing policy. Unlike other building materials, foam blocks can be purchased at a fairly low cost, so the price of an extension made of foam blocks to a wooden house
will not hit the budget too much. - Low thermal conductivity. Thanks to its porous structure, the building material retains heat for a long time, maintaining an optimal indoor microclimate. A wall of one foam block up to 200 mm thick is identical in thermal conductivity to a brick wall 600-700 mm thick.
- Strength and durability. During operation, the strength of foam blocks increases significantly. Foam concrete is one of the most durable materials. It is often used for the construction of multi-story buildings.
- High degree of sound insulation. The material perfectly absorbs extraneous noise. This property is also due to the porous structure of foam concrete. A 100 mm thick block is capable of absorbing noise of 41-43 dB. That is why foam blocks allow you to save money on the use of soundproofing materials.
- Environmentally friendly. In the manufacturing process of foam concrete blocks, only components that are safe for health and certified according to international standards are used. Foam concrete does not contain or emit substances harmful to health, regardless of temperature and operating conditions.
Extension made of foam blocks to a wooden house:
typical
projects
and planning features
Before constructing an extension, first of all, it is necessary to decide on the purpose of the new room. If the additional space will be used to equip a bathroom, bathhouse, toilet, etc., it is necessary to take care of a high-quality ventilation and steam removal system in advance. Excess moisture can settle on the walls and worsen their appearance, spoil the finish, and lead to the formation of mold and mildew.
If a foam concrete extension is needed to furnish a kitchen, you should take care of fire safety, since foam concrete blocks are prone to ignition. Some standard projects involve using an extension to furnish a bedroom. In this case, it is necessary to determine in advance the dimensions of the room and calculate the area of the living room. After performing the calculations, it is necessary to study existing standard projects, which can be found in electronic form on the Internet. Having chosen a specific option that meets your requirements, you can begin building the extension.
Nuances or things to pay attention to
The functional purpose of the extension room is one of the main nuances that should be taken into account during the construction process, but there are also a number of additional aspects. First of all, you need to pay attention to the condition of the wooden house and the properties of the foundation. The reliability of connecting the finished extension will depend on the strength of the main mass and the foundation of the building.
Any changes in the layout of the house must be documented. This should be done after clarifying the construction features and choosing a layout. It is advisable to begin the process of building an extension to the house in the spring, since in the summer the wood dries out very much, and in the fall it gets too wet. It is in the spring that reliable supports for the completed room can be made in the tree. If you are planning to make an extension from foam blocks to a wooden house with your own hands,
use a special
video with
instructions, which can be found on the Internet. With the help of video materials you can avoid mistakes.
What building materials will be needed for construction?
One of the main features of foam blocks is the absence of the need for additional wall insulation. This allows you to significantly save money on the purchase of thermal insulation materials. In the cold season, the low thermal conductivity of foam concrete also allows you to significantly save on heating. To calculate the amount of building materials that will be needed to build an extension, you should determine the area of the additional site.
To build the extension you will need the following materials:
- foam blocks - for the construction of walls;
- screenings, crushed stone and cement - for foundation construction;
- glue, sand, cement - for laying foam blocks;
- beams - for roofing and foundation formwork;
- reinforcement - for reliable fastening of the foundation and walls;
- metal tiles or slate - for roofing.
How to build an extension yourself?
First of all, you should pay utmost attention to the rules for laying the foundation, after which you can move on to studying the facade of a wooden house. At this stage, it is necessary to determine the type and parameters of the foundation, assess the condition of the roof and walls of the house (strengthen them if necessary), arrange the entrance door and the transition from the house to the extension. Additionally, you should decide on the method of attaching the additional structure to the wooden house. The construction of the walls of the extension can begin only after the foundation has completely hardened and settled, i.e. approximately a month after it was installed.
Construction begins at the corner, as it is a guideline for the alignment of the walls. After laying 1-2 rows of walls, reinforcement should be laid out. This will make the walls of the extension strong and reliable. In the process of erecting walls, it is necessary to remember the need to arrange window openings that will provide an optimal level of illumination in the room. The final stage of construction involves the construction of the roof. At this stage, you should definitely take care of reliable water and thermal insulation. During the process of laying roofing material, it is important to ensure that the roof slope has an optimal angle of inclination to ensure the removal of precipitation.
- Everything you need to build with aerated concrete
- How to build a foundation?
- How to build walls?
- How to make a window?
- How to build a roof?
Have you ever thought about increasing your living space? The answer cannot be negative: every person always strives to expand his living (or living) space. In typical multi-story buildings, this can be done by remodeling the apartment. In this case, you “win” only a couple of square meters, but you get a lot of problems when re-registering the house or in case of selling it. BTIs are everywhere struggling with independent interventions in planning.
But for a private house such problems are not at all relevant. Any homeowner can independently make an extension to their house in a short period of time. Nowadays foam concrete blocks are used for these purposes. Their rapidly growing popularity can be explained very simply - foam blocks have a huge number of advantages over other materials:
- environmental friendliness;
- ease of processing and installation;
- durability;
- ideal compatibility with other construction and finishing materials.
It is worth noting that the foam block can be easily sawed or drilled, which simplifies the installation work.
How to build a foundation?
For an extension made of foam blocks, it is necessary to make a reliable foundation.
To do this, we make a pit 30 cm wide and at least 50 cm deep at the proposed construction site. The depth of the pit depends on how dense the soil is at the construction site. On “light” lands its depth should be 10-20 cm greater. The pit is filled with concrete and, through formwork, is raised above ground level to a height equal to the foundation of the main building.
The foundation (especially the part that is below ground level) will take a long time to dry, so this should be done at least 3 months before all construction work is carried out. Between the foundation and the first layer of foam blocks there should be a reliable waterproofing material consisting of 4-5 layers of roofing material. More modern insulation means can be used, but roofing felt has long been tested in construction and has proven itself to be the best.
Return to contents
A tricky way to attach a garage to a house building
The easiest way to attach a garage of any size and shape to the main wall of the house is using a conventional frame structure made of sandwich panels. In this case, it is possible to cleverly use the low weight and design features of such a prefabricated garage:
- The foundation for the construction of the building is made of a strip type to a depth of at least 50-60 cm; concrete can be poured even without formwork, but with mandatory reinforcement with a four-strand rod with a diameter of 10 mm. The insulation of the tape will only need to be done on the outside of the foundation, not adjacent to the building of the house;
- The low weight of the garage and good thermal insulation qualities make it possible to build an extension on a relatively weak foundation, without being tied to the main wall of a residential building;
- According to the standards, such a structure will be considered a temporary building; accordingly, it is possible not to comply with the restrictions on distance from the fence and fire standards of six meters, especially since the walls of the sandwich panels are made of thin sheet steel and mineral wool. There's simply nothing to burn there.
In this way, you can attach a garage to a wooden house or panel structure. The minimum pressure on the ground allows the structure to be attached in close proximity to the foundation of the main residential building, without the risk of subsidence and deformation of the concrete foundation. Steel load-bearing roof trusses, in addition to support posts, are fixed on one side to the brickwork of a residential building, which significantly increases the stability and strength of the structure.A garage attached to a house has an advantage over any other options, primarily in fire resistance, which is of paramount importance for this type of structure. The disadvantages of a structure based on sandwich panels include the fact that the external “plastic” texture of the walls will require additional effort and expense to decorate the building to match the style and color of the main building.
How to properly build a garage made of aerated concrete or foam block
There are no fundamental differences in the construction of a garage made of foam materials. In order to attach a lightweight building made of foam materials, it will be necessary to further increase the rigidity of its walls and ensure maximum strength of the connection between the strip foundation and the base of the residential building.
Firstly, in the walls in every third row, provide horizontal reinforcement of the block masonry with steel mesh. In the corners, you will need to embed vertical reinforcement from a rod into the foundation base, which must be tied with horizontal layers.
Secondly, before pouring the formwork for the foundation strip of the garage, it is necessary to break through the windows to the reinforcement of the foundation of the residential building and weld horizontal sections of the outlet in increments of 20-30 cm to the reinforcement frame of the future foundation of the garage. This will ensure sufficient rigidity of the connection between the two foundations.
Thirdly, it is possible to attach an aerated concrete box to a residential building provided that a reinforcing belt is installed at the top of the garage walls. Otherwise, non-rigid aerated concrete masonry will not withstand the thrusting action of the rafters and roof frame, even if there is a connection with the main wall of a residential building.
Attach a garage made of cinder block or brick to the building
The most common is the decision to attach a garage from the same material that was used in the construction of the main residential building. In most cases, it is believed that the specific pressure on the ground of such an extension will coincide with the load of the foundation of a residential building, which should reduce the difference in the subsidence of the concrete strip or foundation blocks of the two boxes. Accordingly, there is no need to rigidly attach and tie two support systems to each other.
How to build walls?
We begin to build walls from the corner part. For better adhesion of foam blocks to the surface, it is recommended to apply cement mortar to the surface of the roofing material, and moisten the lower part of the block with water. This way, the blocks will not intensively absorb moisture from the cement mortar, and accordingly, a layer of dry cement will not appear between the surfaces. Each laid foam block is pressed tightly against the surface, and its position is controlled using a level.
The second wreath of blocks must also be laid from the corner part of the extension, but in compliance with the dressing rules. In any case, when approaching the wall of the main building, you will need to cut the blocks to length. This can be done with an ordinary hacksaw: foam concrete is cut perfectly. To connect the walls of the extension with the walls of the house, you can use almost any fastening method: tires, corners or anchors. There is no need to be afraid that the extension will “move away” from the house over time: if you have made a high-quality foundation, then it should withstand the weight of the foam concrete and remain in its original position.
Return to contents
Construction
When the foundation is ready, it is important to make a reinforcing belt that will affect both the extension and the foundation of the main house. It should be remembered that wood needs waterproofing, which can be provided by placing roofing felt.
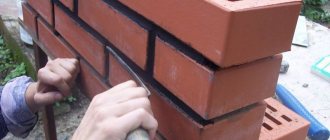
After the construction of the foundation is completed, markings are made for the construction of walls (at different levels). The construction of the walls of the extension begins from the corners. The rows of foam blocks in the corners should be in a checkerboard pattern - one row from one wall, the second row from the other is laid on it. During the laying process, ordinary cement mortar should be used to connect the blocks. The laying of blocks is carried out similarly to brickwork; if necessary, reinforcing elements should be laid.
How to make a window?
After laying several rows of foam blocks, it is worth thinking about whether the extension will be equipped with a window. As a rule, extensions to a house made of foam blocks are made “solid”, but the option of having windows and doors should not be excluded. If they were planned initially, then during the construction of the walls it is necessary to provide openings for them.
We install a rectangle of wood into the window openings. When laying each new row, this window “dummy” is attached with blocks. This will make it easier for you to control the verticality of the walls and select the length of the blocks. A strong beam must run along the upper level of the window opening. It has been scientifically proven that the foam block cannot provide sufficient elasticity and needs the specified reinforcement. Concrete or metal reinforcing structures are successfully used for these purposes, but the option of using wood beams can be considered the best. Judge for yourself: wood has minimal thermal conductivity, which will resist the formation of cold zones above window openings. In the future, this will guarantee that the finishing materials will not be damaged by temperature changes and condensation formed.
I think many owners of their homes had a feeling that something was missing. Someone is tired of being crowded with a large family in a small house. Some people dream of having their own garage. And others even want to have a bathhouse and a luxurious veranda in their home, where they could relax after a busy day.
The best option for enlarging a house is foam blocks. They seem to be created for building walls with your own hands: lightweight, easy to install, unlike traditional materials (brick, cinder block). We will now tell you how to make an extension to a house from foam blocks.
Construction guidelines
When constructing and operating an extension, it is important to take into account the possibility of small shifts:
- If it is necessary to pass communications at the joints of walls, pipes or electrical wiring are protected with corrugation or special gaskets; in some cases, this stage is postponed until the end of the shrinkage process.
- When choosing exterior finishing, preference is given to crack-resistant options: siding or thermal panels.
- The risk of moisture getting inside expansion joints is eliminated.
- Structures made of dissimilar materials require special attention; in this case, it is important to minimize the influence of shrinkage processes. For an extension made of foam blocks to a brick house, it is recommended to lay a monolithic foundation closed along the entire contour, without a rigid connection. Reinforced reinforcement of rows is carried out (every 2, as opposed to the standard 3-5), and non-shrinking mortars are used for laying products. The maximum height for attaching an extension to a brick house varies within the first floor. To connect to walls, you need reinforcement with a cross-section of at least 6 mm.
How to build an extension to a house
Creating a foundation
Before building an extension to a house from foam blocks, you need to decide on the layout of the future extension. And if you don’t know where to start, we will offer you several of the most common projects. You can see approximate examples in the figure below.
After the selected project, we begin preparatory work for the construction of the foundation. The depth of the foundation for most of Russia is 170 cm, which eliminates the possibility of freezing.
But if we exclude this factor, then its depth can be only 40-60 cm. You can choose a strip foundation (by pouring concrete) or a columnar foundation (laying a brick structure), after which it must be covered with waterproofing. Since foam blocks absorb moisture very strongly.
Creating walls
When choosing how to build an extension to a house from foam blocks, you need to pay special attention to connecting the walls with the main structure. They can be connected using metal brackets, after which the extension and the house become one.
Laying foam concrete should be done strictly according to the instructions. But don't be afraid, the instructions are simple and can be easily mastered by any novice builder. So, installation should start from the corner walls of the extension and continue throughout the entire area.
The initial row is laid out on cement mortar mixed with sand in a ratio of 1 to 3. In this case, the thickness of the first seam should not exceed 3 cm. After that, we check the level of the masonry; unevenness can be removed with any grinding tool.
Subsequent rows can be laid using a light mortar with a horizontal seam thickness of 1-1.5 cm and a vertical seam of 0.8-1.5 cm. When using special adhesive mixtures, the seam thickness should be about 2 mm. The solution is applied evenly over the entire area using a special spatula, after which the foam block is placed.
Note! If the construction of an extension to a house made of foam blocks occurs in hot weather, then it is necessary to moisten the block before placing it.
The block itself is placed on top of the mortar without shifting, and the remaining mortar that is squeezed out is immediately picked up. Afterwards the block is leveled and knocked down using a rubber hammer.
In order for the extension to a house made of foam blocks to be strong, you should follow the dressing rules when building walls. The second row should begin with an offset of at least 10/15 cm. The corners should be staggered.
Moreover, if the installation is carried out with industrial foam blocks, you need to decide whether the walls will be plastered on one or both sides. If the wall will be plastered on both sides, then the key joints may not be filled with mortar.
But if you plaster, it will be on one side or not at all. Then the key joint should be filled with mortar, which will help to avoid blowing through the masonry.
Equipment for wall openings
You can use special U-shaped lintels over window and door openings. They are very light, and with their help you can make door and window openings more than 1.75 m long without using lifting equipment.
To install the lintel, you need to install formwork made of wooden beams and metal profiles. After installing the reinforcement, you need to fill it with heavy concrete so as to completely cover the metal reinforcement on all sides. Concrete must be compacted and leveled with adjacent blocks.
The grade of concrete and the diameter of metal reinforcement must be selected based on the maximum possible load.
- Wall foam blocks
- U-shaped blocks
- formwork
- heavy concrete
- metal fittings
U-shaped blocks are also used to create the so-called reinforced belt. Metal reinforcement takes tensile forces quite well. And reliably protects walls from cracks and destruction. The diameter of the reinforcement is usually 1 cm.
Such a metal belt is assembled already on the wall, due to the fact that the entire structure is quite heavy and it will be very difficult to install it in its place. The ends of the fittings are attached to the wall of the house. After installation, the reinforcement is completely filled with concrete so that there are no bare spots left and is leveled. This design takes about 30 days to dry.
Creating a roof
The roof of the extension can be made either single-slope or gable. A shed roof is generally cooler than a gable roof. But construction costs are less.
Also, the construction of the roof for each extension is an individual feature. And only specialists can predict which roof design will be the most optimal.
Today there are many materials created to reduce heat loss through roofs. Namely expanded polystyrene, mineral wool, expanded clay, sawdust.
All these materials have both disadvantages and advantages.
- Mineral wool
is used very often to reduce heat loss in wooden roofs of houses. And indeed this material has a lot of advantages, and these are light weight and fire safety. In addition, it does not contain harmful substances and has very high thermal insulation characteristics. The disadvantages of this material include the fact that it absorbs moisture very well. Therefore, when choosing this material, projects for extensions to a house made of foam blocks provide for good hydro- and vapor barrier.
- Expanded polystyrene
is also often used to reduce heat loss through the roofs of houses. The positive properties of this material are very low vapor permeability, high thermal insulation characteristics even at high humidity, the material’s insusceptibility to physical wear and hydrophobicity. The disadvantage of expanded polystyrene is its flammability and increased noise.
Tip: If you want to quickly and safely insulate your roof, it is better to choose polystyrene foam. It is very easy to install and affordable.
- Sawdust
is an inexpensive material. Used in case of construction with a small budget. One of the disadvantages is that if you use clean sawdust or shavings that are not soaked in lime, then rodents can grow in them over time. Also, from the point of view of protection from fire, it will not stand up to any criticism.
- Expanded clay
is already a traditional material that has been used for more than half a century. The advantages of expanded clay include low moisture absorption, fairly high thermal insulation characteristics, lack of flammability, and of course you will be pleased with the price of this material.
What is important to know before starting construction from foam blocks
Any construction must begin with design, and for this it is important to determine:
- Purpose of the object.
- The required dimensions of the extension are width, length and height.
- Placement in relation to the house.
- The structures and materials from which you plan to build.
It is important to draw up a detailed drawing indicating the dimensions in the plan, the placement of door and window openings, and the marking of communications. The best option would be to develop the project by professionals, because this document will be required for further processing. Before you start building an extension to the house, which will be made of foam blocks, it is important to find out the type of soil - whether your soil is heaving, its freezing depth. It is also important to determine the type of foundation of the existing building. We recommend laying the same foundation for the structure as for a private house - pile, column or strip. It is required to take the design of a major refurbishment seriously. It will be easier to do this before the start of construction work, since otherwise it will take a long time to coordinate documents through the court.
Construction of an extension to a wooden house
An extension to a wooden house made of foam blocks has its own characteristics. The main one is that the buildings will be built from different materials. And the foundations of wooden houses, as a rule, are not deep.
It follows from this that these structures will move differently relative to each other in the case of seasonal, weather and geological factors. Therefore, it is better to contact the appropriate specialists.
So that they make a calculation and, based on the data, provide projects for an extension to a house made of foam blocks.
But if you agree with the risk, then you can choose one of the methods for connecting the extension yourself:
- Make a rectangular foundation for the extension (the choice of foundation is described above). In this case, the foundation of the extension does not need to be fastened to the main one. The same principle applies to the construction of walls. At the junction of the extension wall with the main wall, it is necessary to lay mineral wool and take measures so that it does not fall out either inside or outside the room. The roof of the extension must be fastened to the main roof.
- If the foundation of the extension is attached to the foundation of the building. Then, in order to ensure that the extension to a wooden house made of foam blocks does not crack at the joints, you need to examine the condition of the walls of the main structure. And if defects are found, such as rotten logs, then they need to be replaced. Otherwise, the walls of the house and the extension will shrink unevenly, as a result of which the wooden wall of the house will separate from the wall of the extension. In this case, the extension to the wooden house must be connected using special sliding joints with a longitudinal groove. They, in turn, do not interfere with the shrinkage of the walls, but also prevent them from moving apart.
Planning and preparation
First, you need to create a plan (project) for the future design and coordinate it with the competent authorities (BTI). After creating the project, we begin to calculate estimates for materials. You can build an extension yourself, but if you plan to involve a team of builders, then the costs for it should also be taken into account. When all the “paper” work is completed, the state of the foundation should be analyzed by “location”. If before drawing up the project it was tested for strength, then this is not necessary.
If necessary, you should create a project for supplying communications and lay them to the required point. It is also worth considering the connection point between the extension and the house.
Next, determine the type of foundation. The best option is to build the same foundation as the main building. However, if it is not known what the main building stands on, then the foundation for the extension should be made either monolithic or strip. It is worth remembering that a pile or columnar foundation is usually built for wooden houses, however, the construction of such foundations for an extension is not always correct, since it depends on the type of soil. At the same time, the type and capitality of the foundation is significantly influenced by what function the extension will perform. If it is a barn or gazebo, then a capital foundation is not necessary.
For a living space, bathroom, kitchen, a permanent foundation will be required. But it is still better to refuse to save money and make a reliable foundation even for a light extension of the room, since this will prevent it from sagging and sliding. When building a foundation, it is very important to correctly connect the existing foundation with the newly created one. To do this, you should dismantle the old foundation at the junction, reinforce the area and fill it again.
It is also important to organize a passage in the house (if required), through which there will be communication with the new room. To do this, it is not enough to cut a doorway (which is done at the end of construction). It is also important to think about the levels of floors, ceilings, etc. It is advisable to make the doorway itself instead of a window. If there are no plans to place windows in the extension, then the doorway is cut out immediately.
Only after all preparatory operations have been completed can construction begin.
Conclusion
As you can see from the article, when building an extension there are a large number of nuances that cannot be predicted by an inexperienced person. Therefore, if possible, it is better to contact a specialist.
The video below in this article will help you understand some of the nuances of masonry.
Even in ancient times, it became clear to humanity that air is the best heat insulator.
Layout of reinforcement for a house extension made of aerated concrete blocks.
People decided to take advantage of this property. And today, with the availability of modern materials and the use of nanotechnology, this has not been forgotten. Except that the methods of using air insulation have changed.
Today, the most effective, from the point of view of thermal insulation, are materials that have a low density and contain many air pores inside.
These include fiberglass or basalt, polyurethane foam, polystyrene foam, hollow brick (the more voids there are, the more heat-saving the brick is). Foamed concrete is considered the most effective of modern materials. We will talk about one of its varieties, namely gas silicate or aerated concrete. It is especially indispensable when you need an extension to the house, and not an entire building.
Scheme for adding an additional room.
Aerated concrete is considered an environmentally friendly material, which, thanks to its porous structure, is durable, lightweight and has excellent thermal insulation. The combination of all this makes it more popular among all other types of building materials and allows it to be used both in the construction of entire houses and various extensions to the house. This could be a sauna, veranda, bathroom or heating unit. Easy, fast, without any extra costs. The main thing to remember is that before you start building an extension to your house, it would be a good idea to objectively assess the condition of the building itself. If it is new enough, then an extension makes sense. It may be much more profitable to demolish a very old house and build a new one than to use this inexpensive method of expanding living space.
Scheme of connecting the new foundation to the old one.
Before you start making an extension to a house from aerated concrete blocks, you need to measure the corners of the future structure. Their diagonals should be at the same distance from the wall of the house and have the same length. Next, you need to determine the thickness of the foundation; for the middle zone, 40-50 cm will be optimal. The depth should be 40-60 cm, which is due to soil freezing in winter. A metal belt is made according to the size of the dug trench. For this purpose, fittings are used. Then holes are drilled in the old foundation and a welded metal belt is attached.
Then the foundation itself is poured, for which a sand-gravel mixture is prepared and cement and clean water are added. You will need a lot of water: 125 liters for 1 cubic meter of concrete. You should also know that the strength of the cement used directly depends on its shelf life: the longer it is stored, the more of its strength it loses. After pouring, the foundation is given time to settle, about 2 weeks. Next, a brick base is laid out. And only after this the extension is made directly from aerated concrete.
Basic ways to attach a garage box to a house
The technique for constructing a garage box as an extension to a house depends on the material and method of arranging the foundation and walls of the main building. The heavier the building and the more complex the soil, the more difficult it is to combine the two structures into one. There are several ways to attach a permanent garage building to the load-bearing wall of a house:
- Connect two foundations, the garage and the main building, using a transitional bundle of reinforcement and sealing mass;
- Separate and leave the foundations of the garage and residential building as independent and unconnected structures. This method of arranging a foundation system is used for heavy buildings, and if the soil has weak bearing capacity;
- Attach a garage at the stage of forming the foundation and erecting the main building.
In addition to solving purely technical issues of constructing the foundation and walls of the building, before attaching the box, you will need to draw up a project for changes and reconstruction of the main capital building, and agree on its location with the architectural bureau and the fire inspection authorities. For example, a garage, as a permanent building, in accordance with fire safety standards, must be at least six meters away from the nearest building, while the distance to the site fence fence can be only one meter.
Thus, it is possible to add a garage if the neighbors did not have time to build a similar object on the foundation earlier. But even if there is no construction activity in neighboring areas, this does not mean that it will be possible to find a common language on this issue.
Concrete foamer
An attempt was made to improve the properties of concrete using a foaming agent.
Scheme of technology for constructing a columnar foundation.
As already mentioned, in modern conditions this is the most popular building material, which has the greatest heat-saving ability, but there is another side to the coin: the lower the density of the material, the lower its load-bearing capacity. Concrete is known to be the strongest of modern materials and its load-bearing capacity is quite high. But the walls made of it are very cold, so an extension to a house made of concrete requires mandatory insulation. It is because of this that they came up with the idea of foaming concrete. This is done using foaming agents (most often it is aluminum powder), then it is placed in molds and left to harden either naturally (foam concrete blocks) or in autoclave ovens (aerated concrete blocks). Thus, aerated concrete blocks are produced only industrially, while foam concrete can actually be produced directly on construction sites.
Naturally, this factor cannot but affect the quality and price. Modern manufacturers claim that a wall made of aerated concrete 30-40 cm thick in terms of heat conservation replaces a brick wall 1 m thick; it is also said that the high vapor permeability of this material does not require the construction of ventilation in the room. Only to attach the blocks you need special fasteners, and in order to screw a self-tapping screw into the wall, you need anchor-type fasteners, otherwise nothing will work. Nails in such walls simply do not hold and fall out. Aerated concrete has another remarkable quality: blocks can be sawed with a hacksaw for metal and planed with a plane, like wood. To install the blocks from which the extension is made, it is better to use special glue.
Deformation of building materials
It must be said that deformation of any building materials is inevitable.
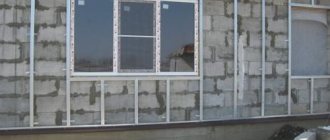
In fairness, it should be noted that no masonry, even 2.5 bricks, is completely airtight. Therefore, it is advisable to seal and coat absolutely all cracks, seams and joints on both one and the other side of the wall. For ventilation gaps between the blocks and facing brickwork, 20 mm will be sufficient. Bonding of blocks and facing masonry is done using nylon reinforcement. It is indispensable when working with tension. In addition to brick, you can use other facade materials. Walls made of aerated concrete must be closed from the outside, since, having high absorbency, they will be extremely fragile. And heat loss in the cold season will be much lower, this is especially true for the middle zone. As practice shows, it is best to plaster a wall on both sides. Then the built extension will be warmer.
Any structure undergoes shrinkage over time. An aerated concrete extension to a house is no exception. After 1-2 years, the walls begin to crack. To fix this, the following is done: first, the wall is puttied in 1 layer with gypsum putty, then fiberglass is glued on. Apply another layer of putty, then, after drying, another layer. Finally, apply a layer of finishing putty. After these procedures, the walls can be painted without fear - no cracks will be visible.
Construction Features
From all of the above, it is clear that aerated concrete is an ideal building material specifically for extensions
. Despite all the apparent advantages, materials made from foam concrete are quite fragile, and therefore using floor slabs made from them is not the best solution. This must be remembered by anyone who is thinking of building their own house or adding another room to existing walls. In any case, preference should be given to those brands of aerated concrete that have reduced porosity. As a roofing material, bituminous slate or flexible tiles are ideal.
