The use of concrete in construction work has remained relevant and effective for decades. The construction of a concrete ceiling has become a basic service in the price list of construction companies, which will no longer surprise anyone. A concrete ceiling should be purchased for the following number of reasons:
strength, stability; ergonomics; durability; low cost.
This is not a complete list of benefits. If you need to replace the ceiling, pay attention to the concrete surface.
Ceiling design in loft style
The loft style has earned its place of honor among the most popular styles today.
It is characterized by industrial motifs, rough finishing or lack thereof. Concrete ceilings will not only be appropriate here, but also the most beneficial. The room looks more damp and the renovations are unfinished. This is the effect designers strive for. Lamps designed in the appropriate style will help to emphasize the ceiling material:
- incandescent lamps without shades;
- lamps - fans;
- lamps reminiscent of street lighting fixtures;
- in the style of industrial chandeliers;
- halogen lamps.
The loft style is not characterized by hidden communications, beams, or ceilings.
For a living space, leaving a concrete ceiling completely unfinished is not entirely correct. Therefore, the ceiling is still covered with transparent varnish in order to highlight it favorably.
Reviews from grateful customers who have already ordered suspended ceilings from our company
07/06/2020
Andrey Nikolaevich
Contract: #2018529095
07/05/2020
Zhannochka Jadalla
Agreement: #2018332715
06/23/2020
Dmitry Baturin
Contract: #2018520184
06/11/2020
Denis Denisov
Contract: #2018520486
Show more than 500 reviews
Concrete ceiling finishing options
There are various ways to emphasize the relief and structure of the original look. You can also paint, whitewash or wallpaper the ceiling, preserving the beneficial properties of the material as such.
Painting a concrete ceiling
Depending on the design of the room or for practical reasons, the following types of concrete ceiling finishing are chosen:
- whitewash;
- painting;
- lining;
- wallpaper;
Wallpapering a concrete ceiling
- tile;
- suspended, tension structures.
Puttying a concrete ceiling with plaster
Features of whitewashing a concrete ceiling
The most ancient method, but not the easiest if the surface is not perfectly flat. It is necessary to know the features and stages of preparing a concrete ceiling for whitewashing.
- Completely remove old, swollen material. Lime is easily removed with water.
- Primer treatment. This is necessary not only to strengthen the concrete surface, but also to ensure a better degree of adhesion of the solution applied in the future.
- Fix the flaws. The putty is diluted to the required thickness and applied to the defects with a spatula.
- After the putty has dried, the ceiling is perfectly leveled using sandpaper.
- Before whitewashing, the surface is primed again.
- Dilute the whitewash solution according to the product instructions. Spraying with a special spray bottle is better than applying with a brush or roller. In this case, the substance will be distributed evenly and will not streak.
The final result is evaluated. Sometimes it is necessary to apply the solution in two layers.
The whitewashed ceiling needs to be updated every 2-3 years
There are two types of material used for work: chalk and lime. Each has positive properties: the first gives greater whiteness, the second has a bactericidal effect.
The process is labor-intensive, but one cannot fail to note the advantages of whitewashing the ceiling:
- environmental friendliness and health safety;
- cheap material;
- possibility of independent implementation.
The whitewashed ceiling needs to be updated every 2-3 years. Such a finish cannot be called durable. Over time, it turns yellow and swells. After work there is a lot of dirt. Therefore, despite all the advantages, many prefer other ceiling design options.
Before whitewashing the ceiling, be sure to clean it
Pouring the ceiling
Before you start pouring concrete, you should assemble the formwork (from any material at hand), install the frame, and carry out reinforcement. To prepare the concrete mixture, you should prepare a special place for mixing or use special construction equipment, which will greatly simplify the task.
mix the concrete mixture for pouring; pour the mixture into the formwork; tamp the mixture, level it with a shovel or spatula; in case of large accumulations of air and the formation of bubbles, press down such areas with a shovel or spatula; remember that the mixture should not be very thick, otherwise the formation of bubbles cannot be avoided ;leave the concrete for several days until completely dry. The drying time is indicated in the purchase instructions; remove the formwork. Return to contents
Painting a concrete ceiling
This option is also more affordable, like the first, but compared to the previous one, it has some advantages: a variety of colors, a better composition and good wear resistance. With the help of such a rich palette you can create interesting designs for apartments and houses. It can be matte or glossy. Matte looks appropriate in modern design (high-tech, loft, minimalism). Glossy requires a perfectly flat ceiling and will look better in a classic or baroque interior.
The peculiarity of painting the ceiling is that all work must be done quickly
To work, you will need to buy paint for interior work. It is divided according to its chemical composition into:
- acrylic;
- latex;
- silicone,
- silicate
Acrylic paint is most popular for its practical properties:
- rich palette;
- does not fade from the sun, does not change shade;
- penetrates into small cracks and masks them (up to 1 mm);
- easy to clean and not washable;
- lies flat;
- durable;
- inexpensive in cost;
- has no odor;
- non-toxic;
- applicable to any surface.
Acrylic paint is truly durable, but only if all the requirements for working with it are met: proper surface preparation, following the instructions when diluting and applying. Basically, two coats are required to achieve the desired color saturation.
Acrylic paint is very durable
Latex paint, like acrylic, consists of rubber, but only of a synthetic nature. Latex paint is richer and can be used in just one coat. It has the same positive properties as its previous brother.
Latex paints are less resistant to low temperatures, so their use is advisable for well-heated rooms.
The general disadvantage of the listed paint options is that they are susceptible to the formation of fungus even despite their moisture-resistant qualities. Modern, improved products on the shelves promise protection against this disease thanks to the addition of special components. Practice shows that this does not add much to their effectiveness. You still have to prime the surface before each coat.
Silicone paints are considered improved in this regard. They tolerate large temperature changes, high humidity, and are resistant to fungus and mold. Combining all the advantages of the options already listed, silicone paint has one drawback - high price.
Silicate paints will be an excellent solution for decorating ceilings in the bathroom, kitchen, and swimming pool. Of all the options, they are the most durable, moisture-resistant, dirt-repellent, and antiseptic. The products are slightly toxic and require additional protection when working with them.
You can also find unusual types of paints on the market: textured, embossed, textured. They are made on the basis of aqueous acrylic dispersion and marble chips. In terms of quality characteristics, it is not inferior to other popular types. You can create interesting designs with them. Not everyone can afford them. The price is quite high.
To paint a concrete ceiling, it is important to choose the right tool:
- special sprayer;
- brush;
- roller
It is best to use several devices at once.
The correct solution would be to use several devices at the same time. Use a brush to carefully paint corners and areas near the wall. At a short distance from the wall they use a small roller; for a larger area they work with a larger tool. To prevent the paint from splashing too much (it is very difficult to wash off), you should hold the rollers at an angle of about 45 degrees and do not press too hard.
For convenience, special nets are pulled to squeeze out the rollers. This allows you to avoid excess dirt and apply the paint evenly.
The same rules apply to brushes. Apply the product, lightly squeezing out the excess.
A special sprayer - an electric spray gun - is more difficult to use. Before starting work, you need to study the instructions. The paint is diluted to a certain thickness. You constantly need to monitor the location of the tool. It should always be at the same distance.
The peculiarity of painting the ceiling is that all work must be done quickly. Modern paints are made to dry quickly for practical reasons. In this case, the master is required to have good skills in finishing work.
The question of how to paint a concrete ceiling so that the coating lasts for more than one year is solved by observing all stages of preparation for work.
- removal of old paint, whitewash, etc.;
- polymer primer treatment;
- putty;
- polishing with sandpaper for perfect alignment;
- re-priming;
- painting;
- Applying a second coat (if necessary).
You can often come across statements that a more or less even ceiling does not need to be puttied before painting. But the point is not even a flat surface, but the fact that the paint in this case will not last long, even if there are no visible flaws.
Making formwork
By the way, this is a fundamental point in the work. According to its execution, the installation of the entire building is dependent and error-free.
Important: Before installing the formwork, you should make sure that it will support the full weight, including the reinforcement. To do this, it is better to consult a professional in this field.
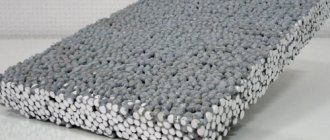
This is the use of iron grating to fill the ceiling. This significantly increases the strength of the floor. It must be performed:
- When the thickness of the ceiling is less than 15 cm, then reinforcement can be carried out in 1 layer;
- Filling is done with liquid concrete so that its grade is no less than M200. Any other material will not provide the required reliability;
- When strengthening, it is necessary to lay reinforcement bars in the form of a cross. Connections must be welded. Specific requirements require strengthening areas of heavy load. These are: the middle of the panel, points in contact with the supports, places where there are holes;
- Reinforcement of the holes is created by a solid contour and additional reinforcement.
- To accomplish this, the opposite sides of the structure should be combined with each other. The step width is determined by the thickness of the reinforcement used, which the master will tell you. For the fidelity and rigidity of the fasteners, it is better to lay the 14th channel along the length. It is more rigid and will not allow the structure to sag;
- Then we lay down the transverse reinforcement. If you use 12-gauge reinforcement, then the step must be at least 200 mm. If you used fittings 10. Then the step must be at least 250 mm. In any case, there is no need to skimp on material;
Frame installation
Important: When laying reinforcement, it must be inserted into the brickwork no less than 15 cm. If you are making a home ceiling where there is already a roof, and not in a new building, then to install the reinforcement you need to make holes in the wall using a punch.
- Connections with transverse ones are rewound with steel wire or welded. If you use wire, then before consumption you need to anneal it so that it is more flexible. To do this, you simply need to heat the material over a fire and let it cool in a natural environment. Do not under any circumstances use water for cooling, this will only harden the wire and not release it;
- Next, the part of the frame located below should be covered with formwork in the form of a shield. To do this, you need to use edged boards or moisture-resistant plywood;
- Next, we press the formwork from below with logs or telescopic racks;
Type of reinforced grating
Important: When installing logs, it is necessary to take into account the load on them. Place components perpendicular and firmly to the ground. When loaded, the rack can be pulled to the side and then the whole system collapses
- After installing the frame, you need to check the horizontal presence of the surface. Be sure to do this.
Method for increasing frame rigidity
Pouring concrete
After the frame has been installed, you can order concrete or create it yourself. To do this, you need to prepare a place for unloading or install a kneading tub.
Pouring concrete using a pump
Important: Whatever pouring option you choose, it does not have to be stopped until the formwork is completely filled. You need to work instantly and together.
- After mixing or delivering concrete, it must be poured into the formwork. Plus, after laying, you should walk along the pouring surface and push the coating with the handle of a shovel. With this effect you will remove any areas of air accumulation that may occur;
- If you use a pump when filling, be sure to use a shovel. When applying the solution, it may create air bubbles on the fittings. This cannot be allowed. Use a mixture that is not very rich;
- We wait for the concrete to dry completely and remove the formwork.
Kitchen ceiling
Here you don’t have to think about finishing the ceiling space. The best option is concrete slabs in their original form. For high rooms, the design can be supplemented with false beams and metal parts: pipes and air ducts or mesh. In low, small rooms, a suspended ceiling would be the ideal solution. Matte concrete gray or glossy white, visually expanding the space.
Photo: Instagram kuhnev.ru
Wallpapering a concrete ceiling
Wallpapering will be the solution if you don’t want to bother with putty for a long time due to minor defects. Modern wallpaper has excellent performance characteristics and allows you to quickly make repairs. When choosing quality products for the job, longevity is assured.
Non-woven or vinyl wallpaper is suitable for the ceiling
Non-woven or vinyl wallpaper is suitable for the ceiling. They are dirt-repellent and easy to maintain. In the hardware store there are options that indistinguishably imitate decorative plaster.
Before starting work, you need to prepare everything:
- cut the wallpaper into pieces along the length of the ceiling;
- dilute the glue;
- eliminate prominent irregularities;
- close all windows and doors to prevent drafts.
Glue parallel to the rays of light from the window. The seams do not need to be rubbed too hard. They need to be joined with your fingers and rolled with a rubber roller.
Flooding (then the wallpaper will simply fall off completely) and high humidity can be detrimental to the wallpaper on the ceiling. To avoid mold and mildew, when purchasing glue, you should pay attention to the antiseptic component or be sure to use a primer before gluing.
Tools and materials
To carry out the work, you need to purchase tools and necessary materials. Don't forget, once you complete or deliver the concrete, you won't have time to do your shopping. Everything needs to be done efficiently and quickly. Order delivery of concrete only after complete completion of the formwork. Otherwise, the material may harden before you complete the wrapping.
- A plank or shawl. You will find this based on the size of the fill. If the area is large, then you need to take a board of at least 50 mm. If it’s not big, then you can get by with 25. It is best to have trimmed material, otherwise the poured mixture will ooze through the cracks. To prevent this from happening, you can use roofing felt. Remember, the larger the gap in the structure, the higher the likelihood of material leakage;
- Plywood. It will be needed to cover the part that is located below the surface. True, many also use edged boards, which they lay closely and knock down in the form of a shield. On top of which film or roofing felt can be laid;
- The bars that will be needed to support the material from below and make it stable until it dries completely;
- Fittings, the quantity you can set depending on the scope of work;
- If the laying area is large. Then you will need to weld the reinforcement connections. This will add structural rigidity. To do this you will need a 220W welding machine;
- If you prepare concrete yourself, then you will need to purchase cement, sand and crushed stone. You can also use any extra stones from your allotment in the mixture.
Installation of tiles on a concrete ceiling
Due to its low cost, quick installation and the ability to quickly repair in case of damage, this finishing method has become very popular. Options with different patterns and textures are sold. Expanded polystyrene tiles are attached with special glue.
Installation of tiles on a concrete ceiling
Before starting work you need to know the following:
- gluing begins from the center of the ceiling;
- immediately assess where large defects are located and calculate the placement of the tiles so that the entire part completely covers the defect;
- Whole tiles will have to be trimmed when the distance to the wall becomes small. Before gluing, markings should be made in advance so that for the most part whole tiles fit. Trimmed options are best placed in places where they are least noticeable (under a curtain, doorway).
Despite the fact that the tiles are glued easily and quickly, one cannot help but note the disadvantages:
- fragility;
- lack of a single canvas, which is not always aesthetically pleasing;
- rarely used in modern interiors;
- not resistant to fungi, mold;
- lags behind at high humidity.
How to fix a hole in the ceiling?
Many people ask the question: how to repair a hole in a concrete surface? If you notice a hole in the ceiling, first determine the type of surface on which it is located. The type of ceiling will determine how to more effectively and correctly seal the hole.
Return to contents
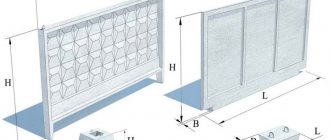
Cassette ceiling
The only solution is to replace the deformed area. Since the cost of this variety is low, the purchase will not hurt your wallet. No major repairs are required, just replace the damaged area with a new one. In some cases, the damaged element can be repaired with a lamp or ventilation grill. if you choose a color that is different from the base of the ceiling, you can change the decor beyond recognition and place new accents in the room.
Return to contents
PVC panels
In this case, it is more difficult to seal the hole. Due to the peculiarities of the joining, part of the ceiling will have to be removed and replaced with a new one, matching it to the adjacent panels.
Return to contents
Plasterboard ceiling
Seal a through hole in drywall.
The hole can be sealed as follows:
trim the edge of the sheet adjacent to the wall (the fax should be removed from half the thickness of the sheet); fill the seam that was formed during deformation with a special putty mixture; sand the surface; using household glue, fasten the paper bandage over the joints. Return to contents
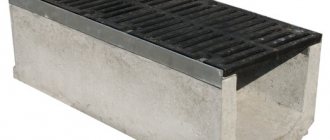
Concrete floor/brick wall (plastered)
widen the existing gap to 10 mm around the perimeter; use a brush to prime the hole with concrete contact or alternative mixtures; use gypsum or acrylic putty; press sickle tape into the mixture; level the surface with a spatula; leave the mixture until completely dry (the time limit should be noted in the instructions for application); sand the ceiling. Return to contents
How to harmoniously fit a concrete ceiling into the interior
Recently, the order tables of design companies have been overflowing with requests to design a living space in a loft style. This interior solution was previously used to design only bulky rooms with high ceilings, but today designers have learned to do the impossible and radically transform even the smallest space, visually making it larger.
Non-standard solutions are common practice today. The concrete ceiling in the interior is a real discovery in the world of design. The peculiarity of the style, the unique decor and the possibility of installing a concrete screed even in a standard apartment make it an important detail of proper design.
In the past, discoveries in the form of sculptures made of concrete and glass led to a breakthrough in architecture, but what will the newfangled combination of incompatible objects in the interior lead to?
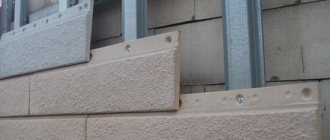
Finishing a concrete ceiling with clapboard
This is a suitable option for large rooms with high ceilings. They especially like to use this finish in dachas and country houses. Natural, natural material immediately sets a special atmosphere of comfort.
Before covering, all necessary communications should be laid in advance. Before use, the wood should be thoroughly dried and treated with a special antifungal and moisture-repellent agent.
All necessary communications need to be laid out in advance.
Sketch for a stained glass ceiling
Our company offers its customers its own unique catalog of images for sandblasted stained glass windows - ornaments, patterns and many other thematic images. For stained glass ceilings with photo printing - more than 10,000 thousand professional images of the highest resolution on a variety of topics, you are sure to choose something special for your interior.
In addition, you can provide your source code or order a unique stained glass sketch. It can be drawn and modified from any image you like.
Stages of work
- Old material is removed from the ceiling.
- Using dowels, a metal profile or wooden beams are attached at a distance of 40-60 cm from each other.
- Cladding with clapboard using a stapler, nails, screws, self-tapping screws.
- Protective varnish or painting.
Painting a wooden ceiling is necessary not only for beauty, but also to protect it from rotting, odors, indelible stains, and parasites.
To preserve the beautiful wood texture, choose water-based paints or special ones based on aniline.
Before starting work, the wooden surface is sanded using sandpaper and treated with stain or special impregnation to preserve the natural properties of the wood.
This coating is durable if all preparation requirements are met. It is easy to care for. The difficulty lies in installing lighting with such a wooden ceiling finished.
Bathroom ceiling
For the bathroom you need to select special materials that can withstand high humidity. Therefore, the ideal choice would be a concrete surface or its imitation, brickwork, or a stretch ceiling made of film. There is no need to choose fabric. You need to be careful when using wood frames. If it is decided to use it, then a particularly effective wood protection must be present.
Photo: Instagram titova_katherina
Interior aesthetics: concrete ceiling in loft style
The use of premises not intended for living has given rise to the appearance of such a style of interior aesthetics as the loft. Translated from English, loft means “attic”.
The need to use originally non-residential premises as an inexpensive alternative to apartments was driven by the surge in population density in America. By organizing living space in former factories, factories and other abandoned infrastructure, people received an excellent opportunity to acquire inexpensive housing and furnish it to their liking. It was at this moment that a new concept of style was born in the interior - loft, and the concrete ceiling in the interior became the main feature of this design direction.
Decoration of low ceilings in the hall
If the ceilings in your living room are low, you should follow slightly different rules for choosing ceilings:
- You should not choose ceiling systems that can “steal” additional precious centimeters of height from the ceilings. First of all, this applies to plasterboard suspended ceilings, which often take away at least 10 cm of height from the room.
- The ceiling in the hall will not seem so low if it is decorated in light shades - mainly blue and other cool colors. A white ceiling would also be a good option here. It is better to choose a ceiling paint of a suitable color and simply paint the surface.
How to make the ceiling in the living room visually higher: gloss in combination with a white ceiling
- If the ceiling in a small room is decorated using a suspended ceiling system, preference should be given to glossy film coatings that reflect light well. In gloss, the height of the room will visually double, which will somewhat smooth out the feeling of crampedness in such a room.
- A bold, but very attractive, and most importantly effective solution in the fight against low ceilings can be 3D wallpaper glued to the surface. This decoration will erase the ceiling boundary and visually make the room virtually endless, you just have to choose the right composition.
Thus, we determined which ceilings are best to make in the hall, based on our own preferences and the characteristics of the room itself. And remember that an original and beautiful ceiling is not always expensive and difficult. A creative approach to solving the problem of ceiling design will allow you to get out of the situation with the least cost and an excellent result in the end.
Did you like the article? Subscribe to our Yandex.Zen channel