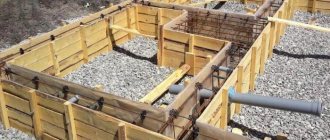
The reinforcement must protrude above the surface so that it can be connected to the reinforcement of the foundation strip. If the soil is not very wet and water does not flow into the well, then the piles can be poured without the use of pipes. After preparing the wells, their lower part is expanded with a plow, and then reinforcement is placed there and concrete is poured.
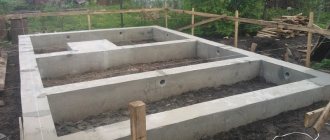
After the piles have hardened, you can begin to form the foundation strip. In order to obtain a stronger structure, it is necessary to fill it at a time so that there are no seams between the layers that reduce strength.
Currently reading
It is not recommended to weld parts of the reinforcement, as corrosion will form at the seams. Before continuing work, after pouring the base on fine sand, it should be left for 6 months.
A pile foundation on sand can be built if the soil is fine-grained. The structure is durable, and the supports are located below the freezing level. Piles can be:. Once the wells are ready, pipes can be made from roofing felt. The upper part of the pipes is made of several layers, and then the material is pulled together with soft steel wire, which will become part of the formwork.
After installing the pipe in the well, it is important to make sure that the hole is not filled with water to more than a quarter of its volume. When pouring concrete, roofing felt is necessary so that the cement laitance does not go into the soil, and the frost heaving forces will affect the rough wall of the piles, and not the smooth one obtained thanks to the roofing felt.
For a well with roofing felt, a reinforcement cage should be made. For this, 6 mm rods are used. They are fastened together by crossbars.
The screw pile is screwed into the soil by the efforts of several people. One of them constantly monitors the level of the support, while the others try to screw it in to the desired level. After the product is below the freezing level of the soil, it is cut to one level and filled with concrete.
The cement solution must get inside the pile pipe, as this will strengthen the support and save the metal from corrosion. After the concrete has hardened, a metal cap is welded to the screw piles. In order to ensure a uniform load from the weight of the building, it is necessary to tie the piles.
Preparatory work
- shovels;
- roulette;
- water level;
- wheelbarrow for soil and building materials;
- sand;
- gravel;
- geotextiles;
- penoplex;
- roofing felt
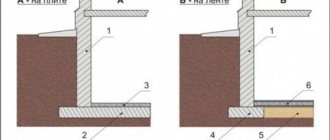
Scheme of the design of a rubble concrete strip foundation on different soils.
This is the most difficult stage physically, because... you will have to dig 0.7 m deep. Such a depth is unusual for a slab foundation, but a high-quality multi-layer backfill will be required. It is best to use the services of an excavator, because with the area of the future house being 10*10 m, you will have to remove 70 m³ of soil manually.
The width of the platform in each direction exceeds the required indicators by 7-8 cm. This is necessary to ensure the stability of the base after pouring.
All walls are leveled to perfect condition and checked with a level for vertical position. The bottom also needs to be leveled as much as possible.
On the walls around the perimeter, you need to immediately make marks from the bottom at the following levels, 30 cm and 10 cm, in order to orientate yourself while filling the pillows.
Geotextile is laid on the bottom, and you can start working.
The first pillow will be made of sand, its thickness is 30 cm. Immediately after backfilling, it must be compacted with a vibrating plate. If there is no stove, then you will have to water the sand and wait for complete drying, which occurs in up to 4 days on normal spring days (18-23 degrees) or in 2-3 at higher temperatures. It is sand that will provide basic stability to the house, simulating a hard surface.
Scheme of foundation construction on a sand cushion.
The second serious pillow is crushed stone. Its thickness of 10 cm will create an improvised drainage that will protect the slab from being washed away from below. In addition, it adapts to the dimensions of the foundation and levels and supports its bottom part, which avoids kinks or fractures in the event of soil subsidence. This pillow does not need tamping, so you can continue working right away.
Now you can lay a thermal insulation board, penoplex, 5 cm thick. The density is chosen to be the highest that can be found. Thanks to thermal insulation, even the worst soil heaving will not be scary.
Roofing felt is rolled out as a waterproofing layer. This will be the last point of protection of the slab from moisture. Next comes the immediate preparation for pouring.
Pile foundation for a bathhouse
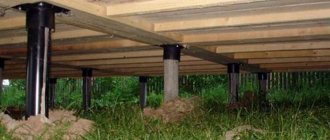
Visually, this type of foundation for a bathhouse resembles a columnar foundation. The only exception is that to create a durable structure, metal piles are used, which are placed in the ground at a distance of 3 to 20 m.
After the piles are installed in strategically important places (ceilings, wall structures, building corners and high-pressure zones), they are fastened together with a grillage. This element helps to create a perfectly flat structure on which the base of the bathhouse will subsequently be laid.
Among all the variations of bases, this option is one of the most expensive, and at the same time reliable and durable. Structures of this type can withstand large buildings with a large mass, any type of soil and other adverse influences.
The most popular variations of pile foundations are screw and bored foundations.
The metal pipe is equipped with a special blade, which is responsible for uniformly screwing the mechanism into the ground. In addition, the blade becomes an element of additional fixation after the pile is completely immersed in the soil.
Only metal products that have high protection against corrosion can be used as piles. In addition, it is recommended to cover them with an additional layer of paint with a high level of adhesion. It will create additional anti-corrosion protection and prevent rust.
The only difficulty when installing a foundation of this type will be that in order to immerse it in the soil, it is necessary to adhere to a special technique that will control the depth and level of verticality of immersion.
Important! Under no circumstances should low quality metal be used as piles. Otherwise, it may bend at the stage of screwing in the pile, which will negatively affect the operational parameters of the entire structure.
We invite you to familiarize yourself with Do-it-yourself lining: how to make a product at home, how to make lining on a circular saw, knives for making the material
To equip the base for a bathhouse of this format, you must perform the following steps:
- Wells are drilled in the ground, the depth of which will correspond to the necessary parameters for driving the pile.
- A metal frame made of reinforcement is installed in the wells, the purpose of which is to fix the hole and prevent it from being subsequently covered with earth.
- Concrete is poured over the reinforcement frame, which, when hardened, forms a solid foundation for the construction of the building.
This option has several disadvantages. One of them is the high cost of the project. In the case of building a bathhouse, laying a bored base will significantly increase the cost of work and materials. In addition, it is extremely difficult to carry out all the actions on your own; you will have to hire professional builders and special equipment.
Preparation of formwork
- edged board;
- laminated plywood;
- hammer with nails;
- duralumin corner;
- roulette.
Slab foundation diagram.
High-quality formwork will help organize not only the construction of the foundation slab, but also not spend extra money.
There are 2 materials from which you can make formwork for a monolithic slab of this type - laminated plywood and edged board from conifers. The first option is easier and faster to install, while the second is much cheaper. The height of the formwork is 20 cm, because The total height of the slab is 25 cm.
Regardless of the type of material used, in any case, you will have to drive in perpendicular boards from behind with a protrusion downwards of 30-35 cm. As a result, the future monolithic slab on bulk soil will not be able to push through the side walls, being not yet hardened (the concrete solution creates a very strong lateral pressure).
The next step is to fasten all the panels together after their installation is finally completed. Due to the fact that the joints at the sides are end-to-end, you can use duralumin corners and indicate their presence from the outside, which will finally strengthen the structure of the body for pouring.
Manufacturing of reinforcing frame
- reinforcing rod 20 mm;
- wire crochet hook;
- galvanized wire;
- Bulgarian;
- wire cutters;
- vice.
Scheme of options for installing a foundation slab depending on the type of soil.
Now it's time to engage in the longest, albeit calming, process. The work is not difficult, but it will take a lot of time, and due to the mass of the future structure, it is carried out immediately on the spot. The only nuance that distinguishes the knitting of this reinforcement from any other for a slab foundation is its diameter (20 mm, as opposed to the usual 10-12), which is associated with the expected loads.
To begin with, lay out the first layer of parallel rods in increments of 20 cm (step is the distance between the rods). According to the rules, the reinforcement should not reach the formwork by 3 cm on each side. This requirement is justified by the fact that the metal will begin to rot if it is regularly exposed to moisture.
The next level is laid perpendicular to the first with a similar step, after which each joint is tied with galvanized wire.
In order for the dressing to take place correctly and quickly, you need to take the following steps:
Diagram of thermal insulation options for slab foundations
- 45 cm galvanized soft wire is taken and aligned with the nearest rod. If there is no soft wire, but there is hard wire, then it can be heated in the fire. Once it has cooled, it will become suitable for work;
- the wire is bent in half so that on one side the legs come together, and on the other there is a gap (the wire is not pressed);
- after the wire bends diagonally across the joint, the legs need to be threaded into the empty space that was left earlier, like a loop;
- The hook is pressed with rotational movements, but without tension. A small part of the wire remains free, but there is no need to touch it: it will not make things worse.
In a similar way, 1 more sheathing is made, even the joints of which must coincide with the first. If you neglect this, then you will not be able to raise them to the required levels.
To lift, you will need to make brackets from a similar rod. Outwardly, they resemble an inverted letter “U”, with the only difference being that each of them has legs bent inward so as not to break through the waterproofing. It is convenient to make all bends in a vice or using a special mechanical bender for reinforcement.
The lower lathing rises 5 cm above the waterproofing, the upper one does not reach the edge of the poured surface by exactly the same amount.
Site drainage - luxury or necessity
In the case when a house is being built on fine sandy soil, which tends to retain water, or in an area with a high groundwater level, it is worth considering the presence of a drainage system that will significantly reduce the destructive effect of water on building structures. To create a better foundation, you will not need major financial investments, and all the work can be done with your own hands.
The most convenient and practical is a closed drainage system, where the main role in drainage is performed by various types of pipes - the simplest and most inexpensive option is to use plastic sewer pipes, in which holes must first be drilled. They are laid at a slight slope in a prepared trench dug around the house, the bottom of which is covered with coarse gravel and sand.
We invite you to familiarize yourself with Bathhouse: projects of impressive and stylish tandems
Pouring the solution and summing up
The very last difficult moment remains - this is the actual pouring of the foundation. Due to the fact that maximum strength is required, it is better to increase the grade of concrete from M300 to M400.
If it is possible to hire automixers to immediately deliver the finished solution, then this will be ideal, but if this is not possible, then it is quite possible to do it yourself. The only condition is the maximum pouring time, 2 days, but ideally all the work is carried out in 1 day, so that when the concrete hardens, it does not feel the difference, which is important.
The entire filling takes place in 2 layers, the first of which is 10 cm, and the second is narrower to the edges. After pouring, the 1st layer is plowed with a reinforcing rod to release the accumulated air, and only then the 2nd layer is poured.
After the work is completed, you need to leave the slab for 28 days, the first 12 of which the slab is watered with water once a day, because the foundation has one bad property: when hardening, the first time it absorbs water in such an amount that it is easy to knead it at first It’s impossible, and if you don’t water it afterwards, microcracks will appear.
After 4 weeks, the formwork is carefully dismantled and construction can continue. The installation of a floating slab foundation usually takes up to 1.5 months, taking into account all waiting periods, and a person is involved for no more than 1 week.
Types of sandy soils
Dusty is the most unfortunate type of foundation, because the bearing capacity of such soil largely depends on moisture. When moistened it resembles clay. The content of particles larger than 0.1 mm is no more than 75%;
Fine - with increasing humidity, as with silty sands, the bearing capacity decreases. When building a foundation, you need to take into account the fact that it is necessary to waterproof the trench with plastic film. The content of particles larger than 0.1 is more than 75%;
Medium-sized and coarse sandy soils contain more than 50% of particles larger than 0.25 mm and 0.5 mm. They have high load-bearing capacity and are an excellent foundation for a house;
Gravelly - contains more than 25% of particles whose size exceeds 2 mm. Such a base will be ideal for the construction of any type of foundation.
Water practically does not linger in sand, which makes it an ideal material for foundations. However, it is worth pointing out some features of this material. Wet sand can compact its structure, which can cause soil displacement.
Therefore, it is recommended to use a sand cushion before laying the foundation. It can be wheels and barrels filled with crushed stone, gravel or the same sand. The sand layer will allow you to quickly get rid of excess water, which is especially important for areas where groundwater is close to the surface.
