If there is a need to increase the usable area of the house, you can build an extension combined with the main structure. In this case, the type of existing foundation does not matter, since the new structure will be erected on its own foundation.
The optimal solution for such cases is an extension on piles to a strip foundation in Moscow. Pile technology makes it possible to level out the difference in height between floors in an existing and new building, since the height of the steel supports can be chosen arbitrarily. This is especially advisable if the house stands on a high plinth, since the construction of the same for an extension will cost a significant amount.
offers turnkey installation services for pile foundations for frame terraces, verandas, summer kitchens, etc. We use our own products in our work, so we can guarantee the high quality of structures based on them.
What is a screw pile
Screw supports are made from metal pipes of various diameters from 50 mm and more. The lower end is equipped with a point and blades. The blades are welded to a trunk with a width of 50 mm, but not more than 300 mm. The length of the pipes ranges from 1.2 m to 12 m. The developer can order the manufacturer to manufacture piles according to individual sizes.
Use supports with an open lower end. When immersed, the pile is filled with soil, which increases its load-bearing capacity. For these purposes, the supports must be coated with high-quality anti-corrosion protection (galvanized).
Advantages of a pile extension
Pile extension - reliable and durable design
An undoubted advantage among various foundations is that foundations on screw supports can be erected in a very short time. The time of year does not affect the production process of constructing a foundation on screw supports. Screw supports are used in almost all soils, except for rocky foundations and soils saturated with stones.
Installation of screw piles does not require excavation costs. Correct adherence to the technology of constructing a pile foundation on screw supports ensures the durability and reliability of house structures.
Disadvantages of a pile extension
An extension on stilts has some disadvantages:
- Susceptibility to the occurrence of corrosion processes in metal supports;
- The impossibility of installing them on rocky foundations and in soils with large inclusions of stones;
- The need to install an insulated base to protect the ground parts of the supports.
When purchasing piles, check the quality of the anti-corrosion coating. Reliable galvanization looks like star patterns on the metal.
Conditions for installing screw piles
Screw supports are suitable for almost any soil
The type of screw supports for the foundation of the extension is determined by the analysis of geological soil survey data:
- Depth of weak clayey, heaving soils;
- Occurrence of a dense layer of soil;
- Ground water level;
- A layer of soil subject to freezing.
Supports can be installed in most types of soil. On rocky ground or on a foundation saturated with stones, these supports are not used due to the impossibility of their immersion. The widespread use of piles is explained by their use on soft soils, clayey, heaving and sandy foundations.
Cost savings on the construction of a pile foundation attracts developers to use screw piles.
Why is it profitable to build an extension on screw piles?
An extension on screw supports can be erected quickly and easily
For example, you need to install an extension to a house measuring 6x6 meters. It will be enough to install 10-12 screw supports on the pile base. Usually such work takes no more than 2-3 days. The same amount of time will be spent on installing the grillage.
When installing strip and column foundations, you need to spend 1.5-2 months. The cost of materials and labor costs for excavation work, installation of formwork, production of frames from reinforcement, and pouring of formwork with concrete should be taken into account.
Concrete is cured for 4 weeks. In winter, heating of the foundation will be required. All this speaks in favor of constructing a foundation for an extension on screw piles.
Video - foundation for an extension to a wooden house
An extension to a house is an independent structure, the installation of which is possible in two ways.
With proper thermal insulation, a constant temperature is maintained in the frame extension for up to 7 hours.
The first method is the simultaneous construction of an extension to the house with the main frame. Its advantage is that with such construction there are no problems with joining the walls of two foundations, the main room and the extension. The second method is to add a new room to the frame of an already finished house. Whatever method you use, it is important to make the foundation for the extension in accordance with all reliability requirements. Both bases interact closely with each other. Therefore, before pouring the foundation for an extension, it is important to obtain the following information:
- type of foundation of the house to which the extension is planned: level of foundation, design, area and pitch of the columnar foundation, width of the base if the foundation is strip;
- type of construction site soil: type and physical and mechanical characteristics of soils, their calculated resistance at the base of the structure, heaving properties within the freezing depth.
An example of the foundation of an extension on screw piles
Before starting work on laying the pile foundation of the extension, you need to know on what foundation the house is built. What is it for? Different types of foundations behave differently during operation. A strip foundation will settle less than a pile foundation or vice versa.
Extension on screw supports
Therefore, if the house and the extension have different types of foundations, then expansion joints are installed in the places where the structures of the house and the extension adjoin. That is, a small gap is left between the pile foundation grillage of the extension and the base of the house. Expansion joints are covered with strips, both outside and inside the house and extension. Otherwise, this is fraught with the appearance of cracks and destruction in places where the extension adjoins the house.
When the house and the extension stand on screw supports, the grillages of both structures, like the rest of the structure, are connected into a single whole.
Construction process
So, a small house stands on screw supports, the developer decided to attach a veranda to it.
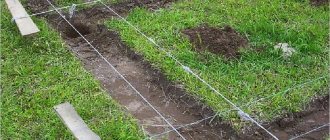
First, mark the centers for installing the piles. Markings are made using twine and wooden pegs. The twine is pulled so that the centers of the supports are at the places where it intersects.
The support centers are located in the corners of the extension, under load-bearing walls and in centers of load concentration (for example, under a summer stove). Piles are placed in increments of 1.5-2 meters. In a site with installed supports, the verticality of subsequent piles is controlled.
After installing the supports in the design position, the tops of the piles are marked for cutting with a grinder to one level.
The depth of soil freezing reaches 0.7 m. Groundwater is located at a depth of 2 meters. Taking into account the small load from the weight of the extension structures, screw piles with a diameter of 100 mm, a length of 1200 mm with a sharp end and blades 60 mm wide are used.
The pile is screwed in by two workers using a pipe threaded through a hole in the top of the pile. If the process of immersing the support is difficult, then pieces of pipe of larger diameter are put on the ends of the lever. During rotation of the pile, it controls the verticality of its immersion. The supports must protrude at least 150 mm above the ground.
We recommend watching a video showing in detail the entire process of installing supports.
The support pipes are filled with concrete mixture. As the pile is filled with concrete, it is compacted with a pin in the form of a piece of smooth reinforcement or other available tools.
Compact the concrete until “cement laitance” appears on the surface.
Grillage arrangement
To connect the supports with the grillage, a piece of metal pin with a thread at the end is immersed inside the pipe. After the concrete has hardened, they move on to constructing a grillage.
Often the grillage is made from wooden beams. Studs are threaded into the holes of the timber and secured with nuts. The upper structures of the extension are attached to the wooden grillage.
Watch the video on how to properly arrange a grillage with your own hands.
The supports of the support are formed depending on the structure of the grillage. If the grillage is made in the form of a frame from a channel or angle, then a metal plate is welded to the upper end of the support. The plate is positioned in such a way that there is play for centering the grillage elements.
The foundation on such supports is laid for light buildings. Stone, brickwork or precast concrete extensions require a foundation of a more powerful structure.
Other posts about extensions
Question from our reader Tatyana: We are planning to build an extension to the adobe house. What is the best way to make it? Will a heavy foundation damage the main building?
Hello. At our dacha, we have a brick house on a strip foundation, built 20 years ago. Now we want to make an extension from foam blocks (the same size). Can this be done on a pile foundation? The soil is heaving, loamy, high...
I really need advice on adding a veranda to the house. I finally decided to ask the question that my husband and I have been discussing all fall and winter. Our country house is small, but outwardly very sturdy. The former owners built it thoroughly. House from…
Good afternoon, dear professionals! I have a wooden (timber + clapboard) house and a board veranda. The foundation is strip. The house is 20 years old. The soils are peat bogs. I would like to add a warm room - approximately 5x4 m. Please advise whether it is possible for an extension...
House at the top of the slope. The slope is about 30*. The soil is clayey. Is it possible to build an extension 4 meters wide and 10 meters long on a slope? If so, what should the foundation be? Extension made of timber 15*20 cm.
How to make an extension with a foundation to a building with a basement?
See all materials
about extensions :
See all
Is it true that the foundation for an extension differs from the main one, what are its features? Many people are looking for the answer to this question, because when adding additional rooms to an existing house, you want these rooms to also have a reliable foundation. We have collected the most important tips and instructions in this article.
Options for connecting the base of the extension to the main structure
To make the foundation of an extension, you need to know two options for connecting it to the foundation of the main structure.
The joints between the foundation of a house and the foundation of an extension are made in two ways:
- Rigid connection with reinforcement.
- Expansion joint.
How to make a foundation with a rigid connection of bases?
Rigid connections are often used on soils that are not subject to heaving.
Rigid connection is used mainly in low-rise construction, where the extension is functionally connected to the main structure, being under the same roof with it. To make the base for the extension, a hole is drilled in it with a diameter equal to the diameter of the reinforcement and a depth equal to about 35 of its diameters. Next, reinforcement is driven into it with an outlet of the same length. If the extension is carried out according to a scheme where the estimated length of the reinforcement is greater than the width of the foundation, then the holes in the foundation of the main structure are made part of the width, and the reinforcement is mounted according to the principle of an anchor, with a wedging liner at the end.
In a closed loop, the holes are drilled in a staggered pattern at two levels, and the reinforcement used has an anchor wedge at one end and a welded washer at the other end. The amount of reinforcement, its pitch and diameter are calculated based on the conditions of its least resistance to shearing and crushing of the concrete underneath it. On average, a closed contour of a new foundation will require 20 rods per square meter of foundation. They are cut using an emery machine or grinder. With an open contour, the number of reinforcement bars is calculated separately in each case and depends on the width of the future foundation.
A rigid connection is used when the recessed strip base of the house and extension is made of monolithic reinforced concrete, and with a shallow type of foundation, the base and foundation form a single monolithic structure. Prefabricated strip foundations and plinths do not provide a reliable connection, but with a columnar foundation, a rigid connection is possible provided that the height of the monolithic grillage is sufficient for installing anchors. A slab foundation allows for a rigid connection provided that there is a protrusion from the base no less than the thickness of the slab. In this option, you can expose the reinforcement frame of the house and connect it (weld, tie) with the reinforcement frame of the extension. A house with a basement can be connected to a basement-free extension with a rigid coupling if the base of the main building and the recessed walls are monolithic. Using an expansion joint
An example of an expansion joint.
Expansion joints are more often used in multi-storey residential and industrial construction, where under a long structure in different parts of it, the soils differ significantly in deformation characteristics and, under the same loads, settlements can differ significantly. Such seams are used for different number of storeys in different parts of the structure, thus giving different loads and different settlement deformations. Another case of using expansion joints is when another structure is attached closely to an existing structure. In the above options, expansion joints should be provided at the design stage. It is often easier and cheaper to use expansion joints for prefabricated foundations in heaving soil.
An expansion joint is an insulation material placed in the gap between walls and basement floors, without adhesion to structures. Often simple tow is used as such insulation. The junction is enclosed with a decorative overlay attached only to the wall of the house. In heaving soil, when using an expansion joint, the floor level of the extension is placed below the floor level of the main structure by the amount of expected deformations.
The filler is removed from the expansion joint area to a sufficient depth for laying the sealant.
What you should consider to make a foundation for an extension using an expansion joint:
- the gap between the bases of the extension and the main structure should be about 5 cm. To comply with this requirement, before making the foundation of the extension, boards covered with waterproofing are applied to the base of the house. They will play the role of an expansion joint in the future;
- for a small one-story extension, the thickness of the expansion joint can be 2 cm;
- the seam can also be filled with thermal insulation material (foam or polystyrene foam is best) and sealed with weather-resistant sealant. From the outside it is closed with a decorative overlay.
Wouldn't an extension be possible without a foundation?
Everyone knows what role the skeleton plays in the human body; similar functions are assigned to the foundation. In fact, this is the basis that is responsible for the reliability and durability of the building. Also, it is the foundation that ensures warmth and dryness in the room. If the base is of poor quality or does not suit specific conditions, then dampness will appear inside, the floors may become deformed and completely deteriorate. It also levels the ground level and prevents carcinogenic gas from entering the living room from the soil.
Extension base
The choice of foundation should be treated with particular care. After all, it is necessary that it can easily withstand loads and correspond to the type of soil. At the same time, there is no need to overdo it, for example, if you can pour a strip or columnar foundation, then there is no point in replacing these simpler options with a complex monolithic foundation. Firstly, it is too expensive and not worth the investment. Secondly, the first ones are much easier to perform and you can do them yourself even without outside help, but you won’t be able to lay a concrete slab on your own.
It is mainly built from stone or concrete, but there are also wooden structures. If the construction is lightweight, then you can give preference to a shallow foundation located above the freezing point. But most often its depth should be below this level. According to its purpose, it is divided into load-bearing and combined. The latter, in addition to standard load-bearing functions, must also provide seismic protection. There is also a special type, which includes “swinging” and “floating” foundations, their pressure corresponds to the pressure of the excavated soil.
Which types of base to choose from?
In this paragraph, we will consider what types the foundation for an extension is divided into. Tape can rightfully be called universal, because it is perfect for both heavy and lightweight structures. It is located only under external and external load-bearing walls. It is mainly poured from concrete; to make the structure more reliable, it should be reinforced with iron rods. If you are going to make this type of base with your own hands, then it is better to give preference to the prefabricated version. The disadvantages include high cost.
Universal strip foundation
But the columnar one, on the contrary, refers to budget options. But it is advisable to use it only if we are talking about lightweight structures, for example, you need to attach a frame extension to a wooden house. The supports are special pillars located at intervals of 1.5 to 3 meters. These pillars must be placed at the intersection of load-bearing walls. It is best to make such elements from brick or reinforced concrete, but larch beams can also be used. However, such supports are expensive, and wood is not durable.
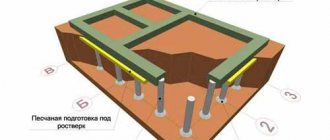
If you are going to build a rather massive building, and weak soil predominates, then you should give preference to the pile type of foundation. This design consists of supports connected by means of a strapping beam.
Connecting the main and attached foundations to each other
When hatching the idea of an additional extension to your main home, you should understand that you cannot just grab it and stick it on. Any construction activity must be carried out consciously and after strict calculations. Otherwise, existing housing may be damaged. After all, the new extension will have an impact on the soil, which may begin to move, which will cause damage to the structure. Therefore, when constructing an extension, it is necessary to connect its foundation with the foundation of an existing house.
Beginning of home binding
The foundation can be tied in several ways:
- rigid connection, this method should be used in those houses that were built a long time ago and their foundation has already become established. In addition, using simple calculations, you should make sure that the resulting load will not cause deformation of the old foundation;
- arrangement of special expansion joints.
A slight retreat, a rigid connection should under no circumstances be practiced in places where non-heaving soils exist.
Let's take a closer look at each of the ways to build a new foundation for an extension to a wooden house .
Rigid foundation system
Before you start pouring the foundation for the extension, you should remember what type of foundation the house was built on. We most often use strip or columnar types of foundation; less often you can find a foundation based on slabs or piles.
In addition to the type of foundation, several other factors should be determined that may affect future construction, namely:
- the depth to which the foundation is laid;
- determine the space it occupies under the house;
- identify the types and types of building materials that were used in the construction of the foundation.
There will be no particular tragedy if part of the information is lost; it can be restored as a result of new research. To do this, a special ditch is dug along the old foundation, which gives an idea of the size of the foundation. Its depth is determined using a simple tool, a piece of reinforcement, with an end like a poker. This end should be pushed under the base so that it literally lies under it.
Reinforcement wall for foundation
After which, the reinforcement should be turned to a horizontal position and pulled all the way to the back wall, after which a notch should be made in the place where the wall ends. We remove the probe and repeat the operation along the entire wall, this will allow us to get a fairly accurate picture of the size of the foundation.
The new foundation must be built of exactly the same type as the old one. Moreover, this should be done after calculating the heaving of the soil at the construction site. Calculations must be made in any case; there should be no excuses that I am building a small extension or it will be made of lightweight materials. In addition, the new foundation should not lie deeper than the old one; they should be located at the same level.
At the next stage of construction, we will need to drill holes for reinforcing reinforcement. The holes for it should be slightly larger than the diameter of the rods themselves. Inexperienced builders often have a question: to what depth should the reinforcement be deepened? To calculate it, there is a universal formula: the recess should be 35 rod diameters.
How can two foundations be connected?
The foundation for the extension can be rigidly adjacent to the base of the housing, resulting in the formation of a single structure. This solution is relevant if the site has a weak or non-heaving type of soil. You should also give preference to this option when you are going to make an extension of several floors and want to connect it with the main housing through one roof.
If the base is a slab, then a monolithic foundation should also be poured for additional housing. In this case, it is necessary that its thickness is at least 400 mm or that the base of the residential building has protrusions. In this case, you can weld the slab reinforcement to the frame of the new foundation. In addition, if you wish, you can do everything yourself.
Monolithic foundation slab
The “tape-to-tape” connection assumes the presence of a sand cushion and reinforcement with a longitudinal slot. Metal rods are driven into specially prepared holes in the base of the house and form a frame for the new foundation. Next, the joint is made using a release about 40 cm long.
You can also build a separate foundation for an extension, which will be located in close proximity to the house. A sheet of roofing material should be placed between the two bases. This material acts as an excellent waterproofer; you can also place a layer of thermal insulation or get by with simple tow. In this case, it is very important that this layer allows the new base not to collect water during precipitation and not damage the foundation of the house. On the outside, special decorative overlays are fixed to the wall to cover the seam.
How to mark the foundation of an extension with your own hands?
If you cannot do without the help of a specialist to determine the type of future foundation, then you can easily calculate the area and mark it yourself. To do this, we first determine the geometry of the base by pulling a cord over the pegs along the perimeter of the site. We calculate its diagonal using the formula: c=√(a²+b²), where a and b are sides, and c is the diagonal. We measure a piece of rope with a length equal to the length of the diagonal, and with its help we check the equality of the diagonals of the site. We make adjustments to the cord contour if necessary. We mark the inner side in the same way if the foundation is not columnar. If the foundation has a complex shape, then it needs to be divided into rectangles and each one must be marked separately. Next, you can carry out excavation work.
Useful tips when building the foundation of a house extension
- if the purpose of the extension to the house is to create a separate zone, and not to expand the room, then the foundation of the extension must be made separately, connecting it to the base of the house using an expansion joint;
- It is better to fill the strip foundation in the fall and begin construction work in the spring;
- a small extension to the house can be built on a shallow, pile-screw, strip foundation, as it is considered the most economical.
As you can see, the correct choice of foundation design and method of connecting it to the main structure is the key to success in building an extension. With the same parameters, the cost of a rigid foundation connection will be significantly higher than when connecting with an expansion joint. However, this task should be approached with all responsibility. This responsibility is greater the older the building is.
Laying the foundation - we do it according to science
Now let's move on to the practical part and look at how to make a foundation for an extension with your own hands. This detailed instruction will help you save on the services of a specialist, because it is designed for independent execution of construction work.
Building a foundation for an extension with your own hands
We are constructing the foundation for a frame-type extension
The sequence of operations for building a foundation for adding to a wooden house is practically no different from constructing the base of the main structure.
Main stages:
- Extracting soil to form a pit.
- Assembling panel formwork for pouring mortar.
- Knitting reinforcement mesh and fixing it in the formwork.
- Filling the formwork with concrete mixture.
It is important to accurately connect the base being added to the base of the existing building. Despite the fact that the foundations were not erected simultaneously, they must be combined into a common power circuit.
Let's figure out how to properly make a foundation for an extension to a frame structure. Sequence of operations:
- Extract the soil to the required depth to facilitate access to the base of the frame structure.
- Dig a pit along the contour of the room to be completed, keeping the two bases equally deep.
- Remove old waterproofing materials from the surface of the existing building foundation.
- Make cavities to a depth of 60–80 mm for the reinforcing bars and drive them tightly into the channels.
- Install a formwork structure made of wooden panels around the perimeter of the future building.
- Waterproof the inner surface of the boards and seal possible concrete leaks.
- Pour the concrete mixture into the formwork, thoroughly compact the solution using an internal vibrator.
After completing the work, wait for the hydration process to complete and the service strength to gain. Regularly moisten the concrete and cover the surface of the mass with polyethylene. By following this work methodology, you can combine buildings from different building materials.
How to make a foundation for an extension to a house - step-by-step diagram
Step 1: Selecting a Base
The new foundation must fully correspond to the type of the previous foundation. In addition, the load and soil type are taken into account. For example, if we are talking about a massive extension to a brick house, then it is necessary to lay a strip or make a pile foundation. But if the additional room is adjacent to a wooden dwelling, then it is possible to get by with a cheaper columnar option.
Step 2: Calculations
Regardless of whether you choose a rigid connection type or a separate foundation, the depth and width, as well as the dimensions of the foundation pillars, if any, should be the same as those of the foundation of the house. Determining these parameters is quite simple. It is necessary to dig a hole next to the wall of the house and measure the dimensions of the base. If there should be no questions about how to measure the depth of the structure, then to measure the width, you should take a rod, bend one of its edges 90° and insert it in a horizontal position under the foundation. Then we turn the rod until its bent part rests on the reverse side. After this, you need to make a mark on the rod and pull it out. By measuring the distance from the hook to the mark, we know the width.
Step 3: Preparatory work
Before pouring the foundation for the extension, it is necessary to carry out preparatory work. If you decide to give preference to a rigid connection, then we dig a trench of the given dimensions and drill holes in the existing base. Moreover, their diameter must exceed the thickness of the reinforcement. Metal rods should also be prepared. It is necessary to make a longitudinal slot at their end and insert a special wedging insert into it.
Step 4: Frame Formation
We drive the reinforcement with wedges into the prepared holes. The number of rods is taken at the rate of 20 pieces per square. In this way, the frame of the future foundation is formed. To ensure a reliable connection of the following parts, it is necessary to leave the edges of the reinforcement about 300 mm long, which will subsequently need to be welded.
Step 5: Installation of formwork
Now you will need wide wooden boards. We form the formwork of the given dimensions. We securely fix its walls with supports, earth, cinder blocks, etc. You can cover the inside of the formwork with polyethylene. The latter is especially true if you are pouring only part of the foundation and you will have to reuse these boards.
Step 6: Pouring the Mortar
We prepare a mixture of cement, sand, crushed stone and water. It is very important to keep the proportions correctly. For example, for M300 you can take 10 kg of cement, 30 kg of sand, 40 kg of crushed stone, mix everything well and fill it with 40 liters of water. If the concrete is too dense, you should dilute it with liquid, but only add it in small parts so as not to spoil the solution. We pour concrete into the formwork and wait several days until it completely hardens. We moisten it periodically, otherwise cracks may appear.
Step 7: Formation of a columnar foundation
Making such a foundation is important when a lightweight extension is adjacent to a wooden house. We drill holes so that they are below the freezing level of the soil. We form a sand cushion and install fiberglass reinforcement. This material has excellent properties and does not require additional treatment with waterproofing compounds. Formwork of specified dimensions is also formed and filled with concrete. This foundation for an extension is the easiest to implement, and everyone can create it with their own hands.
Step 8: Construction of a separate foundation
But when the number of storeys of the main and adjacent housing is different, then a separate foundation should be made in close proximity to the previous one. The distance between the two bases is from 2 to 5 cm, depending on the number of floors of the new room. The higher it is, the wider the seam is selected. We fill this gap with heat-insulating materials or tow. Then a special decorative overlay is attached to the wall of the home. It is very important to correctly mark the base. To do this, we pull the cord onto the pegs around the perimeter of the future site and check whether the diagonals are equal. If a heaving type of soil predominates on the site, then the floor of the extension must be made so that it is not lower than the flooring of the main housing by the amount of possible deformations.
- Registration: 09/16/12 Messages: 10 Thanks: 2
Extension to a house on screw pilesGood afternoon! There is a 7x7 frame house built in 2006 on a 3x3 foundation made of screw piles, tied with timber. I want to make an extension on both sides on 2 floors. The soil is good, no progress in 6 years.
Questions: 1) Has anyone attached anything to a screw foundation? Some pilers write that this is generally almost the best foundation for an extension. 2) At what minimum distance from the old one can a new pile be screwed in? 3) What is the minimum free space (from the wall) to screw in a pile? 4) Is it necessary to connect (weld) the old foundation to the new one? 5) House on a slope - at the bottom of the slope the height of the plinth is 1.5 meters - the plinth is not used in any way - let's call it an underground space. Is it possible to dig a small pit deep down next to the piles? At what minimum distance? Is it necessary to somehow strengthen the soil around the pile?
Last edited by moderator: 11/21/17
- Registration: 05.24.10 Messages: 156 Thanks: 34
My humble IMHO. 1) The best foundation for an extension if you already have a house on stilts... 2) The dimensions of the blades are + 20cm, if the blades are 30cm, then no closer than 80cm from the center of the pile. 3) Depends on the tool and your hemorrhoids, I twisted it at least 10cm from the wall. 4) If we assume that the pile foundation does not float, then it can be welded. 5) It’s better not to dig, because you will weaken the soil next to the pile; for the underground, you can pour a tape 3 meters into the ground instead of piles
- Registration: 04/17/11 Messages: 1,952 Thanks: 3,124
1) I installed it without any problems 2) 60-70cm 3) 60-70 4) mandatory 5) 50cm you can safely remove the soil, and then you need to calculate the freezing depth in your region
- Registration: 09/16/12 Messages: 10 Thanks: 2
Thanks for the answers, singer777 - is it possible to add more details about this yourself, or a link if it’s already been discussed here.
- Registration: 04/17/11 Messages: 1,952 Thanks: 3,124
Look, the customer wanted to build a small extension, for example, but during the process of work, appetites grew and he wanted a larger room +2 meters wide, there are no problems with the extension at all, or another example, they built a house on screw piles, then the customer wanted to attach a solarium with a veranda of 7 m in long and 6 wide, and I also said I want it to be 2 levels
- Registration: 09/16/12 Messages: 10 Thanks: 2
Here in the last photos is my version - only the base there is about one and a half meters and there is a larger slope. I want a slope of 3.5 meters (bay window 4.5) and on one side a meter of 2.5 and also 2 levels. It turns out that all the current windows (3) turn into doors, it’s not clear how to connect the new floor with the old one, and of course I would like to use the base somehow - it’s also not clear - go deeper with the extension and place the base on the foundation or high piles (up to 2.5 meters above earth and sheathed with insulation.
- Registration: 12/30/10 Messages: 4 Thanks: 2
I also have a house on screw stilts. I want to add a garage, but purely screw piles confuse me, because the floor in the garage will be on the ground (later I will fill it with concrete), and the holes from the piles will have to be filled with something - in general, the picture is not very good. So I’m thinking maybe I could somehow pour them on top of the tape? Who can tell me what is the best way to proceed?
- Registration: 03/19/14 Messages: 370 Thanks: 274
I’m also thinking about adding a garage with a concrete floor to the house using a screw. stilts And my piles on that side stick out 60-70 cm above the ground - it looks like a pretty big base. I see an option to fill in the tape with finely sealed tape, and in the center on a sand cushion cast a reinforced concrete slab 10 cm thick, not connected to the tape. Well, like laying some kind of foam styrene between them... On the other hand, a seemingly shallowly ruined foundation assumes some buoyancy on the ground along with the entire structure, and the piles are a monolith. This means there may still be some movement between the house and the garage. In general, my neighbor has a timber house on stilts, and they did the screed for him using plywood without any problems. Maybe we shouldn’t worry either?
- Registration: 01/05/16 Messages: 85 Thanks: 37
I also have a house on screw stilts. I want to add a garage, but purely screw piles confuse me, because the floor in the garage will be on the ground (later I will fill it with concrete), and the holes from the piles will have to be filled with something - in general, the picture is not very good. So I’m thinking maybe I could somehow pour them on top of the tape? Who can tell me what is the best way to proceed?
The tape cannot pull out the piles if they are connected to the house?
- Registration: 01/05/16 Messages: 85 Thanks: 37
I’m also thinking about adding a garage with a concrete floor to the house using a screw. stilts And my piles on that side stick out 60-70 cm above the ground - it looks like a pretty big base. I see an option to fill in the tape with finely sealed tape, and in the center on a sand cushion cast a reinforced concrete slab 10 cm thick, not connected to the tape. Well, like laying some kind of foam styrene between them... On the other hand, a seemingly shallowly ruined foundation assumes some buoyancy on the ground along with the entire structure, and the piles are a monolith. This means there may still be some movement between the house and the garage. In general, my neighbor has a timber house on stilts, and they did the screed for him using plywood without any problems. Maybe we shouldn’t worry either?
In general, for the stability of the house, I would like to sandwich it with a garage on one side and a terrace on the other... and I would like to dig a hole in the garage, and a cellar on the terrace...
Did you somehow decide how to connect a foundation on piles and a strip foundation? What if the tape one is buried in the same way?
- Registration: 03/19/14 Messages: 370 Thanks: 274
@Sannikovland, if there are no problems making a full-fledged tape 2 meters deep, then I think neither one nor the other will move. So there is nothing special to connect. Why do you have a question about propping up the house? Is he heeling? Sannikovland said:
↑
The tape cannot pull out the piles if they are connected to the house?
It seems to me that the house-garage connection is more likely to fall apart than the pile to be pulled out...
Choosing the type of foundation for an extension
Experienced specialists strongly recommend that for the construction of an extension, use the same type of foundation that was used for the construction of the main building . This is due to the fact that different foundations react differently to contact with the soil and also react differently to shrinkage of the building.
Accordingly, if the main house is built on a strip foundation, and the extension is built on columnar piles, sooner or later the auxiliary structure will collapse. Thus, you should not skimp on things like connecting foundations under any circumstances.
If you plan to connect the building to the house, you can use different foundations. Most often we are talking about the following options:
Strip foundation
For those who decide to use a strip foundation for the extension, the following list of work will be required:
- make markings in parallel with the tracing at the site of construction of the base structure (this will require wooden pegs and an ordinary rope);
- dig a trench along the marking;
- secure the fittings;
- prepare a trench;
- fill in a sand cushion (approximately 100-120 mm) and carefully compact the bottom of the trench;
- lay a waterproofing film;
- install reinforcement structure;
- Fill the trench with a solution of cement and gravel.
The pouring of a strip foundation should be approached as responsibly as possible. It is better to do the work in several passes. One third of the trench is poured as the first layer, and after drying - one second. The technology, in principle, allows the use of foam blocks, but not in all cases.
After the cement-gravel layer has completely dried, the formwork is built. The formwork is filled to the brim with concrete. After laying, the concrete is pierced simultaneously in several places. This prevents the formation of air bubbles. After the concrete has completely dried, the formwork is removed.
And finally, just before the walls are erected, the almost complete structure is covered with a layer of waterproofing material. Most often, roofing felt, tar, liquid rubber or bitumen mastic are used for this purpose.
Columnar foundation
If your plans include building a house that is small in size and light in weight, the use of a columnar foundation is quite acceptable. It is usually made of either concrete or brick. For a medium-sized building, 6 support pillars are most often sufficient.
To install such a base you will need:
- dig a hole (depth below the soil freezing level);
- pour a sand cushion on the bottom;
- install metal (or fiberglass) fittings;
- treat the reinforcement with moisture-proofing material (for metal reinforcing bars);
- install formwork;
- fill the base with concrete.
Construction can begin immediately after the concrete has hardened. If there is a need to increase the height of the pillars, you can lay a brick on top of the concrete.
Foundation on screw piles
A foundation on screw piles is the simplest and most cost-effective type of foundation. Please understand that it is only designed for structures that are not too heavy, as it cannot support much weight. But if you are going to add a wooden veranda to your house, this option is quite suitable.
This type of foundation in most cases does not require the participation of specialists. Even a person who has no experience in construction is quite capable of screwing in screw piles with his own hands. It is probably for this reason that many people choose a foundation on screw piles.
If the foundation on stilts is installed correctly, it can last for a long period of time.
But no matter what foundation needs to be installed, on screw piles, columnar or some other, the most important thing is that all work is carried out in accordance with the technology. Therefore, if you do not have enough construction experience, it would be most advisable to entrust the pouring of the foundation to experienced and qualified specialists.
Due to lack of budgetary funds or time, often the built property does not correspond to the desired area. And then the owner begins to plan its expansion to the required size. This is achieved by constructing various types of extensions: living rooms, garage, veranda, terrace and others. The main task is to figure out how to connect two foundations to each other in order to obtain a complete structure that will become the basis of a strong and durable house.

