Waterproofing membrane
A waterproofing membrane is a film of a special composition that protects the concrete base and insulating surfaces from moisture. The fabric plays the role of a protector from mechanical damage and has a porous, elastic structure.
The composition of the protective coating includes polyethylene, which is durable. It contains antioxidant components, polymers, and mineral compounds. The resulting film web has a corrugated surface. The thickness can reach up to 3 mm. There may be cases of using five-millimeter copies.
Application
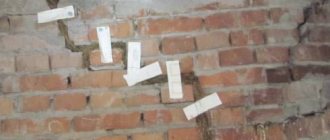
There are many materials that deteriorate when exposed to a humid environment. Concrete also falls into this category. During the period of autumn-winter precipitation, the base of the building is saturated with moisture, and after the arrival of frost it begins to expand. Due to seasonal fluctuations in the concrete structure, cracks appear on the walls.
After the walls are saturated with moisture, the thermal insulation properties decrease, and mold and mildew form on the surface. The microclimate in the rooms becomes uncomfortable and damp.
When the foundation is constantly damp, the load-bearing capacity is reduced, and the reinforcing belt is destroyed due to the development of rust. The overall service life of the facility is reduced.
The protective layer is used to protect:
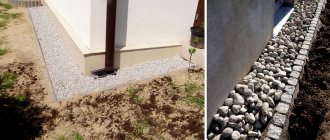
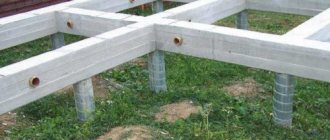
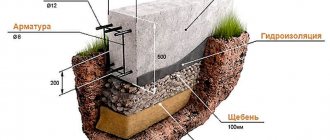
- A foundation that is placed on moist soil, heaving soil, or areas where groundwater passes close to the surface of the earth.
Installation on heaving soils
- Basement, tunnel sections, parking lots, elevator shafts, bridge supports, viaducts.
- Roofs.
- Swimming pools, ponds, wells.
- Walls, floor of a room where there is a high level of humidity. Such facilities include baths, toilets, and showers.
Pros, cons
Advantages:
- The material is resistant to ultraviolet rays.
- With proper installation it can last up to 40-50 years.
- Rodents and exposure to aggressive environments are not scary.
- Eco-friendly, can not cause any harm to human health.
- The material retains its elastic properties at any temperature. Achieved through polymers and minerals in the composition.
- There is no tendency to form coatings that cause corrosion.
- Can be used in environments with acidic and alkaline components.
Waterproofing material presented as a film coating is beneficial from an economic point of view. Installation is carried out without the use of special tools, with your own hands.
The disadvantage is the cost.
Working with membranes
Methods for connecting waterproofing membranes for foundations
- Welding using a semi-automatic welding machine.
- Bonding using the hot stream of a construction hair dryer.
- Self-adhesive strips.
- Sticky tapes.
- Latches or special locks.
Note. To waterproof the foundation, two systems are used: profiled and film.
The film system can be used when low groundwater levels are detected. It is used to drain rain and melt water, as well as possible unintentional runoff. For better adhesion with construction mortar, organize a corrugated system.
A waterproofing profiled membrane for foundations is used when groundwater is high or under pressure, as well as when flooding occurs with a certain frequency. The membrane, packaged in rolls, is made from high-density polyethylene and is reinforced with convex spikes that are hollow inside. It is this form that makes it possible to drain groundwater in a certain direction, creating a layer of air between the insulation and concrete, thereby protecting it from pushing through.
The profiled film is produced with an auxiliary layer of geotextile and a sliding flooring, which have the function of preventing the formation of deformations during the movement of heaving soils. Installation of a waterproofing membrane is possible as a substrate under a monolithic foundation, installing reinforcement frames directly on the polymer coating.
Depth
To choose the right waterproofing membrane for foundations and basements, it is necessary to take into account the depth of formation of the foundation for the building:
- up to 10 m depth - take a film with a thickness of 1.5 mm;
- below 10 m depth - not less than 2 mm.
Note. A membrane with greater thickness can withstand greater loads.
Using a waterproofing membrane for the foundation
Insulation of the base of the house with a membrane can be carried out both at the construction stage and at the end. The main thing in this matter is to ensure free access to structures. The width of the trench is set at a level of at least 80 cm - 1 m. In the future, it is necessary to carry out the process of cleaning and leveling the surface in order to get rid of sharp edges and protrusions that could damage the membrane.
There is no need to prepare the foundation of the building before laying the flexible waterproofing membrane. The membrane is secured using strips that can hang freely. The exception in this case is two-layer installation systems.
The functional purpose of foundation membranes is to provide direct protection from groundwater and the aggressive environment of external precipitation, which often contain alkali and acids that negatively affect the base material.
Types of canvas
The material is becoming so popular that it is gradually replacing the usual waterproofing options - roofing felt, mastics. Installation of the membrane is so simple that you can do it yourself. Does not require seasonal maintenance.
The canvas copes with the task of protecting the foundation from moisture and does not deform.
There are two types of membrane coating used for waterproofing concrete bases:
- Flat film.
- Profiled.
Flat film coating
It is made from polyethylene, polymers, mainly from recycled materials - the product cannot have a high price. Thickness - about 0.2-2 mm. To waterproof concrete foundation walls, it is recommended to use specimens with a thickness of at least 0.4 mm. Flat corrugation provides high-quality adhesion to the foundation surface.
Flat insulation
Profiled coating
The production uses polyethylene made under high pressure. Can be single or multi-layer. They are used only for finishing concrete bases, protecting them from destruction under the influence of moisture. To equip the drainage system, combinations with geotextiles are possible. The smallest thickness encountered in membrane production can be 1 mm, with a protrusion height of 8-20 mm.
Profiled insulation
Products made by different manufacturers may have differences in width. Installation can be done on a flat surface, or this can be achieved by plastering the walls. The canvas protects from mechanical damage.
Installation methods
Membrane with a self-adhesive base for waterproofing foundations
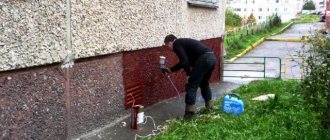
Waterproofing a foundation using a membrane film occurs thanks to additional adhesive materials. The highest quality adhesion can be achieved through preliminary preparation of the surface on which installation will take place. The surface must be pre-cleaned and leveled as much as possible.
It is important to know! Maximum adhesion between the material and the foundation will be ensured by the corrugation on the film, so when purchasing, you need to pay attention to the presence of a tread on the surface.
The membrane with a self-adhesive surface is attached using a roller. Before application, the surface of the foundation is cleaned, then the protective layer is removed from the sticky side of the film and secured with a construction roller.
Profiled membrane waterproofing has a more complex installation process. To install this type of material, several types of construction fasteners are used, which together provide maximum tightness.
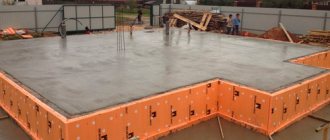
Price of work per m2 for foundation waterproofing
Installation work
Surface preparation
Preparation is required before installation. The surface is inspected for dirt, mildew, mold, and unevenness. The shortcomings must be eliminated.
The foundation is checked for cracks, which are sealed with cement mortar. The protrusions are removed with a punch so as not to damage the membrane during installation.
When the work is completed, it is recommended to prime the surface.
At the preparatory stage, it is necessary to calculate the amount of material, understand how the film sheets will be placed, and approximately in what places the joints will be.
To protect the film from the effects of bitumen and other polymers, use a layer of geotextile as a lining.
Installation of different types of membranes
Installation is carried out using one of two methods:
- Horizontal. It is necessary to attach the geotest to the prepared surface. It is overlapped, 15 cm on each side. To join the material, use a hair dryer. At the junctions of horizontally located parts with vertical ones, it is necessary to protect them with a strip the width of which is 1 meter or more. For horizontal insulation, it is recommended to use a flat film covering.
Horizontal installation
- Vertical. Requires perforated fabric. On the base of the foundation you need to install plastic products - rondels. The rondels are installed in the following steps: one meter horizontally, two meters vertically. To connect the rondels to the membrane, you need to use an adhesive solution. The insulation is covered with geotextile to protect against mechanical damage.
Vertical method
Installation of a waterproofing membrane system on a vertical wall in a pit with backfill
1. Soil 2. Drainage membrane PLANTER geo 3. Extruded polystyrene foam TECHNONIKOL CARBON PROF 300 4. Needle-punched geotextile TechnoNIKOL 5. Waterproofing membrane LOGICBASE V–SL (LOGICROOF T–SL) 6. PVC waterstop TechnoNIKOL EC-220-3 7. Compensation ator from extruded polystyrene foam TECHNONIKOL CARBON PROF 300 8. Polyethylene film TechnoNIKOL 200 microns 9. PVC injection fitting 10. PVC waterstop TechnoNIKOL IC-240-2 11. Protective cement-sand screed 12. Niche for injection of repair composition 13. Foundation slab 14. Concrete preparation 15. Drain pipe
When building in a pit with backfill, the installation of a waterproofing system on the foundation walls begins with the installation of waterproofing dowels and an injection system into the formwork of the walls.
Sectioning waterproofing using profiled waterstops
– The layout of waterstops in the formwork is determined by the project. Waterstops should form maps no larger than 150 m2. – Secure the waterstop into the formwork with short nails at intervals of 250–350 mm. – The nails must not be driven the entire length between the edge of the key and the first edge anchor. – After this, the nails should be bent 40–50° from the vertical position.
– After attaching the waterstop, the reinforcement cage is installed and concrete is poured.
– After dismantling the formwork, all nails protruding from the concrete surface must be removed: pulled out of the concrete or cut off.
– Subsequently, the waterproofing membrane is welded to a key embedded in the foundation wall, and thus sectioning the waterproofing into closed sections is ensured.
Sectioning waterproofing using an adhesive dowel
– Instead of embedded waterstops TechnoNIKOL EC-220-3, adhesive keys from TechnoNIKOL can be used to section the waterproofing field.
– The adhesive dowel is installed using PVC tape with geotextile edges, which is glued to the surface using two-component TechnoNIKOL epoxy adhesive.
– Concrete, brick and natural stone bases must be clean and durable. Mechanical treatment is necessary to remove deteriorating parts, traces of paint, oils and cement laitance. Then clean the surface from dust using compressed air. – Metal surfaces also need to be cleaned of traces of rust, oil and paint by sandblasting, preferably to the state of “clean” metal. Before applying to fresh concrete, it must be allowed to cure. – When using materials, the temperature must not be lower than +5 ° C, and it is necessary to take into account three components: the temperature of the base, the temperature of the air and the temperature of the material itself - and focus on the minimum. For highly porous substrates, it is recommended to use an epoxy primer before applying the adhesive.
– The glue is prepared as follows: components A+B must be mixed for at least 3 minutes. using a mixer (100–150 rpm) until a homogeneous gray mass is formed.
IMPORTANT! The finished mixture should be used within 40 minutes.
– PVC tape is glued with geotextile edges using epoxy glue. To do this, the glue is applied to the substrate in two parallel strips (layer thickness 1–3 mm) so that when laying the PVC tape, the edges of the geotextile rest on the glue strips. The glue should extend beyond the edges of the tape by 20–30 mm.
– The edges of the geotextile tape should be pressed into the adhesive mass. – A second layer of epoxy adhesive is then applied over the geotextile edges of the tape. – The overlap of elastic bands in the joining area must be at least 40 mm.
– Waterproofing tapes are welded together manually using a Leister “Triac PID” machine and a silicone seaming roller in the same way as membranes. Installation of TECHNONICOL PVC tapes – Before overlapping tape welding, when making corner, T-shaped and cross-shaped elements, melt a layer of fleece on their back surface with a hand-held hair dryer at a temperature of 300 °C.
– Remove the melted fleece with a wire brush, this will improve the reliability of the connections. Connecting tapes along the length with an overlap
– When installing the tape at its end, do not apply glue to its edges at a distance of at least 10 cm from the edge.
– When installing subsequent tape, make sure that the newly installed tape overlaps the already installed tape with a length of at least 10 cm.
– Mark and cut the formed overlap as shown in the figure. This will allow the welded joint to be made as tightly as possible.
– Weld the resulting overlap using a manual welding machine.
– Apply epoxy glue to the edges of the tape in the place of the welded overlap so that the newly applied layer “overlaps” the already applied one.
Making a T-joint
– When installing the tape, do not apply epoxy glue to its edges at the planned T-joint.
– Install the second tape on the already installed one with an overlap of at least 10 cm. Pay special attention to the quality of the adhesive in the place where glue was not applied to the edge of the lower tape. Mark and cut the formed overlap as shown in the figure.
– Weld the resulting overlap using a manual welding machine. When welding PVC tapes, be careful not to melt the free edges of the fleece with hot air.
– Cross-shaped elements are manufactured as two T-shaped connections. Making corner elements
— Form an overlap of the tapes at the place where they intersect. Mark and cut the overlap at a 45° angle.
– Boil the resulting overlap using a hand-held device.
Installation of injection system
– When constructing in a pit with backfilling, the installation of control and injection fittings in the foundation walls is carried out by attaching them to the formwork and reinforcement cage before concreting. – In each card, limited by waterproofing dowels, 5 control and injection fittings should be installed. – There should be no more than 4 pieces per fitting. nails – Hammered nails should be bent 40–50° from the vertical position. – Connect the injection tubes to the injection connections using fittings. – The tubes are fixed with wire on the reinforcement frame and are brought inside the structure. – Install injection boxes to collect the injection tubes, place the injection tubes from each of the injection connections in them.
– Tubes from different waterproofing cards can fit into one box.
– Once the control injection fittings and tubes are securely fixed to the surface of the formwork and to the reinforcement cage, concrete the area in accordance with the design.
IMPORTANT! In this case, the inlet hole of the fitting flange must be temporarily sealed or plugged so that no cement mortar gets into the fittings during concreting .
– After finishing concreting and dismantling the formwork, thoroughly clean the surface of the embedded waterstops and control injection fittings for subsequent welding of the membrane to them.
IMPORTANT! All nails protruding from the surface of the concrete must be removed.
– Before subsequent installation of waterproofing, pay special attention to ensure that the surfaces of the concreted external keys and control injection fittings remain undamaged and clean. Laying geotextiles on walls
– Before proceeding with the installation of the PVC membrane, geotextiles with a density of at least 500 g/m2 should be laid. IMPORTANT! Lay geotextiles section by section, that is, within one card, limited by dowels . It should not “cover” the surface of waterstops embedded in concrete.
– For reasons of convenience, geotextile sheets can be placed on the wall both vertically and horizontally.
– Attach geotextile sheets to the foundation wall using disc elements and self-drilling screws 4.8 ´ 50 mm with a polyamide anchor sleeve 8.2 ´ 45 mm.
Installation of waterproofing membrane LOGICBASE V–SL (LOGICROOF T–SL)
– Once the geotextile preparatory layer is fixed to the vertical surface, proceed with the installation of LOGICBASE V–SL (LOGICROOF T–SL) membranes. For reasons of convenience, the waterproofing membrane can be positioned both vertically and horizontally. – Do not make frequent intermediate fastenings of the membrane. Fastening can be limited by welding the membrane to a key embedded in the foundation wall.
– Weld the edge of the membrane to the installed PVC waterstop.
– Systematically roll out the membrane downwards towards the base of the wall.
– Ensure that adjacent panels overlap each other by at least 100 mm. Weld the membrane sheets together using an automatic welding machine.
– Check the quality of all welds using compressed air. For more details, see section 4. – The membrane can also be secured to the foundation wall using PVC rondels.
– Mechanically fix the rondels through the geotextile to the wall surface.
– Weld the membrane to the rondels.
The membrane on the foundation wall can also be fastened according to a temporary scheme:
— If the roll is rolled out not from top to bottom, but along the wall, it is recommended to make temporary fastenings of the membrane to the wall from strips cut from PVC membrane. These strips should be cut off before the next row is welded to the membrane on top.
Options for ending the waterproofing membrane Ending by mechanical fastening through a batten
IMPORTANT! Use edge strip with edge bend.
– Secure all layers of the waterproofing system mechanically using TECHNONICOL EDS-S 4.8 pointed self-tapping screws with a polyamide sleeve.
– Orientation of the edge bend of the batten from the wall.
– The installation pitch of the screws is 200 mm.
– In the places of external and internal corners, cut the strip, and at the place where the two strips “join” leave a gap of 5–10 mm.
– Attach the edge of the strip to the outer corners by installing the first self-tapping screw at a distance of no more than 50 mm from the edge of the corner.
– Fill the gap between the bend of the slats and the wall with TECHNONICOL No. 70 polyurethane sealant.
Ending by joining to the external waterproofing key EC-220-3, EC-320-4 or TECHNONICOL PVC tape
– Non-mechanical completion of waterproofing is carried out by hermetically welding to the surface of a pre-installed external waterstop EC-220-3 or EC-320-4.
– To do this, weld the LOGICBASE V–SL (LOGICROOF T–SL) membrane to the waterstop using a manual welding machine and a pressure roller.
IMPORTANT! Pay special attention to the quality of welding in the area of internal and external corners. The welded joint must be made hermetically. – Instead of a pre-installed waterstop EC-220-3 or EC-320-4, TECHNONICOL PVC tape can be used to seal the end of the waterproofing membrane (see paragraph 3.2 of this section). Once the tape is installed on the concrete surface, seal the LOGICBASE V–SL (LOGICROOF T–SL) membrane to the surface.
– After the end of the waterproofing membrane is hermetically welded to the surface of the PVC tape or waterstop EC-220-3 or EC-320-4, secure the protective layer of geotextile (or profiled membrane) mechanically by installing an edge strip with self-tapping screws above the level of completion of waterproofing (see clause 3.6). In this case, applying sealant to the rail is not required.
Waterproofing protection – After completing the installation of the geotextile and the LOGICBASE V–SL (LOGICROOF T–SL) waterproofing membrane, lay the PLANTER geo protective and drainage membrane on top. This will prevent possible mechanical damage to the waterproofing on the foundation walls during backfilling.
– If not PLANTER geo is used for protection, but another drainage fabric, for example, PLANTER eco, then before installing it, it is recommended to additionally protect the waterproofing membrane with geotextile with a density of 500 g/m2. – Mechanically secure the PLANTER membrane above the waterproofing level.
Another way to fix the drainage sheet is to fasten it using strips cut from a PVC membrane.
– Strips of PVC membrane 5 ´ 30 cm are threaded through the slots made in the drainage fabric.
– The ends of the strip are welded together.
– The resulting loop is welded to the membrane.
– Once PLANTER geo is secured, roll out the roll from top to bottom.
– Install the following rolls with an overlap on the already installed ones. The overlap should be at least 120–150 mm. Fastening the sheets of protective drainage fabric: – Separate the geotextile from the “spikes” of the membrane by 120–150 mm. – Ensure that the edges of the tongue-and-groove membranes overlap where there is no geotextile.
– Secure the panels with self-adhesive butyl rubber tape.
– Make sure that the center of the tape coincides with the edge of the top sheet. – At the junction of two rolls
profiled membrane, place the free edge of the geotextile on the adjacent roll.
– Seal the joint of the geotextile fabrics with double-sided tape or double-sided tape-sealant.
– Bonding geotextile overlaps can also be done with a hand-held hair dryer in low temperature mode.
IMPORTANT! This procedure is necessary to prevent possible separation of geotextiles under the influence of natural and technological factors.
– The connection of geotextile fabrics of two adjacent rolls to each other should be done immediately after the membranes are rolled out.
IMPORTANT! Bonding geotextile sheets prevents silting of the membrane drainage gap.
– Install the edge profile above the level of the waterproofing, this will prevent soil from entering the gap between the waterproofing and the drainage membrane.
To get acquainted with our prices for work, call : 8(925)-240-28-11 and our specialists will answer all your questions about roofing or facade systems of the house. You can also use the Feedback or come to our office. Your call is very important to us! You can find out more detailed information about the design of membrane waterproofing of foundations on the following pages:
- Materials for creating waterproofing membrane systems
- Equipment, tools and accessories for membrane installation
- Hot air membrane seam welding technology
- Weld quality control
- Installation of a foundation slab waterproofing membrane system
- Installation of a waterproofing membrane system on a foundation wall in the ground
- Welding waterstops using special equipment
- Equipment and tools for welding waterstops
- Connection of vertical and horizontal waterproofing
- Construction of internal and external corners
- Sealing the expansion joint of the foundation
- Performing sealing of communication passages
- Performing sealing of junctions with piles
- Waterproofing pits
- Waterproofing membrane system TN-FUNDAMENT Barrier
- Waterproofing membrane system TN-FUNDAMENT Prof
- Waterproofing membrane system TN-FUNDAMENT Expert
- Waterproofing membrane system TN-FOUNDATION Barrier Wall in the ground
- Waterproofing membrane system TN-FOUNDATION Prof Wall in the ground
- Waterproofing membrane system TN-FUNDAMENT Expert Wall in the ground
- Waterproofing membrane system TN-TUNNEL Barrier
- Waterproofing membrane system TN-TUNNEL Prof
- Waterproofing membrane system TN-TUNNEL Expert
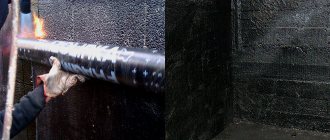
Features of membrane welding
The quality of welding of seam joints determines how well the material’s direct responsibility—waterproofing properties—will be fulfilled. It is recommended to carry out this work in several stages:
- Clean the connection points. It is enough to wipe with a dry cloth if there is no heavy dirt.
- Carry out a test weld.
- Check your work. Wait a couple of hours from the moment of welding.
- If the work was done efficiently and there are no defects, you can move on to the main work.
The recommended temperature for fastening seam joints should not be lower than +15°C. It is recommended to warm up the membrane before welding.
Methods for laying a waterproofing membrane on a foundation
One of the options for securing the membrane can be dowels.
There are two main types of installation for the foundation: horizontal and vertical. When installing horizontally, a substrate is first laid out on the cleaned surface, on top of which a waterproofing material is laid by overlaying the free edge. The overlap of this edge is about ten centimeters. The final stage is welding. Vertical installation is carried out by spot welding.
It is important to know! The main condition for high-quality welding is compliance with the following conditions: the width of the seam should be one and a half centimeters, and the intermediate space between the seams should be two centimeters.
Production
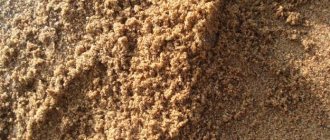
To make the canvas, use:
- 48% chalk.
- 49% fire retardants, additives.
- 3% coloring components.
Silos are used to store bulk solids. To store liquids, tanks are needed. The system, which has three levels, when raw materials are supplied in certain proportions, mixes it, and supplies the finished mixture to the production line.
After lying for a day, the material melts, hemogenizes, and is placed on a reinforcing mesh. At the next stage, the outer layer is formed. The finished product is cooled, cut into strips of the required size, and rolled.
Before the coating is released for sale, each batch is subjected to thorough testing. It is necessary that the raw materials comply with the standards and requirements:
- The tensile strength indicator must be at a sufficient level.
- Resistant to temperature changes.
- Maintains elasticity even at low temperatures.
- Heat resistance.
- UV resistance.
Production is fully automated. The material undergoes thorough testing and complies with GOST standards.