Repair of floor screed defects
floor screed repair
If you are planning to lay a new covering in your apartment, and the base is a cement-sand screed M150, which has been in use since Soviet times, then it is not at all necessary to redo it.
If the screed is well preserved, it is enough to confine yourself to minor repairs or leave everything as is. In some cases, it will be enough to level the screed to the minimum clearance. If dust has accumulated on the screed, it’s not a big deal; dust is a process of releasing particles that have accumulated calcium. It is enough to prime such dust; there is no need to change the screed.
Calculations of the strength of M150 type ties show that they can withstand quite large loads.
If we translate it into a “household” equivalent, then such a tie must withstand the weight of a person who stands on one leg on a thin stiletto heel and weighs more than 100 kg.
But despite these statistics, an ordinary girl dancing in stiletto heels can still violate the integrity of such a screed. The screed can also be broken when moving furniture in the apartment.
On screeds with clearance, rivets are knocked out of the parquet and then inserted into the screed. Hence the conclusion: all coatings, except tiles, that are mounted on the M150 screed must be laid on a substrate that will correctly distribute the load over the entire area of the screed.
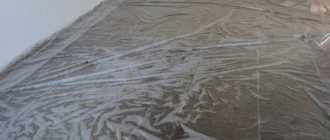
When starting to repair the screed, you need to make sure that there is no contamination on it. Cracks and peeling are not allowed. To identify possible places where the screed “bounces,” tap it with a wooden block. It will immediately become obvious where the voids are - by the dull sound.
Methods for eliminating screed heaving
There are methods for eliminating screed heaving; there are several of them, but they are available to professional builders. To independently eliminate problems with “bumping”, use a scarpel and a hammer, or a hammer drill, which is set to the “impact” operating mode. The boundary of the defect is determined by tapping, then it is dismantled to the concrete base.
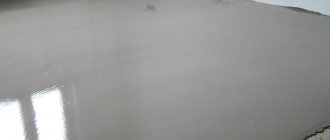
The area of the formed depression is cleared of dirt, dust is removed with a vacuum cleaner and primed with cement water, which is diluted in a ratio of 1 to 2 from cement and water. You can prime with special primers, which are purchased at the construction market.
Buy a primer for low-absorbent surfaces, which includes concrete floors and screeds.
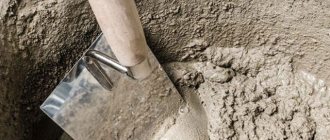
What mixture is needed to repair screeds?
To patch an old M150 screed, you need to make a solution of cement and sand or purchase a dry mixture M300.
Some domestic manufacturers produce M150 mixture, which, after hardening, does not gain the strength regulated by SNiP. Therefore, it is better to use the M300 mixture for patches instead of the M150 mixture.
The strength characteristics of the M300 mixture are not much higher, but comply with State Standards. Strictly follow the instructions when diluting the solution.
floor screed repair
A little more about additives to the screed repair mixture, application and drying process.
Cheap domestic mixtures do not contain polymer additives, which makes them suitable only for patch repairs. It is difficult to work with a mass that is not plastic, difficult to form and, moreover, hardens on the 29th day.
And if there is no need to purchase a plasticizer to eliminate holes (somehow you can form a solution in a small area), then purchasing a hardening accelerator will be simply necessary. The hardener forms a crust in the upper layers of the mortar, which allows further repair work to be carried out without waiting for it to fully set.
Do not skimp on the hardener - attempts to speed up the setting time using a heater will disrupt natural chemical reactions due to the evaporation of the required amount of water. Caring for a patch, on the contrary, involves covering it with a bag and periodically spraying it with a spray bottle.
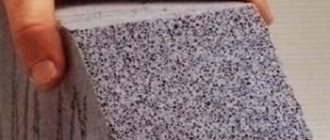
Screeds that are made of expanded clay fraction require the addition of expanded clay for their repair. The ratio of the dry mixture to expanded clay is 1:2. After eliminating the “swelling” areas, you can begin to repair the cracks. Technologically, repairing cracks is similar to repairing “bubble”. If cracks cover most of the screed, then it must be dismantled.
In other cases, cutting cracks will show the real condition of the screed. An unusable screed will chip off in a large piece, while a good one will chip off only the place where the blow was made.
How to get rid of cracks?
Floor screeds can crack due to a variety of factors. Initially, you will have to determine the main cause of the cracks and only then begin repairs. The screed crumbles if the composition is incorrect due to insufficient or excessive amount of water in the initial solution, or it dries too quickly. Other possible reasons include the lack of expansion joints or damper tape.
Correction of floor defects
According to the cause, the floor crack repair methods differ. To solve the problem with expansion joints, cuts are made on the shrinkage joints. It is worth considering that the depth of each of them should be one third greater than the thickness of the base. It is important to take care of the optimal step, reaching five meters. Subsequent sealing is performed using polyurethane sealant.
If a crack appears, it is expanded by making a groove. Next, dust is removed from the walls and primed. For sealing, a non-shrinking mortar is used, which is applied using a spatula. Minor cracks can be left if the floor covering is selected correctly. You can lay tiles that look impressive and eliminate any imperfections.
A solution of cement, PVA glue and water is also suitable for sealing cracks. The ingredients are mixed together, the solution is poured into the gap. Begin laying the selected floor covering only after the solution has hardened.
How to fix a floor
Concrete repair
Concrete repair can be performed on various concrete structures: walls, floors, columns, etc. - but here we will look at technologies for repairing concrete floors.
As strange as it may seem, concrete floor repair may be required for both old and new floors. If the installation of concrete floors is carried out in violation of the technology, then a variety of defects may occur: unevenness, cracks, low strength, peeling, etc.
Below we will look at what technologies are used to repair concrete (repair of floor screed, concrete screed); repair of cracks, peeling, etc. Additionally, we will consider the repair of topping (concrete floors with a reinforced top layer).
TeoKhim LLC professionally installs concrete floors
Concrete floor repair
Let's consider repair technologies depending on the characteristic defects of concrete floors. Please note that all of the following applies to both old and new floors.
1. Irregularities in the concrete floor. Most often, repair of concrete screed is necessary due to various types of surface irregularities that interfere with normal operation. Irregularities can arise both due to poor-quality laying of the concrete floor, and as a result of wear and damage to the surface during operation.
What are the unevenness of a concrete floor and how to eliminate them, see the section on leveling the floor.
2. Low strength. Concrete repair may be required if the strength of concrete floors is insufficient for the given service conditions. A decrease in the grade strength of concrete can occur for various reasons: low-quality concrete was supplied, the top layer of concrete was frozen, vibration compaction was not done or was done poorly, etc.
To correct the situation, you need to strengthen the concrete.
For this, we recommend Elakor materials, which can significantly strengthen the top layer of concrete.
3. Repairing cracks in concrete. If cracks appear after installing concrete floors, this may be due to the fact that shrinkage joints have not been cut. Cut the seams as quickly as possible, otherwise cracking may continue. Cracks can also form during operation due to movement of building structures, movement of the base slab, shock and vibration loads.
Repair of cracks in concrete is carried out by jointing them, cleaning them, priming them and sealing them with polymer putties.
4. Bukhtenie. Heaving is the separation of a concrete screed (concrete floor) from the base with the formation of internal voids. If you knock on such a surface, you will hear a characteristic booming “bubbling” sound. If the concrete is pouring in certain areas, the concrete floor should be repaired only in these areas. In the problem area, make cuts to the entire depth of the concrete.
The purpose of the cuts is to “plant” the raised coiling section in place. The geometry of the slots is chosen for the same purpose: the coiling section must fit into place. After this, it is necessary to extrude the concrete: drill through holes in the problem area and inject adhesives using a syringe (tile adhesive, epoxy compositions, Elakor-PU Putty-2K, etc.).
If there is no visual increase in the level of concrete in the pouring area, only extrusion can be performed (without cuts).
If bouncing occurs over the entire floor area, then in this situation, repairing concrete floors is useless, and the screed must be done again. To construct a new screed, we recommend using complex concrete additives Elakor “Elastoconcrete”. Additives for concrete will significantly speed up the commissioning of the floor and provide high strength characteristics.
What reasons lead to dust formation?
During the operation of a concrete floor covering, its top layer takes on various loads, chemical and mechanical influences, because of this, the destruction of concrete begins, resulting in the formation of cement dust.
Possible reasons:
- violation of concrete pouring technology.
- improperly prepared mixture.
- adding poor quality components to the solution.
Even if concrete has high strength properties, without proper processing and the use of reinforcing compounds it will be subject to the negative effects of abrasive substances, which will lead to surface abrasion, reduced strength and dust formation. If the concrete is of poor quality, it will be subject to corrosion processes, which also leads to dust formation.
There are other reasons why a concrete floor becomes dusty, but those described above are the most common. However, there is a solution to the problem - treating the surface of concrete floors using special compounds. But why to do this is another question, we will answer it below.
Special compositions for dust removal
The most common damage to the subfloor are:
- general weakening of the screed. Characterized by the appearance of a large amount of cement dust as a result of a violation of the mortar preparation technology or poor quality of cement;
- potholes and cracks. Formed due to excessive point load on the floor surface. The presence of voids in the top layer of the concrete base also causes the screed to crack and deform. This defect is considered the most dangerous for decorative flooring: the area located above the damage and lacking solid support quickly deteriorates and collapses;
- detachment. Diagnosis of this malfunction is made by tapping the floor surface with a hammer. In the peeled areas, the sound from the impact will be muffled, and dust will begin to escape through the resulting cracks. Detachment can be expressed in visual swelling of the top layer and raising of the corners after the solution has dried. The reasons are often uneven drying of concrete, lack of a primer layer under the base and the use of low-quality cement;
- excessive dust formation. Due to excessive loads and general aging of the screed, a large amount of cement dust forms on its surface. Sometimes floor dusting is associated with poor quality cement and a violation of pouring technology.
Cracks in the screed
“We have cracks in the screed, what should we do?” - this is the question that people are increasingly asking builders. Recently, our director received a letter from Sergei Kuznetsov in the mail, in which he asks a similar question:
“About 1-2 weeks after the final pouring, cracks appeared on the floor in the living room, and then cracks appeared in the kitchen - there were more of them there even than in the living room.
Our master says that this happens in 100% of cases, they say there is no floor without cracks and the most expensive “Vetonit” also cracks. He suggested that before laying the laminate, thoroughly fill the cracks with a primer and everything will adhere firmly (in his words). What should I do, ask him to redo it, seal the cracks?” And quite recently, literally on October 3, in the well-known professional community OtdelKa, the same question was raised by Konstantin Shkabura. He encountered a similar problem at the site, the developer made a screed about 10 cm thick and it all began to crack, and Konstantin organized a survey in the community on the topic “who is to blame and what to do.”
But before answering the question “what to do?”, which sooner or later faces literally every builder, let’s try to figure out another question – who is to blame. Well, more precisely, what is the reason that cracks appeared in the screed.
BAD SOLUTION
This is one of the most “popular” reasons. It can also be bad for several reasons. A) Too much water . Often, to make the mixture more convenient to apply, builders try to add more water to it. (This is especially true for novice specialists).
Undoubtedly, with a large amount of water, the mixture becomes more plastic, but pouring such a liquid layer usually leads to cracks appearing on the surface of the concrete. C) Incorrect mixture recipe. The screed solution is not a mess that “can’t be spoiled with oil.”
Therefore, when mixing it, you need to very strictly follow the recipe on the package. Unfortunately, no one has canceled the human factor, and this same “factor” sometimes believes that it knows everything much better than the manufacturer, and kneads it by eye as it wants.
And as a result of such tyranny, cracks appear in the screed.
NO REINFORCEMENT
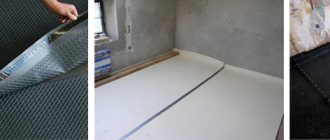
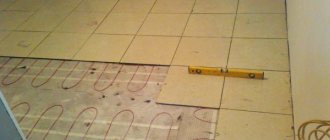
Often expanded clay or expanded polystyrene is placed on the floor under the screed as insulation and filler. First of all, it is used as a filler. After all, cement is a heavy material. However, they are too soft a base, and therefore, so that your concrete floor does not require repair later, you must use a special mesh for reinforcement. The mesh must be poured into a layer of solution of at least 2 cm.
Recommendations for floor repairs
Repairing a floor screed is an extremely important undertaking that requires strict compliance with all established rules for the restoration of old and newly filled screeds.
To repair the base without causing any problems, before performing the entire procedure, you should pay attention to the following nuances:
- First, you should find out exactly what the reason for the appearance of all the flaws is.
- Check to see if this covering has expansion joints.
- You should also find out how the cement mixture was poured and what base the mortar was laid on (concrete or wood).
- If there are no expansion joints on the floor, you should first take care of laying them before filling potholes or cracks.
- To determine whether there is local peeling of concrete, it is advisable to take a rubber hammer and tap the coating with it.
Main types of defects
First, you should decide what type of deformation exists in your case.
The method for eliminating defects will largely depend on the degree of damage to the concrete floor:
- Microscopic cracks up to 1.5 cm in size. They can appear when the coating dries unevenly. If there are only a few cracks on the surface, then regular tile adhesive can be used to cover them.
- Large cracks, the size of which is from 1.5 to 2 cm. This type of damage most often appears due to the absence of expansion joints, as well as due to strong mechanical impact. When repairing apartments, it is not recommended to use caustic compounds, and for this reason, it is most often recommended to use cement mortar or glue to eliminate cracks.
- "Spilling" concrete. Concrete floors can move due to air cavities that are located under the coating. If there is a need to seal up swollen areas, the peeled concrete should be cleaned off and any potholes found should be filled with cement mortar.
- Local unevenness, up to 0.5 cm in height. Bumps should simply be cleaned off with a grinder, and small dents should be filled with tile adhesive or cement mortar M500/M300.
- Potholes and pits larger than 1.5 cm. It is extremely difficult to repair many damages that are located locally. For this reason, in this case, you should do as experts recommend - pour a new screed with a small thickness, i.e. the layer should be up to 4 cm.
We invite you to familiarize yourself with Plants that improve indoor air. 15 indoor plants to purify the air in your apartment
Expansion seams
Here it should be understood that repair work for floor screeds should begin in order to eliminate the causes that caused the problem. If cracks appear on the coating, and you think that the reason lies in the fact that there are no expansion joints, then they should definitely be made.
So, in order to make expansion joints, you will need:
- Make recesses in the base, which is made of concrete, at a distance of approximately 5 meters from each other.
- Next, install a groove into the resulting crack to widen the gap to 2 cm.
- After this, prime the cracks and fill them with an adhesive composition that does not shrink.
- Once the glue has hardened, remove any excess using regular sandpaper.
Watch the video below to see how to make expansion joints. During repair work, experts advise to ventilate the rooms being repaired well, since non-shrink compositions contain harmful volatile substances.
Can a crack expand?
The cement mixture itself is extremely susceptible to defects. At the same time, it is extremely important to find out not only the reason for their appearance, but also the dynamics of the increase in cracks in the screed on the floor. In particular, this practice affects apartments in which the interfloor ceilings do not have sufficient rigidity. How can you tell if there is a tendency for a crack in the foundation to increase?
When checking the coating to determine whether further deformation is likely, the following should be done:
- Place a strip of paper over the crack.
- Do not touch the pasted area for about a month.
- If after a specified period of time the paper breaks, it can be argued that there is a tendency for the size of the crack to increase.
What to do in such a case? Most often, such problems appear when performing independent apartment repairs. Because of which? This may also be due to non-compliance with the rules for mixing and laying concrete mortar, which will inevitably lead to the material deteriorating. To correct the situation, it is advisable to seek help from specialists.
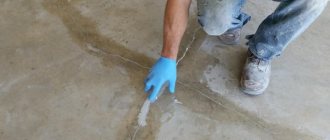
Elimination of small defects
To repair cracks in a concrete screed, with your own hands, you will need the following:
- Use an angle grinder with a diamond blade and make the gap a little wider.
- Remove loose pieces of concrete along the edge of the crack.
- Prime the resulting crack.
- Fill the cracks with tile adhesive.
We invite you to familiarize yourself with Bulk floor screed
Carrying out renovation work in an apartment is associated with certain difficulties, which are worth saying a few words about. If the concrete surface begins to crack, and it is located in a sanitary unit, then it is no longer possible to repair the defects using conventional tile adhesive. After a couple of months, it will already begin to peel off due to the high level of humidity indoors.
Elimination of large cracks
- To begin with, the crevice should be gutted.
- It is desirable that the cracks have smooth edges on both sides.
- The resulting dust should be removed with a vacuum cleaner so that the adhesive mixture obtains a high level of adhesion to the concrete.
- After this, several large and sufficiently deep cuts should be made across the crack so that the load on the seams is reduced.
- Next, the prepared areas should be primed using a special primer solution.
- At the final stage of repair work, a mixture prepared on the basis of epoxy resin should be applied
The repair work in the apartment to restore the screed will be shown in more detail in the video.
Strengthening the foundation
Strengthening a weak screed is a method of preventive repair. Performing certain not very complicated manipulations can save you from removing the screed from the base, and will also protect it from destruction and delay the need for urgent repairs. To strengthen the screed, use a hammer drill to drill holes 2 cm in diameter to the solid base.
When the preparatory work is completed, you should arm yourself with scraps from the reinforcement, which have a diameter of 1.2 cm. The reinforcement rods should be degreased and made shorter in length so that it is equal to the depth of the holes. In addition, when strengthening, you cannot do without a special epoxy mixture for concrete, which is called “Rizopox 3500”.
It can be used for various repair work that will involve the destruction of the screed. The diluted mixture should be mixed with quartz sand, and then poured into the holes that have formed in the floor. After filling the holes, you need to insert pieces of reinforcement into them, and then cover everything with liquid, including the upper part of the hole.
Tips from the professionals
Strengthening the screed can also be done using special compounds that penetrate deep and improve the properties of concrete. They will help extend the life of the screed; the need to dismantle the coating in the future will simply disappear. Before applying such products, the surface should be thoroughly sanded.
Why do you need to remove dust from a concrete floor?
Those who do their own repairs are interested in the question: why do you need to treat concrete so that the floor does not become dusty? And what will happen if this is not done? In this case, the following problems arise:
- If the top layer of the concrete pavement is subject to erosion processes, then gradually they will reach the deeper layers, as a result of which the screed will collapse.
- Cement dust is hazardous to health.
- If the concrete screed is dusty, it can cause damage to household appliances and equipment, because the dust will get on the parts, which will lead to their rapid wear.
- Caring for dusty floor coverings is difficult.
- If you install a floor covering on a dusty base, then over time this will negatively affect the materials; when walking on the floor, an unpleasant crunch and squeak is heard.
Now that we have found out the reasons for the appearance of concrete dust and the possible consequences, let’s talk about how to make sure that the screed does not collect dust.