Pros and cons of a concrete ring pool
Among the positive characteristics of a DIY pool made of concrete rings are:
- Long service life. With a competent approach and the use of high-quality consumables, a home pool can be used for 100-150 years.
- Excellent strength qualities.
- High level of resistance to deformation changes.
- Increased resistance to negative environmental factors, in particular to precipitation and sunlight.
- Compliance with hygienic parameters.
- Simplicity in arrangement.
- There is no need to use an additional waterproofing layer - a waterproof material.
- Short terms of construction of an artificial reservoir.
The disadvantages of a DIY pool include:
- careful handling of concrete rings is required when loading/unloading;
- quite heavy weight of the structure.
Pool manufacturing and finishing options
Strictly speaking, a container of any shape can be cast from concrete, but since it is better to consider the simplest option as a clear example, we will only talk about round and rectangular pools.
In fact, the instructions for both designs are approximately the same, and the only difference is that the round shape will take a little longer to prepare. Mainly due to the fact that you will have to place the reinforcement in a special way, bend the formwork sheets to get the most even circle line possible. In addition, constructing a round concrete pool bowl requires greater consumption of tile adhesive.
Round design
In step-by-step instructions we will analyze both options.
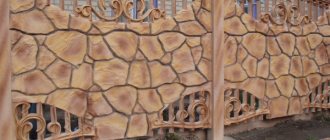
As for the finishing, the choice here depends only on your wallet, taste and preferences. Tile, sandstone, mosaic tiles or even just finishing the surface with paint - as you can see, there are plenty to choose from.
Please note that sometimes a pool can be made from concrete rings, that is, as if from ready-made reinforced concrete products - and there are nuances here. It turns out that the use of ready-made forms, on the one hand, is very convenient, but on the other hand, it is a risk. The catch is that you never know how high-quality the product you will get, whether it will start to crack, and how long such a ring will generally last without problems. So pouring it yourself may be more troublesome, but you become more confident in the final quality.
So, we have figured out the nuances of the base material, now we can begin to review the actual technology for making a concrete pool.
How to make a pool from concrete rings with your own hands
To build a home pool from concrete rings, a standard version of the product with dimensions of 1.2 m to 2.5 m is used. This simplest material has also gained high popularity among consumers due to its good resistance to low temperatures and water resistance. For ease of use, it is recommended to choose concrete rings with a larger diameter.
Preparatory activities
According to the size of the concrete rings, the first step is to dig a pit. Having decided on the location of the home pool, it is necessary to apply markings on the ground surface. You will need to install wooden or metal pegs around the perimeter, tying them together with a rope or construction cord.
Since under the concrete rings you will also need to pour a mixture of sand and crushed stone and make a concrete bottom, the depth of the pit should be increased by 500 mm from the entire depth of the pool. To simplify the process of excavation, special equipment is used for the work. But you still have to complete this process with a shovel.
External waterproofing
When constructing a home pool, it is imperative to provide external and internal waterproofing. From the outside it must be done after the preparatory work is completed. Roofing material is used for these purposes.
First of all, you need to lay the first layer of sand. The optimal thickness of such a pillow is 30 cm. The sand should be compacted well, then fine gravel should be laid, where the layer thickness should be 10-20 cm. Sheets of roofing felt are used as an insulating layer. Thanks to this material, the interaction of groundwater with the reservoir will be eliminated.
For the reliability and durability of the entire structure, the bottom must be concreted according to a similar pattern as the bottom slab. To prepare the working solution you will need to mix:
- 1 part dry cement;
- 3 parts sand;
- 4 parts fine crushed stone;
- water.
All components of the working solution must be mixed in a concrete mixer. After this, pour it onto the bottom of the pit. The duration of complete hardening of concrete varies between 15-18 hours.
If a concrete cover is used, then only the area under the inspection hatch is concreted. But first it is necessary to remove the water drainage pipes through this hole. A ladder should be attached to the concrete rings to make it convenient and safe to descend into the pool.
To avoid negative consequences, it is recommended to protect the concrete structure from the destructive effects of moisture. The construction market offers a lot of options for internal waterproofing. But coating insulation works more efficiently and has high performance properties.
But before applying it, you need to plaster the inner surface of the tank, and make the floor using a self-leveling mixture. When everything inside the bowl is dry, you need to remove particles of dust, dirt, and debris with a brush. When installing internal waterproofing in a home pool made of concrete rings, it is not enough to treat the surface with coating insulation. Particular attention should be paid to the gaps between the walls and the bottom of the bowl. To prevent leaks in these places, hydrophilic rubber is used, which is mounted using sealant. Rubber can expand when in contact with water.
Concrete ring font
If installing a monolithic concrete font seems too complicated and time-consuming to you, consider installing a font made of reinforced concrete rings as an option. They come in different diameters - from 80 cm to several meters. The most suitable diameter for a hot tub is 1.5 m or more. When choosing, please note that the rings must have a lock - a rebate. One, of course, will not be enough, but two will be more than enough even for diving (they are a meter high, but you can also find half a meter if you are 2 m deep).
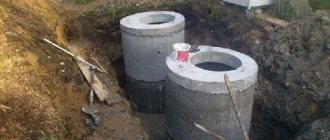
In this case, two rings of 2 meters in diameter were purchased. First, a pit was dug, slightly larger in size than the selected rings. Its depth is 1.5 m. The bottom is leveled and compacted, a drainage pipe is laid (discharged into a sewer well). 15 cm of sand was poured and compacted at the bottom in layers (three layers of 5 cm, each of which was spilled and compacted with a hand tamper (a heavy plate with a handle).
There should be locks on the rings
The outside rings are twice impregnated with bitumen mastic. Several bricks are laid at the bottom of the pit, and the first ring is lowered onto them (with a winch). The lock on the upper edge of the ring is cleaned of dirt/dust (with a brush), diluted water-repellent tile adhesive is laid, and a second ring is installed.
A reinforcing mesh is laid at the bottom and filled with concrete so that it is level with the drain. It turned out about 10 cm of concrete under the ring, and about 5 cm more inside the ring.
The outside of the rings was covered with foam plastic 4 cm thick (cut into strips and glued with the same tile adhesive). Then the “native” soil was filled around the rings and compacted.
To make the side thicker, a brick wall is laid around the ring. The gap between the concrete and brick ring is filled with sand, spilled and compacted as much as possible. Everything is filled with solution on top. While it was wet, the surface was ironed - sprinkled with concrete and rubbed smooth with a trowel.
Concrete ring font
The inside of the rings are treated with Supergrunt 100 primer, and uneven surfaces are sealed with mortar. Then everything was rubbed down to relative smoothness with cement diluted with water. Once again everything was primed and painted with SuperDkor pool paint. There is another composition with normal characteristics - REVETON PISCINAS (“Reveton Pisinas”), it can also be used. That’s all, the do-it-yourself bath font is ready.
Font with installed stairs
A stainless steel staircase is installed inside. Based on the results of operation, we can say that the water does not drain. For the winter, the water was not drained; almost empty plastic eggplants were poured into it (a little water was poured into them so that they were half in the water. When the water freezes, they compensate for the pressure of the ice.
Rings with bottom - convenient
By the way, you can make it even simpler: there are rings with a bottom. It's faster and the seal is practically guaranteed.
The area around this font was then concreted and a polycarbonate “shed” was installed.
To avoid flashing your body, a polycarbonate “shed” is made around the font
Operation and Maintenance
To ensure that a pool made of concrete rings lasts as long as possible, you must adhere to the following recommendations:
- To maintain the integrity of the bowl, there is no need to drain the water for the winter; you can use compensators - plastic bottles half filled with sand. They should be halfway out of the water. Thanks to this simple technique, it will be possible to compensate for the pressure of the ice. As a result, deformation will occur not of the walls of the structure, but of the bottles.
- Periodically, special chemicals must be added to the pool to purify the water.
- To arrange water drainage, hatches with pipe connections should be provided. If necessary, the water can be easily replaced.
Building a swimming pool from reinforced concrete rings with your own hands is a realistic task and relatively easy to accomplish. Maintaining such a home pond is quite simple if you follow the basic rules of care.
Types of ponds, their advantages and disadvantages
To create a pond at the dacha near the house, before starting work, you should consider various options for constructing such a hydraulic structure. The characteristics of the main material of the object, delivery methods, and its cost are analyzed. It is also necessary to optimize the placement of the bowl on the site - it should be in harmony with the surrounding landscape design and buildings. You should pay attention to the positive and negative characteristics of the selected material for construction.
| Indicators | Characteristic |
| Price | The cost of the material is low |
| Strength | High |
| Service | Simple and affordable |
| High ductility | Allows you to create ponds of various shapes |
| Hardware Compatibility | Allows the use of various engineering tools |
| Term of use | Long term |
| Indicators | Characteristic |
| Duration of work | Long lasting |
| Nature of the construction process | Painstaking and time-consuming |
| Exposure to sub-zero temperatures | Covering with frost-resistant material is required |
| Waterproofing | To maintain optimal conditions for living organisms of the aquatic world |
| To increase useful life |
1. Film - represented by butyl rubber, polyvinyl chloride and polyethylene film.
Advantages:
- mobility;
- the possibility of forming an arbitrary shape of a reservoir;
- ease of installation;
- the likelihood of being used for urgent repairs to eliminate leaks in cast or rigid waterproofing of a pond;
- ease of repair in case of damage.
Flaws:
- there is a high probability of damage to the integrity of the material from physical impact and ultraviolet rays;
- the need to construct coastal ledges;
- it is impossible to lay out without creating folds in ponds that have right angles;
- limited service life;
- danger of small children falling into the pond;
- the need to mask the edge of the film;
- average cost.
2. Rigid molds in the form of a finished bowl are made of plastic and fiberglass.
Pros:
- have high strength;
- equipped with coastal ledges;
- the ability to move to another place;
- relative ease of installation;
- Possibility of repair for minor damage;
- ease of maintenance.
Minuses:
- limited size;
- strictly defined bowl shape;
- difficulties with transportation;
- the possibility of gradual destruction of the material under the influence of the sun;
- due to the slippery surface, there is a high probability of children falling into it;
- high price.
3. Made of concrete.
Advantages:
- high strength of the structure;
- long service life;
- creating a pond of any size and configuration;
- ease of maintenance;
- concrete structures are compatible with various engineering equipment;
- low cost.
Flaws:
- the need for lining with a frost-resistant agent;
- labor intensity of work;
- the need for waterproofing with liquid glass to extend the service life and maintain the biological balance required for the normal existence of the aquatic world;
- duration of installation work.
Thus, despite the few disadvantages, a concrete pond has undeniable advantages over other materials used to create a pond. In addition, concrete can be used to recreate both a buried and raised pond.
Photos of pools made of concrete rings
To have an idea of what a pool made from a reinforced concrete ring looks like, just look at the photos of the most common options.
Concrete ring pool
In this case, you can use an ordinary large-diameter sewer ring (about two meters). The method is very easy and quickly erected. A concrete inspection cover with a hatch hole that needs to be concreted can be placed at the bottom of the pool.
A pool made from a concrete sewer ring does not require waterproofing - which is its undeniable advantage. The only thing you need to do is dig a hole to install the ring.
Tire pool
Any sealed container, if desired and diligent, can turn into a comfortable country pool. The easiest way to acquire such a reservoir is to make friends with a tractor driver or a mechanic. Just choose a larger tractor so that the diameter of the discarded tire is sufficient for your height.
If the tire pool turns out to be small, don’t be upset. Children will be happy to splash in such an original pond.
The main idea of the design is a concrete bottom, which will prevent water from leaving the tire. In order to make the pool more comfortable, you need to partially cut off the wide bead of the tire. After this, you can begin to remove the fertile soil layer and pour the sand and crushed stone preparation in the place chosen for installing the tire.
Next, the pool is filled with concrete 10-15 cm thick. This must be done not only inside the tank, but also outside along its contour. After soaking the concrete for 5-7 days, you can begin water procedures.
Don't forget to include a faucet to make draining the water simple and easy.
Determining the location and size of the pond
Before choosing a particular type of pond, it is worth considering a number of features:
- The presence of stable soil is necessary to avoid deformation of the constructed pond during the movement of the earth's crust.
- The absence of trees with a developed root system, since in hot weather the roots will make their way to the water source, disturbing and eventually destroying the waterproofing layer of the pond. In addition, leaves flying around in the autumn will clog the pond, contributing to the formation of algae and bacteria destructive to the aquatic world.
- Moderate illumination of the pond, which has a beneficial effect on plants growing in the water and swimming fish.
When determining the size of the future structure, it is worth considering that the pond should occupy no more than 5 parts of the free area, since its main purpose is to harmoniously complement the garden. However, a small pond requires constant maintenance. In addition, it is much more difficult to establish a full biological balance in it than in a reservoir of impressive dimensions.
Swimming pool from the bathtub
Cast iron is an ideal material for a mini-pool. It is not afraid of corrosion and is highly durable. This is why a pool made from an old bathtub is so popular among summer residents.
There won't be much work. The bathtub needs to be dug into the ground at 3/4 of the height and the area adjacent to it should be decorated with beautiful masonry made of natural stone or decorative concrete.
If the enamel in the bathtub is broken or yellowed over time, then it makes sense to cover it with a layer of ceramic tile adhesive (1-2 cm), adding a colored pigment to it.
If your grandmother did not leave you an inheritance in the form of a cast iron bathtub, then an old steel one will do just fine.
Treat the outside of all areas with damaged enamel with liquid rubber and place the container in the prepared mini-pit. Interior decoration - to your taste. If possible, lay rounded pebbles from the nearest river on the tile adhesive and then your pool will be in perfect harmony with the surrounding landscape.
Pool from an old bathtub
If you have the opportunity to get an old bathtub from the Soviet period, then making a pool from the bathtub will not be very difficult. Of course, the ideal option would be a cast iron bathtub 170 cm long: it is more spacious, durable, and cast iron is not susceptible to corrosion. Although, if you don’t have one, a metal one with a size of 150 cm may well be suitable. In essence, this is a ready-made pool and all that remains is to equip it.
The easiest way would be to just put it on its legs, pour water, heat it in the sun and enjoy the coolness of the water. However, it will be aesthetically better if the bath is buried in the ground at three-quarters of its height and lined around the perimeter with decorative stones, tiles or gravel from the nearest river. How to remove water from the bathtub in order to wash it is something everyone decides for themselves. You can drain through a hose to a lower level or, if this is not possible, scoop out with buckets and use the water to water the area. You can use drainage as shown in the figure.
Gabion pool
For those who do not know what a gabion is, let us tell you: it is a stone laid dry in a steel mesh frame. Gabions are characterized by low cost, ease of installation and high strength. The shape of such a design can be any, from rectangular to round. It all depends on the shape of the mesh that contains the stone. For us, gabion is an excellent basis for making a stone pool affordable and original in appearance.
The technology of work is very simple. We make a concrete bottom (its diameter should be slightly larger than the contour of the gabion). Place a steel mesh container on the bottom. You need to lay the stone in it layer by layer, after which a durable film is mounted in the inner cavity of the stone bowl. Its edges are fixed to the upper gabion belt. That's it, the design is ready.
Its bottom and sides are very strong and stable, and waterproofing is provided by a thick film.
Do-it-yourself reinforced concrete font
Most often, fonts in or near a bathhouse are made of monolithic reinforced concrete. This is understandable: the technology has been proven, the procedure is known. Photo report with step-by-step photos about the manufacture of such a font further (without finishing yet).
We suggest you read: How to sheathe an old wooden house with plasterboard
It was decided to make the font in a corner in a constantly heated part of the house. First, a pit was dug - 1.9 * 1.4 m, depth 1 m (depth of foundation and freezing). The walls will be raised above the floor level by about another 50 cm, the total depth of the font will be about 140 cm (10 cm - concrete at the bottom).
The pit is lined with a thick film - 200 microns. In those places where the font is adjacent to the foundation, the film is fixed to the walls. It must be said right away that it must be secured firmly, perhaps with clamping strips (during work it was torn off several times, and it was also torn off by concrete). On the other two sides they simply pressed it with bricks and there were no problems.
Knitting reinforcement cage
A reinforcement frame is knitted inside the pit lined with film. Ribbed reinforcement with a diameter of 10 mm was used (8 mm is possible, but ribbed reinforcement of this size is very rare). The reinforcement pitch is 200 mm.
The metal frame for the concrete font is ready
The reinforcement must be located in the thickness of the concrete, so a brick is placed underneath the bars. Also, the rods are 7-8 cm away from the walls. Minimum 5 cm, but since the environment is humid, and the total thickness of the font wall will be about 15 cm, we made the reinforcement approximately in the middle.
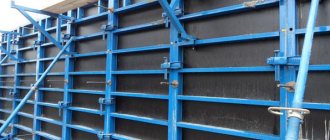
In the garage, internal formwork is assembled from construction laminated chipboard and leftover wood. It is made at full height, taking into account that the walls will be raised above the floor level - the total height of the formwork is 150 cm.
This is what the formwork for a concrete font looks like
We can immediately say that when constructing formwork, the walls must be strengthened not only to compensate for the pushing forces of concrete. It is also necessary to make the structure itself strong, since it will need to be lifted by a crane or winch (the weight of this formwork is more than 100 kg).
For the entire formwork, including the one that was then built on top, we used:
- 1500*1500-2 pcs;
- 1500*1000-2 pcs;
- 1900*850-1 piece;
- 1400*850 - 2 pcs.
Plus a fairly large number of pieces of wood and screws. Based on the results, we can say that the joints in the corners need to be strengthened, and better yet, with corners.
Concrete grade M300 was ordered in quantities of 3.2 cubic meters. According to calculations, 2 cubic meters will be required, the rest will be used for other work (pouring the foundation of the furnace). As a result, 2.5 cubic meters were spent on the font.
Concrete is poured to the bottom, treated with a vibrator
First, about 13 cm of solution was poured onto the bottom. The concrete was treated with a submersible vibrator. It is better not to skip this stage: the sediment at the bottom was about 30%, on the walls - almost 50%. And vibration alone increases the water-repellent properties of concrete significantly.
We insert the formwork inside the pit.
We put formwork in the pit
Along the way, a flaw in the formwork design became clear: a cover was needed. It is needed so that concrete does not get to the bottom, inside the formwork, and so that more or less convenient access to the walls is possible (the solution must be supplied there somehow, then they also need to be treated with a vibrator). We got out of the situation by laying sheets of gypsum fiber board and expanded polystyrene on top.
We invite you to familiarize yourself with: Types of handles for interior doors
Need a lid
First, they poured the solution to about half the height and vibrated it. Then, pre-cut panels were installed outside, attaching them to the walls, fastening them together, and installing spacers so that they wouldn’t “pop out.”
Two parts of the formwork must be fixed using spacers and slopes
Then the concrete was poured to the required level.
Formwork for the protruding part of the font
The concrete was left in the formwork for almost a week.
The concrete is setting
The font in the bathhouse is not finished yet. The formwork was removed, and it remains as it is: finishing work has not yet begun.
To build a home pool from concrete rings, a standard version of the product with dimensions of 1.2 m to 2.5 m is used. This simplest material has also gained high popularity among consumers due to its good resistance to low temperatures and water resistance. For ease of use, it is recommended to choose concrete rings with a larger diameter.
According to the size of the concrete rings, the first step is to dig a pit. Having decided on the location of the home pool, it is necessary to apply markings on the ground surface. You will need to install wooden or metal pegs around the perimeter, tying them together with a rope or construction cord.
Since under the concrete rings you will also need to pour a mixture of sand and crushed stone and make a concrete bottom, the depth of the pit should be increased by 500 mm from the entire depth of the pool. To simplify the process of excavation, special equipment is used for the work. But you still have to complete this process with a shovel.
When constructing a home pool, it is imperative to provide external and internal waterproofing. From the outside it must be done after the preparatory work is completed. Roofing material is used for these purposes.
First of all, you need to lay the first layer of sand. The optimal thickness of such a pillow is 30 cm. The sand should be compacted well, then fine gravel should be laid, where the layer thickness should be 10-20 cm. Sheets of roofing felt are used as an insulating layer. Thanks to this material, the interaction of groundwater with the reservoir will be eliminated.
For the reliability and durability of the entire structure, the bottom must be concreted according to a similar pattern as the bottom slab. To prepare the working solution you will need to mix:
- 1 part dry cement;
- 3 parts sand;
- 4 parts fine crushed stone;
- water.
https://www.youtube.com/watch?v=MKAkgnLRXGI
All components of the working solution must be mixed in a concrete mixer. After this, pour it onto the bottom of the pit. The duration of complete hardening of concrete varies between 15-18 hours.
Advice! In order not to resort to concreting the bottom, you can completely get by with a ready-made concrete lid, which is also placed on the bottom of the pit.
If a concrete cover is used, then only the area under the inspection hatch is concreted. But first it is necessary to remove the water drainage pipes through this hole. A ladder should be attached to the concrete rings to make it convenient and safe to descend into the pool.
To avoid negative consequences, it is recommended to protect the concrete structure from the destructive effects of moisture. The construction market offers a lot of options for internal waterproofing. But coating insulation works more efficiently and has high performance properties.
But before applying it, you need to plaster the inner surface of the tank, and make the floor using a self-leveling mixture. When everything inside the bowl is dry, you need to remove particles of dust, dirt, and debris with a brush. When installing internal waterproofing in a home pool made of concrete rings, it is not enough to treat the surface with coating insulation.
We invite you to familiarize yourself with: Wooden doors for a bathhouse, types of structures for the entrance and steam room
It is recommended to apply waterproofing material to the bottom and walls of the tank after treating them with a primer. The working solution is prepared according to the instructions by adding water to the dry waterproofing mixture. The result should be a homogeneous and not too thick mass. It can be applied using a regular brush; the optimal layer thickness is 3-4 mm.
For facing work during the construction of a swimming pool, ceramic tiles, mosaics or porcelain stoneware are most often used. The latest version of the facing material is more suitable in its characteristics for finishing the floor; it does not have a slippery surface. But its only drawback is the high price.
Mosaic is also an expensive facing material, but it has gained its popularity thanks to its original appearance and many design options. It is also valued for its resistance to chemicals, prevents pathogenic microorganisms from multiplying in the tank, and also prevents the formation of limescale.
The most affordable material for finishing the interior surface of a home pool is ceramic tiles. It differs in price, resistance to aggressive environmental factors, and practicality. It must be laid with a special tile adhesive, and the seams must be treated with a fugue, which has a high degree of resistance to low temperatures and moisture.
For a home pool to be practical, it must be equipped not only with a metal ladder, but also with handrails for safe exit from the water.
Wooden pool
Another way to make a pool from scrap materials with your own hands is to use wooden panels or timber. Both designs are ideal for country-style cottages. They look great against the background of other wooden buildings and are erected quite quickly.
The idea of this technology is reminiscent of gabion technology: the basis of the pool is a power frame, which stands on a concrete bottom or on a dense sand preparation. Ideal tightness can only be ensured by a skillfully assembled wooden barrel, therefore the use of a film membrane is mandatory for our design.
The panel pool is built in two stages: first, a strong wooden frame is assembled on a prepared site, on which boards made of boards are attached.
The structure can be made completely buried in the ground, which will act as a powerful retaining wall. In this case, the frame is not needed. Particular attention should be paid to insulating boards and timber from direct contact with the ground and carefully treat them with a proprietary special product.
Wooden pool
A wooden pool looks great against the background of all other wooden buildings. The material used is wooden beams or separately assembled wooden panels. Just like a gabion pool, a concrete platform is first poured, onto which a durable wooden frame is installed. Then the inside of the frame is covered with flat film membranes, that is, high-strength polyethylene film.
You can dig a wooden frame into the ground two-thirds of the height of the shields, but then you need to ensure reliable waterproofing of that part of the structure that is located in the ground. In this case, the ideal option may be to use liquid rubber. The outer walls of a wooden pool are treated with an antiseptic to prevent the appearance of fungus and mold.
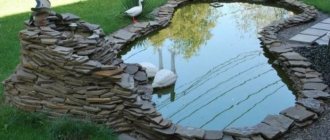
To give an exotic look, you can plant flowers or other vegetation around the pool. You can arrange it around with garden figurines.
Concrete ring - why not a swimming pool?
Indeed, why “invent” a container when there are ready-made well and sewer rings? The standard size of such a structure (from 1.2 to 2.5 meters) will be quite sufficient for the construction of a small swimming pond.
A concrete ring pool does not need a waterproof film if you make a concrete base for it and properly insulate the joint between the walls and the bottom. It is better to place the ring on a layer of cement mortar, which will fill all the gaps and reliably connect it to the concrete platform.
We also note that you can do without concreting the bottom. To do this, it is enough to lay a ready-made concrete cover on the sand preparation, which is used for inspection wells. In this case, all you have to do is seal the hatch hole.
Construction of pools from blocks and concrete rings
In addition to monolithic structures, there are other technologies for constructing concrete reservoirs. To some extent, they are easier to implement on your own.
Construction of an artificial reservoir from concrete blocks
Building a swimming pool from concrete blocks with your own hands is very popular due to the simplicity of the technology. There is no need to make formwork or adjust the pouring of concrete, the main thing is to mount a level base and lay the blocks on it, fastening them with mortar. Reinforce every third row with a net, and install a ladder in one of the sides.
A block pool is easy to build
After installation, all that remains is to carry out waterproofing and finishing work. The film must be secured with massive objects on the edges of the pool, and then tiles or other decorative elements must be laid.
Concrete ring bowl
To build a small pool with your own hands, a concrete ring (well or sewer) is also suitable. You can do without PVC film on the base; it is important to properly insulate the boundary between the bottom and the walls. The ring is mounted on a layer of cement mortar. It firmly connects it to the concrete platform and seals all gaps.
If you have an unnecessary concrete ring, you can find a use for it
By analogy, it is recommended to install internal waterproofing and decorate with finishing materials: tiles, mosaics or special film for swimming pools.
Pool made from a metal container
Any sealed container is optimal for creating a small pool. Having obtained any transport container of suitable dimensions (sea, railway, construction), you can easily turn it into a country pond.
First, arm yourself with a welding machine and weld all the cracks. After this, you need to treat the outside of the metal walls with a good anti-corrosion compound and bury the container in the ground.
The inside of a container pool can be painted with water-resistant paint or tiled with ceramic tiles.
Pool from an old metal tank
If you have the opportunity to get a construction water tank, you can easily solve the problem with a swimming pool in your country house. If the tank is too old and rusty, you need to do restoration work before installing it.
That is, electric weld all the holes, clean the walls of the tank and paint both inside and outside with waterproof paint. If you wish, you can line the inside of the wall with ceramic tiles. The aesthetic appearance of the structure will only benefit from this.
The tank can be buried in the ground or left completely on the surface. If possible, weld a ladder to climb into the metal pool.
Bottle pool
Plastic bottles are a popular material for country crafts. Why not use them to build a swimming pool? The idea of the design is to lay walls from bottles on cement mortar. Such a reservoir can be given any shape by freely choosing its size and depth.
Work begins with preparing the site. To do this, remove the plant layer, after which the sand and gravel preparation is poured. Having filled it with concrete, you can begin laying the walls. The structure will be airtight if the solution fills not only horizontal, but all vertical seams.
Therefore, carefully monitor this as you work. A bottle pool will cost you a nominal amount and will allow you to recycle a huge amount of PVC plastic - a durable and very durable material.
Materials required for the construction of a reservoir
To carry out the work you will need:
- cement;
- crushed stone;
- sand;
- boards for formwork;
- level;
- fittings;
- wire;
- waterproofing material (butyl rubber, polyvinyl chloride film or ordinary roofing felt);
- primer;
- shovel;
- concrete mixer;
- brush;
- liquid glass.
- According to the size of the future reservoir, taking into account the ledges for installing pots with plants, set the pegs in increments of about 70 cm and stretch a rope between them.
- Dig a pit, increasing the depth by 25 cm to thicken the bottom.
- Form the necessary ledges as the earth is excavated.
- Make the walls of the pit with a slope of 20-30°C.
- Remove protruding roots of trees and plants.
- Fill the bottom 15 cm with crushed stone and level it.
- Cover with a 10 cm layer of sand, slightly moisten and compact thoroughly.
- Lay the waterproofing coating without tension, starting from the center to the surface of the ground. Leave a margin of 10-15 cm at the edges and press down securely with stones to avoid slipping during subsequent work.
We suggest you read: How to remove mold from a wall in an apartment
Pouring concrete
- Mix a solution of sand and cement in a ratio of 3:1 so that it is immediately enough to fill one layer of the entire area of the future pond. Otherwise, cracks will appear at the joints of the solution over time.
- Fill the walls with cement mortar first, and then the bottom of the pit with a layer of 6-7 cm.
- Using reinforcement and wire, build a mesh with a cell diameter of about 7-10 cm.
- Press the reinforcing mesh into the uncured concrete so that the edges protrude slightly above the concrete covering.
- After the laid layer has dried, mix the cement mortar again.
- Moisten the walls and bottom of the pit with water.
- Pour a second layer of concrete 5-6 cm thick, with the upper edge overlapping the lower concrete layer by 3-4 cm.
- Form the top edge by carefully pressing the edges of the waterproofing coating against it.
- Level the bottom and walls of the pit.
- For uniform drying, it is better to cover the filled surface with cellophane.
- After the concrete bowl has completely dried, wipe the area from cement dust or apply a primer.
- Fill the surface of the bowl with liquid glass 3-4 mm thick or apply special paint.
After drying, you can begin to directly design the reservoir.
How to make a pond from a concrete ring?
Indeed, why “invent” a container when there are ready-made well and sewer rings? The standard size of such a structure (from 1.2 to 2.5 meters) will be quite sufficient for the construction of a small swimming pond.
A concrete ring pool does not need a waterproof film if you make a concrete base for it and properly insulate the joint between the walls and the bottom. It is better to place the ring on a layer of cement mortar, which will fill all the gaps and reliably connect it to the concrete platform.
We also note that you can do without concreting the bottom. To do this, it is enough to lay a ready-made concrete cover on the sand preparation, which is used for inspection wells. In this case, all you have to do is seal the hatch hole.
Preparing the pit for subsequent work is carried out similarly to the structure described above.
Then:
- Fill the bottom of the pit with cement mortar 10 cm thick on top of the compacted layer of sand.
- After drying, install the finished ring.
- Fill all uneven areas and places where the ring meets the bottom with cement mortar.
- Cover the free space between the walls of the pit and the ring with earth and compact it well.
- Clean the surface from dust.
- Apply a primer, special paint or liquid glass, or lay PVC film.
- Decorate the edges of the pool.
Thus, a concrete ring pond greatly simplifies the work and reduces installation time.