Comments:
- Foam concrete lintels, their structure and purpose
- Types of foam concrete lintels, their structural features
- Features of installation of simple jumpers
- Reinforcement of span lintels
The installation of foam concrete door and window lintels in the construction process, as it may seem at first glance, is of secondary importance. Perhaps this is due to their invisibility in the overall structure of the building. Moreover, many of those who have never worked on a construction site do not even think about their presence in the wall.
However, this element of the building frame is as important as all other structural parts of the house. Indeed, without the presence of special foam blocks installed above the openings of doors and windows and holding the pressure of the wall, deformation and even serious damage are possible in such places.
Therefore, to ensure the safety of the building and guarantee its long-term operation, it is imperative to know the types of specified jumpers, the main parameters of their structure and installation.
Foam concrete lintels, their structure and purpose
During construction, there is always a need to effectively close the resulting openings at the locations of doors and windows. Without such jumpers it is impossible to continue the construction of the next highest floor of the house.
Previously, in stone buildings, this technical problem was always solved by constructing wooden formwork and then filling the resulting closed sector with concrete mortar. In a certain sense, it was time-consuming, troublesome, and financially wasteful due to the high price of wood used to make formwork. Therefore, at present, if not always, then in most cases, ready-made stone blocks are used.
One of the most common materials for their production is foam concrete. This is a lightweight version of concrete with a pronounced porous internal structure. Closed void cells are formed in concrete as a result of the hardening of a solution of cement, water, sand and foaming additives.
This building material is light in weight, characterized by a low degree of thermal conductivity, is an excellent barrier to the spread of all kinds of noise, and is well processed, although it is susceptible to direct exposure to atmospheric moisture.
At the same time, foam concrete lintels, compared to structural parts made of reinforced concrete with the same purpose, have much better thermal insulation properties.
Thanks to this property, a cold bridge is eliminated between individual levels of masonry.
Return to contents
Types of foam concrete lintels, their structural features
All types of lintels known today, the basis for the manufacture of which is foam concrete, come down to two types - a monolithic foam concrete block and a mounting element made in the shape of the letter “U”.
The simplest of the above types is a monolithic block. Based on the objective strength limits of the specified part (which, in turn, follows from the physical characteristics of the cellular structure of the block), it can be used to create reliable lintels over door or window openings up to 1.75 m wide.
U-shaped jumpers are a more complex option, primarily due to their shape. Nevertheless, in many cases they seem to be more preferable for builders, since, simultaneously with the function of a lintel over the opening, they solve the problem of forming a kind of formwork for the preparatory pouring of foam concrete mortar for installation of the next level of the building.
Blocks for lintels are produced by pouring liquid foam concrete mixture into molds of specified sizes and configurations. To give the specified mounting part a sufficient degree of strength, a reinforcing mesh with a cell size of 50x50 mm is placed in the mold for pouring. The mesh is made of wire with a diameter of at least 5 mm.
In order for the lintel to be as reliable and durable as possible, certain construction and installation requirements must be met during its production.
In particular, based on the location in which it is installed and the fact that it is usually not supported from below by a solid wall, the maximum weight of one lintel cannot be more than 85 kg. Its average density should correspond to category D500, and the compressive strength class of foam concrete should correspond to category B1. In addition, the coefficient of ability to conduct heat, which is measured in a dry state, should be in the range of 0.08-0.1 W/m*C.
Return to contents
Features of installation of simple jumpers
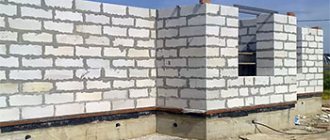
These elements, produced in a factory, are mounted on the stone frame of the building in parallel with the masonry of the main walls. In some cases, using U-shaped foam concrete blocks as permanent formwork, lintels are made directly on the construction site. In this case, the foam formwork blocks with a thickness of 80-100 mm are additionally reinforced, after which a foam concrete solution is poured into the resulting form.
A monolithic concrete belt is combined with lintels installed above door and window openings. The scaffolding and spacers holding the foam concrete lintels cannot be removed within a month from the moment of their installation.
When installing a factory-made lintel, you should pay attention that on each side the specified element rests on a load-bearing wall made of brick or reinforced concrete to a length of 20-25 cm. In this case, the installation will be completed correctly. It is unacceptable to cut the jumper to its length. If the building is erected entirely from foam blocks, then the lintel support on each side cannot be less than 20 cm.
When designing a house, do not forget to make openings for doors and windows. And when designing, take into account the requirements of SNiP II-22-81 (1995) on masonry and reinforced masonry structures. This regulatory document describes, among other things, the requirements for lintels over door or window openings. In this article we will look at how to properly make lintel beams and possible options for the structures used.
Articles on the topic
Installing a bathtub on bricks - what materials are used, instructions, advice from masons
Brick plinth on a strip foundation - masonry technology, instructions, advice from masons
Dew point in a brick house - why it is calculated, instructions, advice from masons
Foundation for a brick house - strip, monolithic, slab, instructions, advice from masons
Beating plaster from brick surfaces using machines and manually, instructions, advice from masons
Strengthening the foundation of a brick house - how to do it, instructions, advice from masons
Insulation of a brick house from the outside - mineral wool, polystyrene foam, expanded polystyrene, instructions, advice from masons
Soundproofing a brick wall - what can be done, instructions, advice from masons
Reviews ()
Why are they needed?
The walls of a house are needed not only to isolate living space from the outside environment or to delimit rooms inside the house. From an engineering point of view, vertical enclosing structures are divided into:
- Bearers. Perceiving, in addition to the load of its own weight, the weight of the walls of all overlying floors, wind load (if these are external fences) as well as the load from floors, coverings and other structural elements resting on them.
- Self-supporting. They bear the load only of their own weight and the weight of all the walls on the floors located above them. If they are external, then there is also a wind load.
- Partitions. Internal interior, loaded only with their own weight.
Holes made in the masonry wall weaken its load-bearing capacity. The above regulatory document states that in order to distribute the load, the openings must be covered with lintels, the load-bearing capacity of which is calculated taking into account the type of structure they are made of.
What types of jumpers are there?
To install the jumper, you can use ready-made products or make it directly on site. Ready-made lintels for walls made of foam blocks can be used as follows:
- Reinforced from aerated concrete. Monolithic product made of autoclaved aerated concrete with reinforcement inside. Beams are designed for continuous deformation load. For reinforcement, steel reinforcement is used, with a cross-section from 5 to 10 mm. The reinforcement is welded into a spatial frame and coated with an anti-corrosion compound.
Beams come in various sections - from 150x200 mm to 375x400 mm and up to 6 meters in length. Foam block lintels with reinforcement can be used in load-bearing and self-supporting walls. The support on the walls must be at least 200 mm. The manufacturer recommends making the support 300 mm.
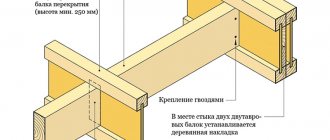
- U-shaped blocks. U-shaped blocks can be used to create beams over openings. They are a block shaped like the letter “U” in cross-section. The dimensions of the block with a cavity correspond to ordinary blocks. When laying walls, they are installed in ordinary blocks in such a way that the support of the lintels on the foam blocks is not less than the permissible minimum - 250 mm. The open part of the block should face up. A spatial reinforcement frame on pads is laid inside and filled with mortar. The photo shows how to install a U-shaped block.
To cover large openings or spans between arches, an I-beam metal beam is placed into the cavity of the block. In addition to installing beams over openings, such products are used to create a monolithic reinforced belt around the perimeter. The construction of the block in the form of permanent formwork made of autoclaved aerated concrete allows eliminating cold bridges that occur on reinforced concrete or iron beams.
- Beams made of reinforced concrete. Bar lintels for walls made of foam blocks are reinforced concrete products made of concrete grade M200, reinforced inside. To construct openings in façade enclosing structures, façade reinforced concrete products are used. When installed on external walls, additional insulation is required. In addition to prefabricated concrete products, lintels are used that can be cast taking into account the load requirements in the formwork at the construction site.
- Metal beams. For the installation of jumpers, you can use rolled metal: I-beams, T-beams, equal-flanged or unequal-flanged angles. They are either poured into the formwork installed in the opening with concrete, or (brands, corners) blocks are laid on them. When used in external walls, insulation is required.
- Casting the lintel in place. In the formwork installed in the opening, a lintel can be cast using reinforcement. The amount of run of the cast lintel onto the wall should not be less than the recommended dimensions.
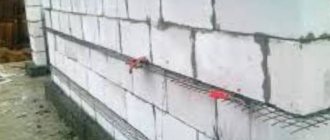
- Openings without lintel. You don't have to use beams to create openings in partitions. To lay the blocks, several reinforcement rods are laid over the opening, extending 500 mm onto the wall on each side of the opening. The number of reinforcement rods must be at least three. The total quantity is calculated depending on the thickness of the wall at the rate of one rod for every 130 mm of thickness. The ends of the reinforcement are anchored during laying - they are bent upward with a hook. A formwork is made in the opening, into which the solution is poured and the rods are sunk into it. Foam blocks are installed on this reinforcement and glued together.
- Wooden. Wooden beams can be used, the parameters of which are calculated depending on the load.
Features of the arrangement of openings
The decision about which lintels for foam block walls to use during construction should be made depending on which opening needs to be blocked. In addition to the design load and the depth of support of the beam on the enclosing structure, it is necessary to take into account the distance between two adjacent openings in load-bearing and self-supporting walls. If the partition between the openings is less than 600 mm, then support pillars made of standard reinforced concrete products or metal should be installed in the partition. The cross-section of the pillars is selected depending on the design load.
Do not neglect the arrangement of jumpers. Their use will protect the walls from cracking during building shrinkage, as well as other loads.
Carrying out renovations has several goals - to update the home, change its appearance and create something new. The best way to achieve what you want is to remodel your home. At the same time, it becomes possible not only to aesthetically transform the home, but also to create additional space. Sometimes this factor is decisive when deciding on redevelopment. Increasingly, consumers are creating internal partitions from foam blocks - the material allows you to quickly and efficiently build an interior wall with your own hands.
The foam block consists of a mixture of concrete and a synthetic or organic foaming agent. When the components are mechanically mixed, air bubbles are evenly distributed in the solution, and after it hardens, a durable but relatively lightweight building material is obtained. A partition made of foam blocks, the price of which depends on the strength class, will in any case be cheaper than a brick structure.
Foam concrete composition:
- cement;
- sand;
- water;
- foaming agent
Advantages of foam concrete blocks:
- high sound and heat insulation properties;
- environmental friendliness;
- fire resistance;
- large size - the parameters of the foam block allow you to quickly lay out an interior wall and reduce the cost of a binding solution;
- low volumetric weight;
- porous structure of the material - thanks to this property, partitions made of foam blocks “breathe” and there is no sweating effect;
- ease of processing - the material can be cut both with power tools and with a simple hacksaw, which allows you to create partitions of various shapes and lay utility lines without much effort;
- easy installation;
- wear resistance;
- affordable price.
Disadvantages of foam block:
- fragility of the material - if improperly transported, it may be damaged;
- the need to waterproof walls - porous concrete has a high degree of vapor permeability and water absorption;
- restrictions on the load of partitions - problems may arise when attaching massive, heavy objects to it.
Preparing for work
Foam blocks for internal partitions - choice of material
When choosing material for interior walls, you should pay attention to the following factors:
- thickness of foam blocks – 10-15 cm;
- material density - D600 brand is usually used for internal partitions;
- homogeneity of structure;
- the shape of the bubbles - they should be round and small (up to 1 mm in diameter);
- no differences in the sizes of foam blocks - it happens that the difference reaches several centimeters;
- packaging of the material - it must be covered with a film to protect it from moisture;
- no cracks or damage.
Calculation of the number of foam blocks
To calculate the number of foam blocks, the parameters of the future wall are measured. For example:
- its length is 4 m;
- height – 2.5 m;
- thickness - 0.1 m.
In this case, the area of window or door openings is taken into account - in this case it will be 2.0x0.7 = 1.4 m². The length of a standard partition foam block is 0.6 m, height 0.3 m. Its area is 0.18 m².
The calculation itself:
- the total area of the wall is calculated - 2.5x4 = 10 m²;
- the area of the doorway is subtracted from the result obtained - 10-1.4 = 8.6 m²;
- the number of foam blocks is calculated: 8.6:0.18=47.8 pcs.
So, to build a partition with an area of 8.6 m², you will need 48-49 foam blocks.
Tools and materials
For laying walls made of foam blocks, two types of mixture are used:
1. Classic mortar - a mixture of sand and cement in a ratio of 1/4. The disadvantages of this method of masonry include the thickness of the seam and, as a result, an increase in “cold bridges”. The advantage is the low cost of such a solution.
2. Special glue is the optimal material for laying walls. Its advantages:
- thin seams;
- ease of preparation;
- excellent adhesion properties;
- flat, smooth wall surface.
For fastening to the wall, embedded pins are used - steel plates with welded reinforcement. The partition is fixed to the floor using self-tapping pins.
To work with foam block you will need the following tools:
- hacksaw, plane and grater;
- drill with attachments for mixing the solution and creating holes for sockets;
- rubber hammer;
- level;
- container for solution or glue;
- trowel or spatula;
- marking tools: laser level, cord, marker or pencil.
How to lay foam blocks
Foam blocks are a new material only in form, but not in content. The masonry of foam blocks differs very little from the masonry of any other wall materials, such as standard types of blocks or bricks. The basis of the masonry is to overlap the seams or bandage.
The idea is to start each even row with half a block. In this case, all seams will be blocked. If this is not done, then no wall will work, it will just be free-standing columns. Needless to say, the strength of the partition will be very, very doubtful.
As for the unique features of masonry with foam blocks, only two factors need to be mentioned here: non-standard glue for the blocks and grinding of the block to the base. And now a little more detail.
Adhesive for foam blocks. Of course, foam blocks can be laid on traditional cement. You can even purchase cement separately, sand and additives separately. And then mix everything 1 to 3 and use it for masonry. But this approach is outdated. The consumption of professional glue for foam blocks is very small (3 mm maximum), so this material will not be expensive.
But the quality and speed of work when using special glue will increase with the inevitability of gravity. Firstly, a thin layer of mortar is easier to control, secondly, a thin layer is easier to work with, and thirdly, the special composition is better suited in structure and properties to foam blocks than a traditional mortar, which means the quality will be excellent.
Grinding in blocks. When laying foam blocks, you need to grind them to the base, that is, to the underlying block. This is done as follows. After the adhesive has been applied to the surface, a new block is placed. Then they begin to move this block a little back and forth along the masonry and try to press it as tightly as possible to the base. At the end, the block is finally positioned, aligned and left in this form, after which it moves on to a new block. This achieves unsurpassed strength of the masonry.
Do-it-yourself foam block partition - installation
- Surfaces adjacent to the mounted structure are cleaned of dust and primed.
- Using a laser level, a tapping cord and a marker, the boundaries of the future partition are marked on the floor, ceiling and walls.
- To prevent the first row of foam blocks from moving, a metal profile is attached to the floor. It is used as a limiter and facilitates precise laying.
- Self-tapping pins are screwed into the floor. It is possible to lay the first layer on the mortar - in this case, fasteners will not be needed.
- Embedded pins are attached to the load-bearing walls or sections of reinforcing rod are driven in. The fasteners should fit into the horizontal joints of the masonry every 2-3 rows.
- The first row of foam blocks is laid strictly according to level. If necessary, the size of the material is reduced using a hacksaw. Since the foam block is quite fragile, the wall should be leveled carefully using a rubber or wooden hammer.
- The laying of the second and subsequent rows of foam blocks is carried out “staggered” - the vertical joints should not be located one above the other. The masonry will be denser if the foam blocks are moistened with water.
- During the construction of the wall, a doorway is formed. To strengthen the structure, reinforcement is placed in its upper part and secured with spacer wedges. It is installed in pre-cut grooves in foam blocks.
- After raising the partition, the resulting gap between the masonry and the ceiling is filled with polyurethane foam.
- Interior partitions made of foam blocks in several layers are treated with a primer and then plastered under wallpaper or other finishing materials. Wall tiling is carried out directly on the wall. In this case, there is no need to plaster the partition.
Nowadays, it is modern, high-quality and multifunctional foam blocks that are ideal for quick and almost clean repairs in an apartment when constructing interior walls. And to the question of how to make a partition in an apartment from foam blocks, there are excellent recommendations, tested by professionals, which are presented in our article.
The relevance of this material is easily explained by its low cost, availability with a large selection of such foam concrete options and many valuable specific advantages not inherent in other construction analogues.
For example, air bubbles inside these blocks significantly reduce their weight and greatly enhance thermal insulation. So, the savings and quality of such walls are undeniable, especially if you build it yourself.
Doorway design
What to make arches in a doorway from is known, but how to decorate an arch in a doorway? You can decorate the finished structure with different materials. Often the design is done using MDF; it can be finished with modern materials, for example, artificial stone, wood, wallpaper, painted and solid wood. When the arch opens into the kitchen, it is recommended to secure the curtain by immediately installing fasteners in the arch. Before sheathing and decorating the arch, you need to do a number of works, step-by-step instructions below:
- The surface of the arch is sanded with sandpaper, removing irregularities, creating a rounded edging.
- Seams, joints and places of self-tapping screws must be sealed using putties, but before this, a perforated plastic corner is placed on the corner, it must be fixed directly into the putty.
Puttying the arch of the doorway
- When the putty dries, sand everything again with sandpaper to remove any unevenness.
- The arch is coated with a primer and when it dries, the finishing putty is applied and sanded one last time.
The arrangement of the arch is completed, you need to select the finishing and place it on the finished opening. As you can see, it’s easy to make a homemade arched opening; anyone can assemble the frame and fix the drywall, not necessarily a master, even if they have little experience. It is recommended to make an arch, the same shape as the window, so that the interior is unified, although the opening itself can be modernized so that the house or cottage is transformed and functional. Finally, a video showing the work process, how much material is needed and how to make a rectangular arched opening with a rounded top:
Owners of small apartments prefer not to close open openings with doors, but to decorate them with arched structures. Due to this, the space visually increases, the interior of the room becomes much more elegant and two rooms are combined into one.
You can use ready-made arched structures, which are sold in hardware stores and are a set of parts, or you can assemble the arch with your own hands, having previously prepared the necessary materials.
How to make elegant elements? Look at the photo of the arch with your own hands. The list of technologies and materials used is huge - use your imagination!
Main characteristics of foam blocks
Let us specify the main advantages of these blocks:
- Cellular concrete gives low heat transfer, which means we do not need to spend additional money on thermal insulation and expensive insulation materials.
- Foam blocks perfectly muffle sounds - so additional sound insulation is no longer needed.
- The air cells of foam concrete almost do not absorb moisture. This is the most important requirement for any building material, guaranteeing the reliability and durability of the building. Such a foam block wall in an apartment is absolutely not subject to shrinkage.
- Foam concrete does not burn and does not even support combustion.
- Foam concrete blocks are environmentally friendly, which is very important for our health. Such blocks are in 2nd place after wood in terms of environmental safety: they do not emit toxins.
- The price of a cubic meter of foam blocks is 40% cheaper than the same amount of brick.
How to make a partition from foam blocks - step-by-step instructions and precise marking of zones (90 photos)
To construct a partition, you can consider several options. A good choice would be either a plasterboard structure or a foam block structure. The recommended option is foam blocks. They are easier to work with and are inexpensive. And most importantly, during operation no such problems arise as during the operation of a plasterboard partition, when hanging even a relatively light shelf on the wall becomes extremely problematic. Prepare a sleigh in summer and a cart in winter, says the old saying. But sometimes construction work has to be carried out not only in summer, autumn and even winter. To do this, you need to take care of high-quality winter workwear.
Making walls
Without a doubt, every beginner who has never renovated an apartment before can independently build a wall from a foam block.
- For “clean” but strong bonding of blocks, we can use not cement, but the latest high-quality .
- The wall must be erected strictly according to the level, then the foam blocks for the partitions in the apartment will line up perfectly evenly.
- foam blocks;
- fittings, reinforcing mesh, metal rods;
- glue;
- betoquartz contact (i.e. acrylic styrene primer).
Materials
Calculation of the number of foam blocks
We will measure the parameters of the partition taking into account the openings of windows or doors.
- Total area of the partition: multiply the height by the length.
- From this resulting area we subtract the area of all planned openings.
- Determine the area of the foam block.
- We calculate the number of blocks: divide the resulting area of the partition by the area of 1 block and get the number of blocks.
Laying foam blocks
So how to build a wall of foam blocks in an apartment?
- Let's start by marking the boundaries of the future partition, first on the floor, then symmetrically on the ceiling and, accordingly, on the walls.
- Using this marking we install a metal leveling frame from the profile. This will ensure optimal straight lines. And we align the middle with a stretched cord.
Advice! Before laying, the floor, ceiling and walls must be cleaned of dirt and covered with a high-quality deep-penetrating primer.
- We fasten the blocks with foam concrete glue, or you can use traditional cement mortar. But the glue gives perfectly smooth seams, enhances thermal insulation and provides strong adhesion.
The instructions guarantee glue consumption for 2mm joints - 15 kg/m3. It is more economical to apply this adhesive solution with a spatula so that when laying the block the glue does not drip copiously.
By the way, let’s not forget about grinding in the foam blocks when laying them: slightly rocking the block, press it into the solution on the lower foam block and move it towards the adjacent block.
Note! This masonry will be strengthened by rods and reinforcement pins driven into the load-bearing walls in the places where they adjoin each new row of blocks.
- 2 days after completion of the masonry under the ceiling, we will seal the gap with polyurethane foam. It is much cleaner, lighter, and better quality than cement.
Preparing openings
The photo shows an opening in a foam block wall.
When correctly solving the problem of how to make a wall of foam blocks in an apartment, we remember that after installing the partition, it is worth disassembling the framing frame - it is no longer needed.
- Now we will trim the door or window openings and trim the edges with a saw.
- If this requires cutting an opening in the partition, we will make it a little larger so that the installation of the window or door is correct.
- The foam blocks at the top must be securely reinforced. To do this, we will cut deep 10 cm grooves at the top of the side walls and insert pins secured with spacer wedges.
- Before finishing the surface, we will do the electrical wiring.
- When finishing, fill all voids with a good quick-drying solution.
Strengthening the wall
- We cover the foam concrete partition with plasterboard, wood, plastic or traditionally plaster it.
Law first
Remodeling an apartment is, of course, an interesting thing, but the law does not always allow you to do what you would like. This is primarily due to safety, since almost every element of the design of a residential building has its own purpose. For example, you cannot move a bathroom into a living space, and vice versa. Also, openings cannot be made in load-bearing walls. If you recklessly make any changes to structural elements, you can significantly reduce the strength.
Please note that you must coordinate any redevelopment actions with the relevant services before work begins. This way you will avoid problems. But if you do make a redevelopment, then still try to arrange everything correctly. Otherwise, over time, when you want to sell your apartment, you will have to urgently resolve this issue, which cannot always be done quickly.
In order to correctly complete all approvals, you must first go to the district administration and receive there an order to develop an architectural planning task and technical conditions. Next, we go to an organization that operates under a license and order the development of the project. Having received the project, we coordinate it with the district architect and, if all is well, we receive an order to begin work.
If we are talking about sealing an opening, then verbal approval from the architecture will be sufficient. After all, you are not destroying the structure of the house, but on the contrary, you are sealing the opening. However, everything here will depend on exactly how you decide to seal the opening. If you are drilling into a load-bearing wall, these actions may be unsafe.
With what? Choosing material
Before you start work, you need to decide on the material with which you will seal the doorway. If you want to seal it once and for all, then use one of these materials:
Conclusion
Let's briefly list the order of work:
- marking a place for (possible with profiles);
- We drive reinforcing bars into the load-bearing walls every 2 rows, as well as into the floor (self-tapping pins and dowels will also work);
- with the other end, let this rod fit into a horizontal, even seam of the masonry (an alternative is aluminum hangers, one edge attached to the block and the other to the wall);
- along a stretched cord, we place the first row of blocks moistened with water on the primed floor;
- then lay out the second row staggered so that the vertical seams do not coincide with the first row;
- we reinforce the first 2 rows with laying mesh or rods, or even fiberglass mesh, and then the subsequent ones in the same way;
- we lay a beam on the doorway;
- We will leave a 1 centimeter gap at the ceiling, which we will then fill with foam;
- We prime the new wall for plaster.
So, with minimal labor costs, we will build universal walls with sound absorption, rational heat transfer, and optimal strength. Everything is simple, and the video in this article will clearly demonstrate all the nuances of the work.
In the process of building a new house or reconstructing a previously used home, partitions from foam blocks are quite often constructed. The masonry technology is accessible even to a beginner, if you first study it step by step, delve into all the nuances, and become more familiar with foam concrete and its properties.
Foam concrete has become popular in the manufacture of interior partitions due to its successful combination of technical characteristics.
- Good sound insulation properties. Foam concrete grade D600 with a thickness of 10 cm creates a noise barrier of 45 dB. This is quite enough: according to SNiP 2-12-17, the minimum noise insulation value of internal partitions is 41 dB.
- Low thermal conductivity. Foam concrete with a density of D600 retains heat 5 times better than sand-lime brick.
- Light weight. Porous material is the best option for interior partitions, since it puts minimal pressure on the base.
- Choice of thickness. This parameter varies between 50-150 mm.
- Precise geometry. The cut foam block has fairly smooth edges - they are easy to plaster and putty.
- Affordable price.
Before starting work, the shortcomings of the material are also taken into account. Partitions made of foam concrete blocks cannot withstand the weight of heavy shelves and wall cabinets (the self-tapping screws simply fly out of the wall under load). In addition, foam concrete strongly absorbs primer, putty and plaster mixtures, so their consumption will be increased (the solution preparation manual will help you find out exactly what it is).
How to seal a doorway with your own hands
How to make an opening in an apartment
During the operation of buildings and individual premises, their owners often face the question: “How to properly seal a doorway?” This is due to the need to liquidate or move it to another location.
The choice of material depends primarily on where exactly it is located. If, as shown in the photo, a street entrance is being sealed, then, if possible, you should use the same material from which the building was constructed.
But in any case, it will be either brick or concrete wall blocks. Well, inside this problem can be solved much easier by sewing up the opening with plasterboard. Together with the video in this article, we will understand the intricacies of this work.
Eliminating a passage with a brick
When sealing openings, brick, as a structural material, has undeniable advantages. With its help, you can wall up a passage in both a load-bearing external and internal wall. Moreover, there is not much difference whether these walls are brick or panel. Although we note that in panel houses they are rarely allowed to move.
As for partitions, brick is more often used for sealing. The reason is that the thickness of asbestos-cement, plaster, or gas-block structures does not always correspond to half a brick. When the thickness differs, differences are formed, which can create certain problems during plastering.
Selection of material according to the thickness of the partition
But there is almost always a way out - you just need to try to choose the material that best fits the width. The same brick, but only solid, can be laid not flat, but on the edge, which is important for those cases when the partition has a minimum thickness (7.5-8 cm).
- You can see how it looks in the picture below, and the difference of 1 cm can be easily removed by increasing the thickness of the plaster coating. If, for example, the thickness of the partition is 9-10 cm, you can take not a single brick, but a one-and-a-half brick, which has a height of 88 mm, and also place it on the edge.
- If the wall is to be plastered, then it is better that the thickness of the “patch” be less than the thickness of the main structure. If the masonry protrudes beyond the plane of the wall, then in order to smooth it you will have to spend more plaster on the entire surface, which will entail unnecessary costs.
- Before sealing the passage with piece masonry material, you need to properly prepare the base and end surfaces. The base below should be level, without a threshold or floor covering. Usually this is a concrete slab, on which it is advisable to lay a strip of roofing material under the first row of bricks.
- So that the new masonry can firmly adhere to the old one, notches need to be made on it. If the wall is brick, you can simply remove part of the mortar from the end seams, or even slightly knock down the corners of the products to create peculiar grooves. Then the dust is carefully removed, the surfaces are thoroughly moistened with water - and you can begin sealing the opening.
The masonry is carried out in the usual way, with bandaging of the seams. For reliability, some craftsmen hammer long nails into the seams of the old masonry so that their free end can be placed in the new one. But by and large, this is not necessary.
Plasterboard sealing
When it comes to moving a door, the owner of the premises is rather faced with the task of how to decorate the opening, since neither the strength nor other physical and technical properties of the structure are of great importance here. For interior renovations, plasterboard is perhaps the best material.
In any case, it is much easier to eliminate the opening in the partition using dry plaster mounted on a frame of profiles yourself - and the price of these consumables is low. We think that the instructions we have proposed will help solve this problem without any problems.
Frame and sheathing
Considering the size of a standard opening, four UD-28 guide profiles, three or 4 meters long, may be sufficient. Mount it along the entire inner perimeter of the opening in two parallel rows. The profile is fastened to the wall with 6*40 mm dowel nails, and with self-tapping screws with a press washer.
- Your task: to remove the surfaces of the area to be sealed. To do this, the guides are installed with an indentation from the edge, taking into account the thickness of the plasterboard sheet - the minimum is 12.5 mm.
Fastening profiles to each other
- Then, sections of the CD 27/60 profile are placed across, to which, in fact, the sheet of dry plaster will be attached. The distance between the crossbars must be at least 60 cm. As a result, a kind of spatial frame is formed, which must be filled with any slab insulation, which will provide the structure with proper sound insulation.
Note! It is better to cut the facing part of the new opening from a single sheet, but if you have pieces left over, for example, after covering the walls of the previous room, it is quite possible to use them. The main thing to remember is that they need to be joined in the places where the cross members are located.
Just keep in mind that if you don’t have an edge plane to chamfer at an angle, you won’t get normal joints - and then they need to be properly sealed.
- If you don’t have any remnants of gypsum board, you will need to purchase two sheets measuring 2.5 * 1.2 m, and cut out solid fragments from them . This is done using a knife with a reinforced blade. According to preliminary markings, the plasterboard shell is cut, and then the sheet is refracted. All that remains is to cut the cardboard from the back side - and you're done.
- Next, the drywall should be attached to the frame and screwed with self-tapping screws, making fastenings every 20-25 cm. It must be screwed tightly, but without excessive force, so that the fasteners do not break through the shell and damage the core of the sheet. If the cladding was assembled from pieces, then the next step would be to seal the joints between them.
- To do this you will need a primer, putty and reinforcing paper tape . After the seams have been treated with a primer, they are half filled with gypsum putty, and while it retains its plasticity, the tape is pressed in. In conclusion, the entire area of the opening should be filled with putty - and it is ready for finishing (see Finishing a doorway: how and with what).
- Usually, an opening sealed with plasterboard, like the entire wall, is covered with wallpaper , but you can decorate it in a more interesting way. For example, you can cover this section of the wall with photo wallpaper with some interesting plot, and even frame it with the same platband as on a real door.
If the wall in which the opening needs to be sealed is thick enough, you can leave a recess in it. You will get a niche that can be decorated in any way you like: with the same wallpaper, fabric, decorative plaster, or with lighting.
Block laying technology
Interior partitions made of foam concrete are installed both during the construction and during the renovation of an already functioning house. The masonry is made using foam blocks for the construction of partitions with a density of D600, with a standard height and length of 300x600 mm. The thickness is selected depending on the functions of the future wall. The partition for zoning the room allows a size of 50 or 75 mm. A permanent partition with the installation of a door or window is laid out from foam blocks with a thickness of at least 100-150 mm.
In order for installation to be carried out quickly and without difficulty, you should prepare materials and tools in advance:
- special glue for connecting foam blocks to each other;
- polyurethane foam, deep penetration primer;
- glue container;
- drill - for drilling holes for communications, as well as mixing the adhesive solution;
- drills and mixer attachment;
- long building level, tape measure, painting cord;
- metal profile for installation of drywall, dowel-nails, hammer drill;
- hacksaw - to cut the block to the desired size;
- reciprocating electric saw - for making openings;
- putty knife.

